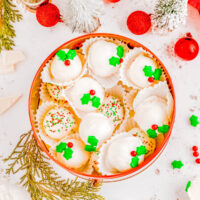
White Chocolate Truffles
Made with real butter, heavy cream, and a double dose of white chocolate in both the filling and the coating, these EASY truffles are CREAMY, decadent, and perfect for the holidays! Make this festive no-bake candy recipe for your next Christmas party, holiday entertaining, gift them to a special friend, or bring them along as a hostess gift. Everyone will appreciate these decadent little treats!
Servings: 20
Calories: 265kcal
Ingredients
Truffle Filling
- 7 tablespoons heavy whipping cream at room temperature (do not use half-and-half)
- 16 ounces white chocolate from a bar finely chopped (do not use white chocolate chips)
- 4 ½ tablespoons salted butter softened to room temperature
- ½ teaspoon vanilla extract
Coating
- 2 cups white chocolate melting wafers
- Christmas sprinkles jimmies, candy decorations, as desired; optional but recommended
Instructions
- Truffle Filling - To a large microwave safe bowl, add the heavy cream and heat for 1 minute on high power. You're just warming the cream, you're not boiling it.
- Add the chopped white chocolate to the warm cream and stir to combine and encourage the white chocolate to melt. If it seems that it's not going to melt, place the bowl in the microwave and heat in 15-second bursts until it can be stirred smooth. Tip - I recommend a high quality white chocolate bar such as Lindt or Ghirardelli. Do not use chocolate chips. They are resistant to melting and not advised.
- To the creamy melted white chocolate mixture, add the butter and stir to combine until the butter has melted. Again, if it seems the butter is not going to melt because the mixture is a bit too cool, place the bowl in the microwave and heat in 15-second bursts until it can be stirred smooth. Tip - I use salted butter because the salt from it cuts the sweetness of the white chocolate. You can use unsalted butter and add about 1/4 teaspoon salt if preferred.
- Add the vanilla and stir to combine.
- Cover the bowl with plastic wrap, making sure the plastic wrap is touching the top of the white chocolate mixture (see blog post photos), and refrigerate the bowl for 3 hours, or until firm. Tip - Do not rush the chilling process and I advise using the fridge and being patient, rather than the freezer because you don't want to accidentally freeze it, or have it start to freeze around the edges, with a soupy center, which is how things normally begin to freeze.
- Line a baking sheet (or large dinner plate if you don't think a baking sheet will fit in your freezer); set aside.
- After the mixture has chilled as needed to firm up so that you can scoop out ball shapes, using a small to medium-cookie scoop, scoop 1 1/2 teaspoon sized truffle balls, or make approximately 20 truffles, and place them on the prepared baking sheet.
- Place the baking sheet into the freezer (it's okay - and recommended - to use the freezer this time rather than the fridge) and allow the truffles to chill and firm up for about 30 minutes.
- After 30 minutes, or when firm enough to roll into smooth balls, roll each truffle between the palms of your hands to form smooth balls ready to be dipped.
- Coating - Shortly before you're going to start dipping them, heat the white chocolate melting wafers as directed on the package. Tips - I strongly recommend using melting wafers because they melt so evenly, smoothly, are resistant to seizing, don't set up too fast which makes dipping easier. If you want to use "white almond bark coating" or another white chocolate type product intended for candy making and you know how to bake, go for it. If you're a beginner, for your own ease, stick with the melting wafers. You can use any brand but I always have great luck with Ghirardelli. They're also available in the baking section of most well stocked grocery stores.
- Dipping - Remove the truffles from the freezer (make sure they're nice and cold so the warm melted coating will stick and grab easily), and place one truffle on the fork, dip it into the melted chocolate to coat it, allow the excess to drip off through the fork tines, and place back on the parchment lined baking sheet. You can also do this with a toothpick. Spear one truffle, dip, shake the excess, place on the baking sheet. I like to dip about 5 truffles at a time.
- Before the coating has set, sprinkle each truffle with holiday-themed sprinkles, jimmies, candies, or as desired.
- Allow the truffles to set, at room temperature, until the coating is completely set before placing in the fridge. Tips - I let the coating fully set at room temperature because sometimes if you put wet chocolate into the fridge, it can dry with splotches on it and you can't correct that if it happens. Better to dry at room temp where it's much more of a guarantee it won't happen! For this reason, I never place wet chocolate in the freezer to set. It's a guarantee it will get splotchy and then when it's back at room temp, condensation will form on the exterior of the coating, and ruin the appearance.
Notes
NOTE: Do NOT substitute any of the ingredients because you risk the truffles not setting up or the recipe not working. Read more about why not if you're interested in the blog post.
Storage - Truffles will keep airtight in the fridge for up to 2 weeks. For the reason above, I don't like freezing truffles. While they will taste fine, visually they won't look as nice. If you're planning on serving these at a party, they will keep at room temp for 3-4 hours or so, but because they're made with real butter and cream, I suggest refrigerating them after that.
Nutrition
Serving: 1 | Calories: 265kcal | Carbohydrates: 25g | Protein: 3g | Fat: 18g | Saturated Fat: 11g | Polyunsaturated Fat: 6g | Cholesterol: 21mg | Sodium: 64mg | Sugar: 24g