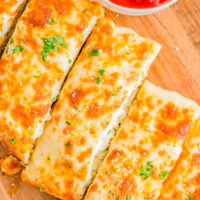
Cheesy Garlic Bread
French bread that's been brushed with melted garlic butter and Italian seasoning, then topped with mounds of mozzarella and Parmesan cheeses, and baked to perfection is what this EASY appetizer, snack, or side is all about! Garlic bread with cheese is a family favorite that no one can resist and ready in just 15 minutes!
Servings: 12
Calories: 250kcal
Ingredients
- 1 pound fresh French bread halved vertically
- ½ cup unsalted butter melted (salted butter may be substituted if preferred)
- 4 to 5 cloves garlic finely minced
- 1 teaspoon Italian Seasoning
- ⅓ cup freshly grated Parmesan divided; plus more for garnishing if desired
- 3 cups shredded mozzarella Cheese divided (use a 12-ounce block if grating it yourself)
- Fresh parsley basil, oregano, or other herbs for garnishing, optional and to taste
Instructions
- Preheat oven to 400F, line a baking sheet with parchment paper or foil for easier cleanup if desired; set aside.
- Slice the French bread vertically, so you have two long pieces with an interior cut side. Tips - I buy my 1 pound (16 ounce) loaf of French bread from my grocery store's bakery section. You can also use Italian bread or anything hearty, crusty bread if that's what you have available. Don't use regular bread because it won't stand up to the weight of the butter and cheese.
- Place the bread with the interior cut side facing up. Tip - If the half that used to the the top of the bread is a little wobbly or won't sit flat on your baking sheet, using a knife shave off the offending area so it will lay flat. This is important so the cheese doesn't slide off while it bakes. Set aside.
- To a 2-cup glass measuring cup (easier) or small bowl microwave-safe bowl, add the butter, and heat on high for about 45-60 seconds to melt.
- Add the garlic, Italian seasoning, and stir to combine. Tips - If you love garlic and want to make this more garlicky, you can add additional freshly minced garlic, or add about 1/2 to 1 teaspoon garlic powder or garlic salt. You can also add salt and/or pepper to the melted butter mixture if you want it saltier.
- Evenly pour the butter over the cut side of the bread. If you melted the butter in a small bowl, use a brush to brush it on. Make sure to use every last drop!
- Evenly sprinkle the 1/3 cup Parmesan divided over the two halves of bread and then evenly sprinkle the 3 cups of mozzarella divided over the two halves.
- Baking - Bake for about 12 minutes on the middle rack, or until the cheese has melted. Make sure to keep a close eye on it since all ovens bake differently, and all cheese melts at different rates, so bake until done and melted as desired in your oven. You can stop here although I recommend broiling it momentarily, see Step 9.
- Broiling (optional but recommended) - Turn your oven to high broil and allow the bread to broil for about 2-3 minutes. Tips - You don't have to move the baking sheet to the top oven rack, and it can just remain on the middle rack. This is safer since its farther away from the heat source, and while it may take an extra minute, you'll have more control over the heat output and it'll be less prone to accidentally burning. Make sure not to get distracted, nor start multitasking. I recommend standing at the oven door (closed or open, as you prefer) for the 2-3 minutes it will take to broil the bread, and simply watch it so that cheese becomes dotted with golden spots and neither the cheese nor the bread actually burns!
- Optionally garnish the baked bread with fresh herbs as desired, and optionally sprinkle a bit more Parmesan before serving. Serve immediately. Bread is best hot and fresh but will keep airtight in the fridge for up to 4-5 days. I reheat carefully in my microwave, although you can reheat in your oven, if preferred. See Notes below for freezer and make-ahead instructions.
Notes
In the Freezer: This recipe (unbaked) will keep airtight in the freezer for up to 3 months. I don't recommend freezing already-baked bread, then thawing, and reheating it.
Make Ahead: This is useful if you want to enjoy half the cheesy garlic bread now, and then in the future to enjoy the second half. You'll want to prep it, wrap well what you plan to freeze, freeze it, and then bake it off like you would a frozen pizza when you're ready to enjoy it. You'll probably need to add a few extra minutes to the bake time.
Nutrition
Serving: 1 | Calories: 250kcal | Carbohydrates: 22g | Protein: 10g | Fat: 14g | Saturated Fat: 8g | Polyunsaturated Fat: 4g | Cholesterol: 37mg | Sodium: 426mg | Fiber: 1g | Sugar: 2g