Red Velvet Cookies
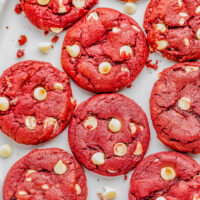
Red Velvet Cookies — Soft and chewy red velvet cookies that are loaded with white chocolate chips in every bite! A classic from-scratch red velvet cookie recipe that’s made in one bowl and EASY to make with PERFECT results every time! Perfect for Valentine’s Day, Christmas, or anytime you’re craving red velvet because these come together in no time and everyone LOVES them!
Servings: 20
Calories: 166kcal
Ingredients
- 1 ⅔ cups all-purpose flour
- ¼ cup unsweetened natural cocoa powder
- 1 teaspoon baking soda
- ½ teaspoon salt
- ½ cup unsalted butter softened to room temperature
- ⅔ cup light brown sugar packed
- ¼ cup granulated sugar
- 1 large egg
- 1 tablespoon milk 2% or whole milk preferred, although any type may be used
- 1 teaspoon vanilla extract
- 3 teaspoons liquid red food coloring or as desired*
- 1 cup white chocolate chips milk or semi-sweet chocolate chips may be substituted
Instructions
- To a large bowl, add the flour, cocoa powder, baking soda, salt, and whisk to combine the dry ingredients; set aside.
- To the bowl of a stand mixer fitted with the paddle attachment (or large mixing bowl and handheld electric mixer), add the butter, and beat on high speed for 1 minute, or until soft and creamy; stop to scrape down the sides of the bowl.
- Add the sugars and beat for 1 minute, or until light and creamy.
- Add the egg, milk, vanilla, and beat for 1 to 2 minutes, or until creamy and combined; stop to scrape down the sides of the bowl.
- Slowly add the dry ingredients, little by little, beating to incorporate them as you go, until you've added everything and a smooth dough forms; don't overmix.
- Add the food color (I use liquid food color, but gel food color may be used noting you'll need less because it's more concentrated) and beat carefully to incorporate, taking care that it doesn't splatter up on you because it stains everything in its presence. Food Coloring Tips - I used 4 teaspoons liquid food color but you can use up to about 5-6 teaspoons if you want a brighter and/or more prominent red color. If you want fire engine red cookies, you'll either need to use at least 2-3 tablespoons (not teaspoons) liquid food color, or perhaps about 3/4 to 1 tablespoon gel food color.
- Add the white chocolate chips and mix to incorporate.
- Cover the bowl with plastic wrap and place in the fridge to chill for 1 hour. Tips - Alternatively, you can form dough balls and place them on a plate to chill for up to 48 hours. However, if you're going to keep the dough chilling in the bowl, after 1 hour, retrieve it and form the cookie dough balls, otherwise the dough simply gets too hard to chisel out of the bowl.
- Preheat the oven to 350F and line two baking sheets with parchment or Silpat baking mats; set aside momentarily.
- Using a medium cookie scoop, form approximately 20 mounds of dough, about 2 tablespoons each in size and evenly place them on the baking sheets. You'll want about 10 to 12 dough balls per baking sheet, but not more, because they'll spread and need room.
- Bake for about 12 to 13 minutes, or just until the edges are beginning to set, even if the centers look undone because the cookies will firm up as they cool. Allow them to sit on the bakings sheets and firm. up for about 10 minutes, or until they're cool enough to transfer to a wire rack to cool completely (See More Baking Tips below). Tip - If desired, add a couple white chocolate chips to the top of each freshly baked cookie for visual appeal and a burst of additional chocolate flavor.
- Storage - Cookies are best fresh but will keep airtight at room temp for up to 5 days. Unbaked cookie dough balls can remain airtight in the fridge for up to 48-72 hours before being baked. Unbaked cookie dough balls will keep airtight in the freezer for up to 3-4 months. You do not need to thaw them and can bake straight from frozen, simply add 1-2 minutes or as necessary to the baking time so they're done. You can also freeze baked cookies airtight for up to 3-4 months, although I prefer freezing the cookie dough balls so that I can always bake up a batch of fresh cookies.
- Recipe adapted from Sally's Baking Addiction
Notes
Baking Tips - Bake on the center rack, and if possible, bake one sheet of cookies at a time, rotating the baking sheet once midway through baking for optimal results. The baking sheet on the bottom, if you're baking two sheets at once, never bakes quite as nicely as the one on the top does. While 12-13 minutes works well in my oven, always bake until done in your oven, climate, and variances such as cookie sheet material, size of dough balls, etc. If your cookies need less or more time to bake through, adjust accordingly and watch your cookies and not the clock when evaluating doneness.
Nutrition
Serving: 1 | Calories: 166kcal | Carbohydrates: 22g | Protein: 2g | Fat: 8g | Saturated Fat: 5g | Polyunsaturated Fat: 3g | Cholesterol: 23mg | Sodium: 130mg | Fiber: 1g | Sugar: 13g