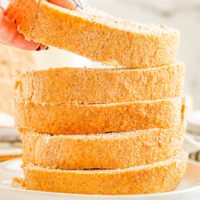
Honey Whole Wheat Bread
An EASY and foolproof homemade bread recipe for honey sweetened whole wheat bread! It's soft, thick, and scrumptious! Serve it plain, toast it, make sandwiches with it, or serve it with honey butter which is my favorite! Even if you're never made bread before, my recipe is straightforward and do-able.
Servings: 16
Calories: 185kcal
Ingredients
- 2 cups warm water*
- ¼ cup warm milk*
- ¼ cup honey
- 5 teaspoons active dry yeast
- 1 tablespoon light brown sugar packed
- 3 ½ cups whole wheat flour
- 2 ½ cups all-purpose flour
- 2 teaspoon salt
Instructions
- To the bowl of a stand mixer fitted with the dough hook, add the warm water, warm milk (Tip - Warm them according the temperature on the package directions on the brand of yeast you're using. The temp can vary from brand to brand. Check the temp with a digital thermometer and do NOT guess), honey, active dry yeast, brown sugar, and proof for 5 minutes. Tips - Proof means "to prove" that the. yeast is alive and well. You will know this if the mixture turns bubbly and frothy looking. If it does not, it means that the yeast isn't alive and your bread won't rise later on. So you need to start over until you see bubbles and a frothy looking mixture.
- While waiting, in a separate large mixing bowl, whisk together the whole wheat flour, all-purpose flour, and salt.
- After it's clear that the yeast has proofed, turn on the mixer to low speed, and slowly add the dry ingredients with the mixer running.
- After all the dry ingredients have been added and a dough is beginning to take shape, you can increase the speed slightly of the mixer and allow it to knead the dough for 4 to 5 minutes, or until it's smooth and elastic. Tips -When kneading the dough you can test to see if the dough has enough elasticity by pressing it. If it springs back it's ready. If it stays pushed in, keep kneading! If you're doing this by hand, simply add a few tablespoons of flour to a clean work surface, and knead the dough by hand for 6 to 8 minutes, or until smooth and elastic. If for some reason your dough is very sticky and hasn't come together, you can add up to 4 tablespoons additional flour (I suggest all-purpose). However, you really shouldn't need to.
- Spray a large mixing bowl very well with cooking spray, and place the dough into the mixing bowl, and cover with plastic wrap (spray the surface that the dough will come into contact) and allow the dough to rise for about 90 minutes, or until doubled in size. Tips- The warmer your kitchen is, the faster the dough will rise. If you're making this in the dead of winter in a cold kitchen, it may take 2 hours for your dough to double in size; just be patient this is fine. Also if you're using more milk than water, the dough may rise slightly faster due to the extra sugar content in milk. Although we're talking a few minutes, not more.
- After about 90 minutes, punch down the dough.
- Divide it into two pieces, and form loaf-like shapes with it.
- Place one mound of dough into two 8x4-inch baking pans, well sprayed with nonstick cooking spray.
- Allow the dough to rise in the loaf pans, uncovered, for 20 to 30 minutes. While waiting, preheat your oven to 350F.
- Bake the bread for about 37 minutes, or until lightly golden brown, set, and done. Tip - Rotate each loaf pan once midway through baking to ensure even cooking and browning.
- Allow the bread to cool momentarily in the loaf pans until it's cool enough to handle and you can turn it out onto a wire rack to cool completely before slicing and serving. Bread will keep airtight at room temp for up to 3 to 4 days, or in the freezer for up to 4 months. Do not store baked bread in the fridge as it just dries out and gets hard. And do not freeze unbaked bread dough.
Notes
*You need 2 1/4 cups total liquid. I use 2 cups water and 1/4 milk since frankly water is cheaper to use than milk.
However, you can use more milk than water, or use all water, or use all milk. The bread will taste a bit richer as you increase the amount of milk and reduce the amount of water. You can use skim, 1%, 2%, whole, soy, almond, cashew, or your favorite type of milk.
Note that if you do use a higher percentage of milk, that because of the sugars in milk, it may cause the bread to rise a bit faster. Something to be mindful of but we're talking minutes, not hours, faster.
Nutrition
Serving: 1 | Calories: 185kcal | Carbohydrates: 40g | Protein: 6g | Fat: 1g | Polyunsaturated Fat: 1g | Sodium: 269mg | Fiber: 4g | Sugar: 5g