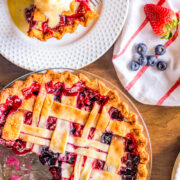
Rhubarb Berry Pie
A classic, EASY, fruit pie made with rhubarb, strawberries, and blueberries! Sweet yet a bit tart, very juicy, and a PERFECT spring or summer dessert! Use a store bought pie crust to save time!
Servings: 8
Calories: 238kcal
Ingredients
- 1 package refrigerated pie crusts should contain 2 crusts; alternatively make a double-crust homemade pie crust recipe
- 3 cups rhubarb* diced into 1 to 1.5-inch pieces
- 1 cup sliced strawberries** I used some fresh/some frozen, either are fine
- 1 cup blueberries** I used frozen, fresh are fine
- 1 cup granulated sugar plus about 2 tablespoon for sprinkling
- 1 large egg beaten
- 1 tablespoon quick-cooking or minute tapioca
- 1 tablespoon all-purpose flour plus more for dusting counter
Instructions
- Preheat oven to 375F and place a baking sheet or pizza stone inside the oven to heat up as well.
- Allow the refrigerated pie crusts to soften for about 15 minutes on a clean counter before flouring your countertop as needing to prevent sticking, rolling out one pie crust, and draping it into a greased 9-inch glass pie plate; set aside.
- While waiting for the pie crusts to come up to warm temp, to a large bowl, add the rhubarb, strawberries, blueberries, 1 cup sugar, egg, Minute Tapioca, flour, and gently stir together, and allow the mixture to stand for 15 to 30 minutes. This allows the fruit to release its natural juices and tapioca starch to start working to thicken them.
- Meanwhile, sprinkle your counter with additional flour to prevent sticking, flatten the second crust with a rolling pin, and roll it out so that it's 12 inches in diameter.
- Using a pizza cutter/wheel, slice the crust into 1-inch wide strips, making 12 strips.
- Vertically slice 4 of those strips in half to create 8 thinner strips (1/2-inch each in width); leave these strips in pairs.
- Arrange the strips in lattice design over filling.***
- Seal and flute edges of the pie plate using your fingers.
- Evenly sprinkle the top with about 2 tablespoons sugar.
- Cover the entire pie plate with foil, place on the preheated baking sheet (helps guard against accidental overflow and also begins cooking the bottom crust immediately and prevents a soggy bottom) and bake for 40 minutes.
- Remove the pie plate from the oven, remove the foil, and create a barrier of foil to just cover around the crust around the perimeter of the pie plate. This strategically placed foil helps prevent excess browning/burning. Bake for an additional 25 to 30 minutes, or until the filling is bubbling and the lattice crust is lightly golden browned. Watch your pie and not the clock, noting it could finish earlier/later than the estimates given and it's your job to watch it so it doesn't burn or come out underdone based on how your oven operates, fresh vs. frozen fruit, etc.
- Allow the pie to cool on a wire rack for about 2 hours at room temp before slicing and serving, or until completely set. You can accelerate this process by placing the pie in the fridge.
- Serve with ice cream, whipped cream or whipped topping, or plain. Store leftover pie well-covered (airtight) in the fridge for up to 5 days.
Notes
*I used frozen rhubarb because it's what I could find although fresh rhubarb will work interchangeably. If using frozen, measure the 3 cups worth, then allow it to thaw and drain any excess water that's released.
**You can use either fresh or frozen berries. If using frozen, you only need to allow them to thaw about half-way. Blackberries or raspberries may also be substituted in place of the strawberries and blueberries.
***Refer to the collage photo in the blog post to see how I made the lattice top. There are lots of tutorials and complicated videos on the internet, but I tried to keep this basic. The 1/2-inch wide strips I keep as a "pair" and alternate them with the 1-inch wide strips, weaving in and out, up and down. However, if you don't want to bother with this, your pie will turn out just fine if you keep all 12 strips the same 1-inch width and make a classic lattice that way.
Nutrition
Serving: 1 | Calories: 238kcal | Carbohydrates: 44g | Protein: 3g | Fat: 6g | Saturated Fat: 2g | Polyunsaturated Fat: 4g | Cholesterol: 23mg | Sodium: 101mg | Fiber: 2g | Sugar: 29g