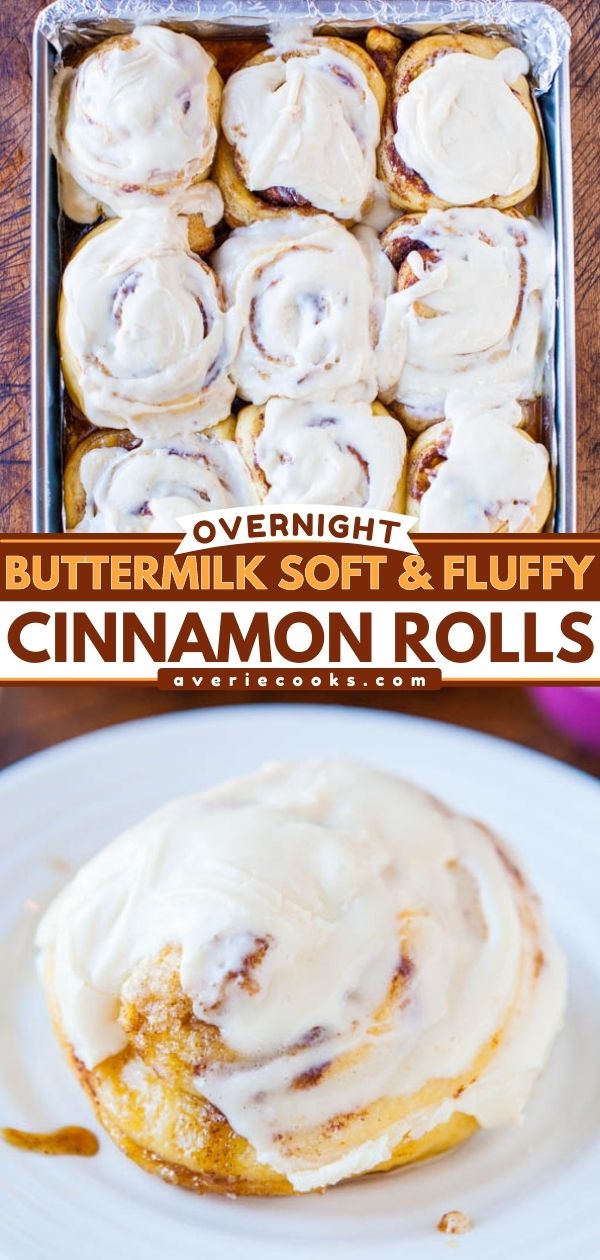
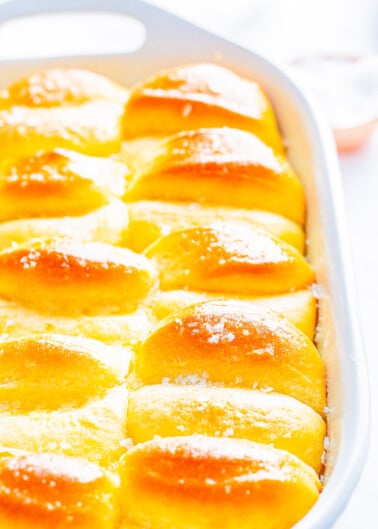
Overnight Cinnamon Rolls — These overnight cinnamon rolls are ultra soft and fluffy thanks to the buttermilk in the dough. Top them with homemade cream cheese frosting and enjoy!

Table of Contents
- The Best Overnight Cinnamon Rolls
- Overnight Cinnamon Rolls Ingredients
- How to Make Homemade Cinnamon Rolls
- How to Tell If the Buttermilk Mixture is Warm Enough to Activate the Yeast
- How to Encourage Your Dough to Rise
- How to Store Cinnamon Rolls
- Can I Freeze Cinnamon Rolls?
- What Type of Yeast Should I Use?
- Can I Make Overnight Cinnamon Rolls with Bread Flour?
- Tips for Making Overnight Cinnamon Rolls
- Overnight Soft and Fluffy Cinnamon Rolls Recipe
- More Cinnamon Roll Recipes:
The Best Overnight Cinnamon Rolls
Homemade cinnamon rolls sound great in theory until you do the math and realize in order to have a warm cinnamon roll with your 10am coffee, you need to wake up about 5am. No thanks!
I solved that problem and made the fluffiest, softest, and best cinnamon rolls I’ve ever had.
Every recipe out there promises the best cinnamon rolls, and I have more recipes to try. Consider this the first installment in my Cinnamon Roll Recipe Showdown. But to date these are the best cinnamon rolls I have ever had, and I’m super picky. The next recipe will happen when I have time to work in an extra cardio session to make up for all the fluffiness I consumed.
Even if you’ve never worked with yeast or made cinnamon rolls, this overnight cinnamon roll recipe is do-able, but it’s not for everyone. There are no shortcuts, this is not bread-in-a-hurry, which is why I made the recipe work as overnight rolls.
At 5am, the last thing I am is wide awake and wanting to dive right into a yeast bread recipe. However, you can make it straight through if preferred, and start to finish you’re looking at about 5 hours of work. You’re either getting up at the wee hours, or you’re having afternoon cinnamon rolls.
These overnight cinnamon rolls have soft, fluffy, tender dough that’s buttery and scrumptious. They’re as light and feathery as cinnamon rolls can get. They’re lighter and not as dense, heavy, and ‘bready’ as Cinnabon’s. They still are heavy and filling, but less like a ton of bricks in your stomach. Maybe just a half ton.
While baking, the filling mixture of brown sugar and butter melts and caramelizes, producing a thick, sweet, caramely sauce, pleasantly spiced with cinnamon. That saucy filling, along with melted frosting, is what a cinnamon roll is all about.
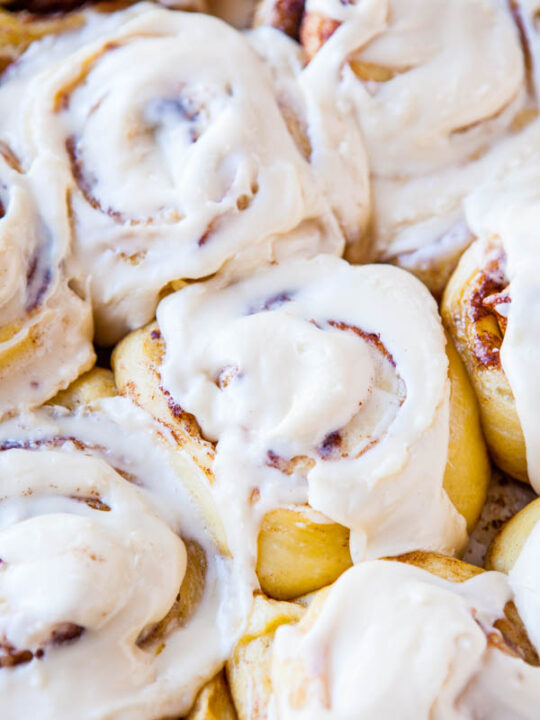
Just like carrot cake needs cream cheese frosting, so do cinnamon rolls. The frosting is tangy from the cream cheese, rich from the butter, and densely satisfying. There is nothing like homemade cream cheese frosting. So smooth, creamy, indulgent, and blissful.
They were every bit as wonderful as I had hoped. Future recipes have their work cutout for them. To date, the best cinnamon roll I’ve ever had, and the family concurs.

Overnight Cinnamon Rolls Ingredients
To make the best cinnamon roll recipe ever, you’ll need:
- All-purpose flour
- Granulated sugar
- Instant dry yeast
- Salt
- Unsalted butter
- Eggs
- Buttermilk
- Light brown sugar
- Cinnamon
- Cream cheese
- Vanilla extract
- Confectioners’ sugar

How to Make Homemade Cinnamon Rolls
To the bowl of your stand mixer, add the all-purpose flour, instant dry yeast, sugar, optional salt. Let the dry ingredients hang out in the mixing bowl while you melt some butter, lightly beat the eggs, and warm the buttermilk.
I warm it in the microwave for about 45 seconds in a glass measuring cup. If after warming the buttermilk, it’s separated or gotten a little foamy, whisk it and it will smooth out.
The type of yeast you use and the manufacturer’s directions will dictate the necessary buttermilk temperature. For Platinum yeast, the water should be warmed to about 120ºF to 130ºF, which is notably warmer than most other instant dry yeast, which typically call for temps in the 100ºF range. Follow the manufacturer’s recommendations for whatever yeast you use.

Beat the dry and wet ingredients together with the paddle, and after a minute switch to the dough hook. Moist, wet batter will be stuck to your paddle, so just pick it off as best you can. Allow the dough hook to knead for 10 to 12 minutes.
If after 5 minutes the dough is still extremely wet and sloppy and not coming together, add one-quarter cup more flour, one tablespoon at a time, until it firms up.
The most important thing you can do in this entire recipe is trust that the high moisture level of the dough is high and not over-flour it. The more flour you add, the denser the dough becomes, and the heavier the rolls will be. It’s nice in theory to have a smooth, round, mound of satiny, non-sticky dough, but that’s not this cinnamon roll dough.
The cinnamon roll dough in this recipe is wet, gloppy, moist, messy, sticky, and of all the bread I’ve ever made, this dough gets the award as the sloppiest. I was cursing it. When kneading in a mixer, the rule of thumb for this type of dough is that it clears the sides of the bowl, but sticking the bottom of the bowl is fine.

Transfer the sloppy mess to a cooking-sprayed large mixing bowl, cover it with plastic wrap, and let it rise for 2 to 2 1/2 hours, or until doubled in size. The sloppiness factor will diminish as the dough rises and all the moisture helps create light and fluffy rolls.

Just look at the blubbery, wobbly, jiggly puffiness after 2 1/2 hours.

It was literally pillowy soft. It felt like I was punching a pillow.

Pssssssss. Deflation. Trapped gases released. Talk about a limp, deflated state of affairs after the punchdown.

On a floured Silpat or counter, roll the dough out to a large rectangle, about 16×10 inches. I didn’t measure with a ruler because I know that’s just slightly larger than my Silpat, so I rolled it about that size.
Spread a stick of very soft butter over the dough and sprinkle with brown sugar and shake on the cinnamon. I used almost 5 teaspoons of cinnamon, but wrote to use 3 teaspoons in the recipe, or to taste.
I love cinnamon, especially in cinnamon rolls, hence their name. In no way was 5 teaspoons overpowering. That’s a lot of dough and it needs to be properly flavored, but season to taste.

Starting on a long edge (I started where you can see some letters on the Silpat peeking out), roll up the dough into as tightly coiled log as possible. It’s messy and if your log isn’t perfect, that’s okay. Slice it into 12 pieces and put them onto the baking sheet.
For slicing, use a serrated knife or unwaxed and unflavored dental floss works great. You can pinch off the slices without compressing and squishing down the log. I used my trusty bench scraper.
I used a large jellyroll or sheetcake-style baking sheet with a raised edge, 11-by-16-inches. You could use a 9×13-inch pan, but I prefer the jellyroll pan because the rolls are less squished, have more room to spread out and rise, and baking is more uniform.
Some people complain their cinnamon rolls get too browned on the top before the center cooks through, which can happen if they’re too cramped in a pan. The jellyroll pan was $5.99 in my grocery store baking aisle and did the trick. I imagine that you could also make two eight-inch round pans.

Cover with plastic wrap and now it’s decision time.
If you’re doing the overnight make-ahead option, slide the pan into the fridge and keep it there for up to 16 hours before baking the rolls. When it’s time to bake the next day, allow the rolls to come up to room temperature and rise for 1 hour on the counter, or until almost doubled in size. And then bake.
If you’re making them straight through, allow the rolls to rise in a warm, draft-free place for 60 to 90 minutes, or until almost doubled in size. And then bake.
Bake them at 350ºF for 22 to 25 minutes, or until lightly golden on top and cooked through, but not overly browned. I prefer these on the paler side. Nothing says dealbreaker like a hard or crusty cinnamon roll.
After 12 hours in the fridge, this is what my rolls looked like. They sat on the counter for 1 hour before I baked them.

I baked for 23 minutes, and rotated the pan once. It’s amazing how much they puffed during the 1 hour rise and in the oven. The term for it is called oven spring. Yes, they sprung, which is why I can’t imagine a 9×13 pan.
While they bake, make the cream cheese frosting. However, if you’re doing the overnight option, I highly suggest making it the night before so it’s one less thing to think about the next day before you’ve had your coffee.
Put the frosting into an airtight container and slide it into the fridge along with rolls. The next morning, take them both out at the same time. You want the cream cheese frosting to be very soft so that it spreads smoothly over the rolls.
Immediately after taking the rolls out of the oven, generously frost them so it drips into all the cracks and crevices. And dig into a little piece of heaven.

How to Tell If the Buttermilk Mixture is Warm Enough to Activate the Yeast
Some people just dip their finger into the liquid and if that’s the method you’re using, err on the side of warm bath water rather than hot because you don’t want to risk killing the yeast. In bread-making, I don’t like to guess and always use a candy thermometer. I just never use it for candy.
I urge you to buy a (cheapie) thermometer. They’re about $5.99 at the grocery store, Bed Bath & Beyond, or Target. It could save you from a bread fail and if you’re going to go to the work of making cinnamon rolls, having one is a no-brainer.
How to Encourage Your Dough to Rise
A trick for creating a warm environment for the dough to rise in is to turn on the oven for one minute to 400ºF, then shut the oven off. Repeat: don’t leave the oven on, you are just blasting in hot air for one minute only.
Quickly slide your bowl into the oven and let it stay there to rise. It will be about 85ºF inside the oven after the brief one-minute blast. This tricks the yeast into thinking it’s a nice, warm summer day in your kitchen, which is how do their best work.
For the 2 1/2 hours the dough bowl was parked inside my powered-off oven, I powered it on 3 times, every 45 minutes or so, for 1 minute each time. This kept the oven toasty because it was a cold night I made the dough and the oven and my warm environment was cooling off.

How to Store Cinnamon Rolls
The rolls are best eaten fresh, but will keep in an airtight container at room temperature for up to 5 days. Reheat leftover rolls for a few seconds in the microwave before serving. If you have issues with cream cheese frosting at room temperature, then refrigerate the leftover rolls; I don’t.
Can I Freeze Cinnamon Rolls?
Yes, these overnight cinnamon rolls freeze well. You’ll want to prep and bake the cinnamon rolls all the way through and then freeze them without the icing. When you’re ready to eat the frozen cinnamon rolls, set them on your counter to thaw and make a fresh batch of icing.

What Type of Yeast Should I Use?
I used Red Star Platinum yeast, which is my gold standard. It’s an instant dry yeast, so you don’t have to proof it first with water and wait for it to get bubbly and foamy. Just sprinkle it right into the bowl with the other ingredients and then pour the liquids over the top of everything. When I deviate from Platinum and use other yeast, my dough doesn’t rise as well and doesn’t bake up as puffy and fluffy.
Can I Make Overnight Cinnamon Rolls with Bread Flour?
I love bread flour for producing extra chewy bread, rolls, and cookies, but for these homemade cinnamon rolls I didn’t want any chewiness. I wanted softness and fluffiness, and all-purpose flour is the way to go. It has a lower protein and thus lower gluten content, meaning the finished rolls will be more tender and soft with less chew-factor.

Tips for Making Overnight Cinnamon Rolls
A stand mixer will make your life immensely easier because the dough needs to be kneaded for a minimum of 10 minutes. However, you can also do it by hand — and in the process, you’ll burn off enough calories that you easily deserve a couple rolls.
Also, the recipe for cream cheese frosting — like all frosting — is dictated by personal preference. I simply used butter, cream cheese, vanilla, and confectioners’ sugar in it. Adding milk, cream, buttermilk, orange zest, almond extract, or whatever you like in your frosting is all up to you.
The amount of cream cheese frosting for cinnamon rolls I made is in excess of what you may need for your rolls if you don’t like a lot of frosting, but I do. Plus, frosting keeps for a couple weeks in the refrigerator and I have also frozen it for months. When I am dirtying the mixer to make it, I may as well make a decent amount.
Halve the recipe if preferred, but you’d be surprised that if you make it, people will want it and eat it. It’s not like making extra lima beans where requests for extra are nonexistent. A smear of extra frosting before nuking leftover cinnamon rolls is extra wonderful.
And finally, please note that I wrote the recipe below as clearly and descriptively as possible. Before making these homemade cinnamon rolls, read it over at least three times so you know where you’re going, what’s next, and more importantly, how much butter you need to set aside.

Pin This Recipe
Enjoy AverieCooks.com Without Ads! 🆕
Go Ad Free
Overnight Soft and Fluffy Cinnamon Rolls
Ingredients
Dough
- up to 4 1/4 cups all-purpose flour, divided
- ⅓ cup granulated sugar
- 2 ¼ teaspoons instant dry yeast, one 1/4-ounce packet, I use Red Star Platinum
- pinch salt, optional and to taste
- 6 tablespoons unsalted butter, melted (3/4 of one stick)
- 3 large eggs, lightly whisked
- ¾ cup buttermilk*, See Notes
Filling
- ½ cup unsalted butter, 1 stick, very soft – let it sit out while dough rises
- 1 to 1 ¼ cups light brown sugar, packed (granulated sugar or a half-and-half combo of white and brown sugars may be substituted)
- 3 to 4 teaspoons cinnamon, or to taste (I use 5 teaspoons)
Cream Cheese Frosting
- ½ cup unsalted butter, softened
- 6 ounces cream cheese, softened
- 1 tablespoon vanilla extract
- 1 pound confectioners’ sugar, 4 cups
- ½ teaspoon salt, optional and to taste
Instructions
- Make the Dough
- To the bowl of a stand mixer fitted with the paddle attachment, combine 4 cups flour, 1/3 cup sugar, yeast, salt to taste; set aside.
- Place 6 tablespoons butter in a small microwave-safe bowl, and heat to melt, about 45 seconds; set aside.
- Crack eggs in another bowl and whisk; set aside.
- Add buttermilk to a glass measuring cup and warm to temperature, about 45 seconds on high power in the microwave. Tips – Based on the type of yeast used, milk temperatures will vary. Red Star Platinum yeast calls for warmer temperatures than most, 120 to 130F; other brands and yeast call for much lower temperatures, about 95 to 105F. Warm milk according to manufacturer’s recommendations on the packaging. Taking the temperature with a digital thermometer is highly recommended, but if you’re not, make sure the milk is warm, not hot. Err on the cooler rather than hotter side so you don’t kill the yeast. If the milk separates or gets a little funny looking after being warmed, whisk it to smooth it out.
- To the dry ingredients in the stand mixer, add the melted butter, eggs, buttermilk, and beat on medium-low speed for about 1 minute, or until combined.
- Switch to the dough hook (the dough will have stuck to the paddle and just pick off what you can and put it into the bowl) and knead for 10 to 12 minutes (15 to 18 minutes by hand).
- If after 5 minutes more flour is needed, add the remaining 1/4 cup flour, 1 tablespoon at a time, until the dough clears the side of the bowl but sticks to the bottom. Tips – This is a very sticky, tacky, moist, and borderline sloppy dough; don’t be tempted to over-flour it. It’s supposed to be that way. The more flour you add now, the less fluffy and more dense the rolls will be. Dough should clear the sides of the mixer while kneading but sticking to the bottom is fine. However, if the dough is simply too sloppy to work with, you can't move it from mixing bowl to rising bowl, it does need more flour so add some, as little as you can get away with, until you can work with the dough more easily.
- Remove the dough from the mixing bowl, spray a large mixing bowl with cooking spray, and place the dough in the bowl. Cover with plastic wrap and place it in a warm, draft-free place to rise for about 2 to 2 1/2 hours, or doubled in size. I keep my bowl inside a powered-off oven. Every 45 minutes or so, I power on the oven for 1 minute to 400F, as if I am preheating it, then I power it off. Do not, repeat not, keep the oven on. These short bursts of 1 minute of heat create a stable 85F-ish warm environment, ideal for the yeast. If your rising spot is cold, it will take longer than 2 1/2 hours.
- Prepare a 11-by-17-inch or similar sized jellyroll pan or sheetcake pan with a raised edge, or use a 9-by-13-inch pan. I prefer a jellyroll pan because it’s slightly larger so the rolls are less squished, have more room to rise, and bake more evenly. Line pan with aluminum foil, spray with cooking spray; set aside.
- Shape the Cinnamon Rolls
- After dough has doubled in size, punch it down. Turn dough out onto a floured Silpat or floured countertop. Knead it lightly for about 2 minutes.
- With a rolling pin, roll it out to a 16-by-12-inch rectangle; just slightly larger than a standard Silpat.
- With a knife, butter the dough with 1/2 cup soft butter, leaving a 3/4-inch border around the edges.
- Sprinkle the brown sugar over it. Sprinkle the cinnamon over the brown sugar; I was very generous with the cinnamon and used almost 5 teaspoons and recommend at least 3; just eyeball it and shake it on.
- Loosen the dough from the counter using a bench scraper (or metal spatula), and starting with a long edge, roll the dough into a tight log. Pinch the seam closed and turn log so seam side is down.
- Gently stretch the log to be 18 inches in length with an even diameter all the way around and pat the ends to even them up. Don’t fret if your log isn’t perfect; it’s okay.
- Slice the cylinder into 12 evenly sized rolls (about 1 1/2 inches wide) using a bench scraper, serrated knife, or plain unwaxed dental floss (works great to not squish and compact the log).
- Arrange the rolls cut side down in the prepared baking pan. Cover with plastic wrap.
- If making the rolls straight through: Let rise in a warm, draft-free place until the rolls have nearly doubled in size, 1 to 1 1/2 hours.
- If making the rolls overnight: Don’t let rolls rise after they’ve been sliced and placed in covered pan. Place pan in refrigerator for up to 16 hours. Before baking, let the rolls sit at room temperature until they have nearly doubled in size, about 1 hour.
- Bake the Rolls
- For either version, bake at 350ºF for 22 to 25 minutes, or until lightly golden on top and cooked through but not overly browned.
- While the rolls cool, make the frosting.
- Make the Cream Cheese Frosting
- To the bowl of a stand mixer fitted with the paddle attachment, combine 1/2 cup butter, cream cheese, and beat on medium speed to combine, about 1 minute.
- Add the vanilla, 3 cups confectioners’ sugar (I don’t bother sifting), and beat until smooth and fluffy, about 3 minutes, stopping to scrape down the sides of the bowl as necessary.
- Add remaining 1 cup of sugar (or more, or none) as necessary, to taste, based on desired frosting consistency and flavor.
- Spread the frosting over the tops of the semi-cooled rolls and serve. Tips – Make sure they're not too warm or the frosting will melt. You may not use all the frosting if you don't like a lot of frosting on your rolls. That's fine, you don't need to use it all. Extra frosting will keep airtight in the fridge for many weeks or you can freeze it.
Notes
- Make your own buttermilk with whole milk and vinegar. Add 3/4 cup of 2% or whole milk to a large measuring cup. Stir in 1 tablespoon of white vinegar. Let that mixture sit for 2 minutes before using in the recipe.
- You can use powdered buttermilk. You’ll mix how many ever tablespoons the package calls for, with 3/4 cup of water, to yield 3/4 cup of buttermilk. For those who bake with or use buttermilk semi-frequently, but not so frequently to keep in in your fridge, keeping a tub of powdered buttermilk in your pantry is very handy.
Nutrition
Nutrition information is automatically calculated, so should only be used as an approximation.
©averiecooks.com. Content and photographs are copyright protected. Sharing of this recipe is both encouraged and appreciated. Copying and/or pasting full recipes to any social media is strictly prohibited.
More Cinnamon Roll Recipes:
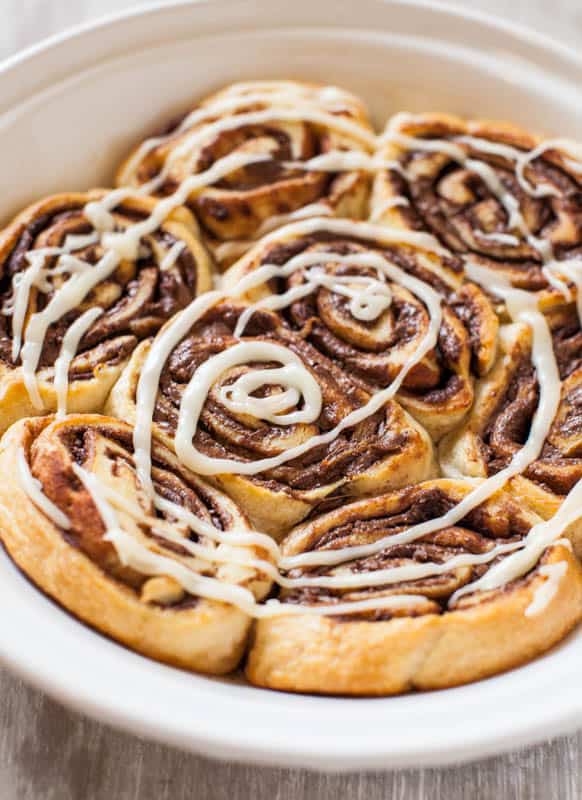
Nutella Cinnamon Rolls with Vanilla Glaze — A can of crescent rolls never tasted so good as when they’re stuffed with Nutella and rolled up. Ready from start to finish in 15 minutes, no joke
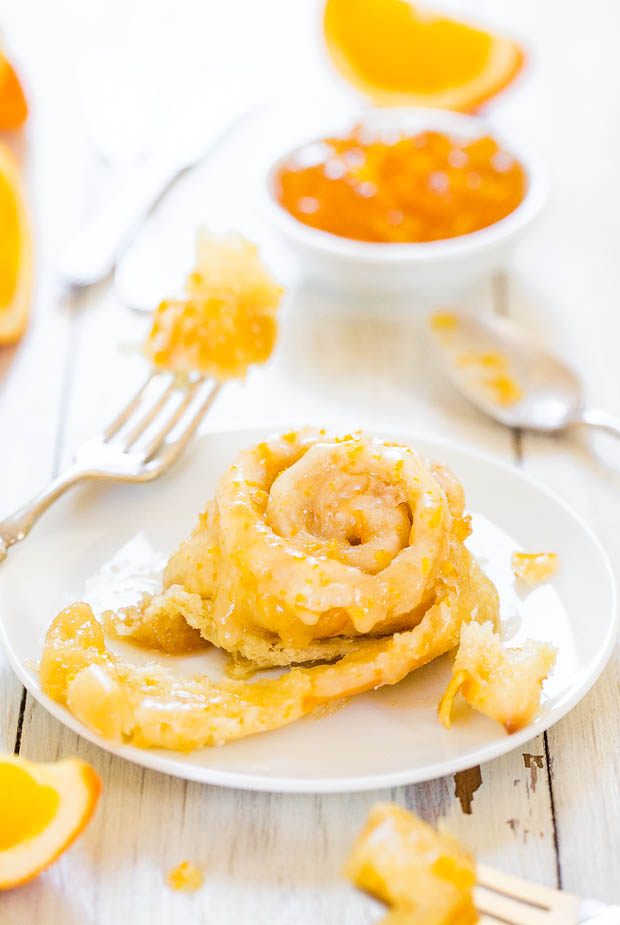
The Best Glazed Orange Sweet Rolls — These homemade orange rolls are filled with a buttery orange filling and are topped with a simple orange glaze. They can be prepped the night before, if needed.
Pumpkin Cinnamon Roll Bake — The recipe is easy, ready in 40 minutes, and you don’t even have to make scratch cinnamon roll dough.
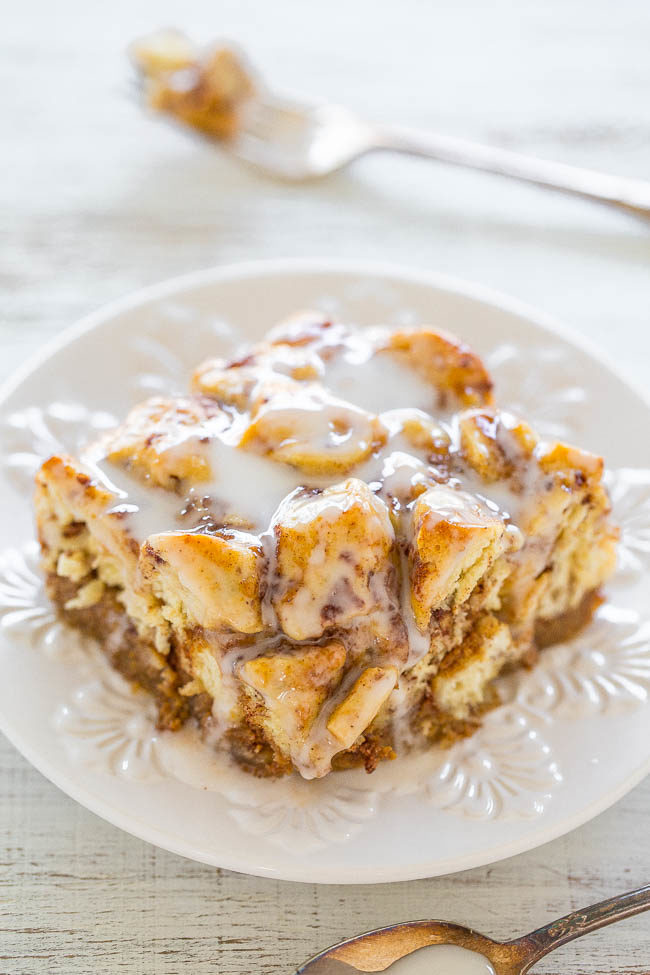
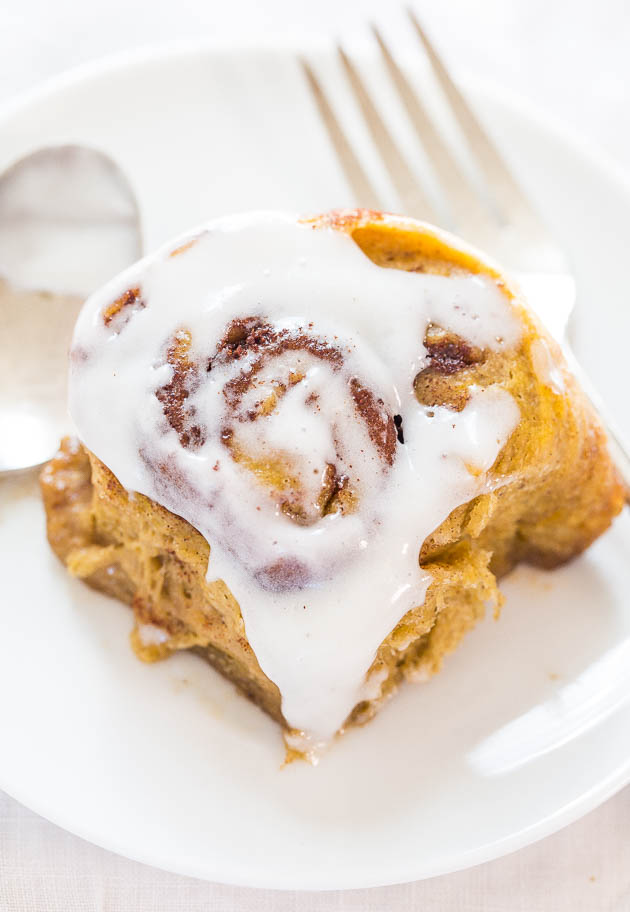
The BEST Pumpkin Cinnamon Rolls — The glaze soaks into the nooks and crannies and adds even more moisture and softness. Total gooey, cinnamon-and-sugary, juicy perfection.
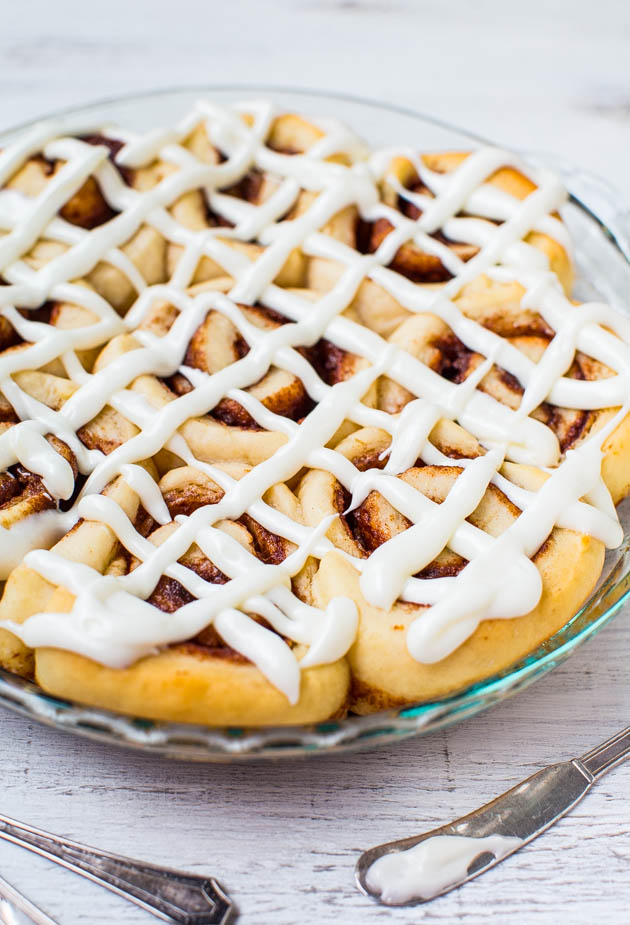
1-Hour Cinnamon Rolls with Cream Cheese Frosting — The dough is made, rolled out, sliced, and immediately baked, which eliminates many hours and steps compared to most cinnamon roll recipes.
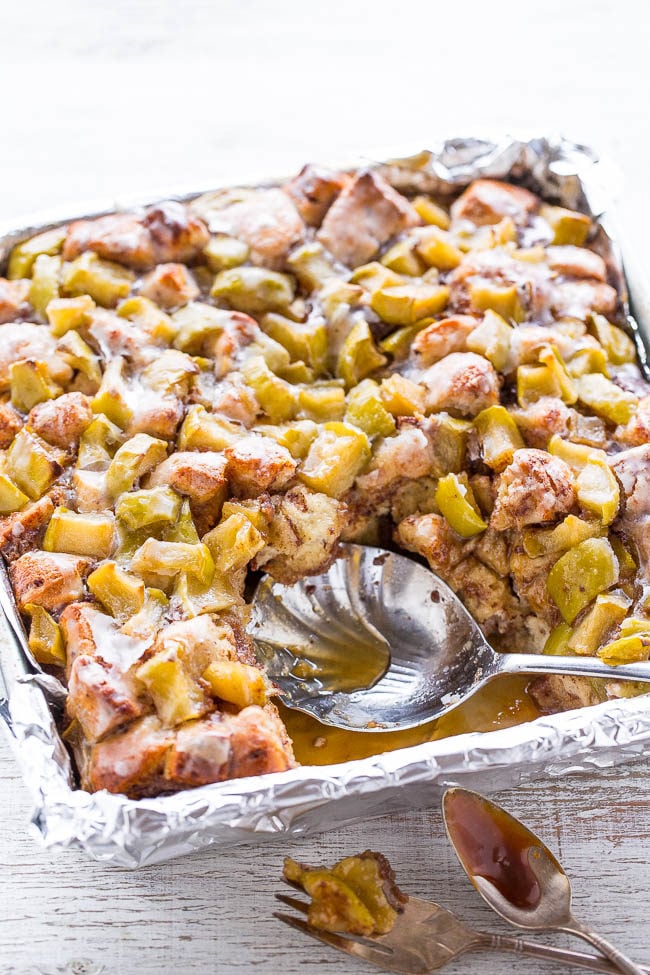
Caramel Apple Cinnamon Roll Bake — This cinnamon roll recipe with apples and caramel sauce is easy, ready in 30 minutes, and you don’t even have to make scratch cinnamon roll dough.

Have been making these a few times a year for the past 5+yrs. Currently making them for Christmas morning!!! Great recipe and always turn out delicious
Have been making these a few times a year for the past 5+yrs. Currently making them for Christmas morning!!! Great recipe and always turn out delicious
Thanks for the 5 star review and glad they’ve been a 5+ year tradition for you! Hope you had a wonderful Christmas!
I’ve made this recipe MANY times now over several years. It’s my go-to Christmas morning recipe. Being able to make the dough the night before is a lifesaver. And everyone who’s ever had one of these has raved!! I’m not a very frequent baker, but these are delicious, and easy enough if you follow the steps and rise times. (I’d suggest also to let the dough rise in a square-ish tub vs a regular bowl if you have one. It’s what they do on GBBO because it’s easier to tell when it’s doubled in size, especially if the tub has measurement markers!) I make it exactly as written. I always have too much frosting, but that’s not exactly a problem ;)
I’ve made this recipe MANY times now over several years. It’s my go-to Christmas morning recipe. Being able to make the dough the night before is a lifesaver. And everyone who’s ever had one of these has raved!! I’m not a very frequent baker, but these are delicious, and easy enough if you follow the steps and rise times. (I’d suggest also to let the dough rise in a square-ish tub vs a regular bowl if you have one. It’s what they do on GBBO because it’s easier to tell when it’s doubled in size, especially if the tub has measurement markers!) I make it exactly as written. I always have too much frosting, but that’s not exactly a problem ;)
Thanks for the 5 star review and I am so glad to hear that this recipe has become a Christmas morning tradition for you! I agree, being able to make them the night before is a lifesaver. I am glad everyone loves and raves about these! 🙏🏻🎄
I made these for the kids for Christmas morning and just WOW. They were SO SO SO GOOD. They take time, but it’s SO WORTH IT. I did the overnight version, which worked out perfectly. I seriously cannot recommend this recipe enough. Thank you!
I made these for the kids for Christmas morning and just WOW. They were SO SO SO GOOD. They take time, but it’s SO WORTH IT. I did the overnight version, which worked out perfectly. I seriously cannot recommend this recipe enough. Thank you!
Thanks for the 5 star review and I’m glad that these were so so good and worth it!! I know that they take time as all homemade cinnamon rolls do BUT like you said, they are worth it!! :)
Greeting to you! You can find the foollowing links interesting and helpful. Feel free to explore them below.
https://www.tecteem.com/how-to-start-an-online-business/
https://www.tecteem.com/easiest-way-to-get-a-payday-loan/
https://www.tecteem.com/linkedin-jobs-how-to-apply-for-linkedin-jobs/
https://www.tecteem.com/japanese-government-mext-scholarship-application-apply-now/
https://www.tecteem.com/guide-to-getting-paydaynow-same-day-online/
https://www.tecteem.com/merrimack-valley-credit-union-login-at-www-mvcu-com/
https://www.tecteem.com/what-is-a-balance-transfer/
https://www.tecteem.com/how-to-set-up-financial-goals-for-your-future/
https://www.tecteem.com/why-nearly-every-purchase-should-be-on-a-credit-card/
https://www.tecteem.com/www-nymcu-org/
https://www.tecteem.com/ched-scholarship-application-online/
https://www.tecteem.com/stock-to-invest-in-2022-2023/
https://www.tecteem.com/sakfc-survey/
https://www.tecteem.com/part-time-jobs-for-retirees/
https://www.tecteem.com/what-is-a-balance-transfer-credit-card/
These were delicious and such a hit!! Have you tried preparing the dough and cutting them out and then freezing the uncooked rolls? I’m looking for a way to give these to friends as a treat so they can e just pull them out of the freezer and cook them. Thank you for a such a yummy recipe!!
These were delicious and such a hit!! Have you tried preparing the dough and cutting them out and then freezing the uncooked rolls? I’m looking for a way to give these to friends as a treat so they can e just pull them out of the freezer and cook them. Thank you for a such a yummy recipe!!
Thanks for the 5 star review and I am glad that they were delicious!
I’ve never tried that. Yeast can be funny…sometimes what you describe works, sometimes it doesn’t. You would have to make a test batch (or test a half batch) and see if it works. It’s not quite the same but baking them off and then freezing the baked rolls works. My grandma used to do this all the time. You can warm them very briefly after thawing them and top with frosting and they’re almost just as good!
Thank you for sharing this Overnight Buttermilk Soft and Fluffy Cinnamon Rolls, seems amazing . Can’t wait to try these delicious cinnamon roll.
Thank you for sharing this Overnight Buttermilk Soft and Fluffy Cinnamon Rolls, seems amazing . Can’t wait to try these delicious cinnamon roll.
Thank you for sharing this Overnight Buttermilk Soft and Fluffy Cinnamon Rolls, seems amazing . Can’t wait to try these delicious cinnamon roll.
great