The BEST Glazed Orange Rolls — These homemade orange rolls are filled with a buttery orange filling and are topped with a simple orange glaze. They can be prepped the night before, if needed.
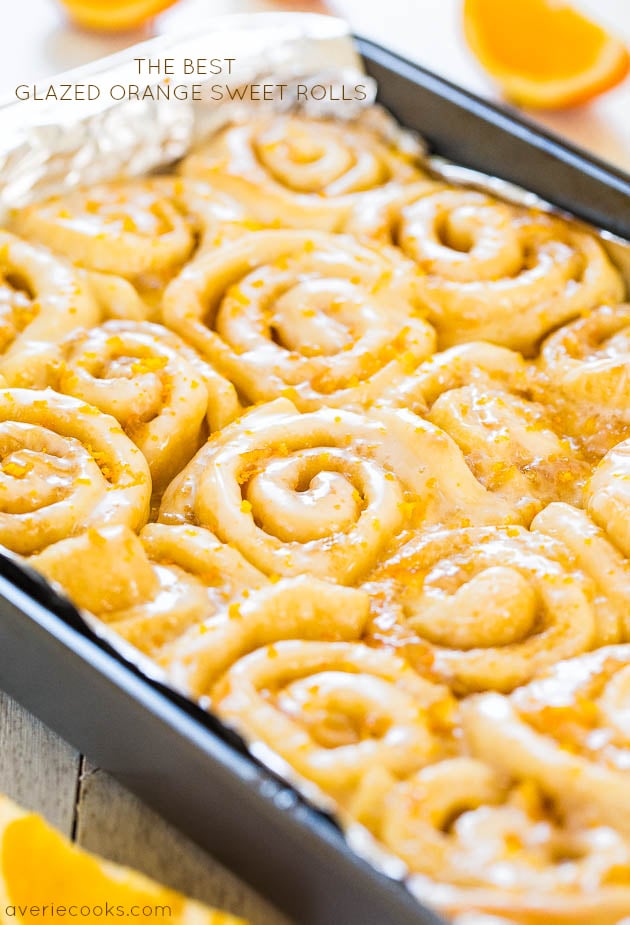
Glazed Orange Sweet Rolls
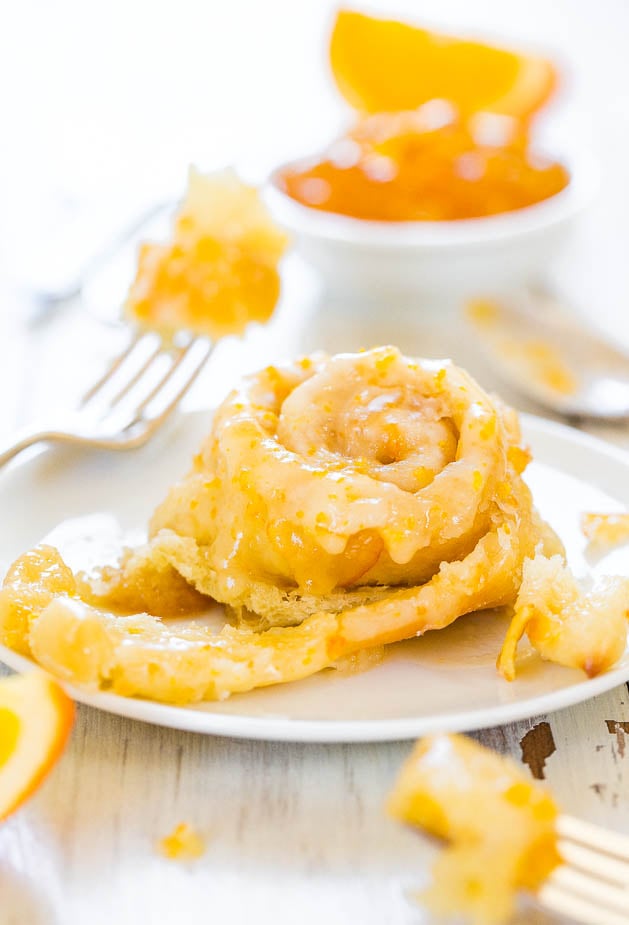
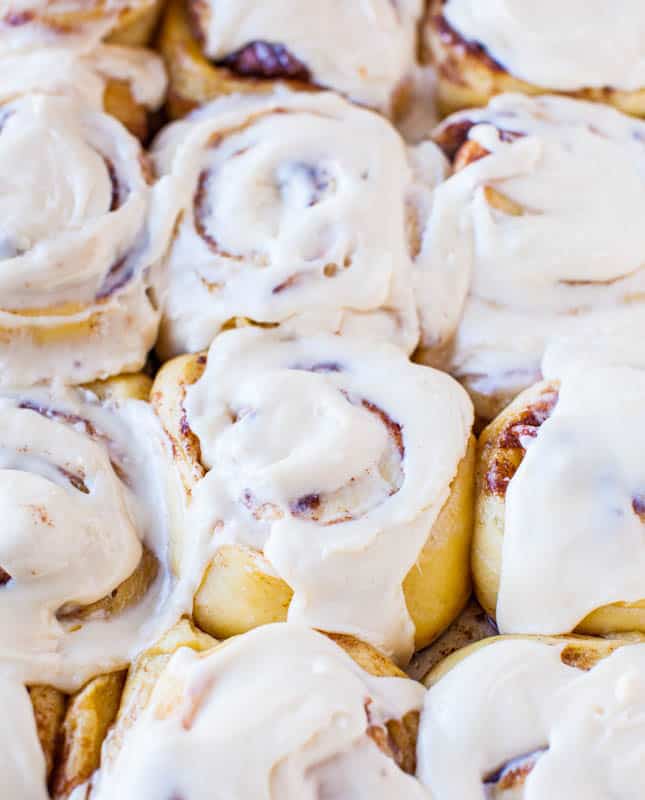
These orange rolls are so soft, moist, tender, wonderfully sweet, and just irresistibly good. They’re one of the best things that has ever come out of my kitchen.
For the filling, I used store-bought orange marmalade, but if you have homemade, even better. I love the tiny bits of orange rind that are almost imperceptible in the finished rolls, but there’s just enough to add subtle texture.
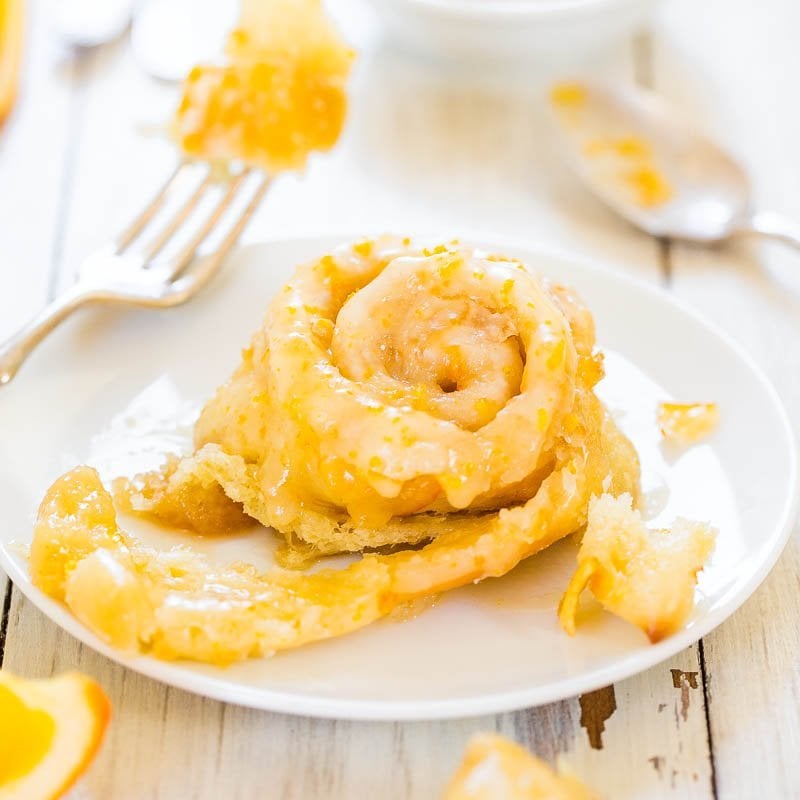
The glaze is an orange juice-based confectioners’ sugar glaze, with orange zest stirred in for an extra pop of orange flavor.
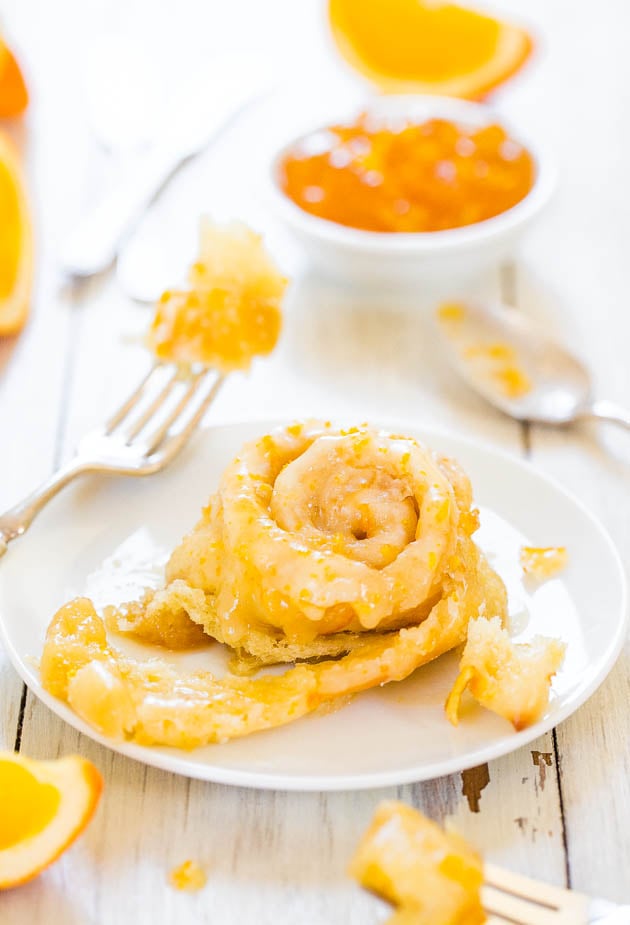
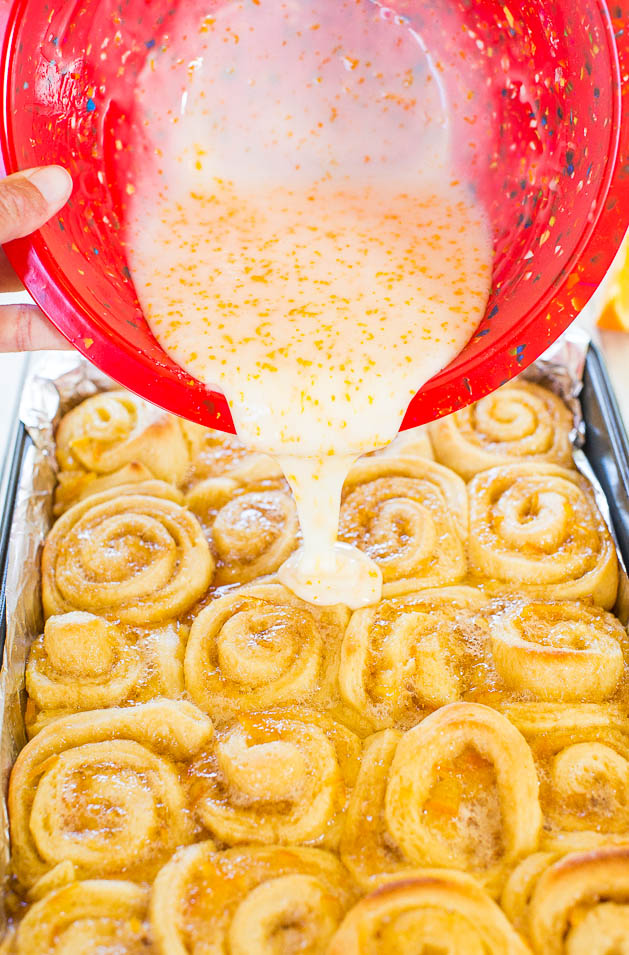
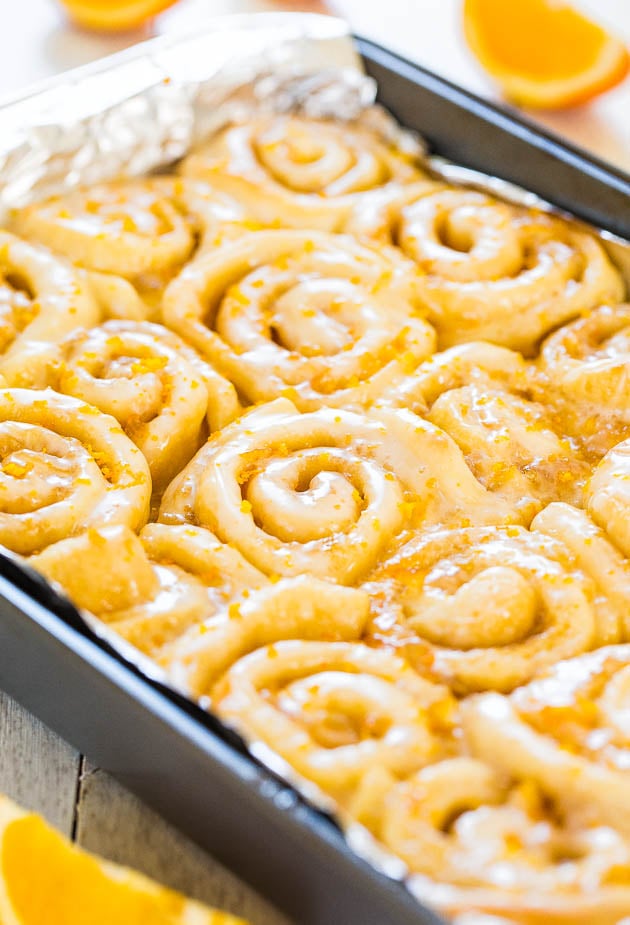
The glaze is poured on as soon as the rolls come out of the oven. It soaks into the nooks and crannies and adds more moisture and softness to the already moist, soft orange cinnamon rolls.
Some glaze will drip through onto the bottom of the baking pan, so make sure to spoon it up and don’t waste of drop of that liquid gold.
Try them and you’ll be a believer, too. I promise. People here may have fought over who got the last one.
Ingredients in Orange Rolls
There are three components to this recipe for orange glazed cinnamon rolls: the dough, the orange filling, and the orange glaze.
To make the orange cinnamon roll dough, you’ll need:
- All-purpose flour
- Granulated sugar
- Instant or dry yeast
- Salt
- Unsalted butter
- Buttermilk
- Eggs
For the orange filling, you’ll need:
- Unsalted butter
- Orange marmelade
- Light brown sugar
And for the orange glaze, you’ll need:
- Orange juice
- Vanilla extract
- Confectioners’ sugar
- Salt
- Milk or cream
- Orange zest
Glaze Tip
I’ve also made the glaze using lemon juice when I was testing the recipe and if you’re a lemon fan, it’s a fun twist.
How to Make Orange Rolls
Making orange cinnamon rolls with orange icing is fairly simple, but as with any sweet roll recipe there’s quite a bit of prep work involved in rolling out and shaping the dough.
Here’s an overview of how the orange glazed sweet rolls are prepared:
- You first need to make the yeast dough. Once the dough comes together, let it rise for roughly 2 hours in a greased bowl, or until it’s doubled in size.
- Once the dough has doubled in size, roll it out into a large rectangle.
- Spread the butter evenly over the dough, followed by the orange marmalade and a sprinkle of brown sugar.
- Gently roll up the orange roll dough and slice it into 20 even pieces.
- Place the orange rolls into your prepared baking pan and let them rise for another hour, or until doubled in size.
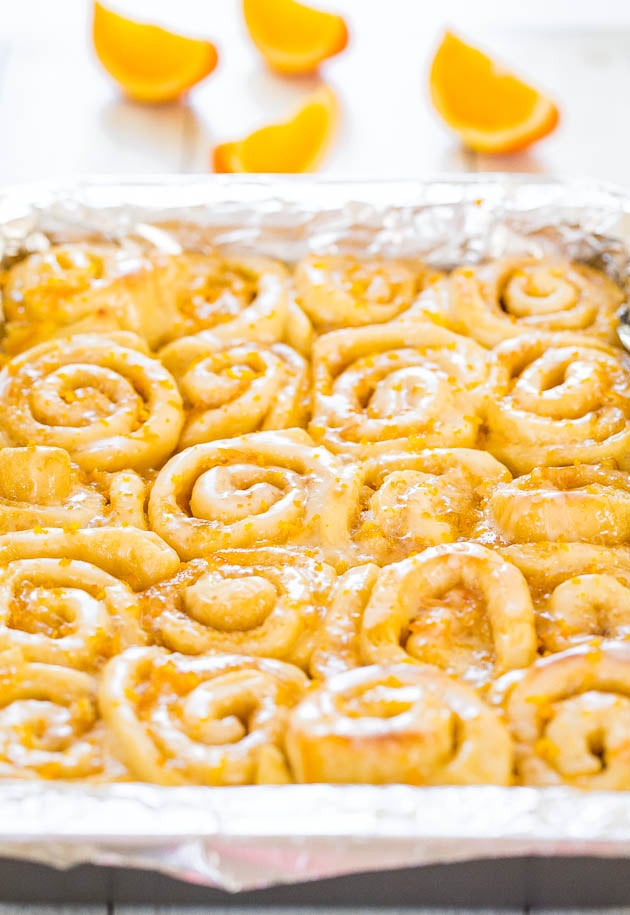
- Once risen, bake the orange cinnamon rolls until they’re golden on top.
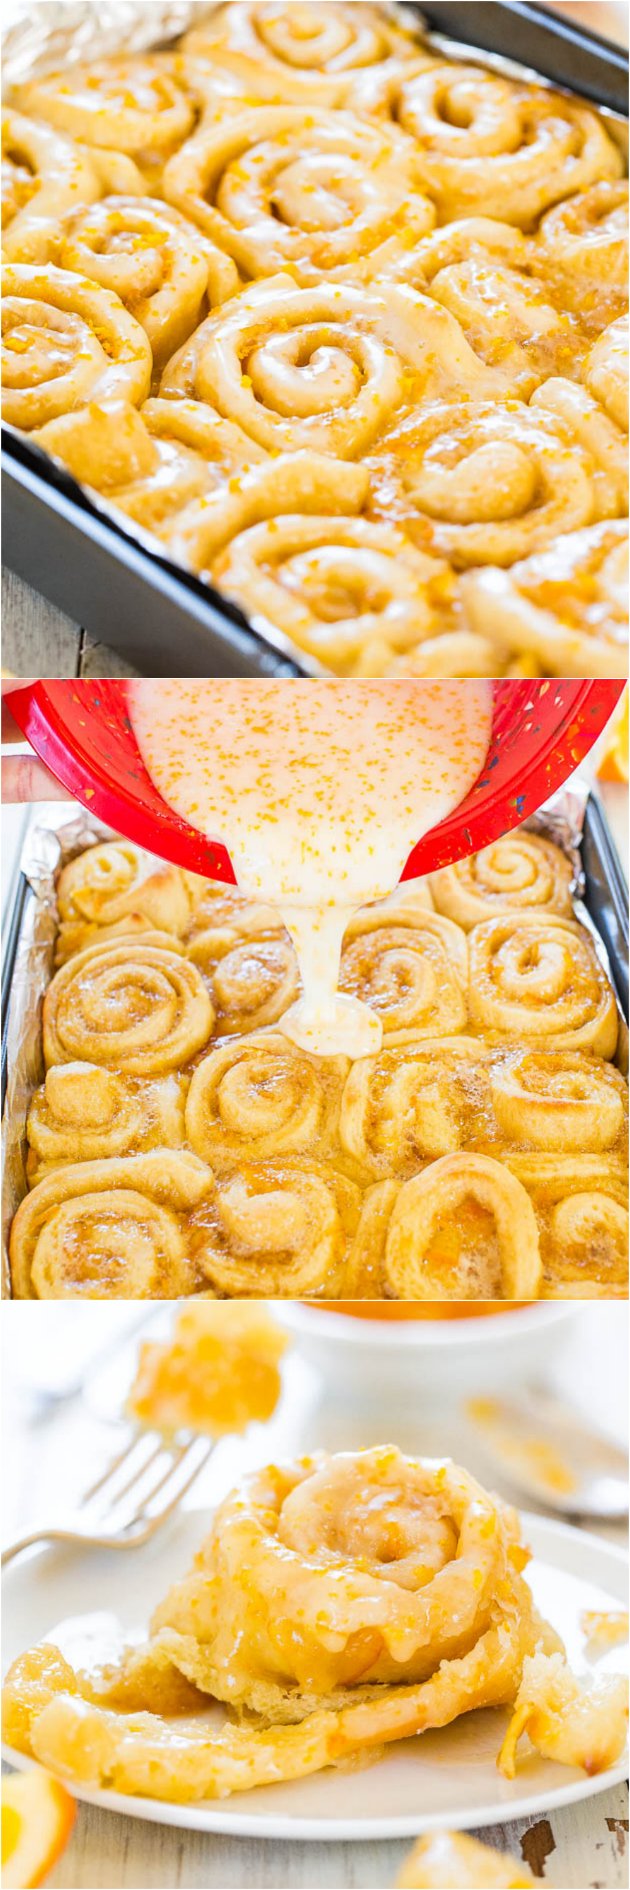
- As soon as the orange rolls come out of the oven, whisk together the orange glaze and evenly drizzle it over the rolls. These beauties are best enjoyed immediately!
FAQs
The dough is buttermilk-based, and although I’ve made non-buttermilk sweet rolls before, for the softest, lightest, and most tender rolls, I swear by buttermilk. Between the eggs, butter, and buttermilk, the dough rises beautifully and it’s my new favorite dough base.
Yes, there’s an option to make the orange cinnamon rolls as overnight rolls. Start the dough at night, roll and shape it, and don’t let the dough rise.
Then refrigerate the coiled rolls until you’re ready to bake the next morning. Before baking, let the rolls rise at room temperature until they have nearly doubled in size, about 1 hour.
This way you don’t have to get up at 5am to have these ready with your first cup of coffee!
Yes, these sweet rolls can be made and baked to completion, and then frozen for up to 6 months. When you’re ready to eat the frozen rolls, set them on your counter to thaw and glaze them immediately prior to serving.
If you want to make these orange rolls in bulk in advance, I recommend baking these from start to finish and then freezing, rather than trying to freeze unbaked dough.
Tips for Making Orange Rolls From Scratch
Ingredients: Because this is more of a special occasion breakfast, I recommend buying the exact ingredients I call for in the recipe and not making any substitutions. Real buttermilk makes a big difference in these orange rolls, as does real butter and sugar.
Slicing cinnamon rolls: When slicing the orange cinnamon rolls, I highly suggest using dental floss instead of a knife to do the job. Floss doesn’t compress the rolls like a knife does, and it makes the process go more smoothly.
Storage: And if you have leftover orange rolls, you’ll want to keep them on your counter. If you store these in the fridge, they’ll dry out quickly.

The Best Glazed Orange Rolls
Ingredients
Dough
- 3 cups all-purpose flour, or as needed
- ¼ cup granulated sugar
- 2 ¼ teaspoons instant dry yeast, one 1/4-ounce packet, I use Red Star Platinum
- pinch salt, to taste
- ½ cup unsalted butter, melted (1 stick)
- ½ cup buttermilk
- 2 large eggs, lightly whisked
Filling
- 6 tablespoons unsalted butter, 3/4 of 1 stick, very soft – let it sit out while dough rises
- about 1 cup orange marmalade
- ½ cup light brown sugar, packed
Orange Glaze
- ¼ cup orange juice
- ½ teaspoon vanilla extract, orange extract may be substituted
- 2 cups confectioners’ sugar
- pinch salt, optional and to taste (helps balance the sweetness)
- about 3 tablespoons milk or cream, or as needed for consistency
- 3 teaspoons orange zest, divided
Instructions
- Make the Dough
- To the bowl of a stand mixer fitted with the dough hook (or use a large mixing bowl and wooden spoon and your hands), add 3 cups flour, sugar, yeast, salt; set aside.
- In 2-cup glass measuring cup or microwave-safe bowl, and the butter and heat to melt, about 1 minute on high power.
- Add buttermilk to melted butter and warm to temperature, about 45 seconds on high power in the microwave. (Based on the type of yeast used, milk temperatures will vary. Red Star Platinum yeast calls for warmer temperatures than most, 120 to 130F; other brands and yeast call for much lower temperatures, about 95 to 105F. Heat the mixture according to manufacturer’s recommendations on the packaging. Taking the temperature with a digital thermometer is highly recommended, but if you’re not, make sure the milk is warm, not hot. Err on the cooler rather than hotter side so you don’t kill the yeast.) If the milk separates or gets a little funny looking after being warmed, whisk it to smooth it out.
- Add butter-buttermilk mixture to the dry ingredients in mixing bowl.
- In a small bowl, crack and lightly whisk the eggs, and then add eggs to mixing bowl.
- Turn mixer on low speed and allow it to knead dough for about 5 to 7 minutes (about 7 to 10 minutes by hand using a wooden spoon and then switching to your hands). 3 cups of flour and 5 minutes is perfect for me, but if after 5 minutes your dough is very sloppy, wet, and won’t come together, add up to 1/4 cup flour, or as needed until it does come together. However, the more flour added, the denser and heavier the rolls will be; wetter dough is preferred to overly dry. If dough is dry or crumbly, drizzle in buttermilk until it comes together.
- Remove dough from the mixing bowl, spray a large bowl with cooking spray, place the dough in the bowl, and flip it over once so it’s lightly oiled on both top and bottom.
- Cover bowl with plasticwrap and place it in a warm, draft-free place to rise for about 2 to 2 1/2 hours, or doubled in size. I keep my bowl inside a powered-off oven that I preheated for 1 minute to 400F, then it’s powered off. Do not, repeat do not, keep the oven on. The pre-heated, warm oven creates a nice 85F-ish environment, ideal for yeast. If your rising spot is cold, rising will likely take longer than 2 1/2 hours.
- While dough rises, line a 9×13-inch pan with aluminum foil, spray with cooking spray; set aside.
- Roll Out the Dough & Fill
- After dough has doubled in size, punch it down. Turn dough out onto a Silpat or floured countertop.
- With a rolling pin, roll it out to about 26-by-13-inches. Use the 13-inch side of the 9-x13 pan to eyeball it, no need use a ruler.
- Using a knife, evenly spread butter over dough, leaving a 1/2-inch bare margin.
- Add about 3/4 cup marmalade, more as needed, and smooth it with a knife. It should be a thin-ish layer; too much and you risk it leaking, but not enough and the rolls aren’t orangey enough; use your judgment. The butter and marmalade get smeared together, which is okay.
- Evenly sprinkle the brown sugar over the top, and lightly pat it down with your fingertips to help it adhere.
- Slice the Dough
- Starting with a long edge (the 26-inch side), roll the dough into a tightly wound log, with the seam side down.
- Using a knife, make small hash marks so there will be 20 evenly sized rolls (about 1 to 1 1/2 inches wide; or make bigger rolls and yield 12 to 16). Hash marks create less guesswork once you start slicing and things get messier and harder to eyeball where to slice; the hash marks are nice place-markers.
- Use plain, unwaxed dental floss to slice the rolls. I highly recommend slicing the rolls with floss, not knives. Floss does not squish or compact the log like knives do.
- Arrange the rolls in the prepared pan, 5 rows of 4 rolls across. Cover with plastic wrap.
- Let rise in a warm, draft-free place until the rolls have nearly doubled in size, about 1 hour. (See note below)*
- Bake the Orange Rolls
- Bake at 375F for about 15 minutes, or until lightly golden on top and cooked through (ovens, dough, and climates vary and so will baking duration, but 1 to 2 minutes matters in this recipe). Watch rolls like a hawk and don’t overbake or they won’t taste nearly as good.
- Make the Orange Glaze
- In a medium bowl, add the orange juice, vanilla, confectioners’ sugar, optional salt, and whisk to combine; mixture will be thick.
- Drizzle in the milk as needed until mixture can be whisked smooth and is to desired consistency.
- Whisk in 2 teaspoons zest; set aside remainder.
- Evenly pour glaze over rolls.
- Evenly sprinkle with remaining 1 teaspoon zest.
- Serve immediately. Rolls are best warm and fresh, but will keep airtight at room temp for up to 4 days; reheat in micro for about 5 seconds to re-soften or as desired. I am comfortable keeping glazed rolls at room temp and do not recommend storing them in the fridge because they will dry out.
Notes
Nutrition
Nutrition information is automatically calculated, so should only be used as an approximation.
©averiecooks.com. Content and photographs are copyright protected. Sharing of this recipe is both encouraged and appreciated. Copying and/or pasting full recipes to any social media is strictly prohibited.
More Easy Cinnamon Roll Recipes:
Overnight Buttermilk Cinnamon Rolls — To date, these are the best cinnamon rolls I’ve ever had. They’re soft and fluffy and taste better than the kind you get at the mall.
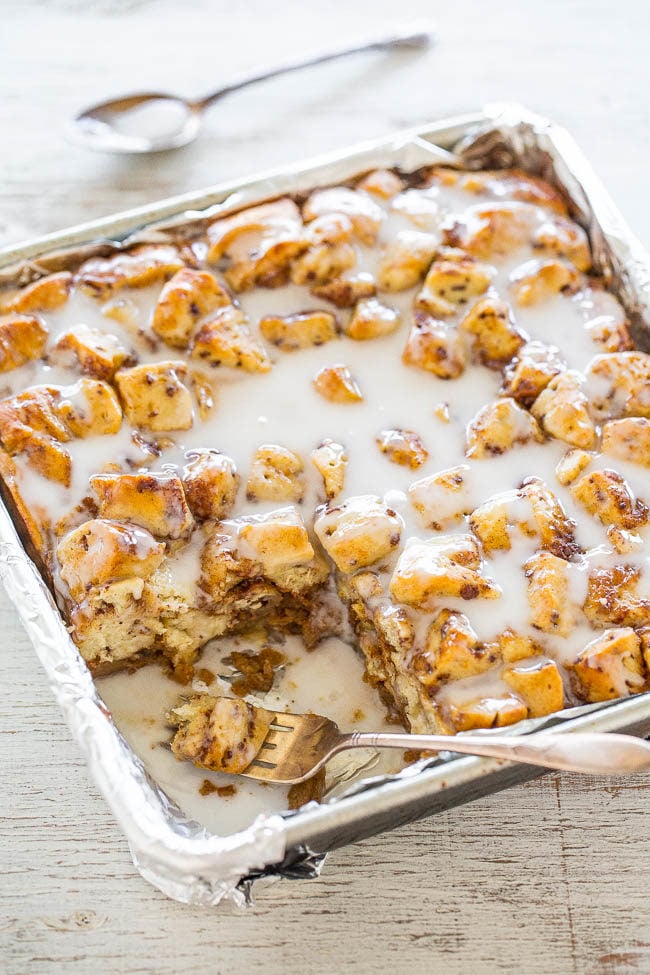
Pumpkin Cinnamon Roll Bake — The cinnamon rolls have the soft and gooey factor of a Cinnabon but with rich pumpkin flavor and plenty of icing!
Strawberry Sweet Rolls with Vanilla Cream Cheese Glaze — Soft, glazed rolls filled with sweet strawberry jam!

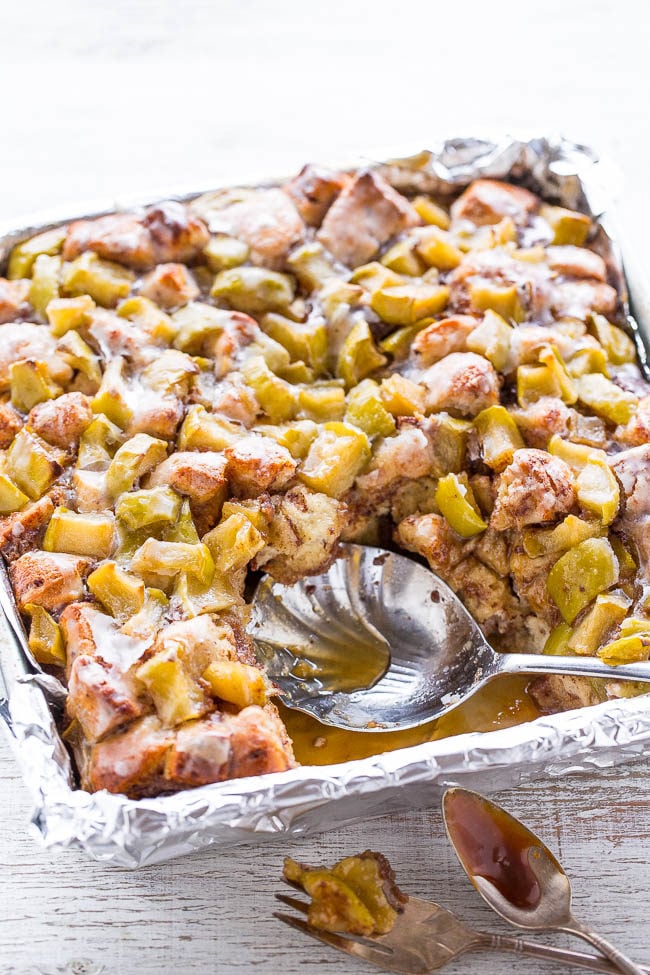
Caramel Apple Cinnamon Roll Bake — This cinnamon roll recipe with apples and caramel sauce is easy, ready in 30 minutes, and you don’t even have to make scratch cinnamon roll dough.
1-Hour Homemade Cinnamon Rolls with Cream Cheese Frosting — Make soft, light, fluffy cinnamon rolls from scratch in 1 hour!

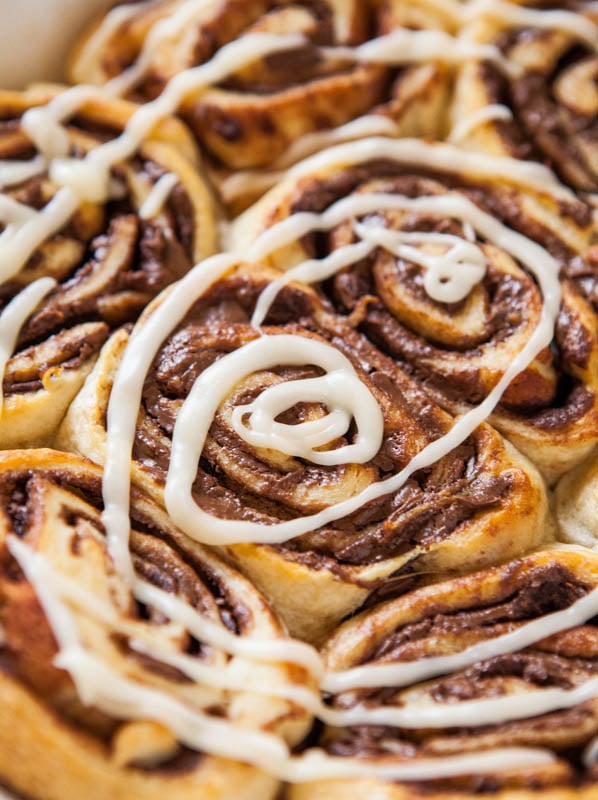
Nutella Cinnamon Rolls with Vanilla Glaze – A can of crescent rolls never tasted so good as when they’re stuffed with Nutella and rolled up. Ready from start to finish in 15 minutes!
The BEST Pumpkin Cinnamon Rolls — These truly are the best pumpkin cinnamon rolls. Soft, light, fluffy and there’s just enough pumpkin flavor to notice, but not so much that it overwhelms the inherent beauty of classic cinnamon rolls.
Birthday Cake Cinnamon Rolls — The softest, fluffiest, most tender cinnamon rolls stuffed with cinnamon-and-sugar and rainbow sprinkles!

Hi Averie,
I’m waiting on my rolls as we speak – checking them every 5 minutes so they come out as perfect as your images. However, my rolls have now been in the oven for 30 minutes without browning. Normally I have no trouble with my oven or baking times. The elements and temperature are working fine, and I can say without hesitation that I don’t believe my oven is the culprit. Could I have overworked my dough in the rolling phase to get it to the 13×28? They are getting a little “hard” on top (not golden yet) and are soft and smushy – yes that is too a baking term! ;-) – everywhere that isn’t top.
I pride myself on being meticulous and following all new and untried recipes to the letter, and the only conclusion I can come up with here is that I’m based in Montana where the air is different, and that I overworked my dough.
Any help is GREATLY appreciated!! I will let you know what the final product turns out to be! :-)
The finished images of the rolls you see on my blog have glaze on them which sort of helps give them the ‘glow’ they take on in the photos. I really don’t think the dough itself should be ‘browned’ per se as it’s in the pan in the oven. You want it done and set and not raw, but I personally would err on the side of a little gooey than overdone and hard. If you feel the top is browning too quickly before the insides are setting, then I would cover with a sheet of foil (that’s a universal trick). Overworking the dough will make the rolls tough, but I don’t know if it would impact their color. I think that you should just bake until done, whatever that means in your oven, and tent with foil as necessary. Hope they come out for you just fine!
I have made you no rise cinnamon rolls a few times and they are AMAZING!!! So when I saw these I knew that had to be in my oven soon! I made them today! This was my 1st time making rolls that you had to let them rise and then roll and rise again. So glad that you have such detailed instructions. Makes the process so much easier. They have just cam out of the oven and they are soooo good! Only issue I had was the time they took to bake. It was close to 25min i think. Anyway look forward to making more rolls of yours in the future!
Always bake until done, whatever that means in your oven, climate, size of pan, etc. is what I always tell people. Sounds like they turned out perfectly and so glad you’re pleased with these as well as my other rolls.
Thanks for noticing the detail in which I write my recipes and glad it helps – with yeast recipes, I find you can never give too much info :)
These look perfect to make for my beach trip with friends next week! With this recipe can I make ahead and freeze? How long would they need to sit out before baking? Thank you, they look DELICIOUS and can only imagine the wonderful smell of them in the oven.
I gave detailed info in the recipe section about storage, making ahead, etc. Please re-read and enjoy your trip!
Averie, I’ve made several of your recipes and they always work great. You also take beautiful pictures. I am going to put this on my to-do list!
Thanks for trying my recipes, glad they’re always a success, and thanks for the photography compliments!
These sweet rolls would be a great addition to any breakfast menu!
The dough was easy to make but it didn’t rise as much as I thought it should. I was SO disappointed. For a moment. I decided to follow through and roll it out- the dough was almost way too easy to roll out (unlike other cinnamon roll recipes I’ve tried) and I had just the right amount of filling. I tried to roll it up into a tight log…#FAIL. I’ve only made giant cinnamon roll cakes before, not individual rolls, so it was kind of a challenge for me:). Nonetheless, I baked them…and tasted them…and it was ORANGE BLISS!! I WAS SO HAPPY!! The rolls were soft, the filling was zesty and sweet; Averie, it was marvelous! (Even though they didn’t look as professional as yours) Thanks for the recipe! (Sorry for the long comment!)
Thanks for trying them and sometimes dough doesn’t always rise a ton in the bowl but when you bake it, it’s fine! For me, I didn’t have any issues with this dough rising and glad in the end it all worked out well for you! “The rolls were soft, the filling was zesty and sweet…” and glad you didn’t have any issues rolling out the dough, either!
Dude – it’s 1:17AM and all I want is this ENTIRE PAN of rolls! I could always run it off later, right?
Umm… Is it breakfast time yet?? Because if it isn’t, I’m going to bed this very second so morning comes that much sooner! ;) I absolutely adore the photo you took with the filling bubbling up right after baking — such a gorgeous way to capture the rolls! And all of those tiny nuggets of zest… So perfect. And yes, I try to make things smaller for better portion control, but that doesn’t always work out so well. Although I know I’ll go back for seconds regardless of the size, so maybe it kind of does, in my slightly skewed imagination!
Look at that beauty!! Portion control?!? Girl, not if that pan is in my face!! And then look at that glaze!! Lawwwwd, ain’t nothing gonna come between me and my sweet rolls! :-D
they look great!
Hi! These look delish!!! I was wondering do you know the calorie count on these? Thanks!
No idea!
oh my gawd, Avery! These are beautiful!!! Pinned and can’t wait to try! Stunning!!!
Thanks for pinning and tweeting, too! You’re awesome :)
Gah! I want to stuff my face into this pan :)
Gosh, these could not BE any more perfect! I really need to start expanding my palate to include more citrusy stuff — I really do LOVE lemons most, but limes and oranges are awesome, too. These orange rolls are gorgeous and look so refreshing for summertime brunches. Pinned!
Thanks for pinning and I know both you and Dorothy are lemon fanatics!
This is amazing, Averie! Every time I see it, I want to sink my teeth into the computer screen!
Buttermilk based batters yield the best results! These rolls look unbearably irresistible (portion control? *pft*). 9×13 pans make me giddy. :D
Yes on buttermilk doughs and batters and yes on smaller-ish pan size. Both you and me with our cringing at 4cup++ flour recipes!