
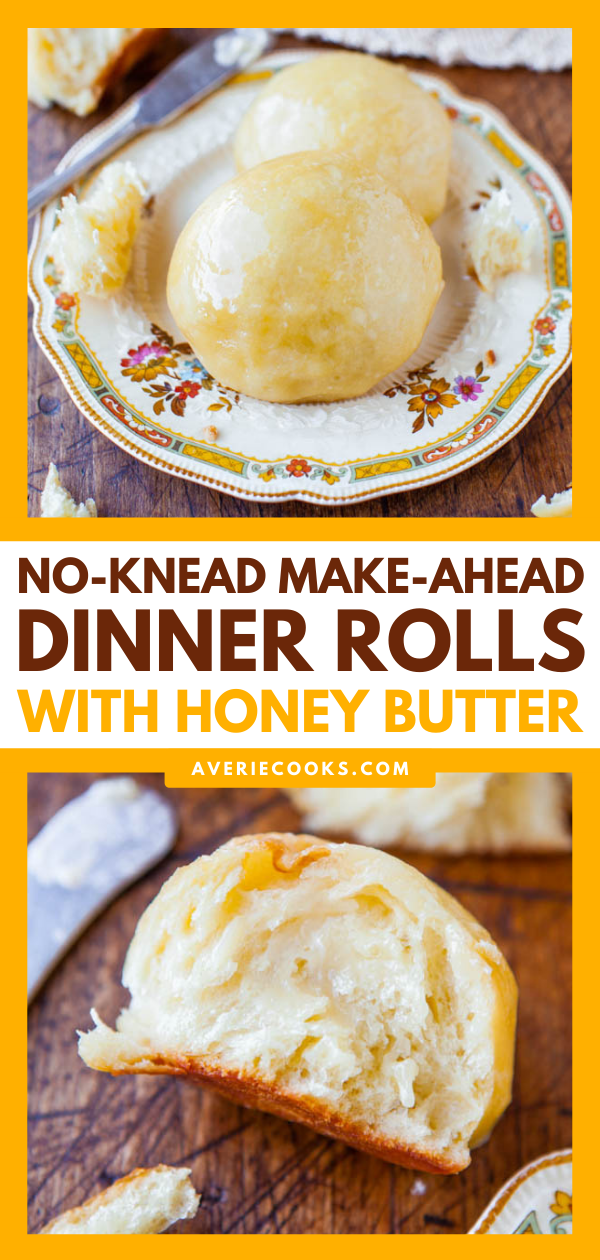
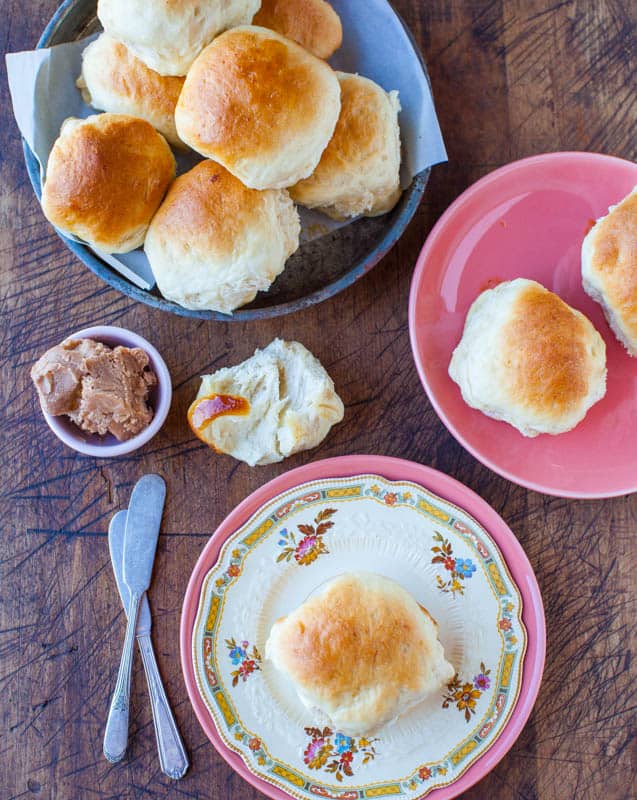
🍯 My No-Knead Dinner Rolls are soft, light, fluffy, and SO easy to make! They’re practically work-free because there’s no kneading involved! If you’ve ever been scared to try your hand at bread making, don’t be with this foolproof dinner roll recipe!

Easiest No-Knead Dinner Rolls Recipe
There’s nothing better than warm, fresh, buttery homemade dinner rolls. The only thing better than the rolls is that the dough is a make-ahead and no-knead dough.
This quick dinner roll recipe is perfect for anyone who’s never worked with yeast, because it’s almost impossible to screw up. If you can dump ingredients in a bowl and stir, you can make these.
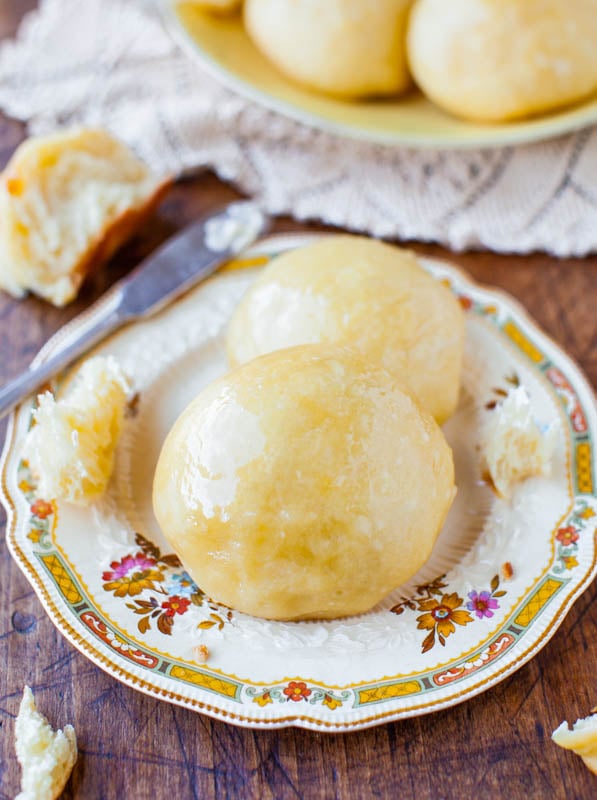
I like to brush the tops with honey butter before baking, and it makes them even more irresistible. Schmear the extra honey butter on after they’ve baked as you’re devouring them. So good.
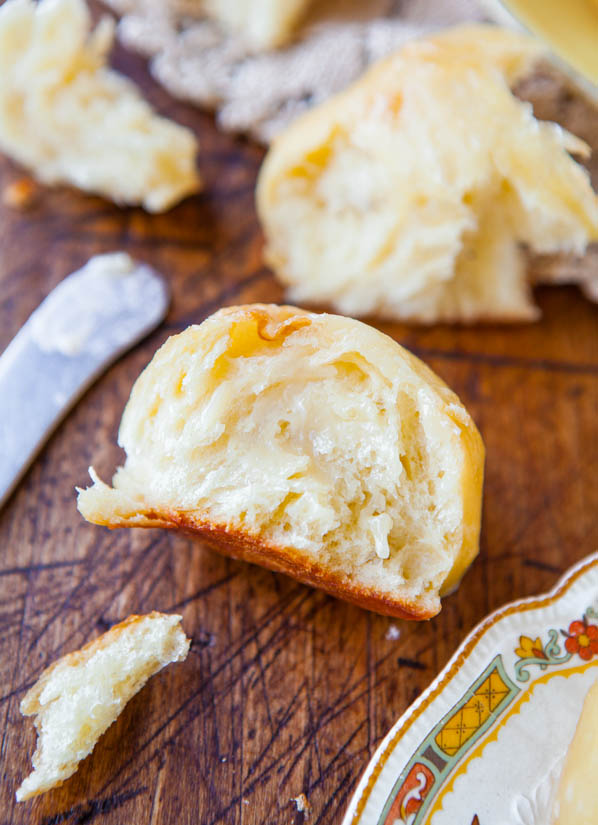
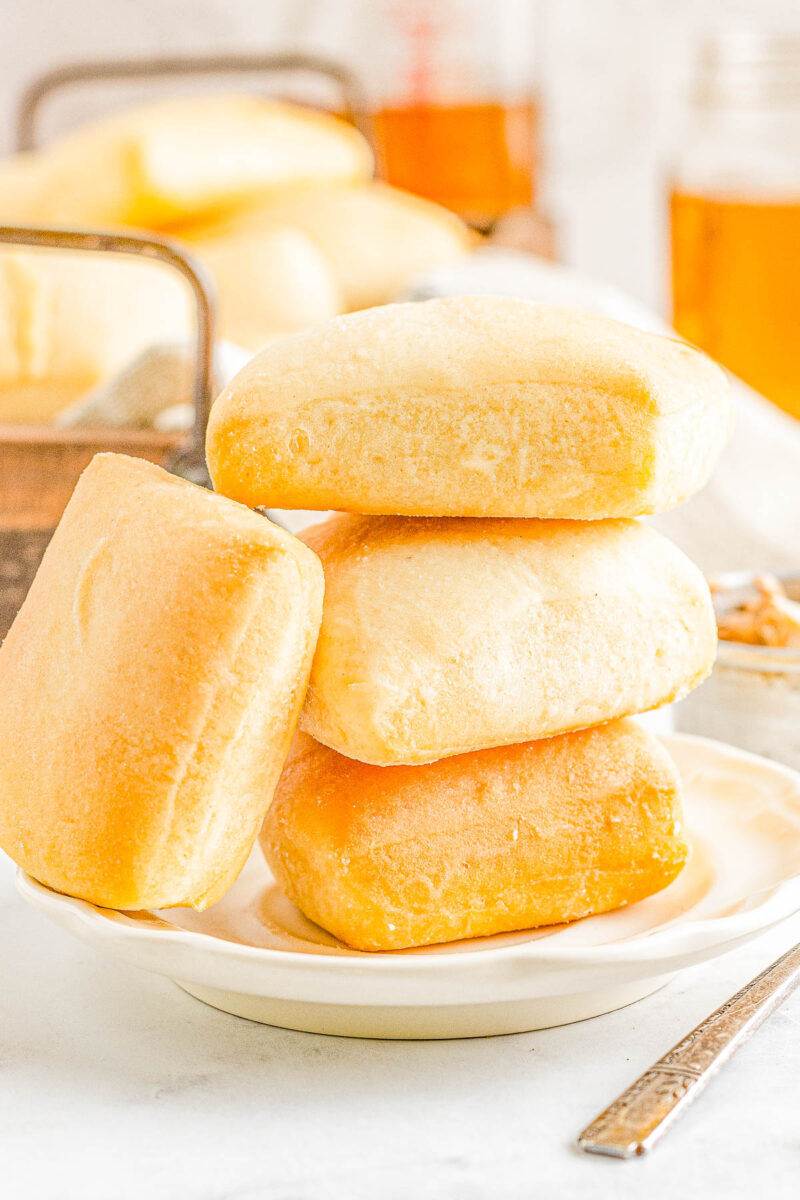
The rolls are light, soft, and fluffy. I just want to rip them apart and drench them in honey butter. They’re the perfect pairing for everything from honey baked ham and foolproof roasted turkey to weeknight meals like creamy chicken and mushroom soup and homemade chicken noodle soup.
Now You Can Make This in a Slow Cooker!
This no-knead roll recipe has been a reader favorite since I first published it in 2013. I recently created a spinoff recipe for no-knead slow cooker dinner rolls, which uses just 6 basic ingredients and is also a breeze to make!
Ingredients You’ll Need
These are such easy homemade dinner rolls to make, and they call for minimal ingredients. To make these no-knead dinner rolls, gather the following:
- Water
- Instant yeast: Use an active dry yeast or an instant yeast. I use Red Star Platinum Yeast, and it never lets me down
- Eggs
- Oil (canola or vegetable works well): You can also use melted butter. Oil creates a softer loaf, and butter creates a crustier crust. Also, butter-based dough is firmer and slightly easier to work with, but I have no trouble with oil-based dough and prefer it
- Honey
- Salt
- All-purpose flour: I’ve made this recipe using a blend of all-purpose and bread flour, but I prefer using just all-purpose flour because it creates softer, squishier bread, and it’s not quite as high-rising. If you want to use bread flour as well, I’ve also tested this recipe with a blend of 2 1/2 cups bread flour and 1 cup all-purpose
- Butter (for the honey butter)
Note: Scroll down to the recipe card section of the post for the ingredients with amounts included and for more complete directions.

How to Make No-Knead Dinner Rolls
These no-knead bread rolls are practically work-free because there’s no kneading involved. Since there’s no kneading, I don’t even use my stand mixer and stir everything together with a wooden spoon in a bowl.
Here’s an overview of how the rolls come together:
- Simply combine warm water, yeast, two eggs, honey, oil, and flour.
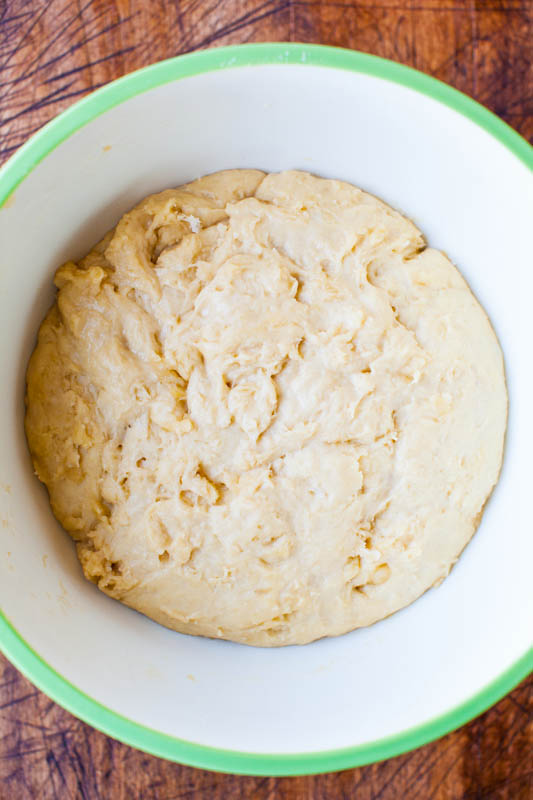
- Stir the dough together, then cover the bowl with plastic wrap and set aside for about two hours to rise. (The plastic wrap is very important and shouldn’t be overlooked! If you leave off the plastic wrap, you’ll wind up with dense dough balls.)
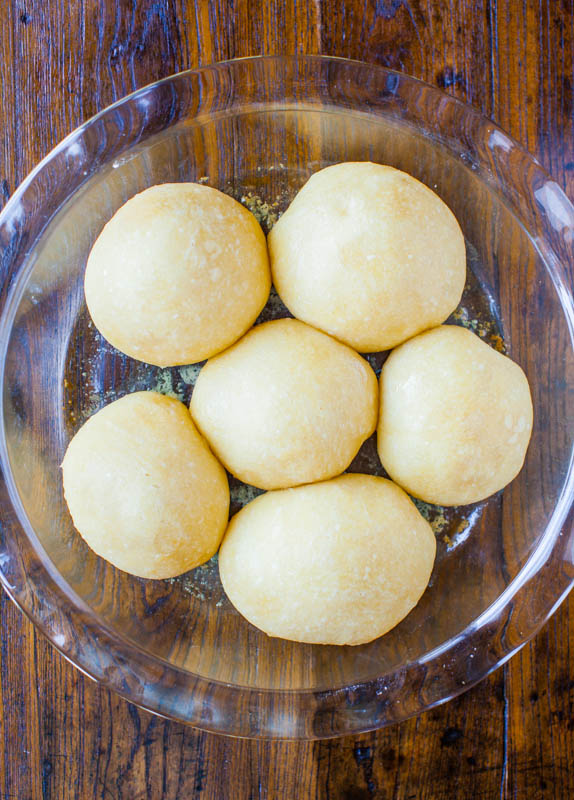
- Gently punch down the dough. Knead it only so much as necessary to shape it into balls for dinner rolls.
- Place balls of dough in a baking dish sprayed with non-stick spray. Let the dough rise at room temperature until doubled in size.
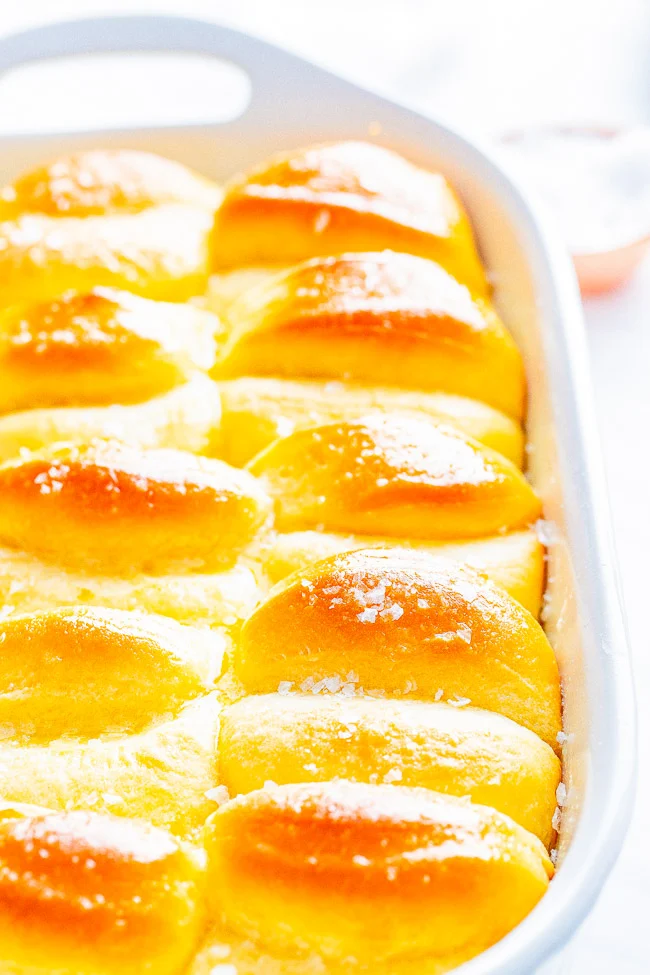
- Bake the rolls for about 15 to 18 minutes, or until lightly golden brown and puffed.
Baking Tip: Use the Dough for Other Kinds of Bread!
The recipe will yield about 14 to 16 dinner rolls, but I don’t only make rolls with this dough. Sometimes I make mini challah loaves, or I make mini loaves of bread in mini loaf pans.
You can see how much mileage I got from one batch of dough. And it’s not even that much dough, just a 3 1/2 cups flour recipe, but I love the flexibility of it!
No-Knead Dinner Rolls
Equipment
- 1 Microwave-Safe Bowl
- 1 (9-inch) Round Glass Pie Plate
Ingredients
No Knead Rolls
- ⅞ cup water, scant 1 cup, warmed to about 125F for Platinum yeast, about 105 to 115F for most other yeast
- 2 ¼ teaspoons instant or active dry yeast (one 1/4-ounce packet, I use Red Star Platinum
- 2 large eggs
- ¼ cup canola or vegetable oil, or 1/4 cup butter (oil creates a softer loaf, butter creates a crustier crust; butter-based dough is firmer and slightly easier to work with, but I have no trouble with oil-based dough and prefer the bread)
- ¼ cup honey
- ½ teaspoon salt, or to taste
- 3 ½ cups all-purpose flour, I have also used 2 1/2 cups bread flour and 1 cup all-purpose; bread flour creates chewier, firmer bread; AP creates softer, squisher bread and it’s not quite as high-rising
Honey Butter (Optional)
- ¼ cup unsalted butter, very soft
- 2 to 3 tablespoons honey
Instructions
Make the dough:
- Pour water into a microwave-safe measuring cup or bowl and warm it to manufacturer’s directions on yeast packet, about 45 seconds on high power. Take the temperature with a thermometer. If you don’t have one, water should be warm to the touch, but not hot. Err on the side of too cool rather than too hot because you don’t want to kill the yeast.
- Pour water into a large mixing bowl and sprinkle the yeast over the top; wait 5 to 10 minutes, or until yeast is foamy. This means it’s alive and will work. (This is proofing and technically with instant dry yeast you don’t have to proof it, but for this recipe, I do)
- Add the eggs, oil, 1/4 cup honey, optional salt, and whisk to combine, about 30 seconds.
- Add the flour and stir with a wooden spoon to incorporate the flour. Stir for about 1 minute more. This is as much ‘kneading’ as the recipe requires. Dough will be thick, lumpy, bumpy, and not smooth. This is okay.
- Make a ball with the dough in the center of the bowl. Cover bowl with plastic wrap and place in a warm, draft-free place to rise until doubled in bulk, about 2 hours. * (see note below)
- At this point, you have two choices: bake the rolls now or bake them later.
If baking immediately:
- If you plan to bake now, punch dough down, remove it from bowl, and turn it out onto a well-floured surface.
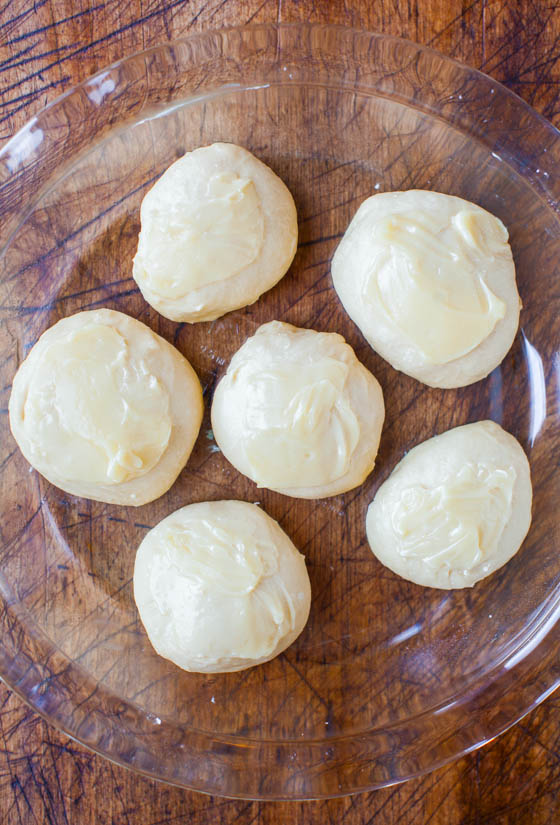
- Knead it only so much as necessary to shape it into balls for rolls (I divide the dough in half, and if I’m making rolls, I make 8 rolls from each half, for 16 rolls total, they’re just a bit bigger than golf balls). Or form desired shapes such as mini loaves, challah, breadsticks, pretzels, etc. Use only what you need and save the rest for later in the refrigerator.
- Place balls of dough in a cooking sprayed round baking dish or pie plate, or in an 8×8 or 9×9 pan; size depends on how many you’re making. They can be close to each other, but if they’re overly squished they’ll bake into each other.
- Cover baking dish with plastic wrap, and allow rolls to rise in a warm, draft-free environment for about 1 hour, until almost doubled in size. I use the preheated oven trick again.
- In the final minutes of rising, preheat oven to 350F.
- Bake rolls for about 15 to 18 minutes, or until lightly golden and puffed. Baking time will vary greatly based on how many rolls you’re baking, or if it’s another shape such as a mini loaf, the size of the pan, and personal preference. Watch your bread, not the clock.
- Serve as soon as bread is cool enough to handle.
If baking later:
- If you plan to bake later, take dough that’s risen for about 2 hours from step 5, keep it covered, and refrigerate it. Dough may be kept refrigerated for up to 5 days before baking.
- When you plan to bake, pick up at step 5 and follow through the section labeled "if baking immediately."
Make the honey butter:
- Stir to combine the butter and honey. Generously brush or spread the mixture over the top of the dough before baking.
- Reserve remainder to serve with rolls after baking.
Notes
1. Let the dough rise once, then place it in the fridge for up to 5 days.
2. When ready to use, punch down the dough and form the rolls.
3. Let the rolls rise a second time (about 1 hour) before baking them as instructed in the recipe card below. Storage: Rolls are best fresh, but will keep airtight for up to 4 days at room temperature or may be frozen for up to 4 months.
Nutrition
Nutrition information is automatically calculated, so should only be used as an approximation.
©averiecooks.com. Content and photographs are copyright protected. Sharing of this recipe is both encouraged and appreciated. Copying and/or pasting full recipes to any social media is strictly prohibited.
More Easy Dinner Roll Recipes:
No-Knead Slow Cooker Dinner Rolls – 🙌🏻😋 Learn how to make dinner rolls from scratch in your Crock-Pot in less than 2 hours WITHOUT kneading! These are the EASIEST rolls you’ll ever make!

Texas Roadhouse Rolls — Soft, buttery, fluffy, and light this easy COPYCAT recipe for Texas Roadhouse rolls with cinnamon honey butter is INCREDIBLE!
Parker House Rolls — The BEST homemade dinner rolls because they’re so light, airy, fluffy and practically melt in your mouth!
Honey Dinner Rolls — Lightly sweetened from honey in the dough and are then brushed with honey-butter prior to baking, which lends both a golden color to the rolls and infuses them with a subtle sweetness.
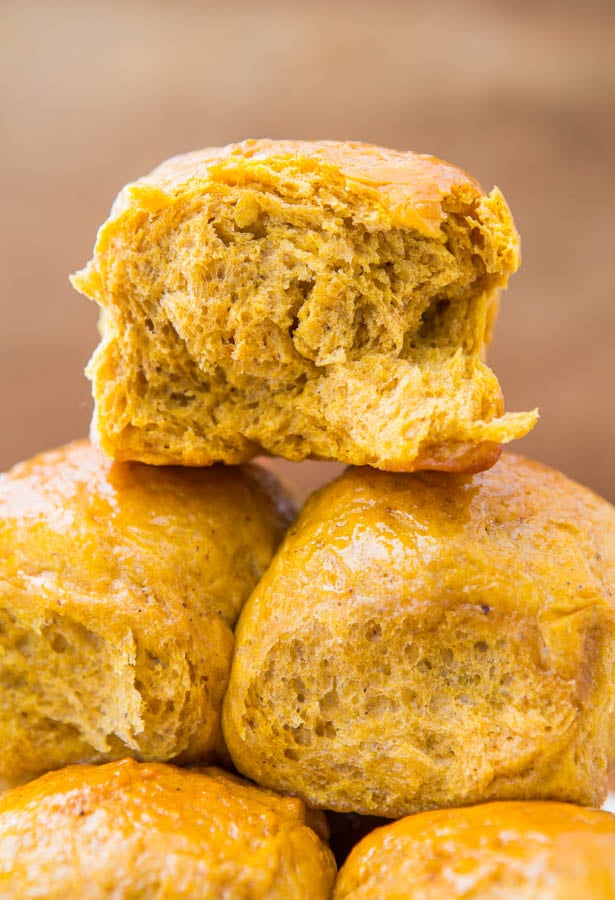
Pumpkin Dinner Rolls — These rolls are soft, slightly chewy, and the pumpkin puree keeps them moist and adds just enough tooth-sinking density.

I’d like more info on the challah and mini loaves you made. Can you advise the times and temps for these please?
It really depends on how small you’re going. Oven temp I’d aim for 375F or so and bake until done.
Ok, Thanks, but in your Tips for other uses of the dough, you noted that you sometimes make challah and mini loaves……….. I was asking you you could tell us more about that (how you do what you do to make the challah and mini loaves – time, temp, pan sizes, additional or alternate steps taken, etc. Thank you.
https://www.averiecooks.com/challah/ I have a dedicated challah post that you can review with all the steps, details, etc. Hope you enjoy it!
I want to try this recipe but is it vegan because I have issues with some flour
You’ll need to decide then if this is the recipe for you or not.
Very easy and the rolls came out so beautiful except that the “optional salt” should be mandatory and also more than a dash..my rolls smelled wonderful..looked wonderful but tasted like nothing! Salt is necessary!
Will try again with MORE salt!🤞🏻
Thanks, Evelyn, for the nice review and I am glad that these rolls came out beautifully for you, and that they were easy, too!
I took your comment to heart and indicated 1/2 teaspoon, or to taste :)
Made these twice. Followed the rising tips and everything. One I did with butter the other I did with oil. All fresh ingredients. The only thing I omitted was the optional honey in the rolls. Followed all steps and they came out dense and flavorless. Would not recommend.
great
Hi!
Making these for Thanksgiving (tomorrow.) I made the dough yesterday and tested four…I had a couple of issues. They were pretty dense and a little dry..almost like biscuits? Any wisdom?
Also they blobbed together?! I did them in a loan pan. Hoping if I make smaller sized balls this wont happen tomorrow!
It’s so hard to give this kind of advice from afar. But dry and dense, that’s an easy one – too much flour. Cut back on the flour.
I hope they turn out perfectly for you for Thanksgiving!
Right you are! I double-checked and realized I used a 2-cup measuring cup rather than a 1-cup, so I put in twice the amount of liquid. Although my “modified” product was tasty after adding 2 cups of flour, let me do this again the right way.
Whenever someone has to add THAT much extra flour, etc. to a recipe, the first thing I always ask is are you sure you measured correctly and that’s usually the culprit! Hope you enjoy the next round of rolls after trying the ‘modified’ ones :)
Are the liquid amounts correct? My dough turned out more like pancake batter. I had to add an extra 2 cups of flour to give it the shaggy look in your pictures.
Yes they’re correct. Maybe you accidentally added more water than you thought you did? Glad you were able to get the dough to come together.
I tried these today. The rise looked great, but when I baked them, mine were flat too. The only oil I had on hand was corn oil. Would that make a difference? Great recipe though…I’ll try again :)
Corn oil, hmm, I don’t use it but I don’t think that’s the culprit as much as possibly just not letting them rise long enough, not baking them fully through (underbaked bread will deflate upon cooling), and/or not using quite enough flour, and/or not using super fresh yeast.
With bread, there are lots of variables and I would make sure all ingredients are super fresh, make sure to bake long enough, use a good quality flour like King Arthur (truly makes a huge difference) and Red Star yeast, and make these small changes and I think you’ll be set next time.
I made these today. I followed the instructions perfectly. The dough seemed to rise fine during both rises. However, while baking, the rising stopped. They are dense, hard,and flat. The yeast was store brand active dry that I just bought yesterday. I used 1 package. I warmed my water to 105, added the yeast and let sit for 10min. It did not foam. I am really bummed because this is my 1st time to make bread from scratch and I was so excited. What happened?
The fact that the yeast didn’t foam is a telltale sign that the yeast wasn’t alive, or was barely alive. Despite it being fresh, some packages can be duds. I have to say this is a situation where I REALLY trust Red Star yeast and really don’t cheat on them because it’s not worth my time and ingredients to wonder maybe, if, possibly…there’s something wrong with the yeast. Personal preference, but it never lets me down. I would use a trusted name brand rather than store brand and make sure it foams before carrying on with the rest of the recipe.