
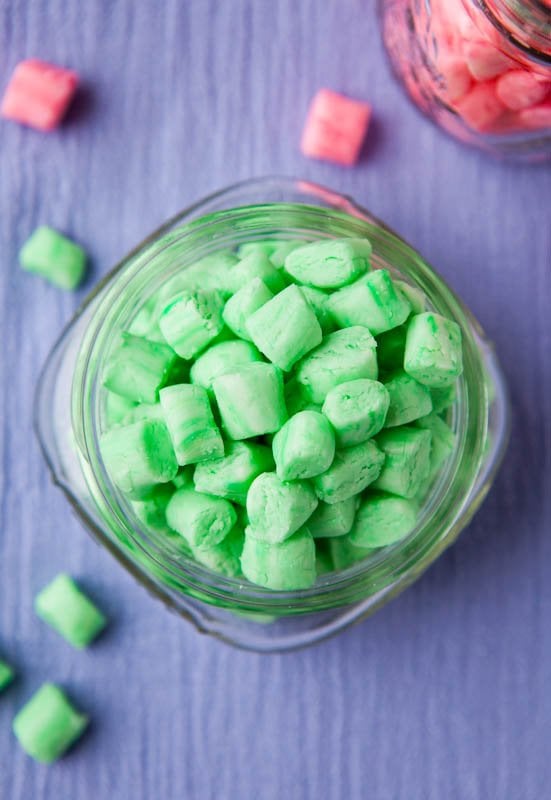
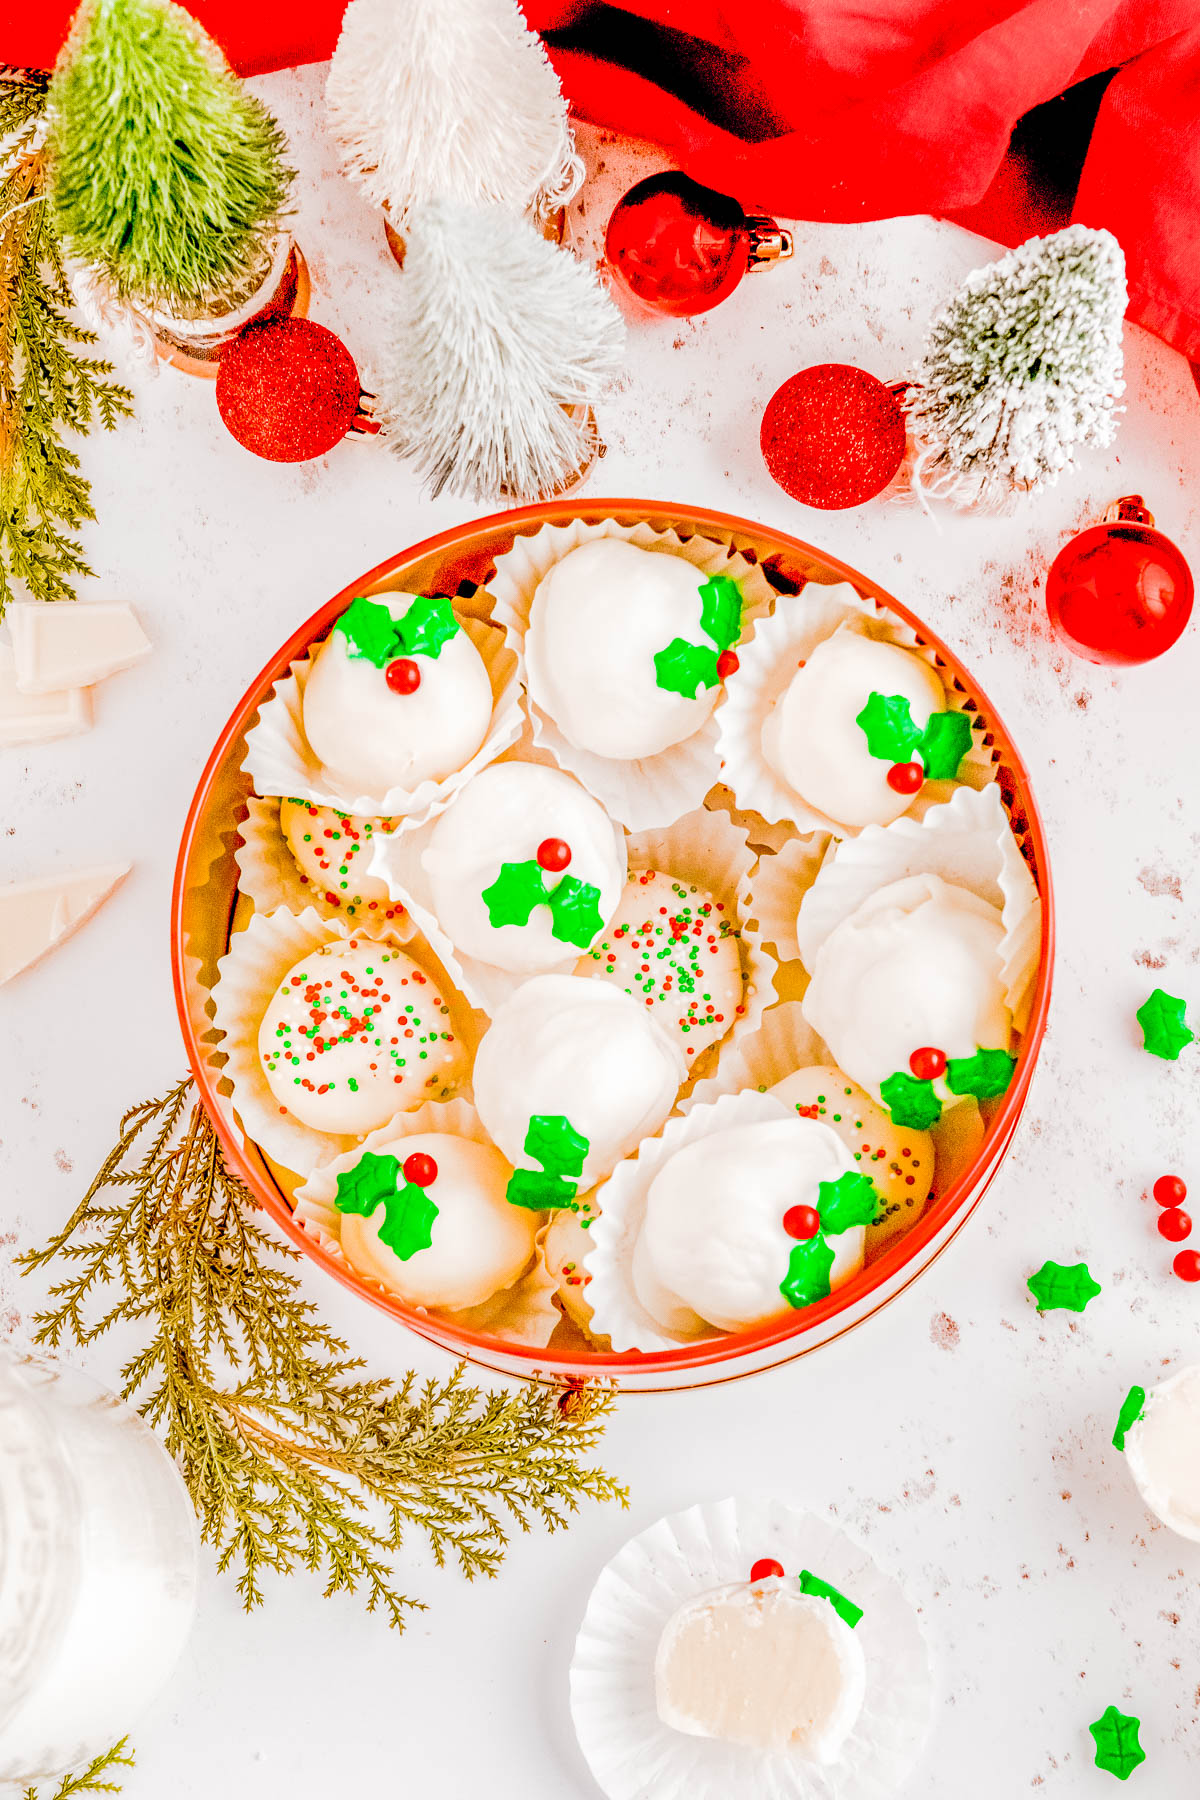
Old-Fashioned Butter Mints — 💚❤️ These homemade butter mints require just 6 ingredients to make! This recipe makes a big batch, so you’ll have lots left over for gifting.

Table of Contents
Old-Fashioned Butter Mints Recipe
One of the highlights of going to my grandma’s house when I was growing up — in addition to playing Gin Rummy for money at age six — was raiding her candy dish. She used to have Jolly Ranchers, butterscotch candies, and after dinner mints in that little white dish with the lid. (When you’re six,”after dinner” means the minute you can get your sweaty little mitts on the mints, you do.)
I decided it was time to make my own homemade mints since I have such fond memories of them.
These homemade butter mints are so smooth and just melt in your mouth.
Normally with mints, one is all you need. Maybe two. With these, you want at least 17 because they are cool yet sweet, firm yet melty. Plus they’re tiny.
It may not have been the brightest idea to make a recipe that needed to be sliced into 250 little pieces (just a guess) and I am not one for extra steps and monkey business and fussy recipes, but I rolled the dough into long skinny logs in between my hands and it felt like I was playing with Play-Doh.
You will never want a store-bought after buttercream mints again!

Ingredients for Butter Mints
To make these creamy, soft mints, you’ll need the following:
- Unsalted butter
- Salt
- Confectioner’s sugar
- Sweetened condensed milk
- Peppermint extract
- Food coloring
Note: Scroll down to the recipe card section of the post for the ingredients with amounts included and for more complete directions.

How to Make Homemade Butter Mints
- Cream together the salt and butter for about a minute.
- Beat in the sweetened condensed milk, powdered sugar, and peppermint extract.
- Continue mixing until a dough forms, then remove the dough from the mixer and divide into one to four equal-sized balls.
- Add one dough ball at a time back into the mixer and add your choice of food coloring to the dough. Mix until the color is uniform throughout. Wash the mixing bowl and paddle between each color change and repeat this process until each dough ball is colored.
- To shape the butter mints, roll out a golf ball-sized piece of dough into a long rope and slice into bite-sized pieces.

Recipe FAQs
Yes, you can use any variety of mint extract you prefer (i.e. mint, peppermint, spearmint, etc). These after dinner mints will be tasty no matter what type of mint extract you use.
Just remember that mint extract cannot be undone and if you plan to make these, make sure you read my mint cautionary tales in the recipe section. You want to eat mints. Not eat a bottle of Listerine.
I’ve only ever made this butter mints recipe using peppermint extract, so I can’t speak to whether or not (food grade!) peppermint essential oil will work here.
I suspect this recipe would be nice with cinnamon extract, lemon or orange extract, or many other specialty flavored extracts from butter to rum to coconut to coffee extract. If you choose to use another specialty flavored extract, you’ll have to use your best judgement when flavoring these butter mints.
I used red and green food coloring, but you could make these for Easter, Mother’s Day, a baby or bridal shower and use pastels. The un-dyed dough is stark white and a blank canvas.


Old-Fashioned Butter Mints
Ingredients
- ¼ cup butter, softened (I used unsalted, but salted may be substituted based on preference)
- ¼ teaspoon salt, consider omitting if you used salted butter
- 3 ¼ cups confectioners’ sugar plus 1/4 cup+, if needed
- ⅓ cup sweetened condensed milk
- ½ teaspoon peppermint extract*
- food coloring, optional
Instructions
- To the bowl of stand mixer fitted with the paddle attachment, combine butter and salt and beat for 1 minute on medium-high speed.
- Add 3 1/4 cups confectioners’ sugar, milk, peppermint, and beat on medium-low speed until a dough forms. If the dough seems wet, add additional confectioners’ sugar until dough combines (I use 3 1/2 cups sugar). The dough will be crumbly but will come together when pinched and squeezed into a ball.
- Taste the batter. If you want a more intense mint flavor, add additional mint extract, to taste (see note below).
- Remove dough from the mixer, separate it into 1 to 4 smaller balls, and add one ball back into the mixer. Add the food coloring of your choice to the ball by squirting the droplets on top of the dough (careful when you turn on the mixer), and paddle on low speed until coloring is well-blended. Coloring will not blend completely into each and every speck of dough if examined extremely closely, but overall, mix until color is uniform. (I separated approximately two-thirds of the dough and made it green using about 15 drops green food coloring and made one-third of the dough red-pink by using about 7 drops red food coloring).
- Wash the mixing bowl and the paddle in between each color change and repeat until all the balls are colored.
- After the dough has been colored, either wrap it with plastic wrap and place it in an airtight container in the refrigerator to be rolled out later or roll it immediately.
- To shape the butter mints, place a golf-ball sized amount of dough in your hands and roll dough into long thin cylinders about 1 centimeter wide. Place cylinders on countertop and with a pizza cutter (or knife – be careful of your counter), slice cylinders into bite-sized pieces, approximately 1 centimeter long.
- Store mints in an airtight container in the refrigerator where they will keep for many weeks.
Notes
Nutrition
Nutrition information is automatically calculated, so should only be used as an approximation.
©averiecooks.com. Content and photographs are copyright protected. Sharing of this recipe is both encouraged and appreciated. Copying and/or pasting full recipes to any social media is strictly prohibited.
More Easy Homemade Candies:
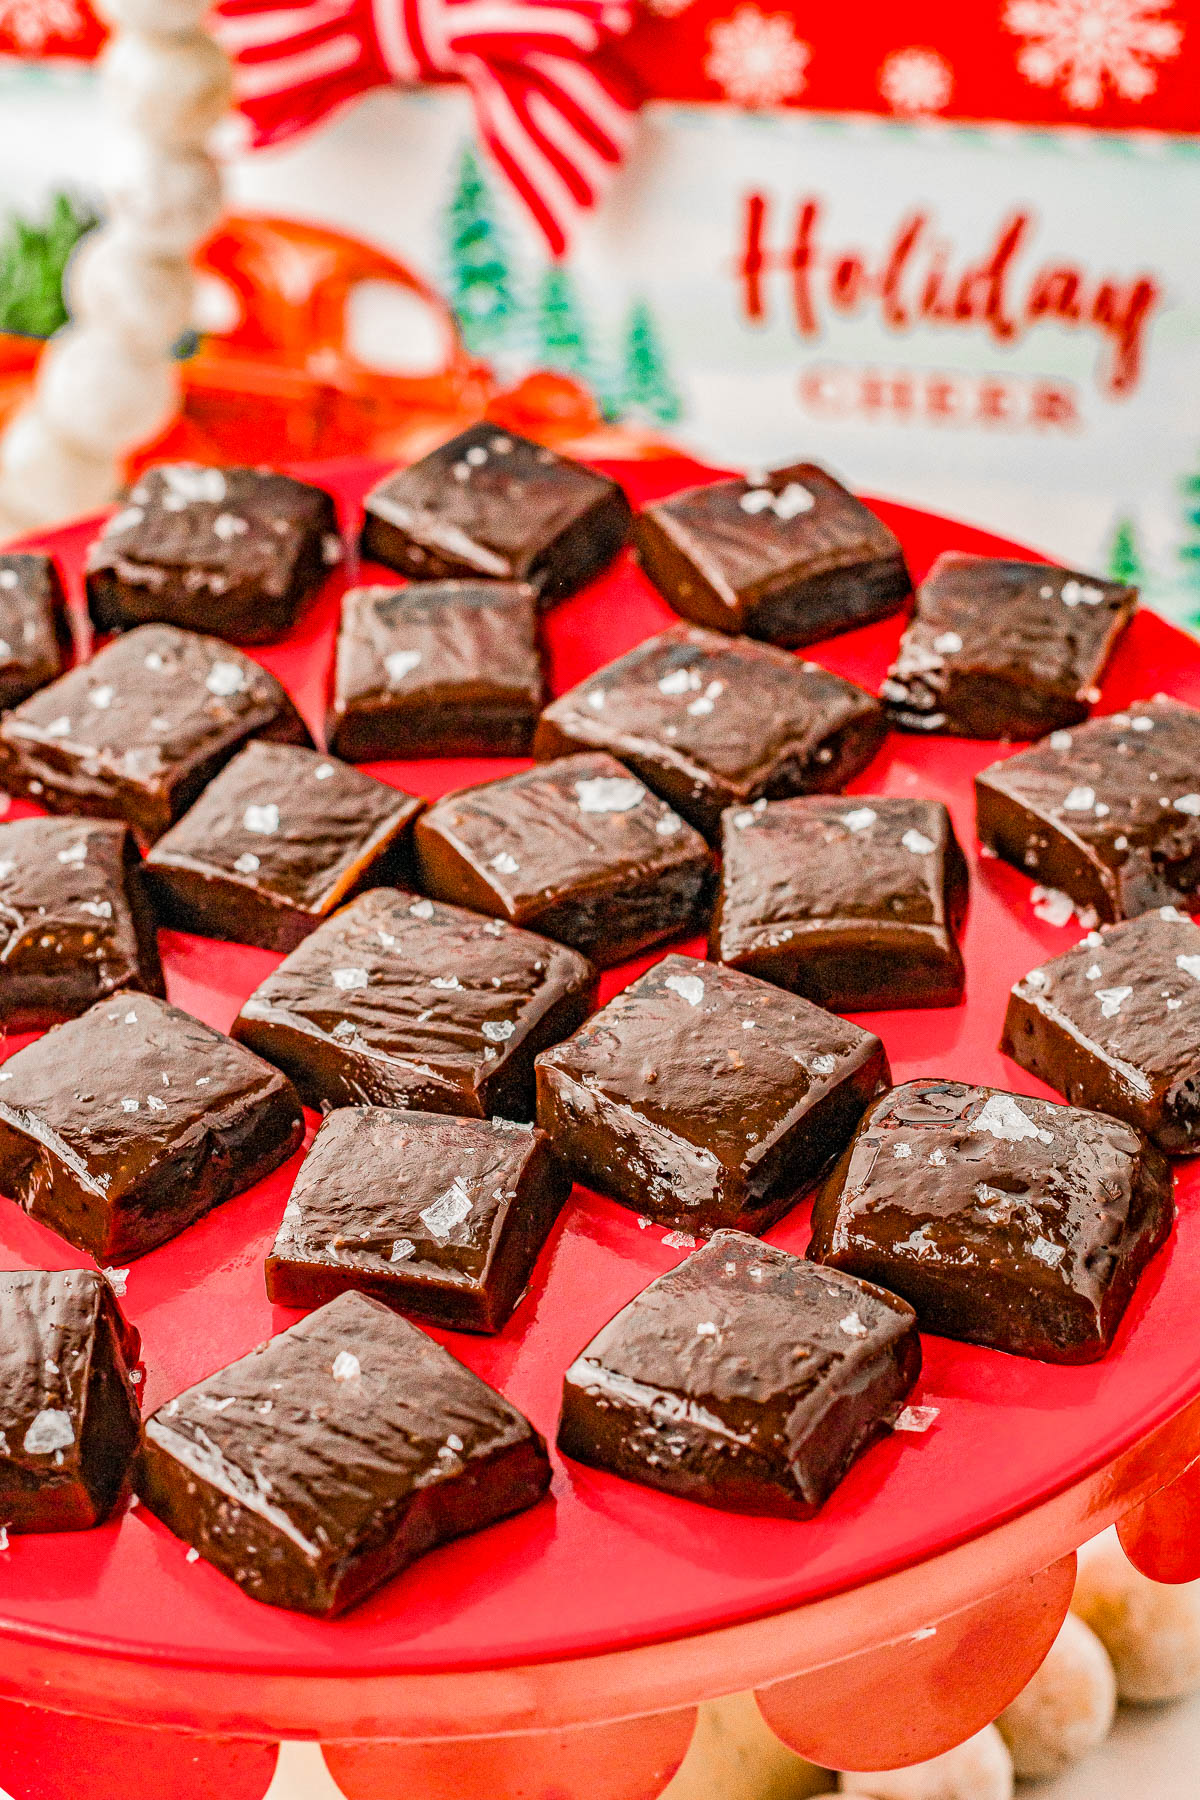
Chocolate Caramels — Soft and chewy, nice and chocolaty, with the slightest hint of espresso flavor that makes the chocolate flavor even richer! A final pinch of flaky sea salt is optional but AMAZING!
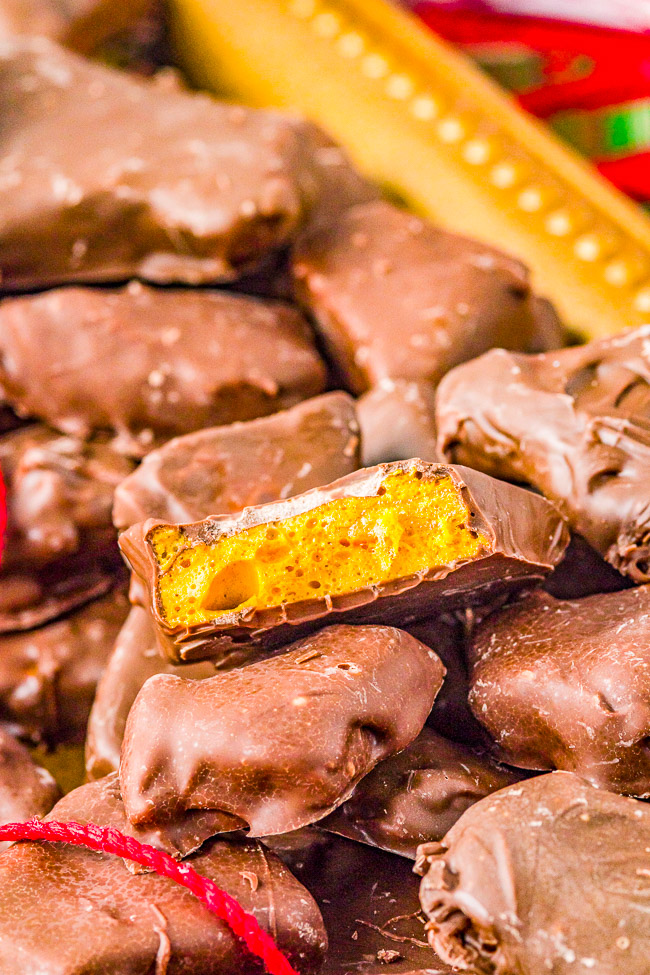
Chocolate Sponge Candy — A classic homemade Christmas candy that’s light and airy candy inside and chocolate-dipped on the outside. Easy to make! Great for cookie exchanges and hostess gifts because it keeps fresh for a long time!
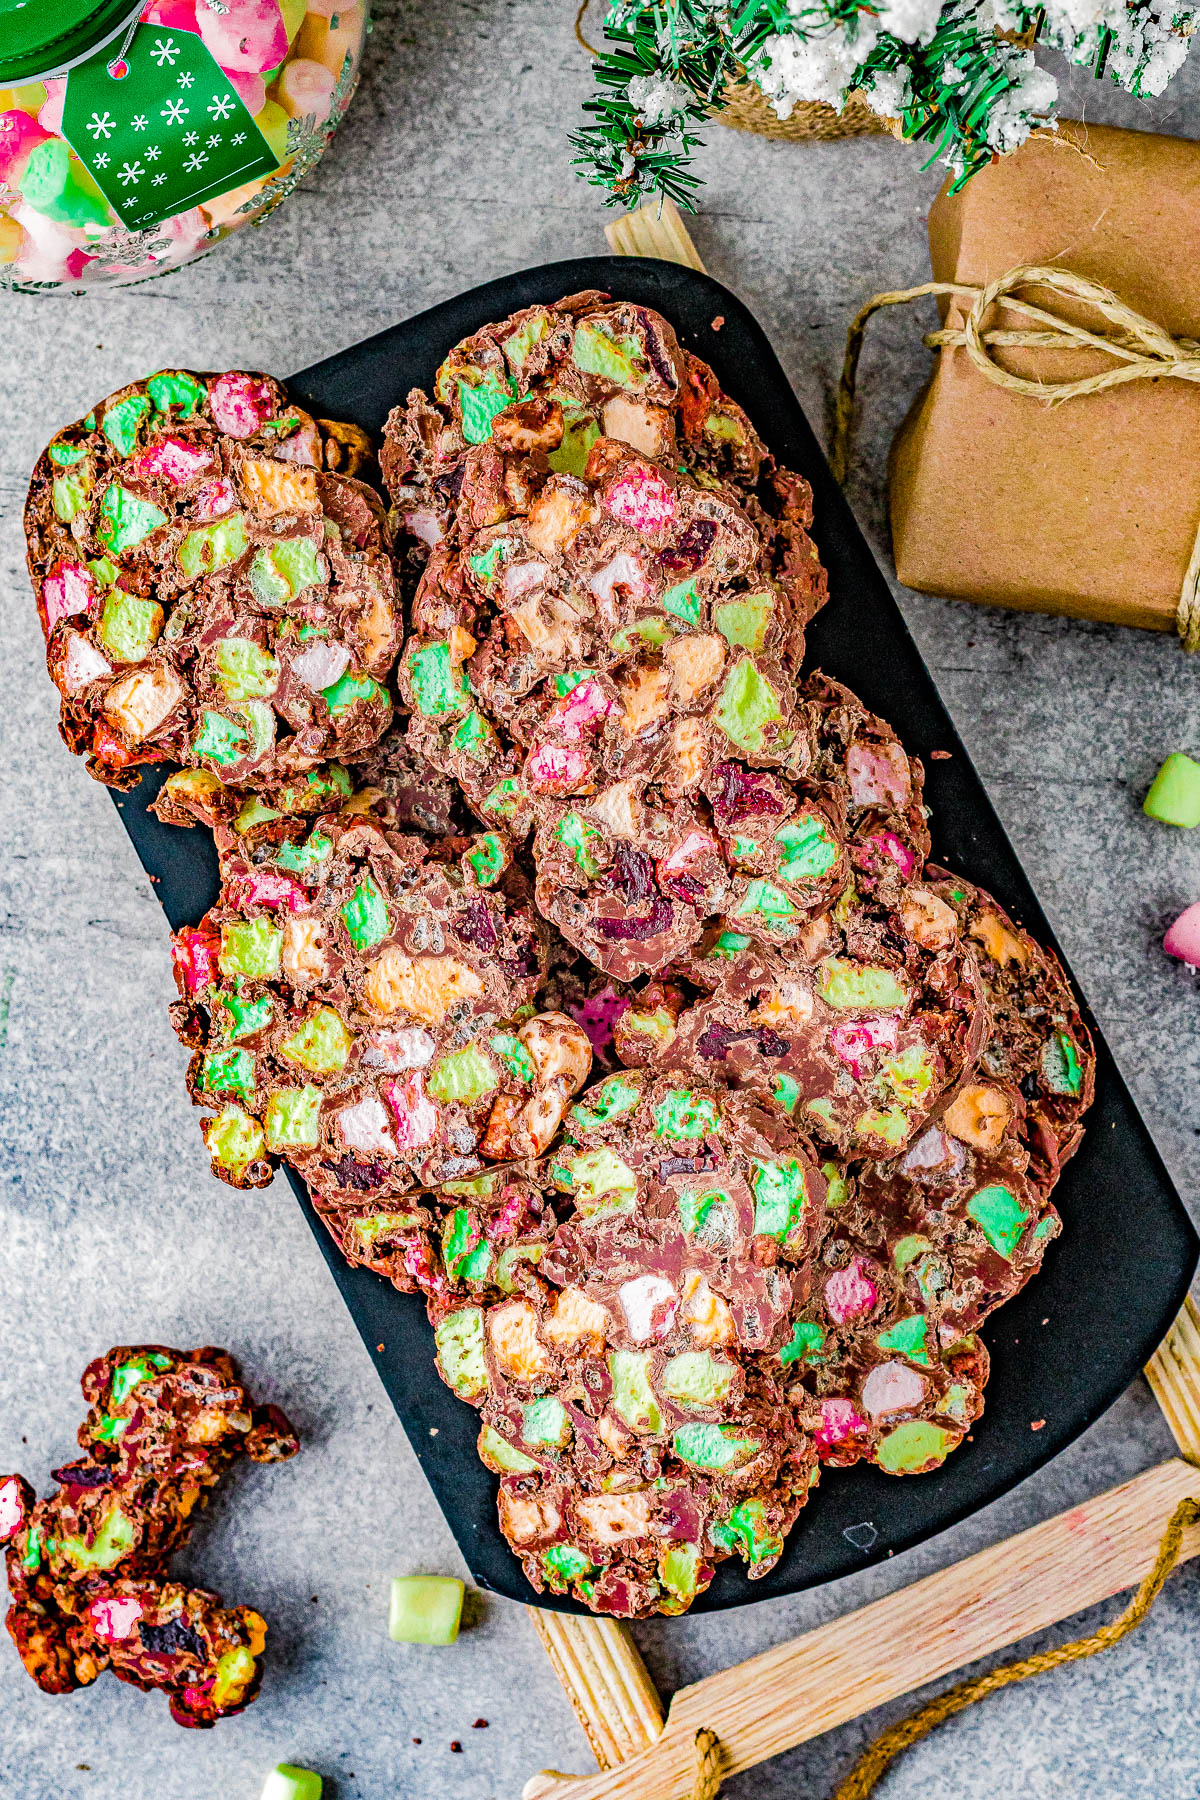
Chocolate Stained Glass Candy — Likely the prettiest Christmas candy you’ll make all holiday season! It’s FAST, EASY, and NO-BAKE! Milk chocolate takes on the appearance of stained glass by adding colored mini marshmallows, crispy Rice Krispies, and chewy dried cherries.
White Chocolate Truffles — Made with real butter, heavy cream, and a double dose of white chocolate in both the filling and the coating, these EASY truffles are CREAMY, decadent, and perfect for the holidays!
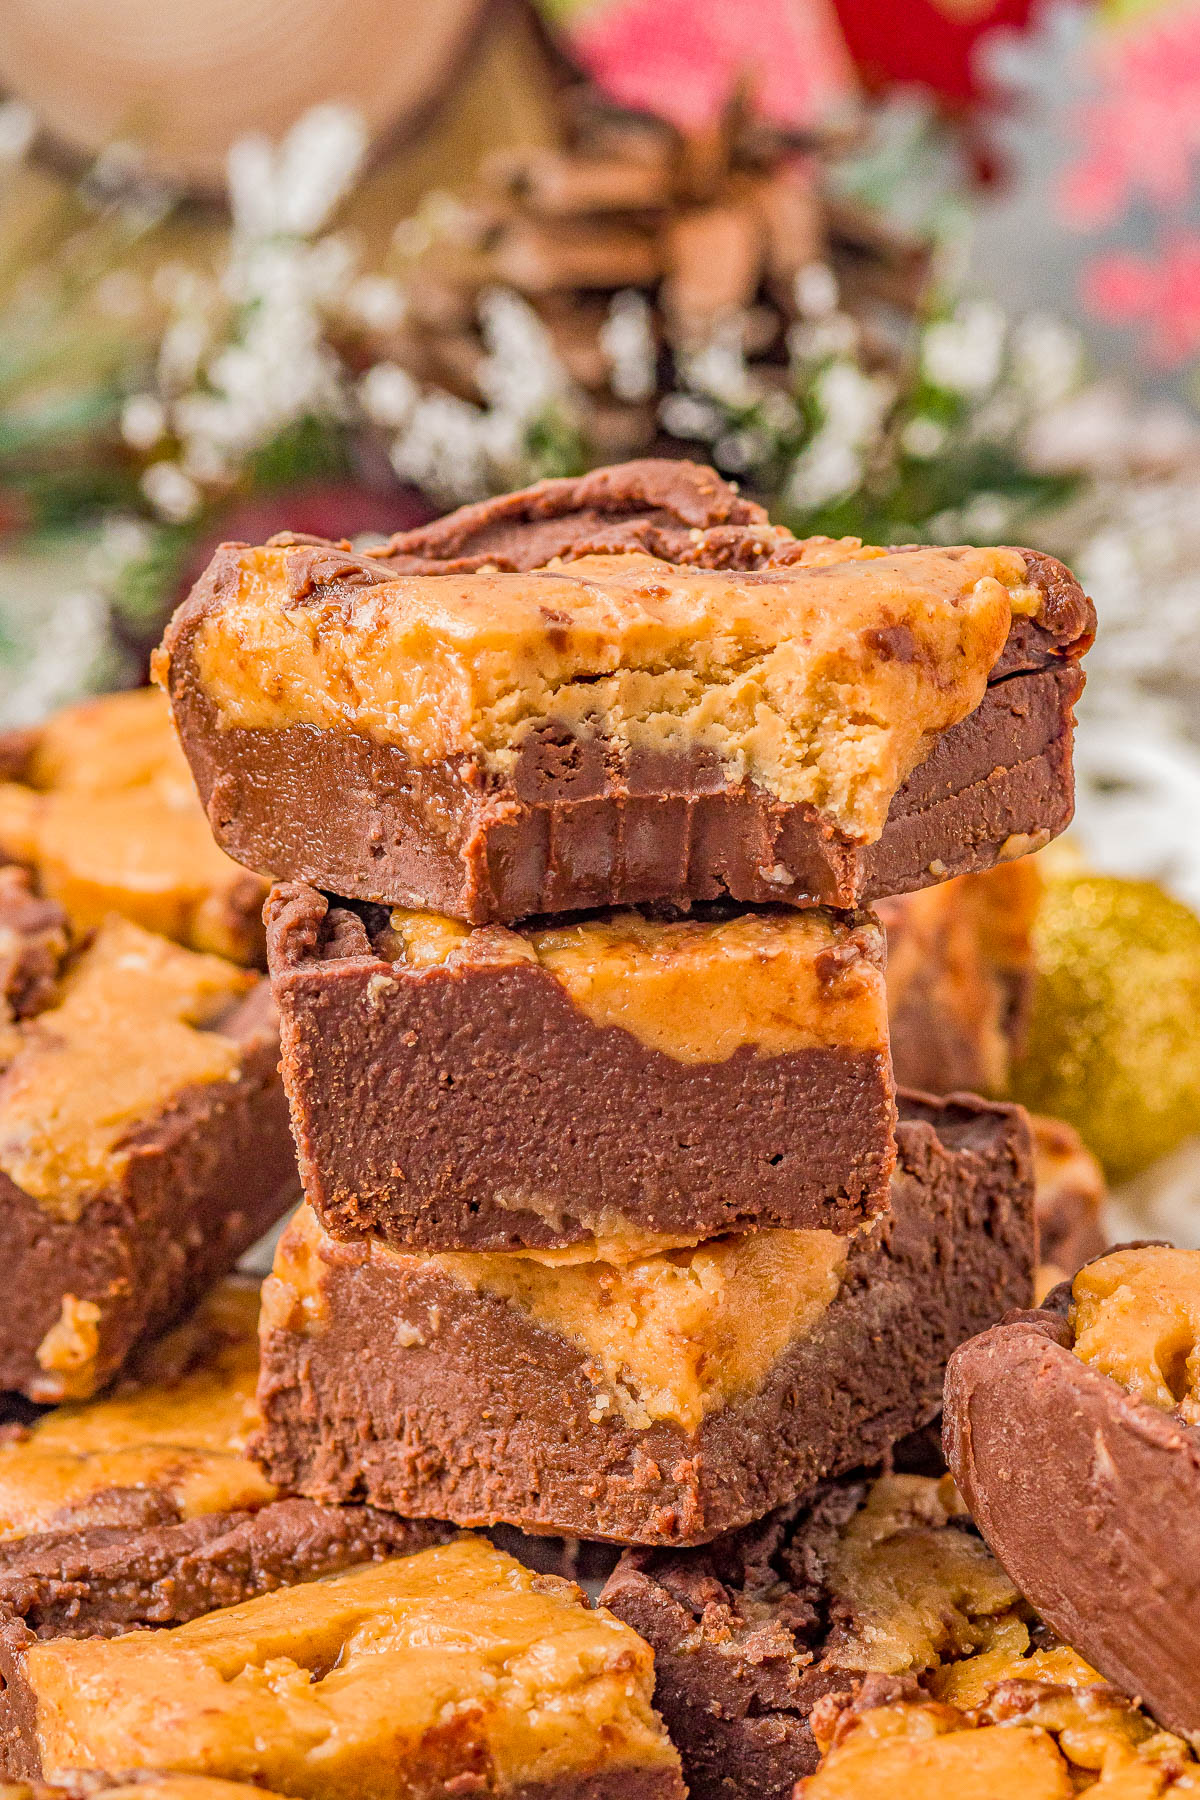
Microwave Chocolate Peanut Butter Fudge — 🙌😋 Rich and decadent chocolate fudge adorned with peanut butter swirls! Made in the microwave with just SIX ingredients, there’s no boiling or candy thermometers involved in this FAST and EASY recipe for PERFECT fudge every time!
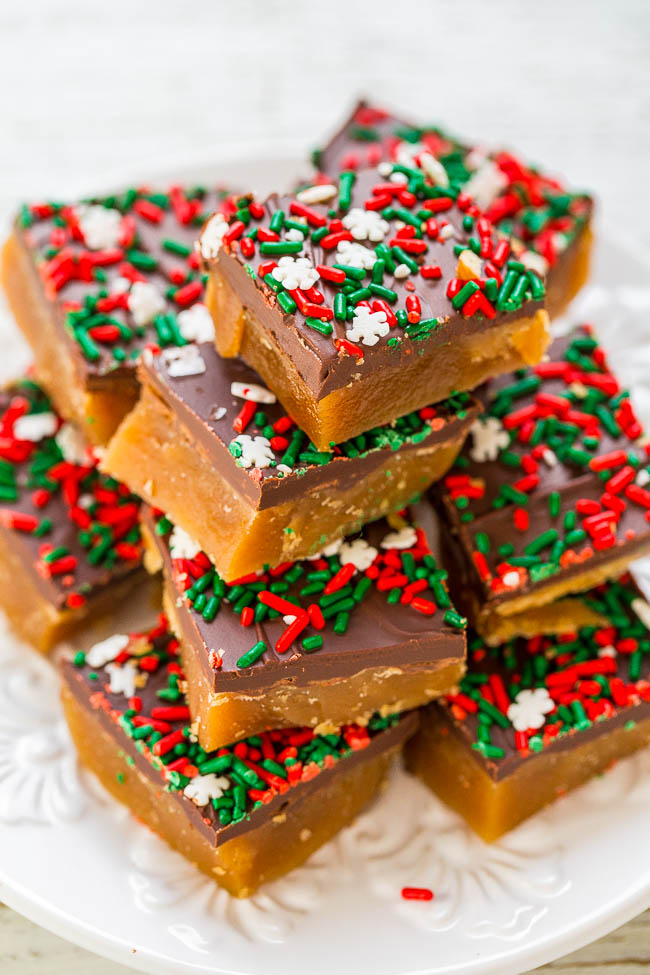
Melt in Your Mouth Homemade Toffee — 😋💚❤️ Irresistible, buttery, ADDICTIVE, and just melts in your mouth!! EASY and perfect for holiday parties, gift-giving, or cookie exchanges!!

I was thinking about making one big mint with the entire mixture and then do a chocolate outer coating, do you know how I might do this?
I really don’t know but you could experiment and see what happens!
I used the lemon extract for Easter and it works great
Awesome! Great idea!
I just made these & they turned out terrific! I didn’t use a mixer, just my trusty wooden spoon at first then hands to fully knead in all ingredients. I didn’t use coloring though, the next time I may and utilize plastic gloves. I started with 3 cups of the powdered sugar and gradually added the last 1/2 cup. When time came to rolling, it broke apart, so I grated a little more butter over & worked it in and then it rolled out fine. Now, comes the hard part..waiting for them to fully dry. Thanks for the recipe!
Thanks for trying the recipe and I’m glad it came out great for you!
I have made these before, just with butter and sugar. i used a fork to mix it together, until it was soft and creamy. I used to use mint, but my family doesn’t care for the mint, so I just use food coloring and end up with “butter” mints. I roll them in little balls on waxed paper and flatten with a fork, like peanut butter cookies. I let them air dry, until they are no longer sticky, turning them a couple times a day. This does sometimes take a couple of days, and of course they do get eaten upon in the process.
I am afraid if I put these in an airtight container in the fridge to store they will stick together. Do you dry them on the counter first? I want to make a big amount for a baby shower in pink and need to store them for a week. Also after storing in fridge do they soften up when put in a candy dish for serving? They will sit out for a few hours.
Do you dry them on the counter first? = yes
I highly recommend making a test batch to see how things go and make tweaks from there. Good luck and enjoy!
I would love to make these with my daughter, it all I have is a handheld mixer with the standard attachments. Not a paddle attachment. Is there a way I can still make them??
I’m sure a hand mixer will be fine.
I used a spoon. That was “mixer” enough.
could i use coconut oil instead?????
No.
I know this is an old comment, but the answer is yes.
I made this recipe with refined coconut oil instead of butter, and added water in tbsp till I got the right consistency instead of sweetened condensed milk. (I don’t remember how much water but it was less.)
This made the mints indefinitely shelf stable and reminded more of the after dinner mints at restaurants. Since the mints at restaurants NEVER contain butter or milk. More store bought butter mints are sugar, corn syrup, hydrogenated oil, and artificial flavor.
Candies like this are meant to “Air Dry” after to harden up so they get firm to the touch not sit in air tight containers and defiantly not in a refrigerator. I worked in a candy store that made all kinds of things like this. From hand dipped Carmel Apples, fudge, cast chocolate, cinnamon candy, hard candy, peanut brittle, too many to many items to list by name, anything that was traditional and specialized in wedding items. I notice some in the comments are confusing theses with the traditional “Wedding” mints made with Cream cheese. I have made millions of those for countless wedding both at the store and for my Grandmother who decorated cakes for weddings. They also need to dry out in an open container the dough can be made ahead and like yours kept in the freezer for at least a year or longer. We would make 10lbs batches at a time freeze then take out what we needed color/flavor and mold it. Once they are air dried then they can be kept in a air tight container especially if you life in an “Wet” climate or you home has lots of humidity, say an area like Washington where it rains a lot of the time. For Christmas Weddings we used to make Red and White peppermint Candy-Cains out of the Wedding mint mix its a lot like working with Fondant. If your mold stick spray with pan spray or dust lightly with powdered sugar the key to getting good molded mints is to keep the dough cold and firm. To only work it in small as need batches so keep the majority in the refrigerator only take out enough to mold a little at a time. If it gets warm your in for a sticky icky frustrating mess.
Thanks for commenting made it so much easier to make
I agree with your hints regarding the storage and keeping candy cold and working with small amts at a time. I as well worked in a candy shop a few years on Macinack Island. TY Averie for this recipe… I’m going to give it a whirl, it’s similar to the one I used to use.
My sister and I were just talking about how one year at Christmas, our Mom made soft peppermint candies. Neither of us are old enough to remember how Mom made them. But I am going to try your recipe and see if I can recreate some Christmas memories.
*were old enough*