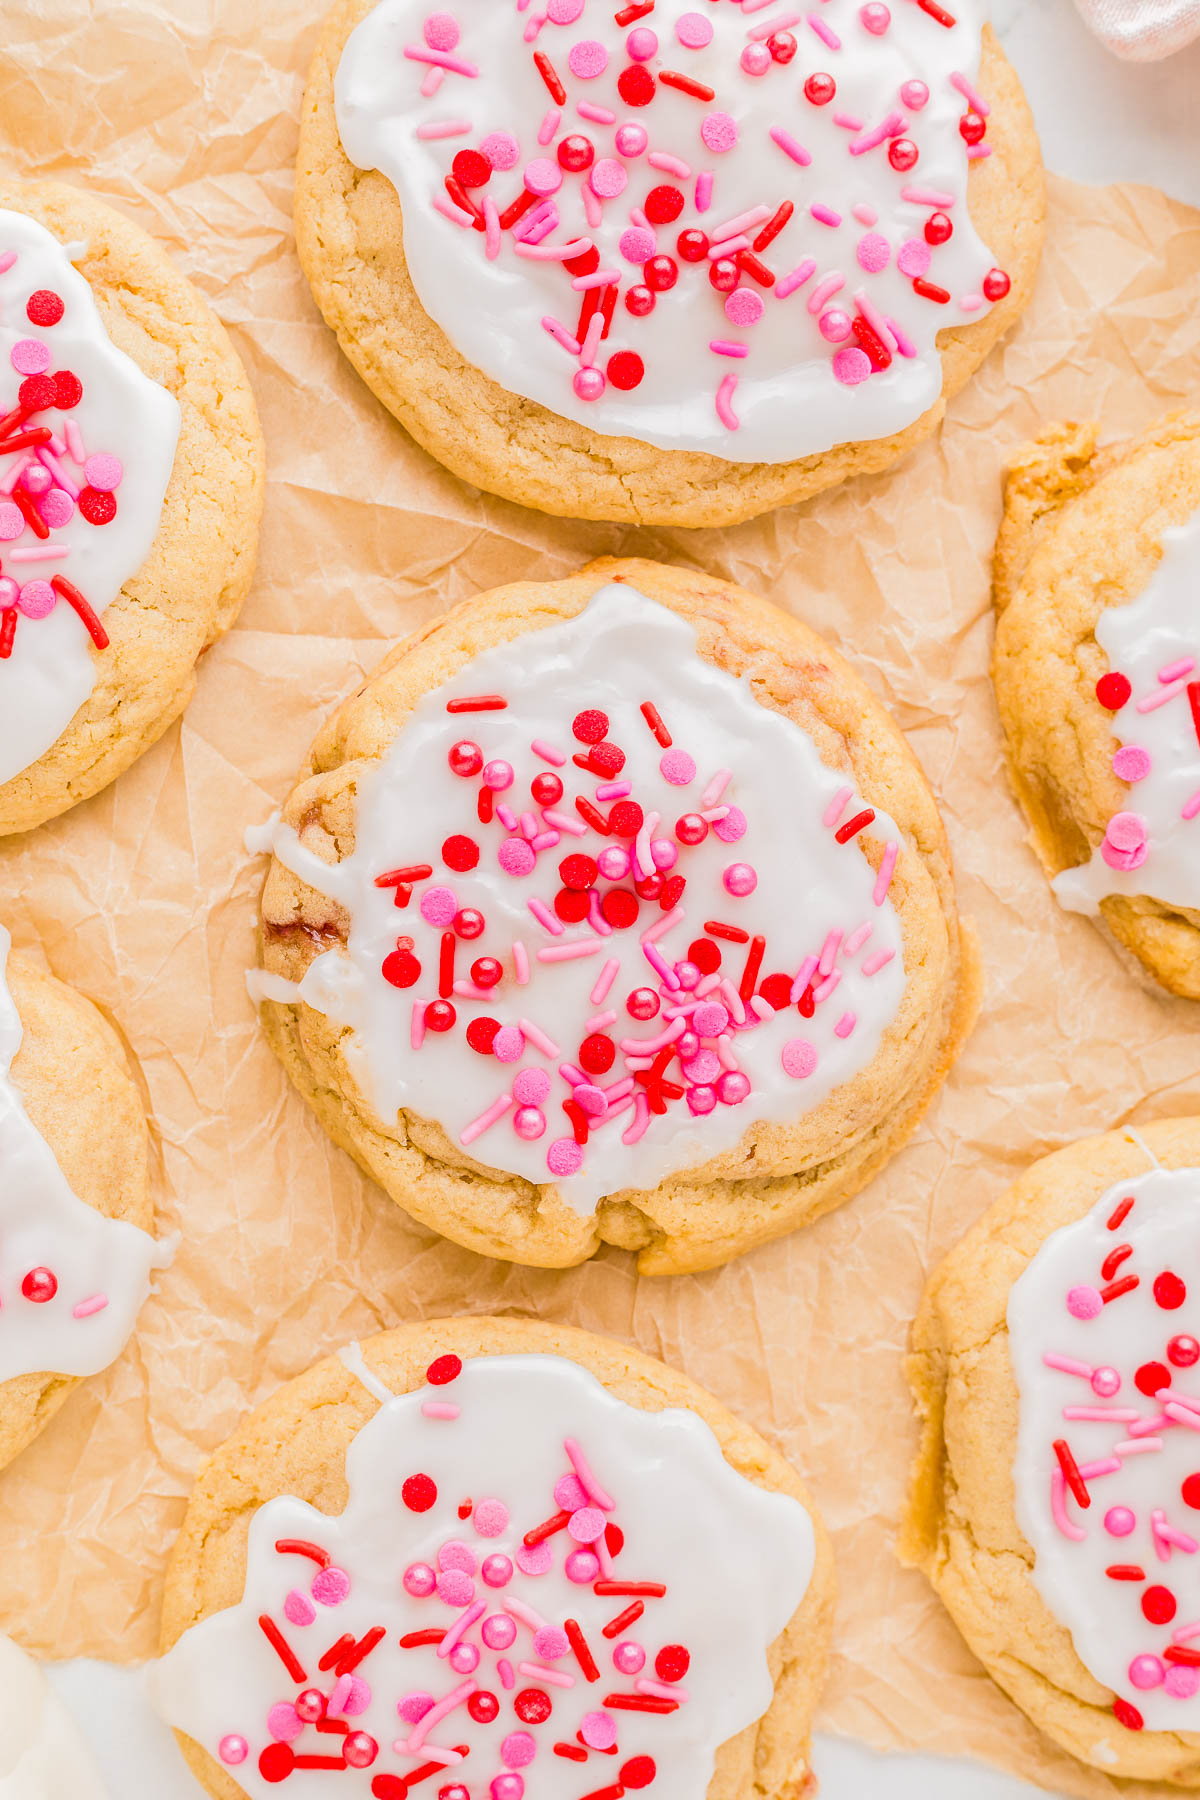
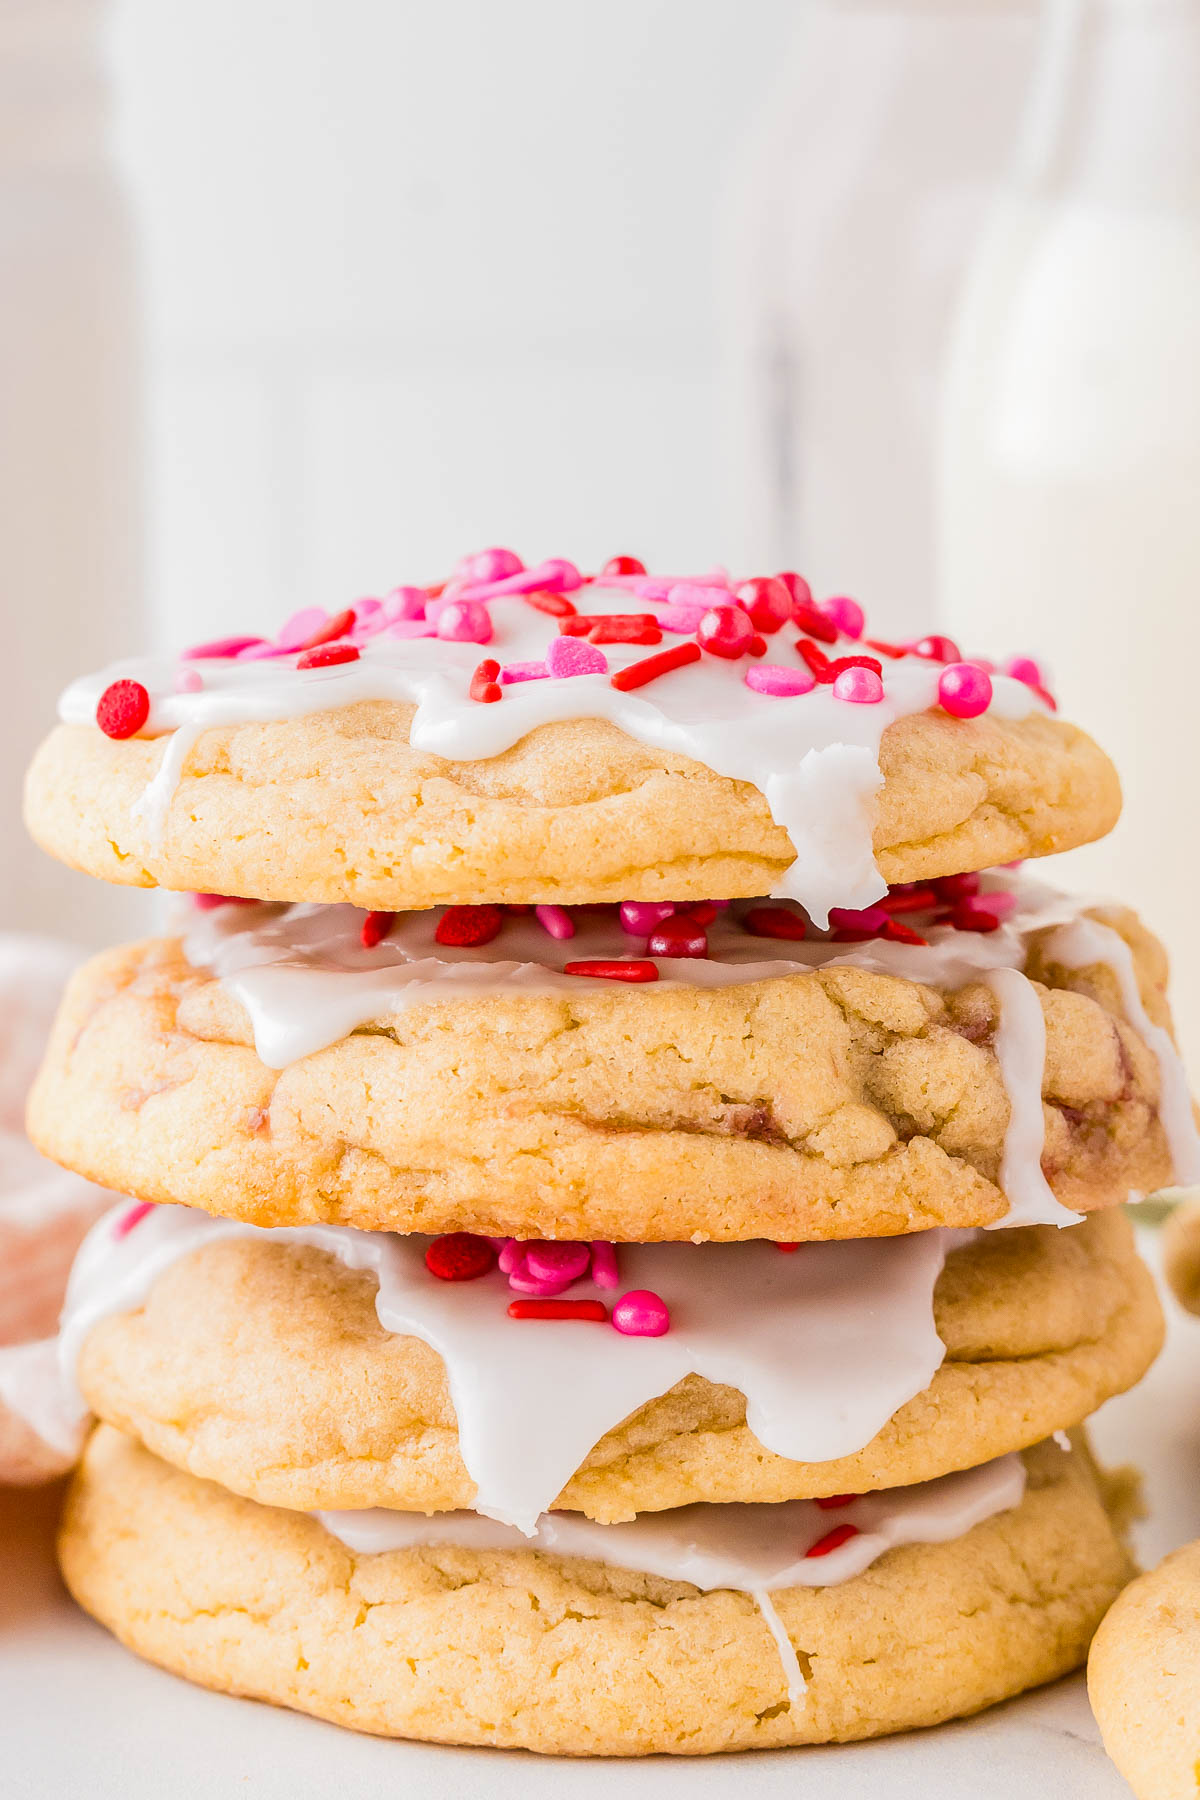
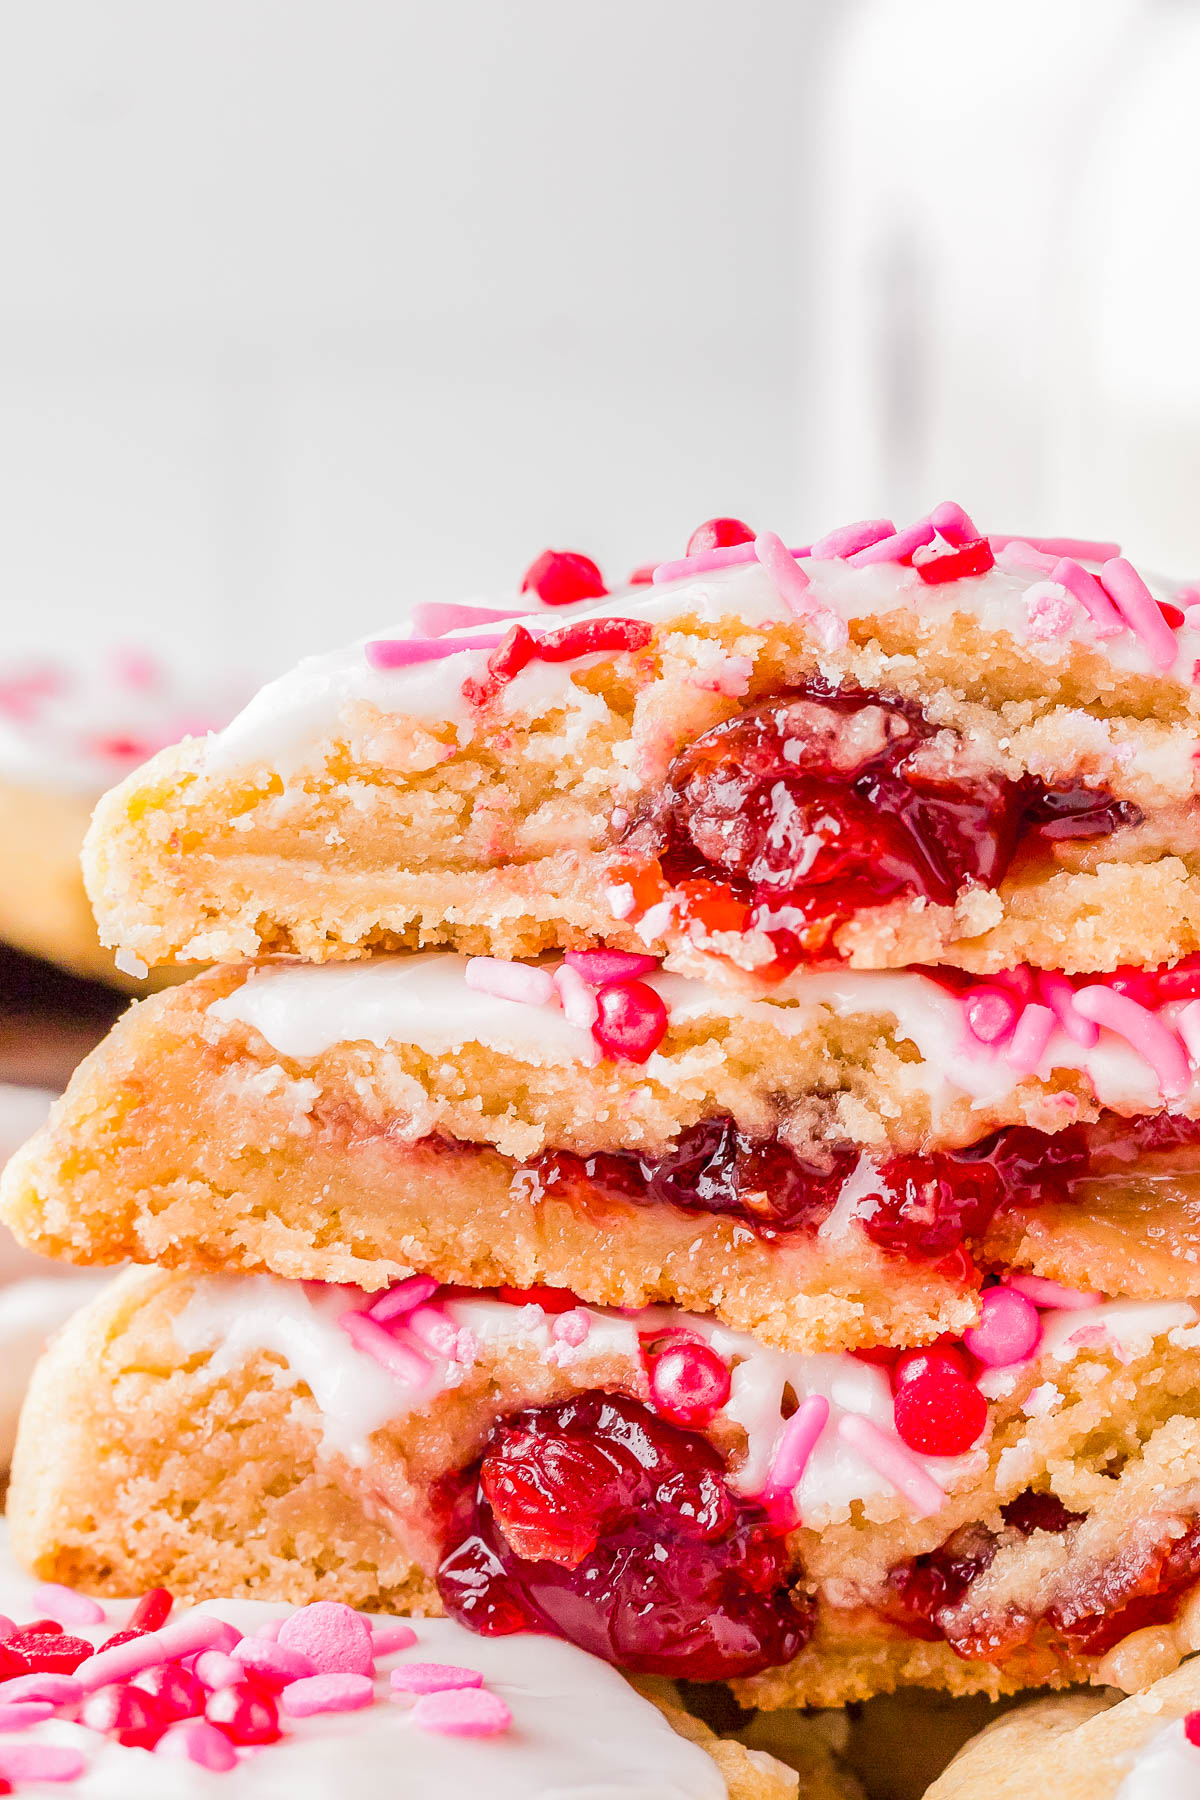
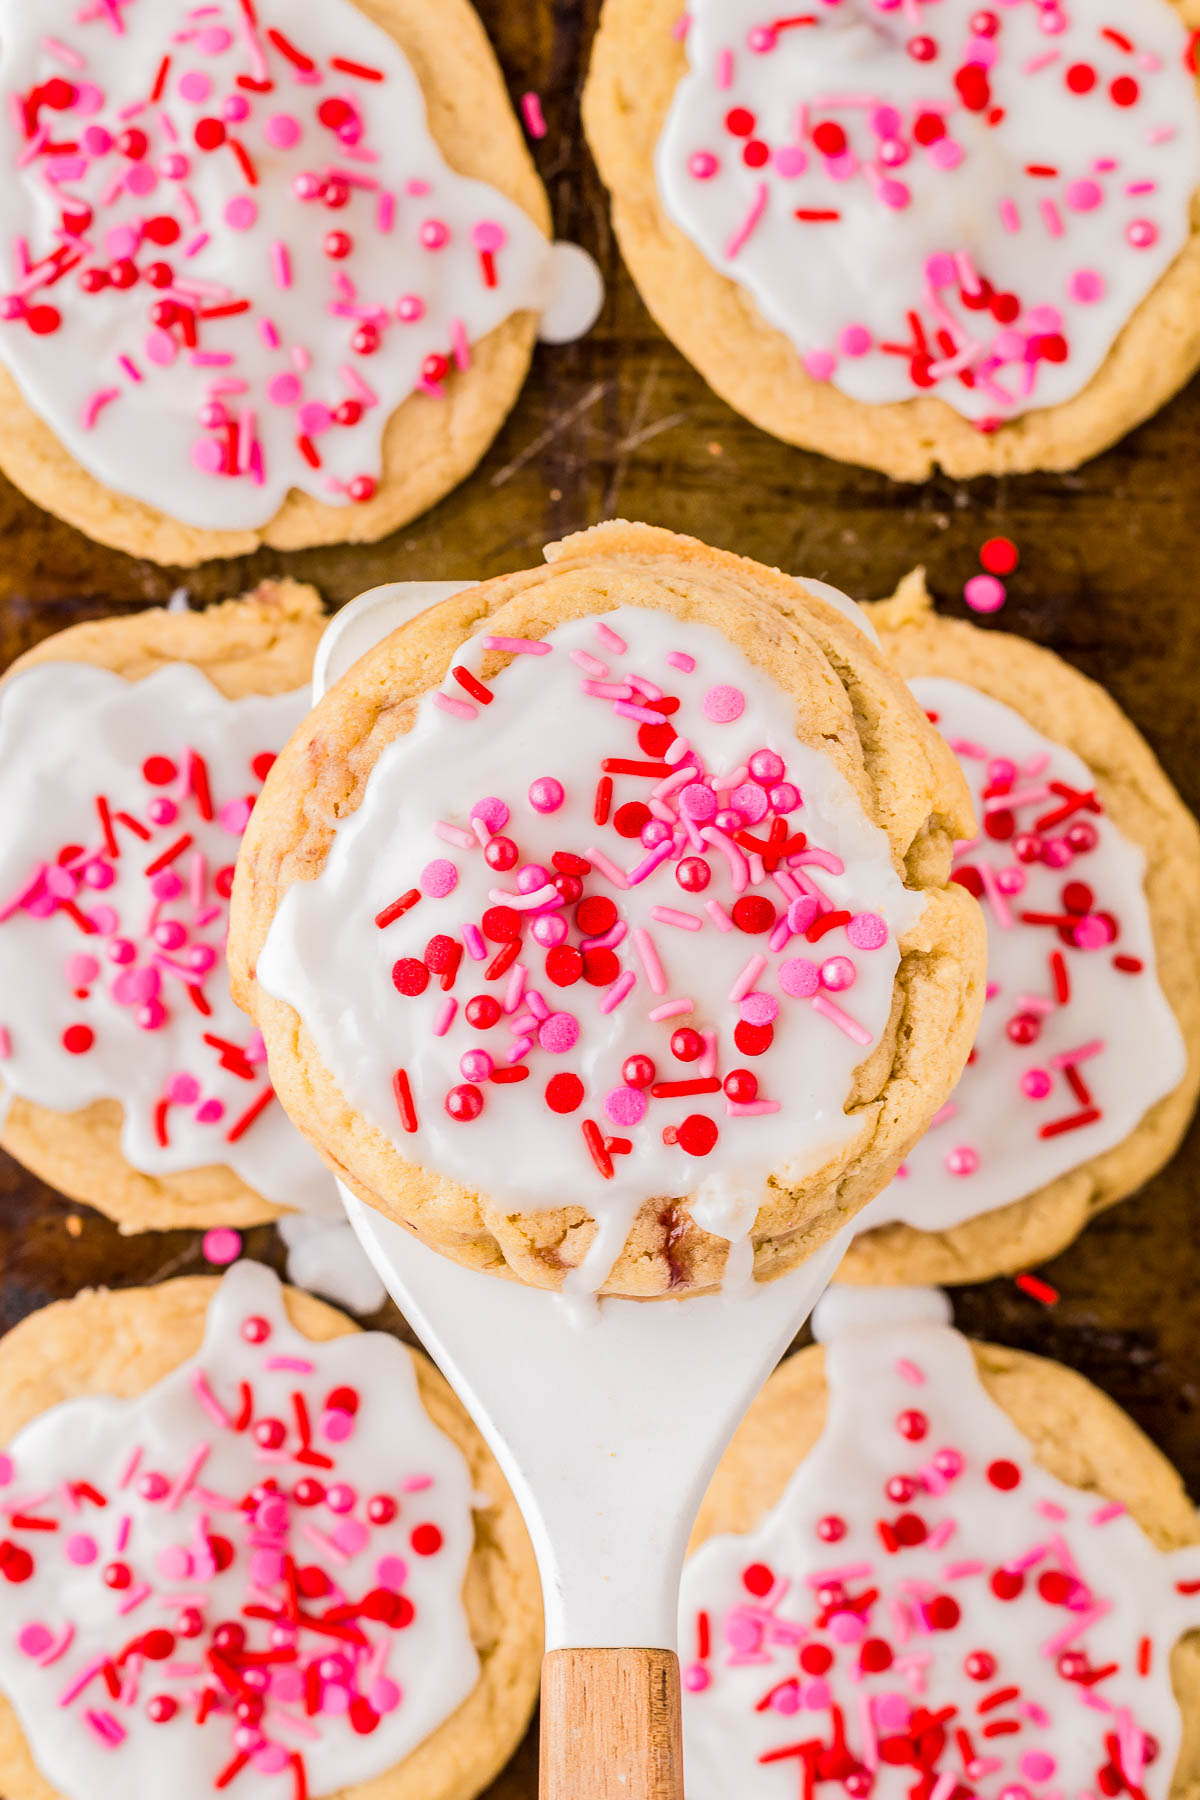
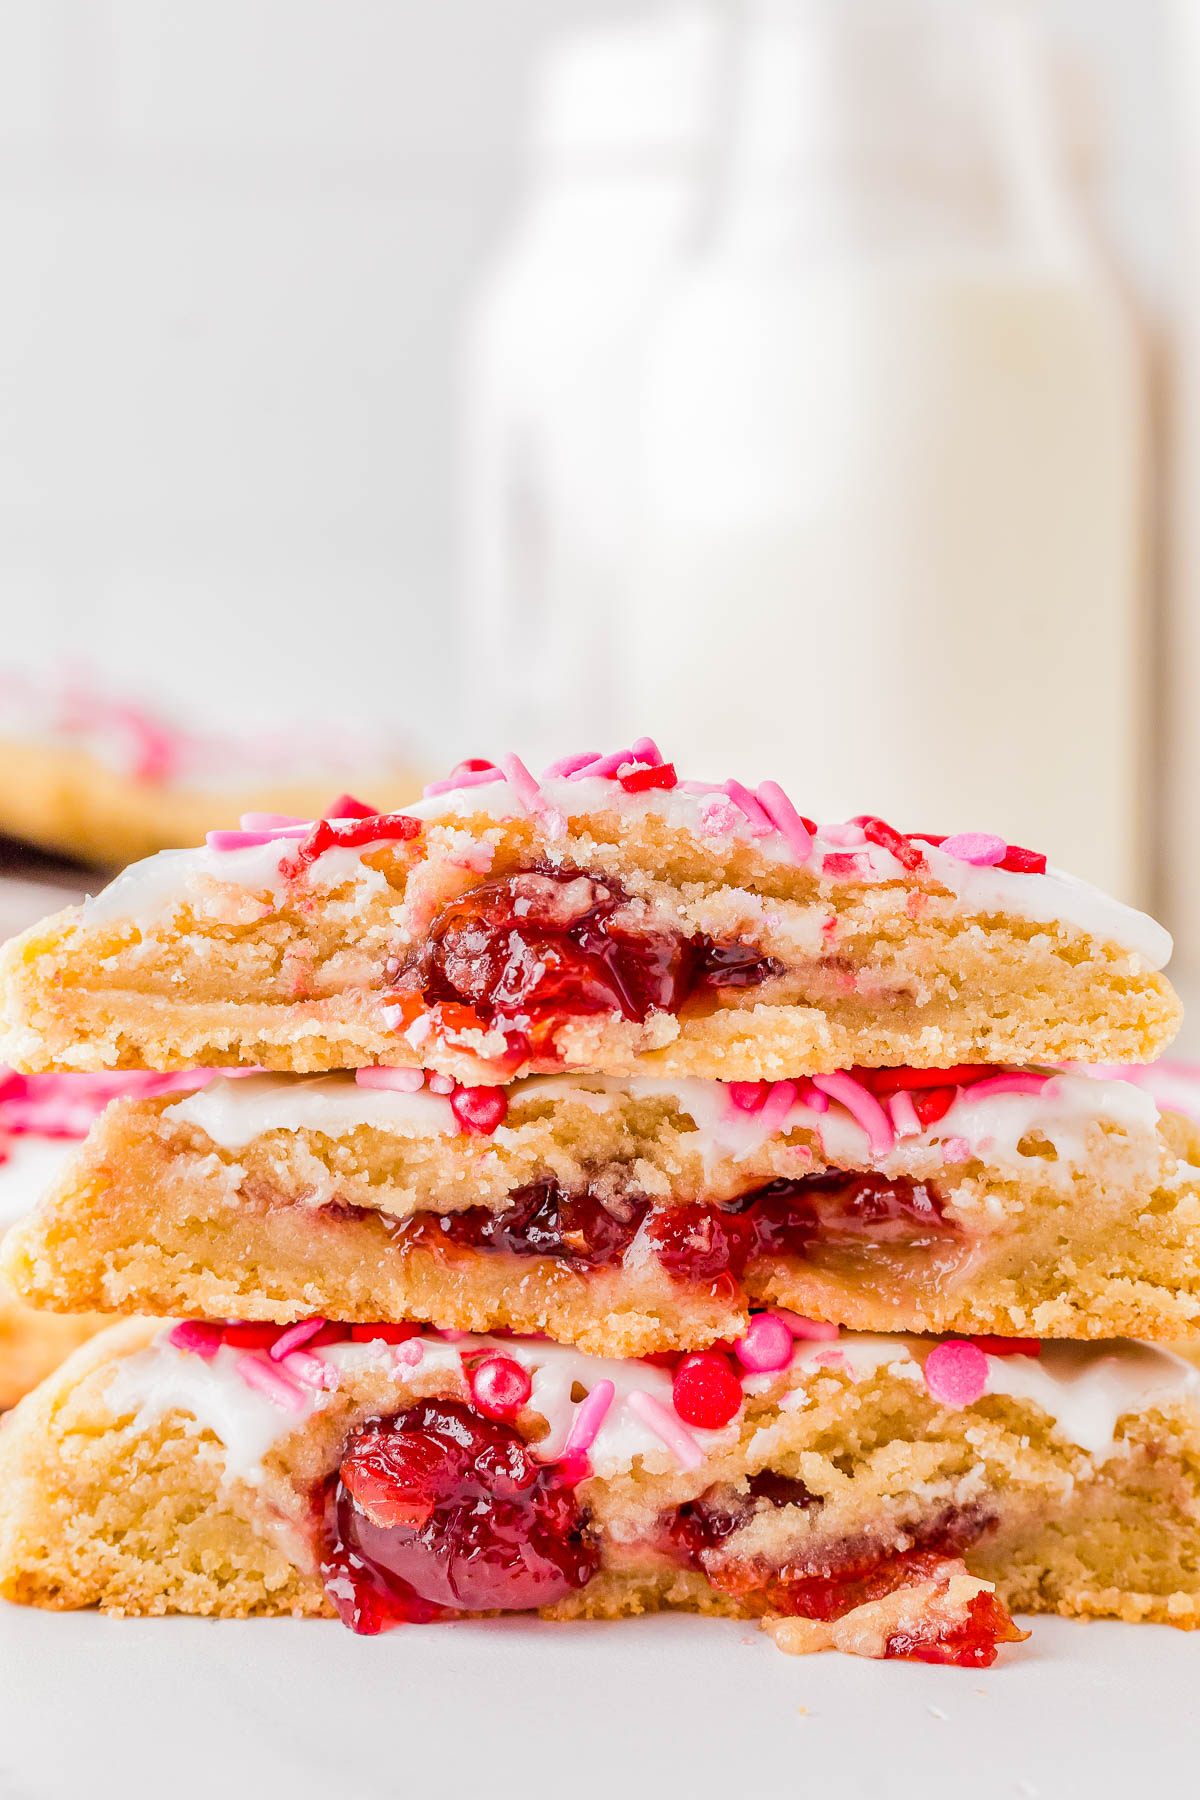
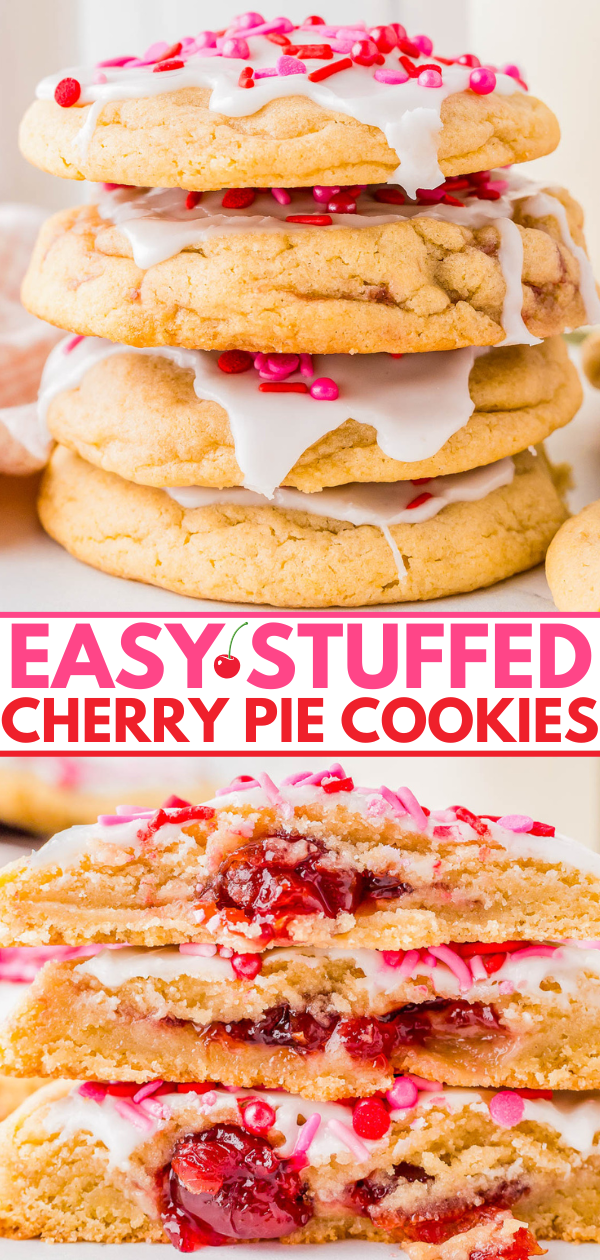
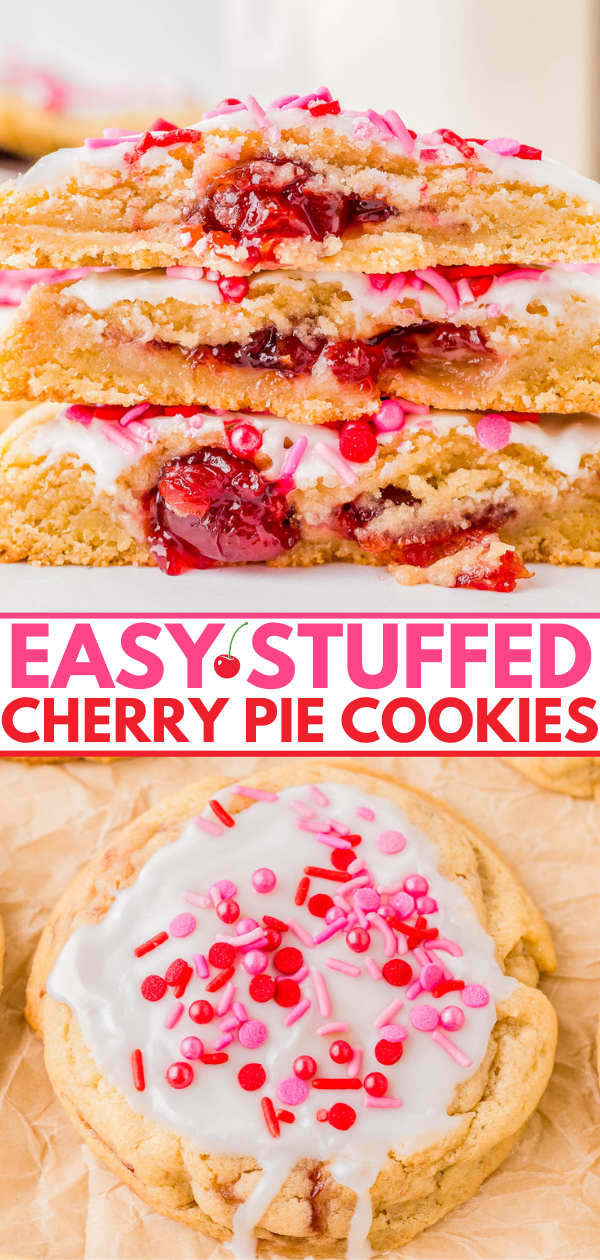
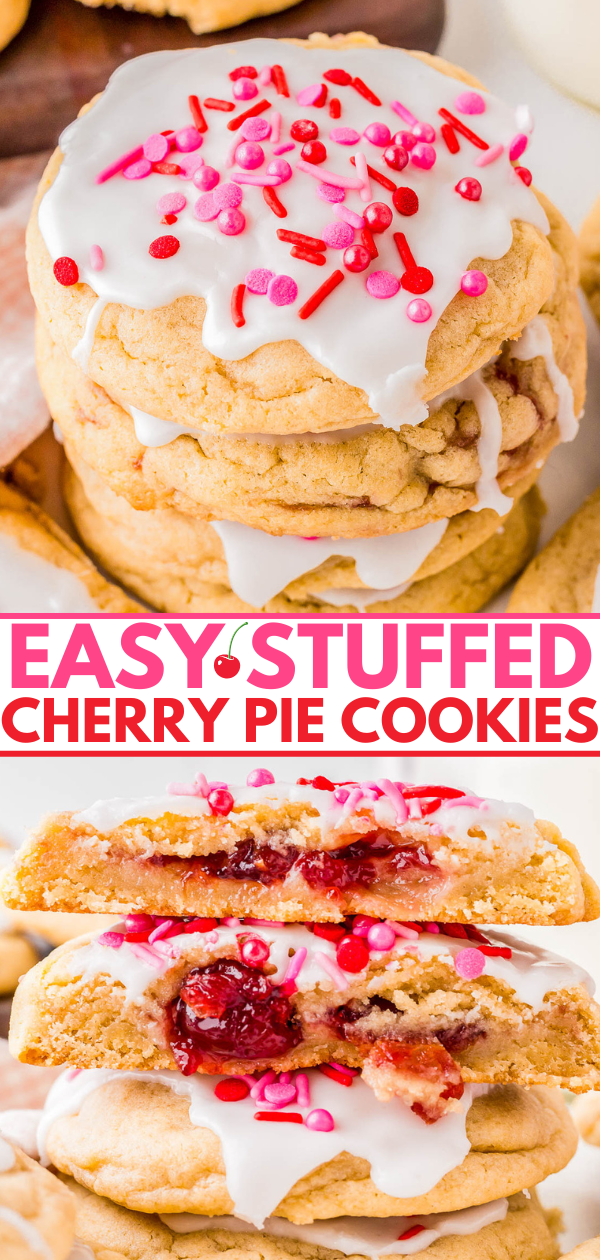
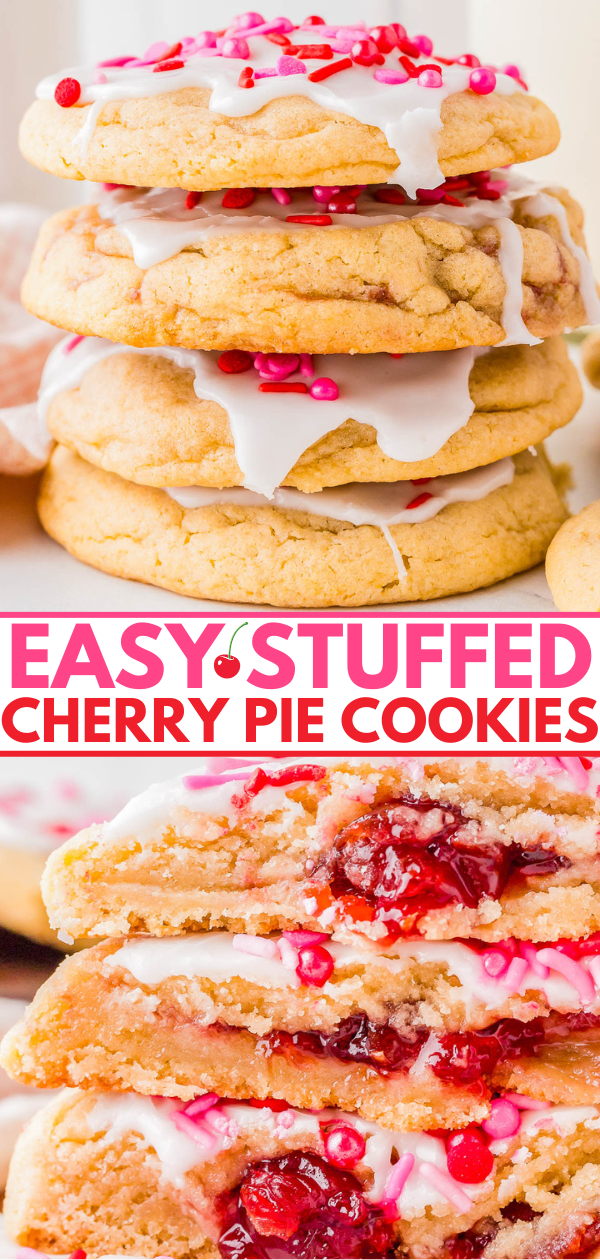
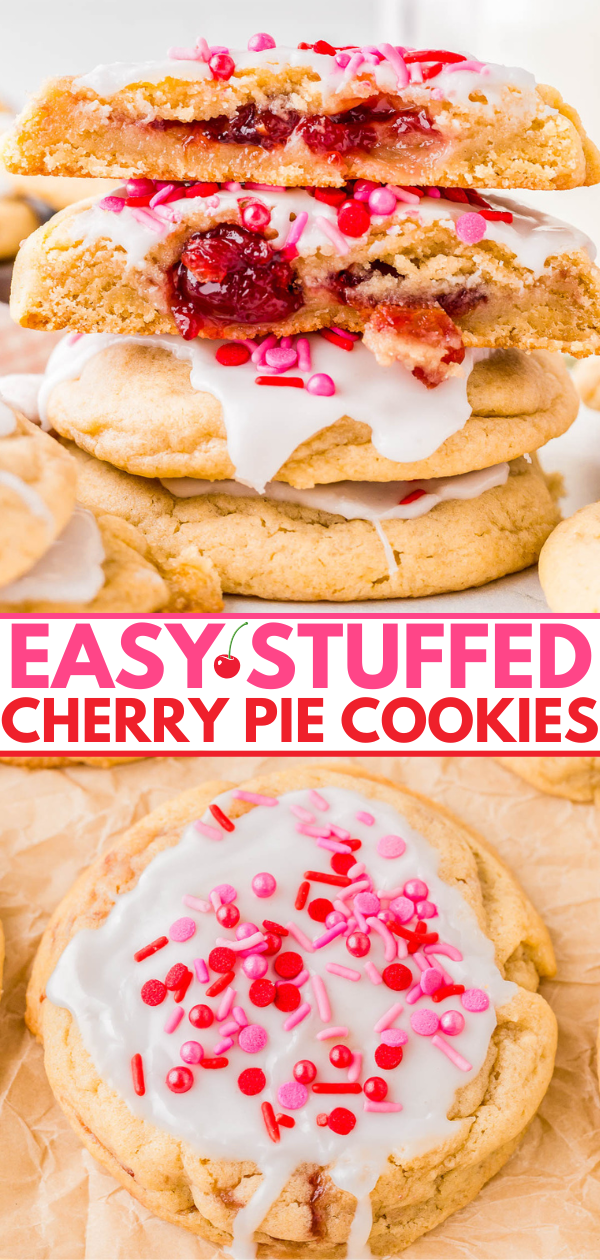
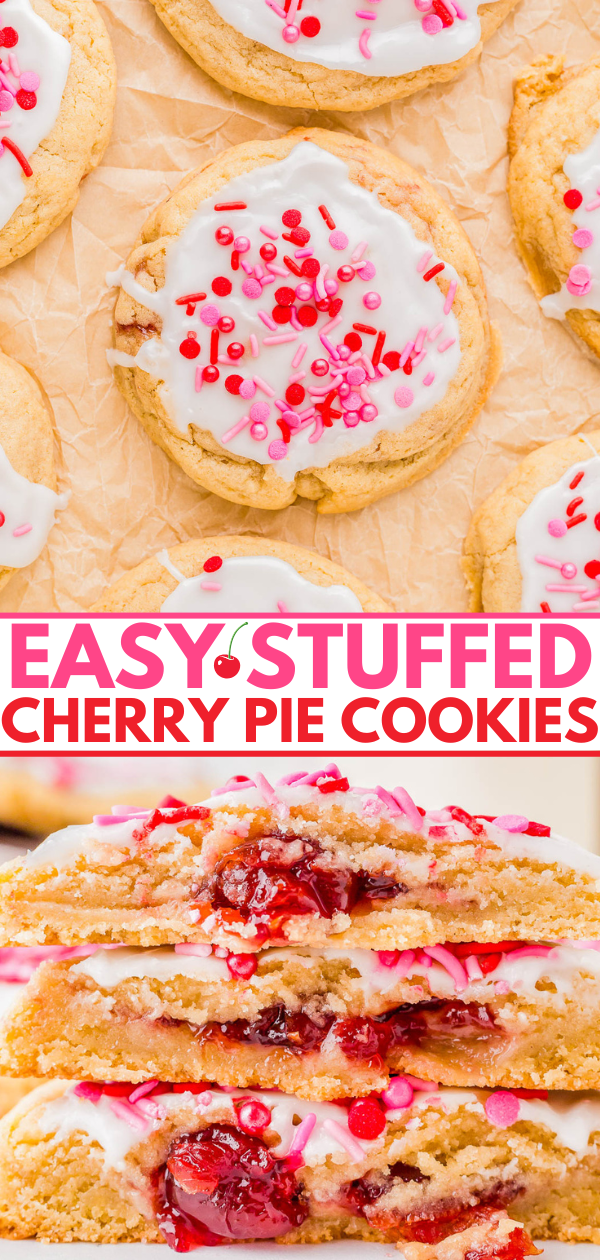
Stuffed Cherry Pie Cookies – 🍒🩷❤️ Soft and chewy buttery cookies stuffed with cherry preserves are QUICK and EASY to make and the perfect Valentine’s Day dessert! I like to add a simple glaze so that I can add sprinkles for a more festive look! You can easily change the colors of the sprinkles and the flavor of jam inside making these cookies not only delicious but very versatile for other holidays.

Table of Contents
- Easy Glazed Stuffed Cherry Pie Cookies Recipe
- more Easy valentine’s Day Cookies
- Ingredients in Cherry Pie Stuffed Cookies and Glaze
- Use Sprinkles For Seasonal Versatility
- How to Make Cherry Pie Filling Cookies (Cherry Pop Tart Cookies)
- Storage
- Recipe FAQs
- Stuffed Cherry Pie Cookies Recipe
- More Easy Cherry Dessert Recipes
Easy Glazed Stuffed Cherry Pie Cookies Recipe
These easy and decadent stuffed cookies are the perfect Valentine’s Day cookie recipe with the best flavor!
- Although, you can easily change up the color of the sprinkles and they’ll work great as Christmas cookies, 4th of July cookies, Easter cookies, and more.
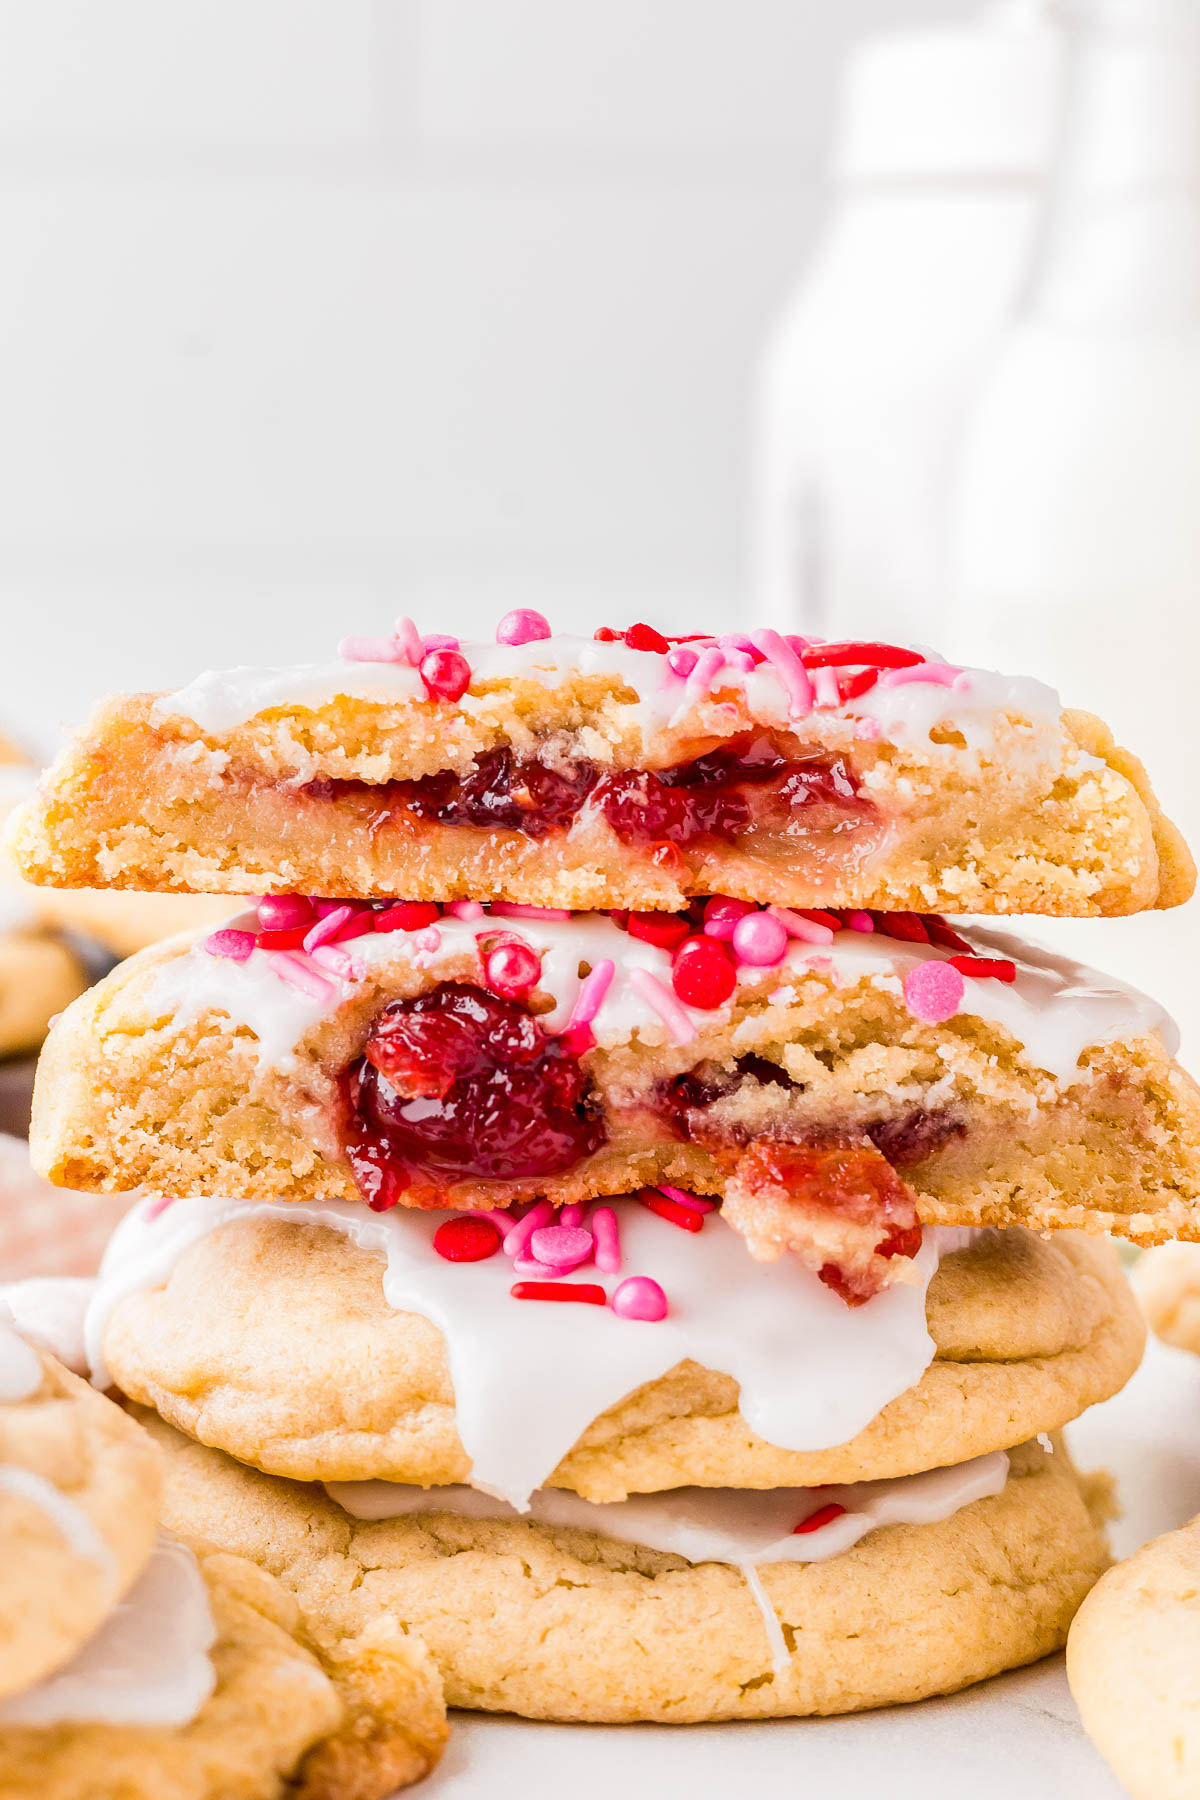
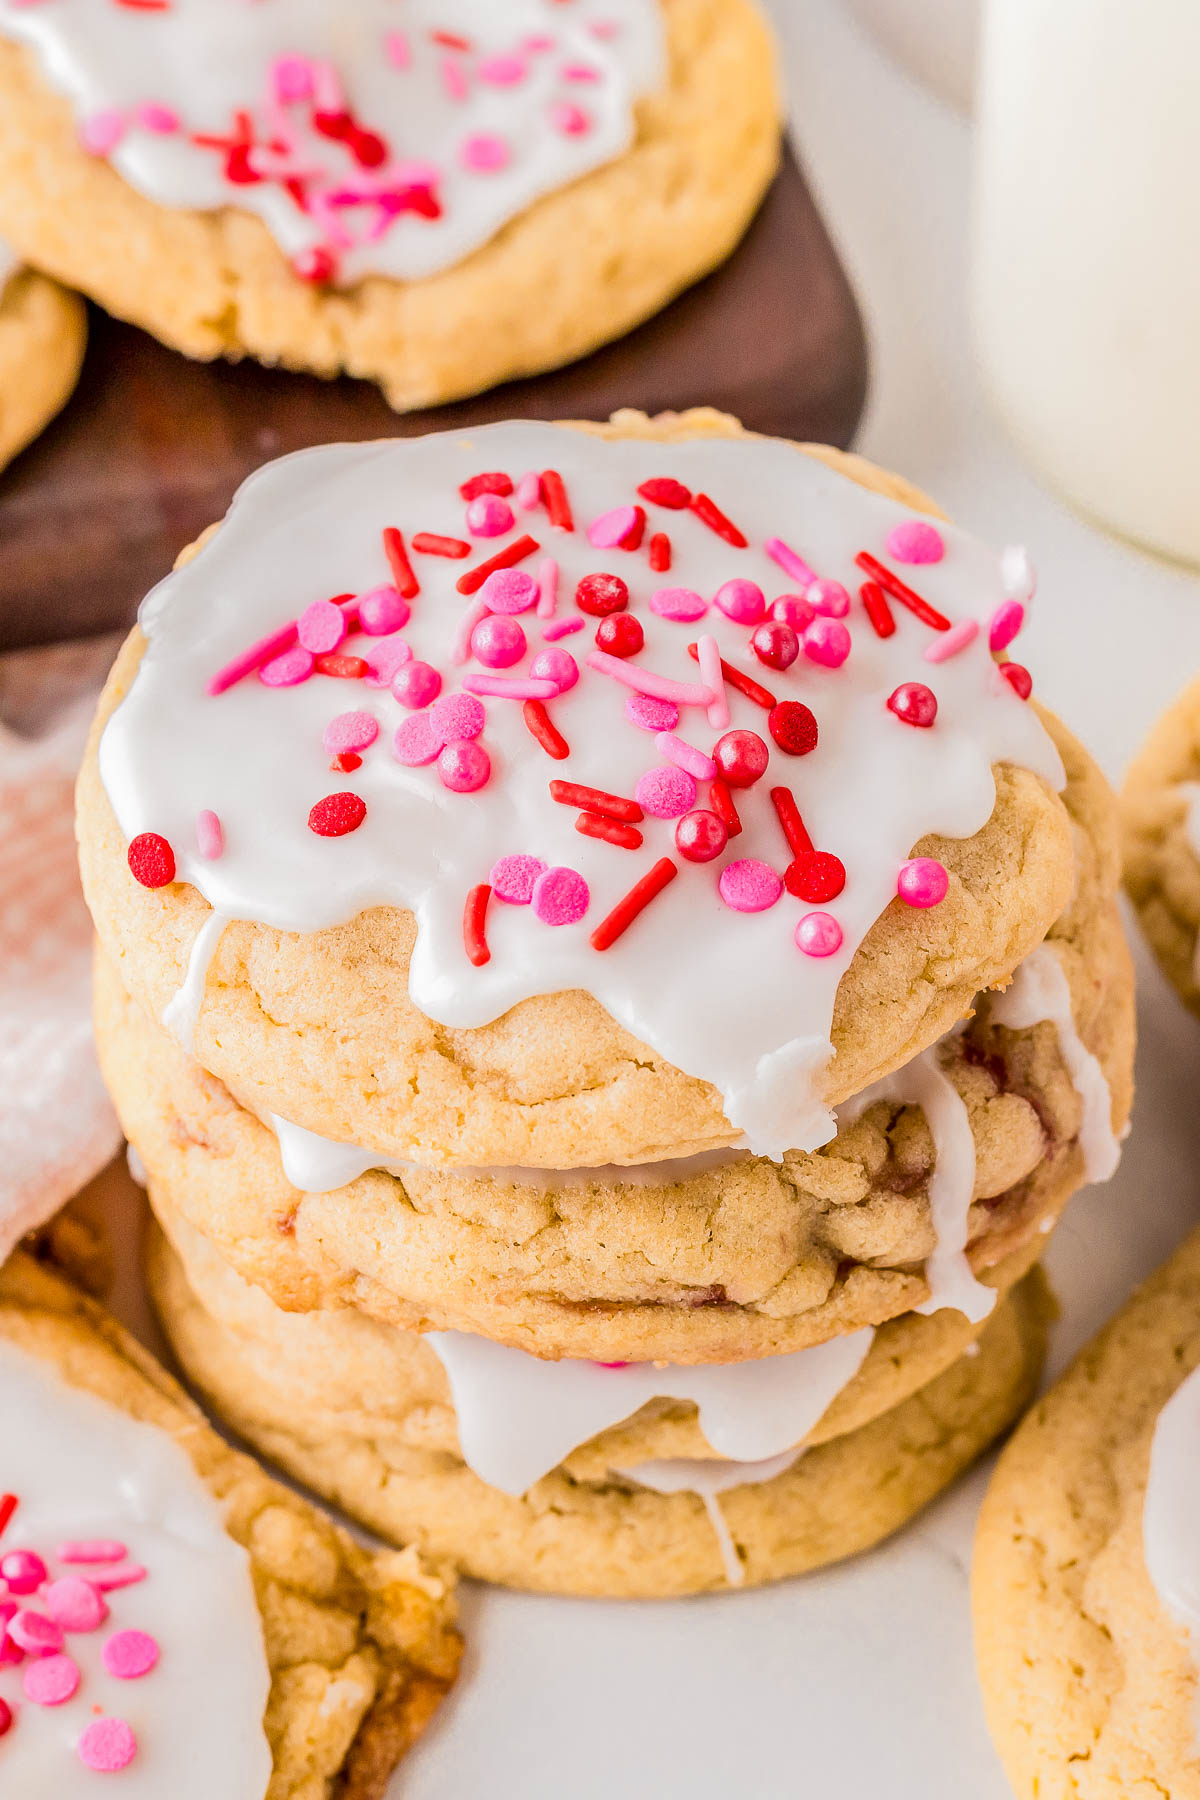
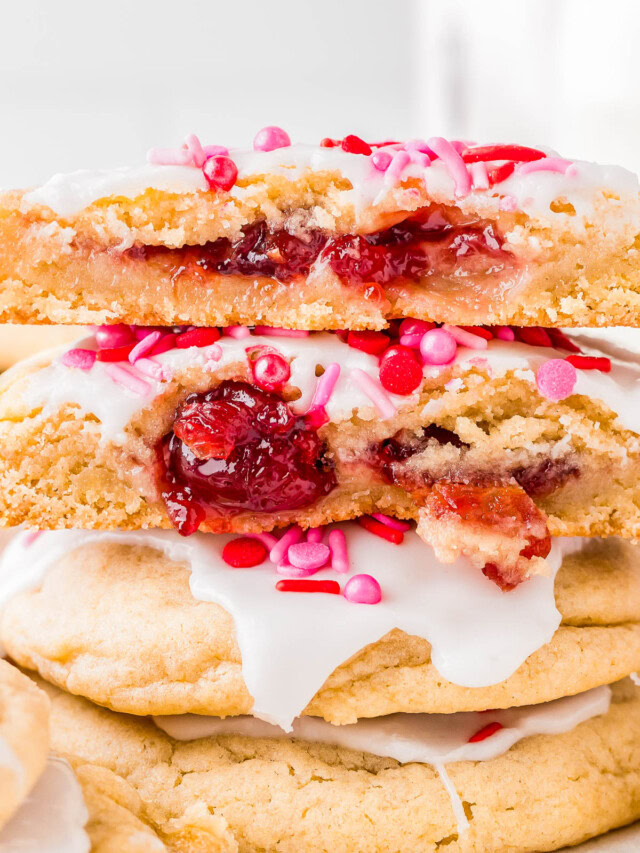
- Soft and chewy, buttery cookie dough is stuffed with cherry preserves. The combination is incredible and kids and adults alike will adore these cookies! Want to use another flavor of jam? You can – check out the FAQs below.
- While it’s optional, I like to glaze the cookies to jazz them up visually and of course, add another layer of flavor. Before the glaze sets is your chance to decorate them with sprinkles or how you’d like.
- They’re easy to make and a fun little cookie to make with kids or grandkids as your helpers!
- The dough only needs to chill for 30 minutes – just about the time it takes for your oven to preheat – so these are ready in no time!
- They remind me of thumbprint cookies which are always a hit.
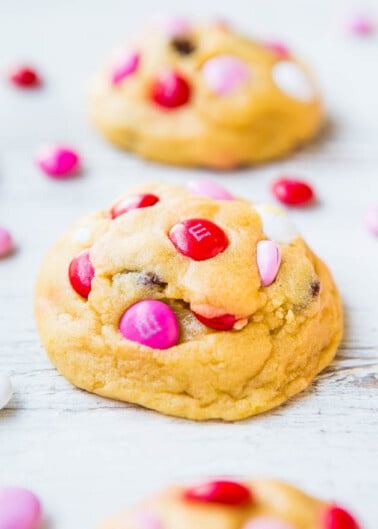
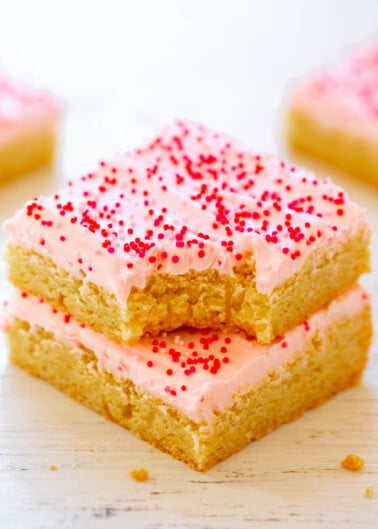
more Easy valentine’s Day Cookies
Ingredients in Cherry Pie Stuffed Cookies and Glaze
Cookies
- Butter – Unsalted butter or salted butter is fine based on how salty-sweet (or not) you like your desserts
- Sugars – Both granulated and light brown sugar are used for texture, taste, and dough consistency and I don’t recommend trying to reduce or change the ratios
- Eggs – You’ll need two large eggs
- Vanilla extract – A must for baking! If you like almond extract, it works really well here too
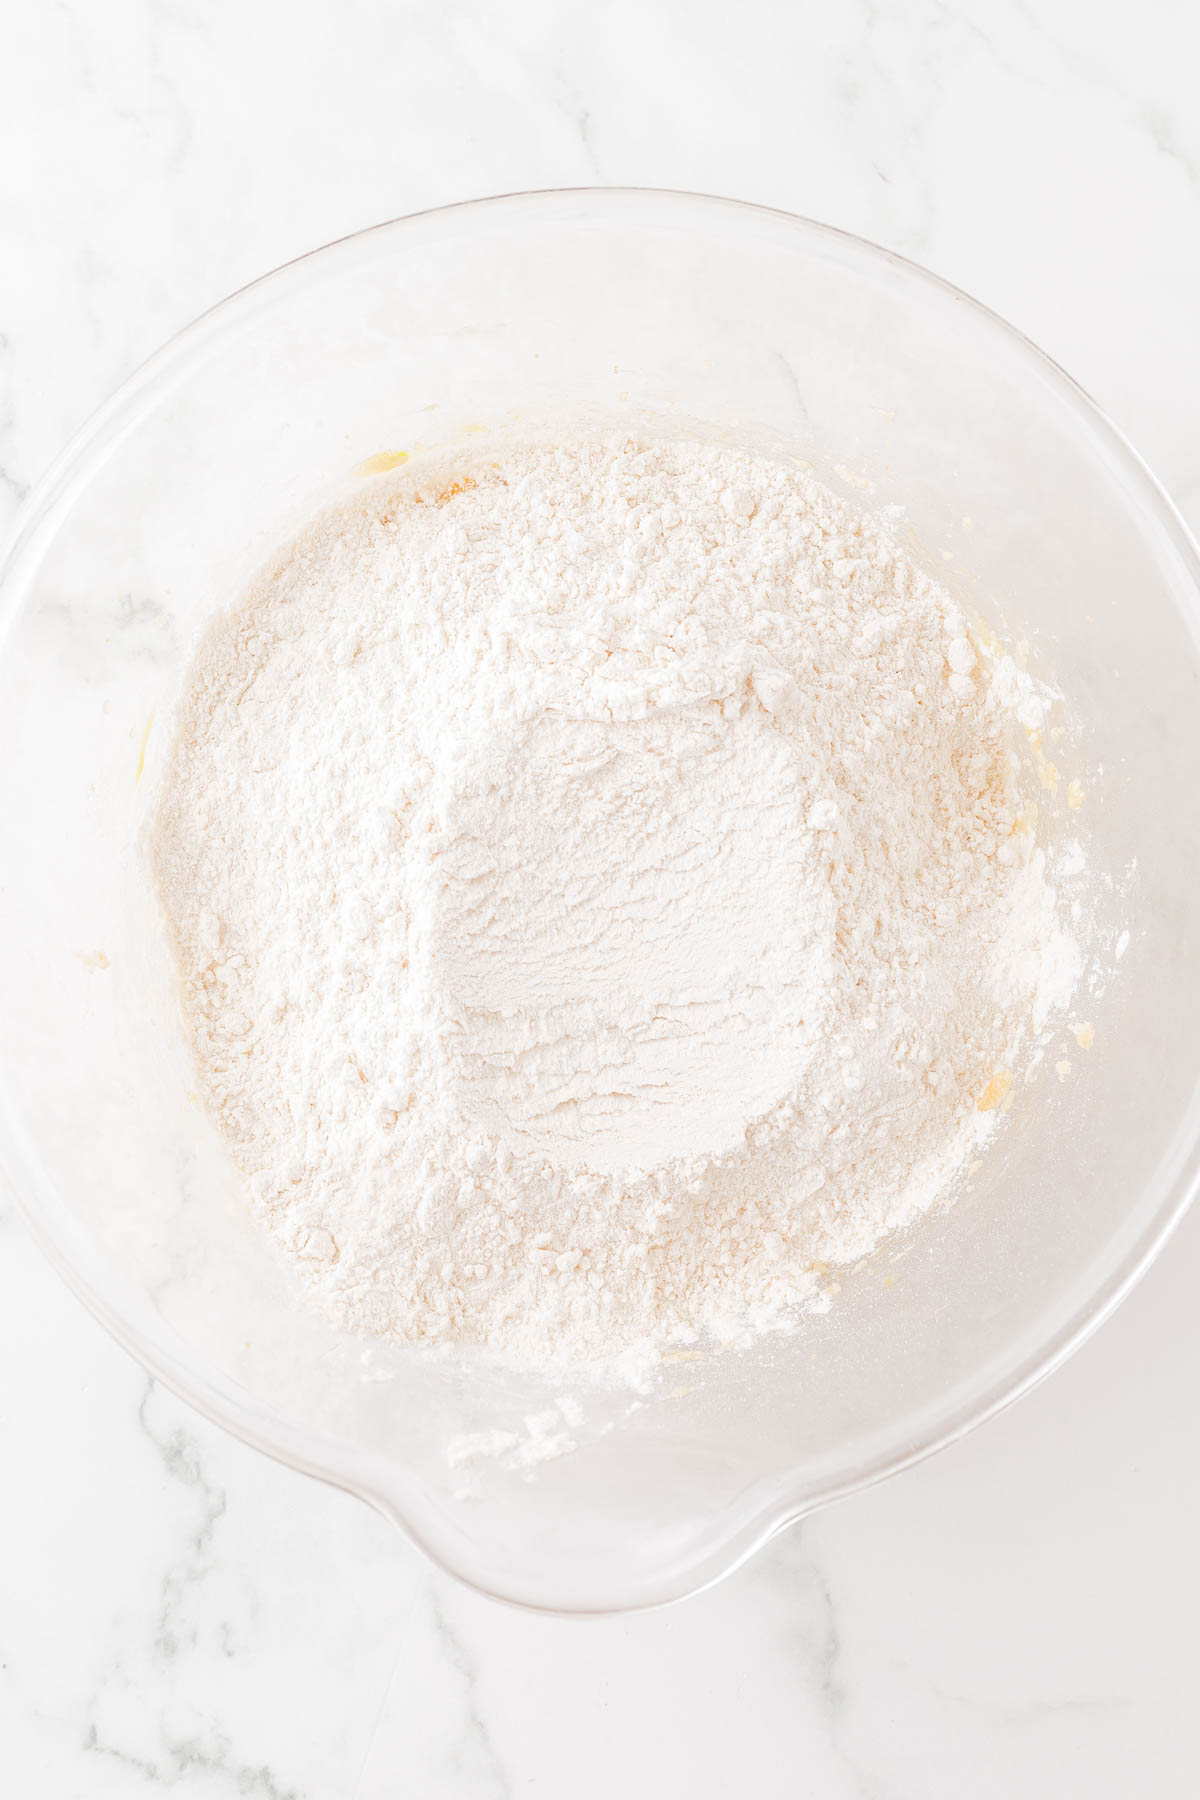
- Dry ingredients – All-purpose flour, baking soda, baking powder, salt
- Cherry preserves – Look for cherry preserves or cherry jam and NOT cherry pie filling. Save the sweet cherry pie filling for actual cherry pie! Cherry jelly is too runny and won’t hold well as the cookies are baking so bypass that too
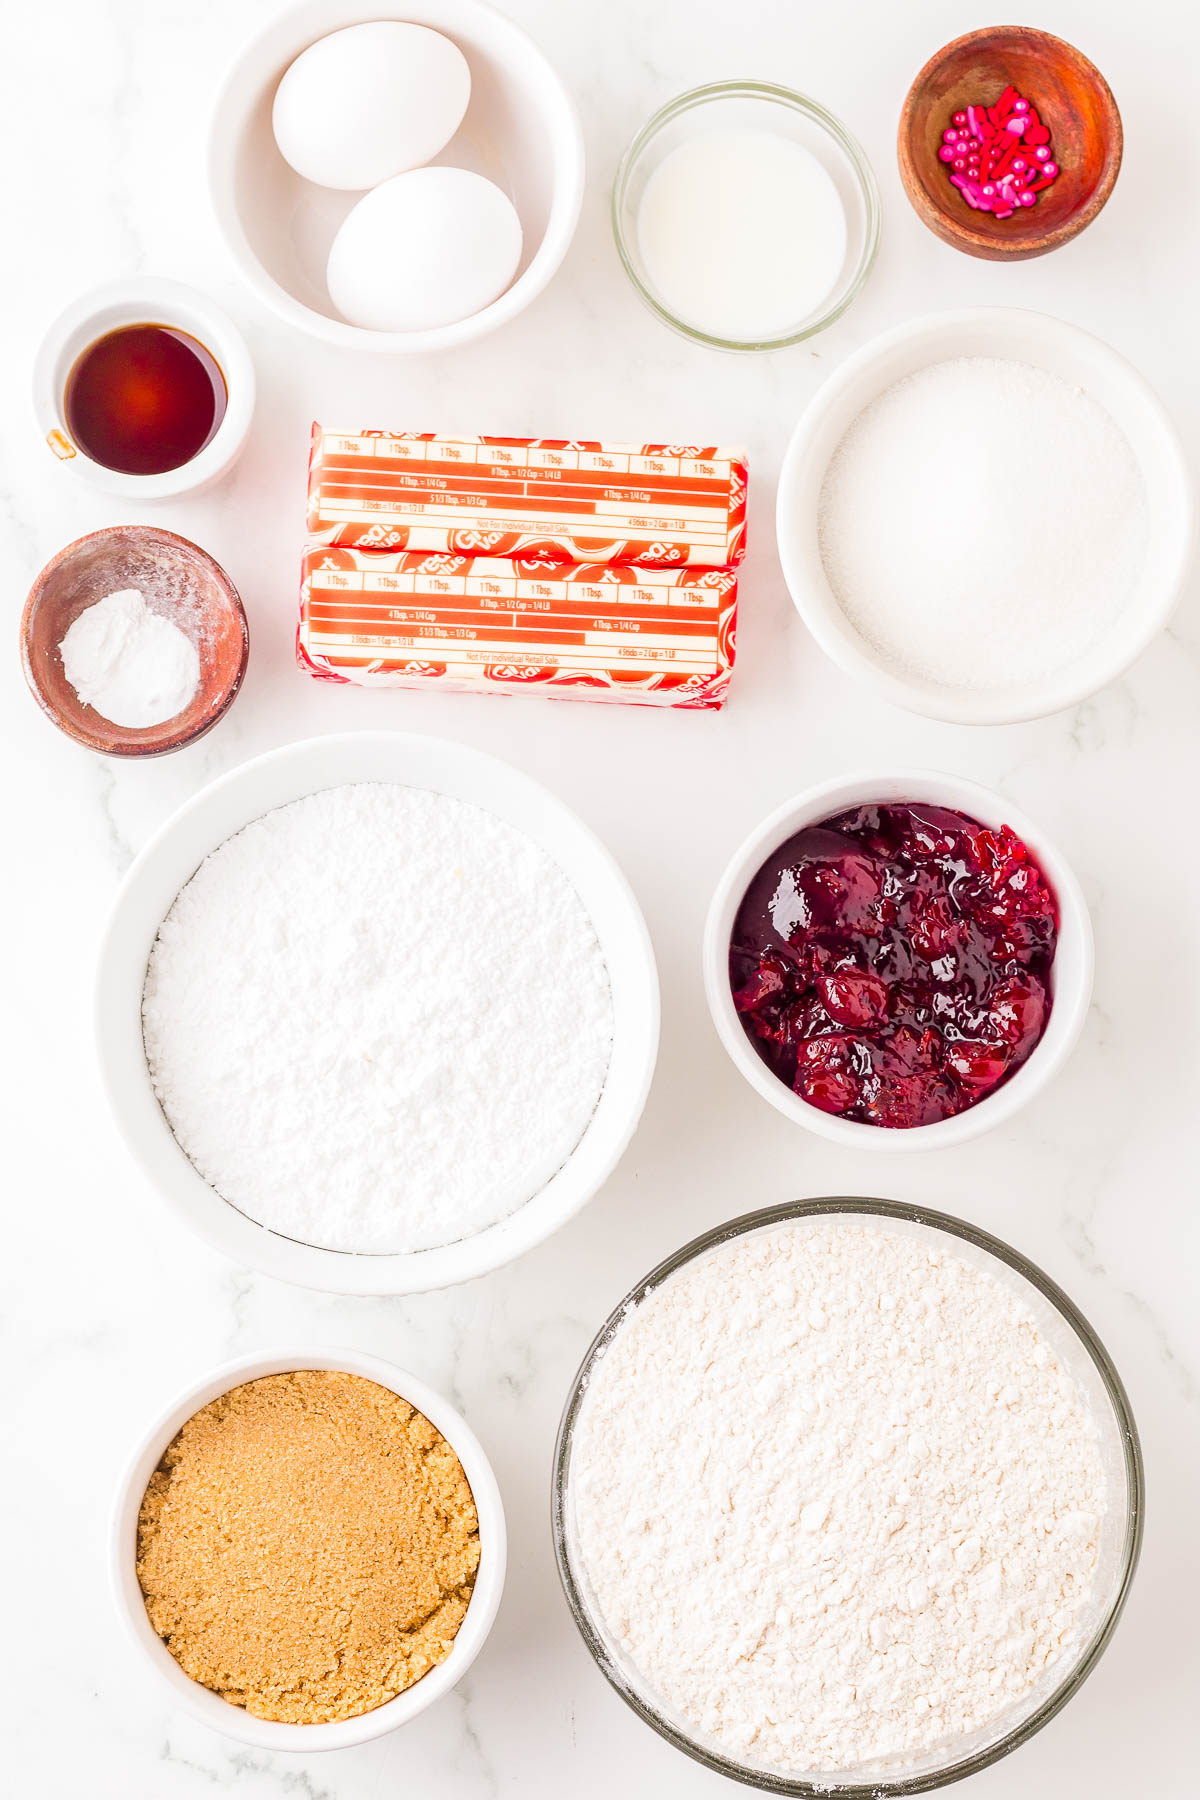
Glaze – Technically optional, but it adds a great touch and is very quick and easy!
- Confectioners’ sugar – Sift if if it’s lumpy
- Milk – Whole milk is preferred although 2% is fine. In a pinch, water will even work
- Vanilla extract
- Sprinkles – Optional for decorating. See Tip below
Note: Scroll down to the recipe card section of the post for the ingredients with amounts included and for more complete directions.
How to Make Cherry Pie Filling Cookies (Cherry Pop Tart Cookies)
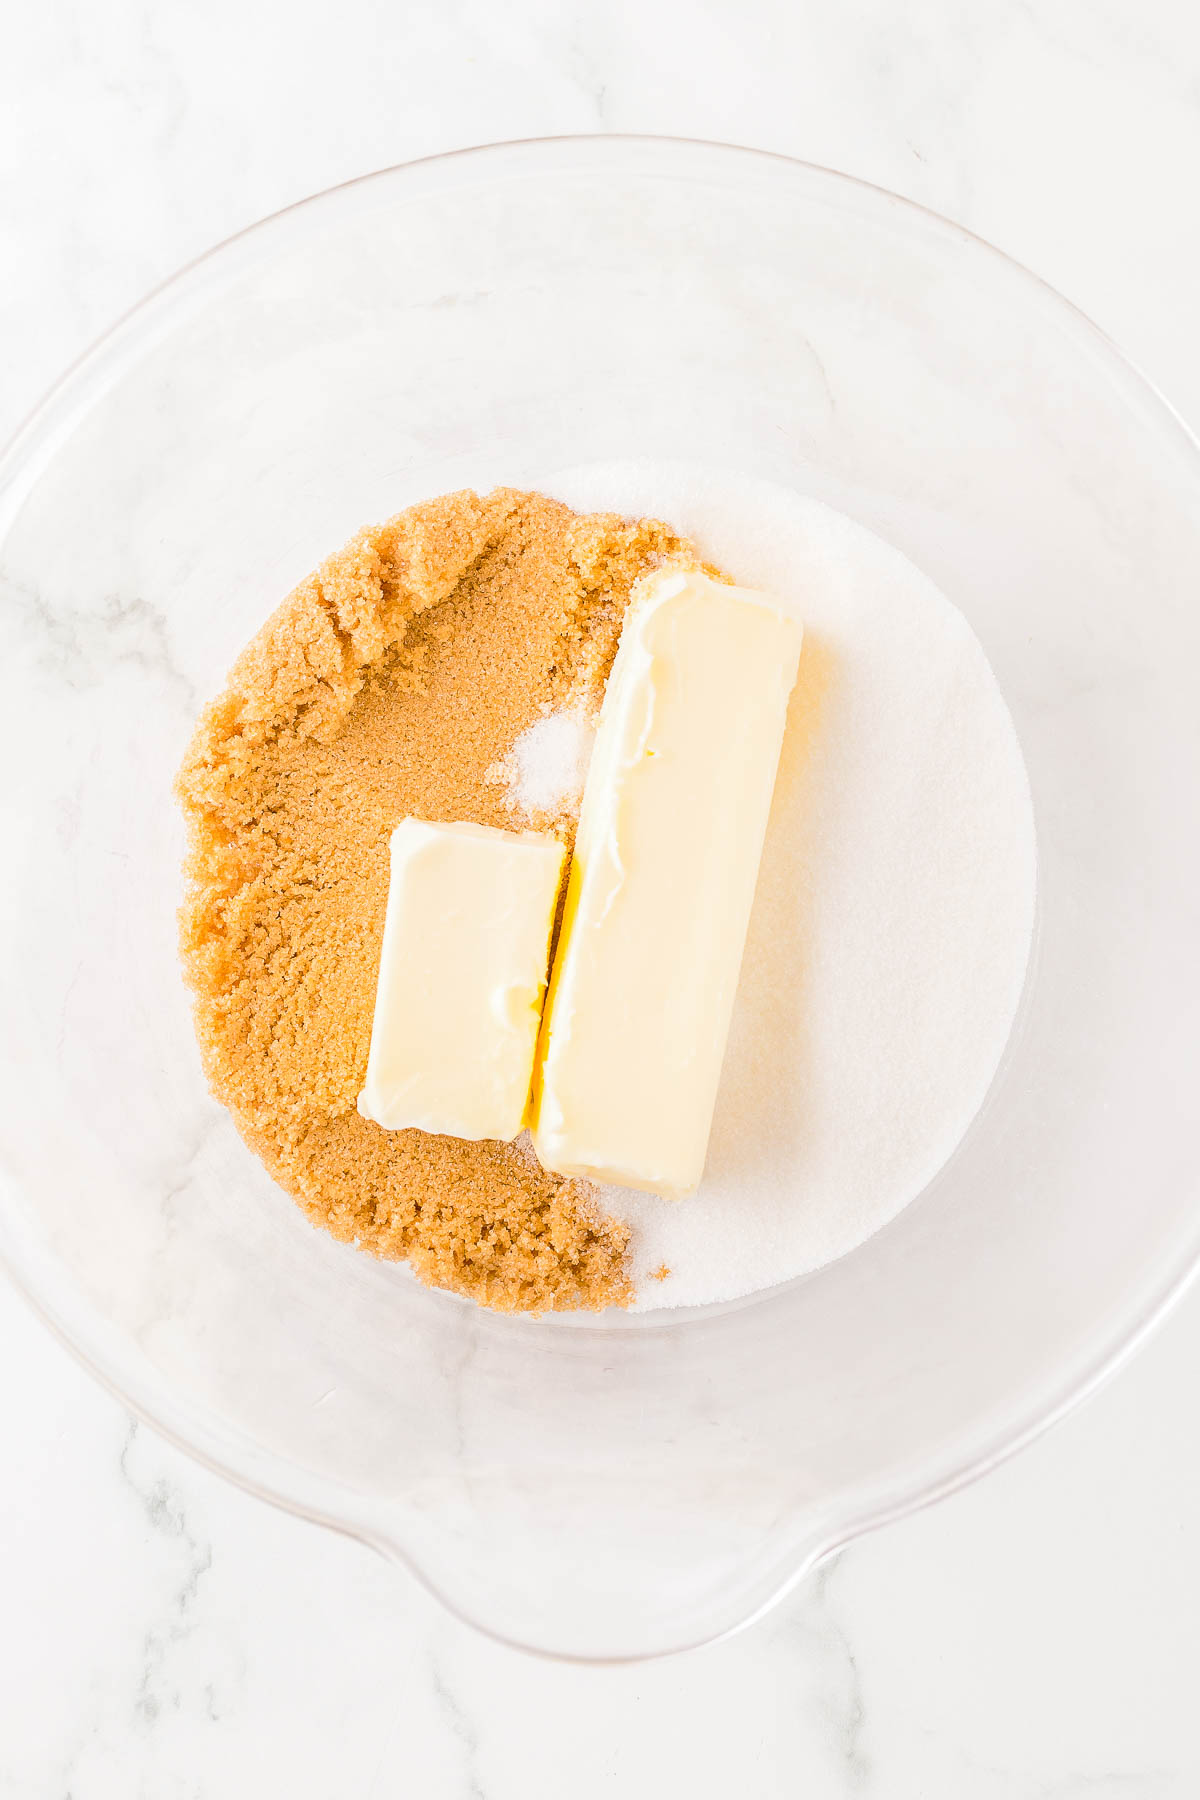
- Cookies: To a large bowl and using a hand mixer, or the bowl of a stand mixer, add the butter, sugars, and cream for about 2 minutes until light golden brown in color.
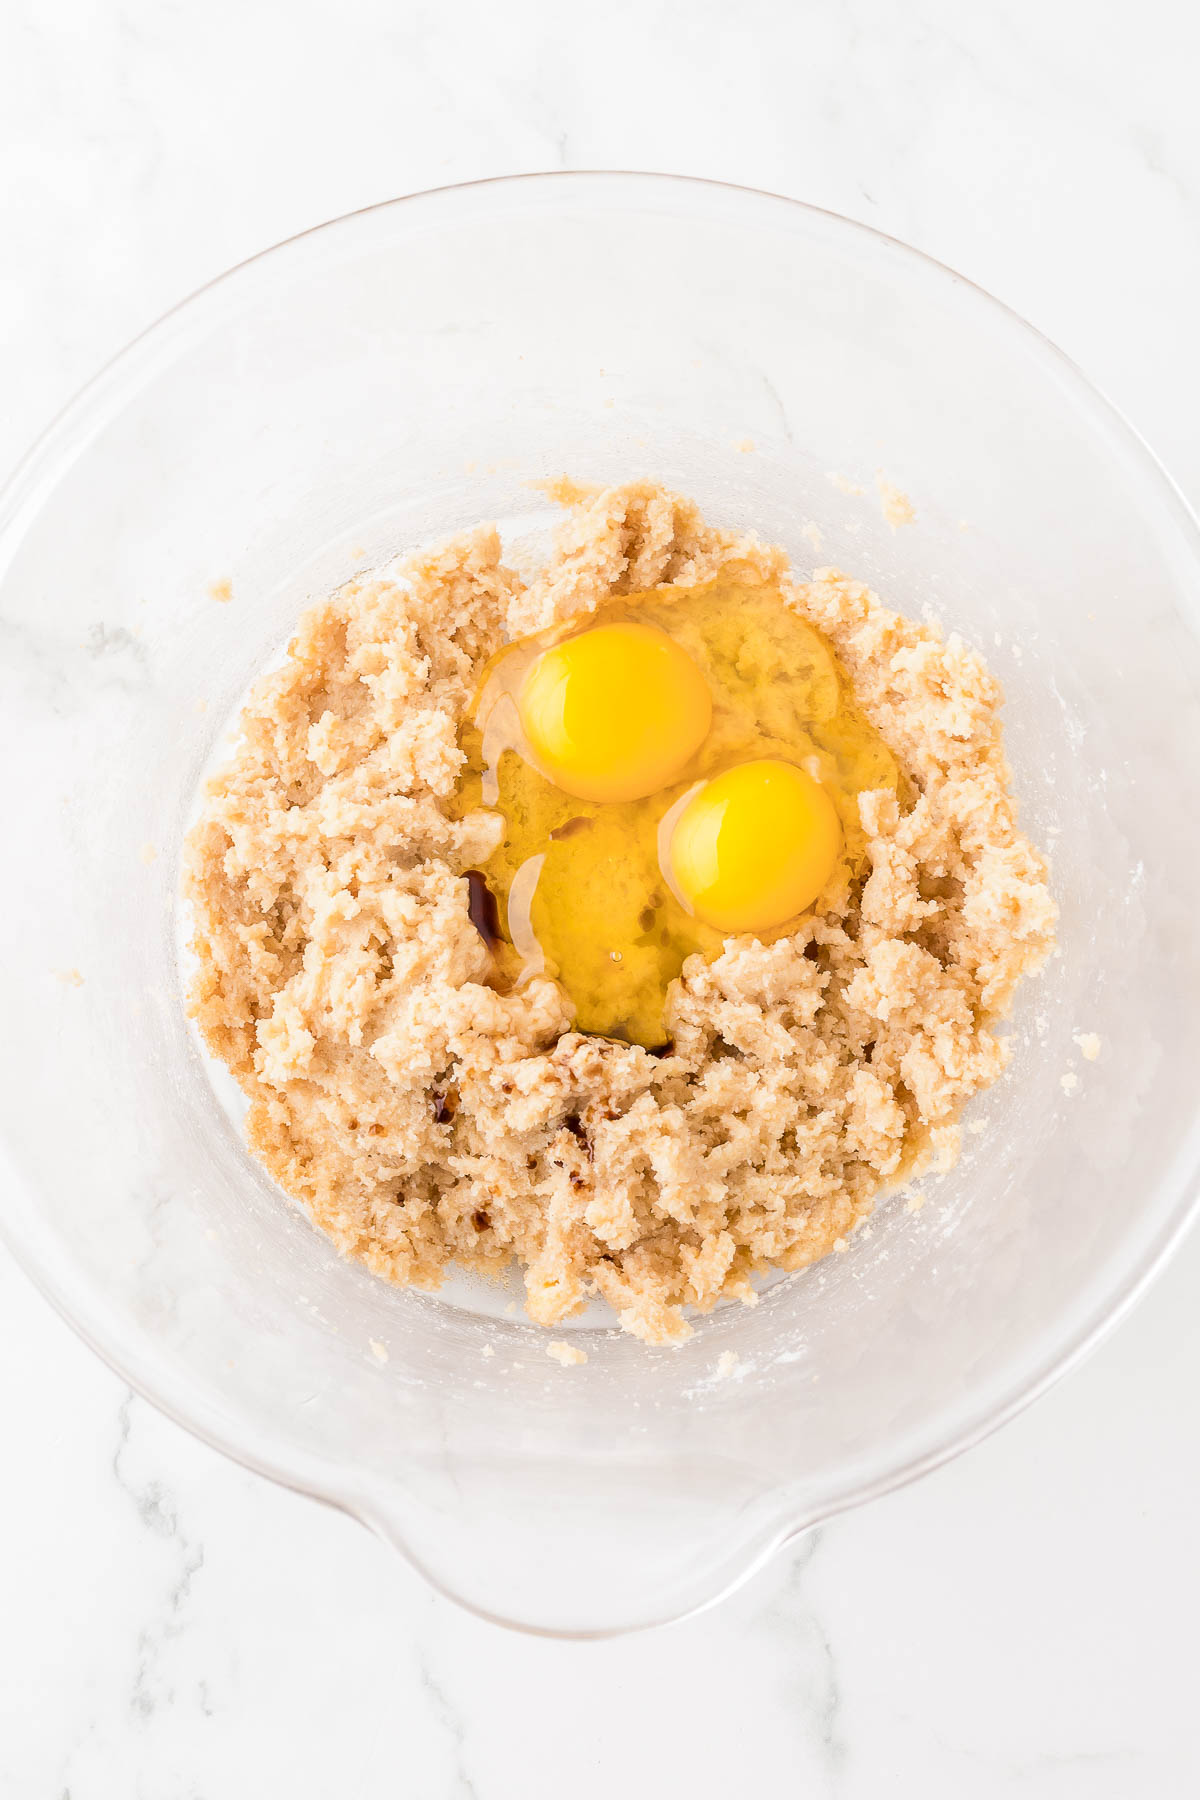
- Add the eggs, vanilla, beat again. Then add the dry ingredients and beat to just incorporate them into the mixture.
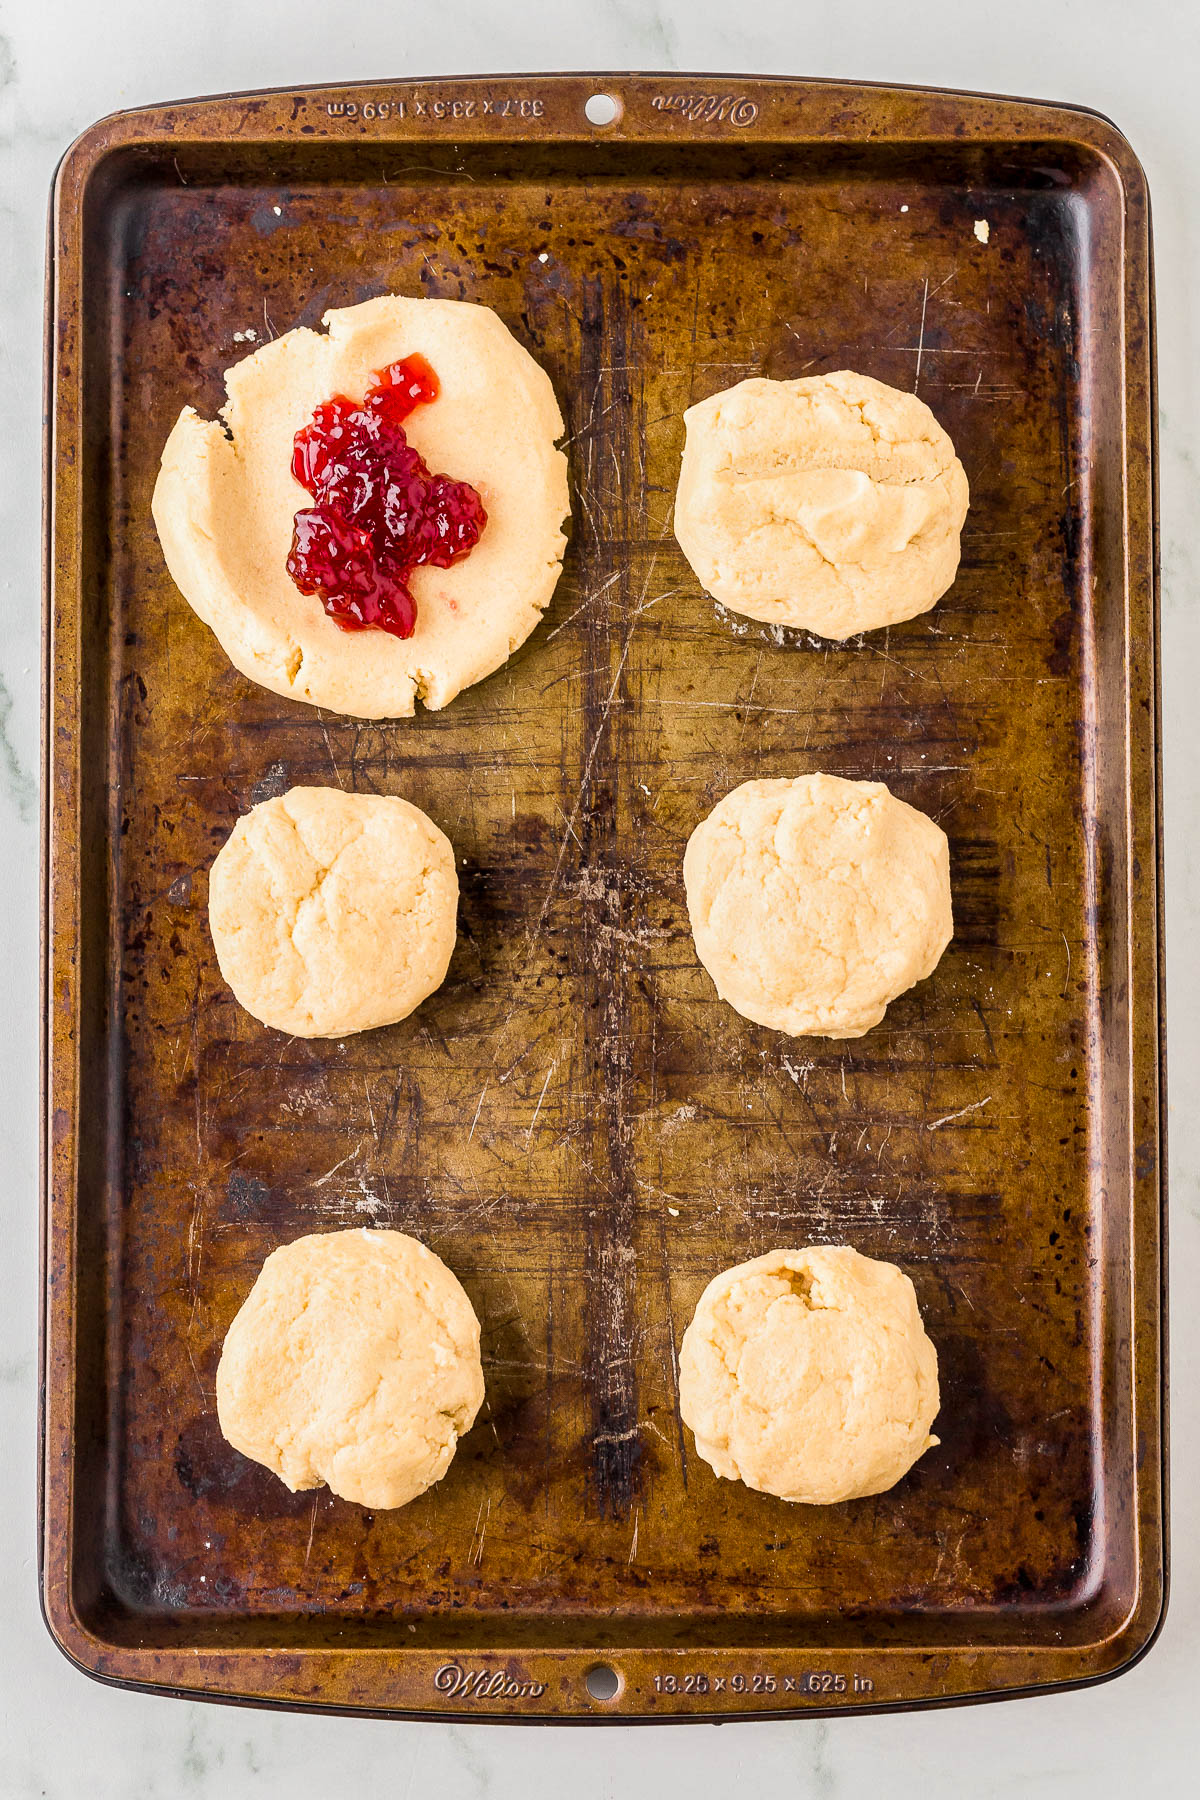
- Divide the dough in 12 cookie dough balls, flatten into discs, put a dollop of the cherry preserves in the center of each, fold the dough over the cherry preserves to seal it fully.
- Chilling: Chill the dough for 30 minutes while your oven is preheating to 350F (don’t skip this or cookies will spread) place chilled dough on a Silpat lined or parchment lined prepared baking sheet, and bake the cookies for about 12 minutes. Cool on a wire rack.
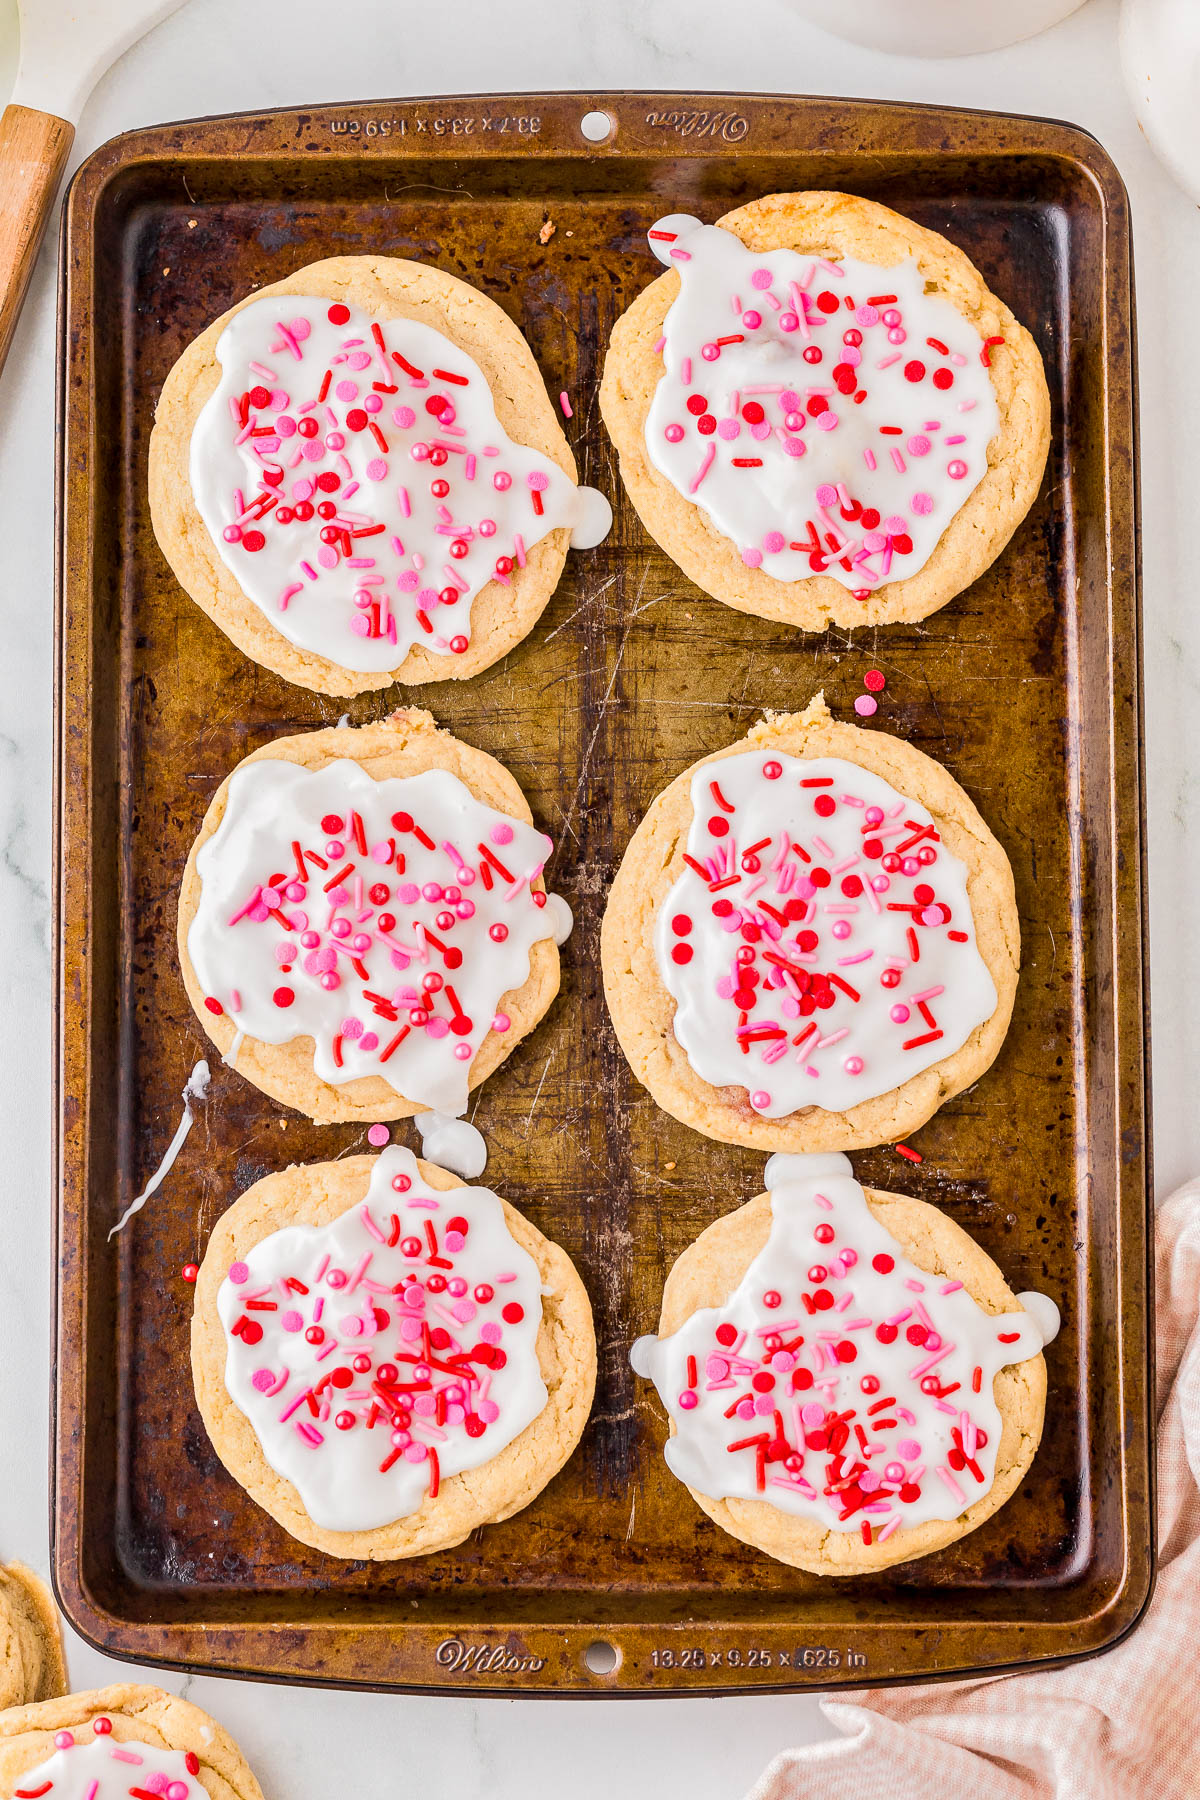
- Optional glaze: While the cookies bake, in a separate bowl, whisk together all the glaze ingredients. When the cookies have cooled fully, drizzle glaze over the tops, sprinkle, and enjoy.
Storage
At Room Temp: Cookies recipe will keep in an airtight container for up to 5 days. I am comfortable storing glazed items at room temp but if you’re not, I would skip the glaze. I don’t recommend storing cookies in the refrigerator because they dry out.
In the Freezer: Baked cookies will keep airtight in the freezer for up to 3 months. However, I wouldn’t glaze them if you plan to freeze them. Glaze them after they thaw. I haven’t ever tried freezing unbaked cookie dough that’s stuffed with cherry pie filling. It will probably be fine, but I haven’t tested it.
Recipe FAQs
Yes you do or the cookies will spread and in other recipes where there’s no cherry preserves involved in the center, it’s not that big of a deal. However, in this case, you’ll then be dealing with a real mess and with cookies that are inedible as it’s likely the cherry preserves will burn badly. Only 30 minutes is needed, no biggie, and it’ll likely take your oven nearly that long to come up to temperature anyway.
Even though these cookies are on the larger side, similar to bakery style or Crumbl cookies, it’s practically obligatory to make them this size in order to add enough cherry jam so that the flavor comes across and then so that you have enough dough to work with to seal it well inside the center of each cookie. You could try to make smaller cookies, although I never have.
Yes, no problem. Double everything, or halve everything. Baking temp will remain the same and unless you’re baking tons of cookies all at once, the time should remain the same too.
Of course! Other types of berry preserves (strawberry, blueberry, raspberry, mixed berry, peach, etc.) all work well. Make sure that you’re using a whole berry or chunky type of preserves or jam.
Jelly = smooth, no chunks of fruit, so avoid jelly as it tends to just seep out and create a mess.
Stuffed Cherry Pie Cookies
Ingredients
Cookies
- ¾ cup butter, softened (I use unsalted but if using salted omit the added salt)
- ¾ cup light brown sugar, packed
- ¾ cup white granulated sugar
- 2 large eggs
- 2 teaspoons pure vanilla extract, (or sub 1 teaspoon vanilla extract + 1 teaspoon almond extract)
- 2 ½ cups all-purpose flour
- ½ teaspoon baking soda
- ½ teaspoon baking powder
- ½ teaspoon salt
- 1 cup cherry preserves, divided, (or cherry jam, NOT cherry pie filling and not cherry jelly
Glaze (optional but recommend)
- 2 ½ cups confectioners’ sugar, sifted if lumpy
- 2-3 tablespoons whole milk, (2% may be substituted)
- ½ teaspoon pure vanilla extract, (or sub with 1/2 teaspoon almond extract)
- Valentine’s Sprinkles, optional and as desired
Instructions
- Cookies – To the bowl of a stand mixer (or large mixing bowl and handheld electric mixer), add the butter, sugars, and beat on high speed until light and fluffy, about 3 minutes. Stop and scrape down the sides of the bowl.
- Add the eggs, vanilla, and beat to incorporate and until light and fluffy, about 2 minutes. Stop and scrape down the sides of the bowl.
- With the mixing running on low, slowly add the flour, baking soda, baking powder, salt, and beat to just incorporate – don't overmix. Dough Tips – Dough should be smooth enough to work with and form into balls and not overly sticky. If for some reason it's sticky, add 1-3 tablespoons flour, 1 tbsp at a time. I don't foresee this to be necessary but if you need this option, now you know what to do.
- Divide the dough into 12 equal sized mounds, roll into balls between your palms, and flatted each about halfway into discs.
- Place the discs on a clean countertop or work surface, and add a dollop (about 1 heaping tablespoon) of cherry preserves or jam to the center of each, and fold the edges into the center to completely enclose the preserves or jam. Tip – It's very important to seal well because you don't want the jam to leak out while baking because not only will it make a mess, it'll be prone to burning.
- Chilling – Place the 12 stuffed dough balls into the fridge and chill for 30 minutes. Do not skip this step or try to game the system and do it in the freezer because they can actually get overly cold.
- While the dough is chilling, preheat your oven to 350F, and line 1 or 2 baking sheets with Silpat baking mats or parchment paper; set aside.
- After the dough has chilled, place the mounds of dough on the baking sheet(s), evenly spaced. Spacing Tips – These are pretty big cookies and I wouldn't be surprised if you can only fit 6-8 per baking sheet, even if you're using half sheet pans. It's better to use 2 sheets than crowd onto 1.
- Baking – Bake the cookies for about 12 minutes, or until the edges are set and the tops are mostly set even if a little glossy. Baking Tips – I tend to pull cookies when they're a bit underdone looking on top because they do firm up as they cool. However, everyone's preferences are different so bake as long as you like and for as long as is necessary in your oven since all ovens, climates, baking sheets, etc. vary. I always rotate my baking sheets once midway through baking. And I prefer to bake 1 sheet of cookies at a time because the sheet on the bottom never turns out as nice as the sheet on top, but it's up to you.
- Cooling – Allow cookies to cool on the baking sheet for about 15 minutes. Make sure they're sufficiently cooled if you're glazing them or it'll just melt and turn into a mess.
- Glaze (optional but recommended) – To a medium bowl, add all the ingredients (except sprinkles), whisk to combine, and if necessary add a bit more sugar/milk to thicken or thin out the glaze, as desired.
- Using a small spoon, drizzle the glaze over the cooled cookies.
- If desired, add sprinkles to the top of each cookie before the glaze sets. Wait about 15 minutes, or until the glaze has set fully before enjoying (or sooner if you don't care about a bit of messiness).
Notes
Nutrition
Nutrition information is automatically calculated, so should only be used as an approximation.
©averiecooks.com. Content and photographs are copyright protected. Sharing of this recipe is both encouraged and appreciated. Copying and/or pasting full recipes to any social media is strictly prohibited.