
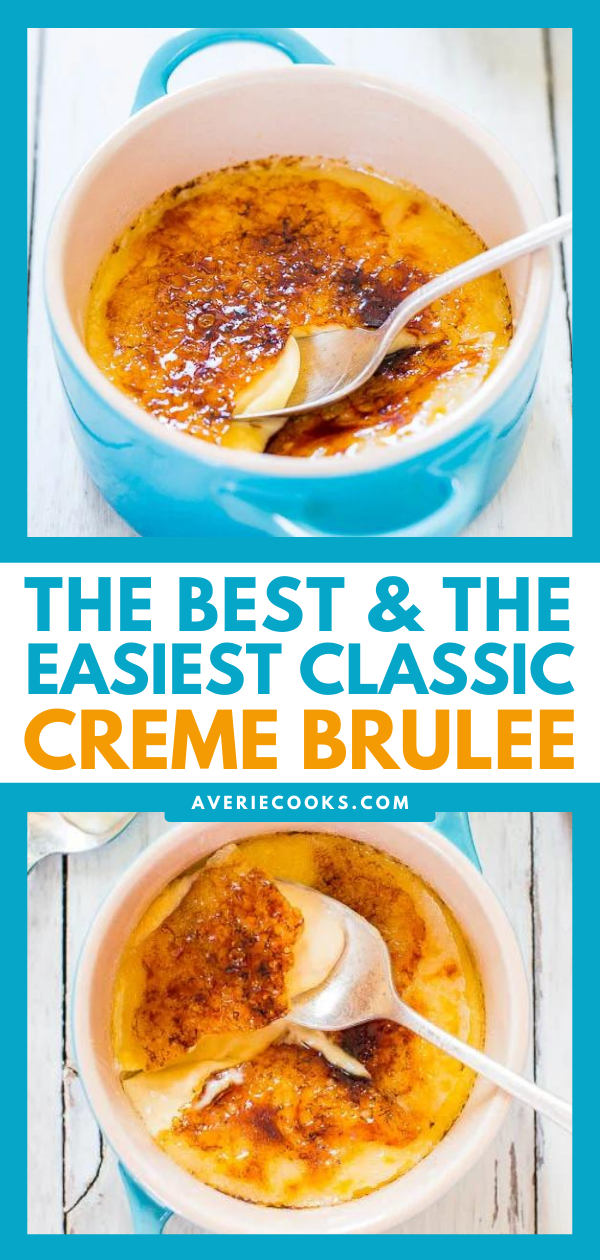
🍮 This Classic Crème Brûlée Recipe is an easy take on the popular dessert that doesn’t require a candy thermometer or stand mixer and isn’t doctored up with specialty flavorings. It’s simple, delicious, and always a crowd favorite!

Easy Crème Brûlée Recipe
After years of blogging and writing cookbooks, I thought we’d tried every dessert. So when I asked my family what they wanted most, I expected vague answers, not crème brûlée.
Custardy desserts, like caramel flan and New York cheesecake, have never been a favorite of his, but after ordering it at business dinners, it quickly became a new obsession. That meant I had to recreate a classic crème brûlée at home.
Most recipes I found were overly fussy, requiring special tools and tedious steps. This version keeps things simple while delivering the rich, creamy texture and crisp caramelized sugar topping that makes crème brûlée so irresistible. Unlike other crème brûlée recipes, my version:
- Is made with no thermometer or stand mixer needed
- Offers classic vanilla flavor without any unnecessary add-ins
- Features a smooth, creamy custard with a crisp brûléed top
- Is perfect for dinner parties or make-ahead desserts
My family says it rivals restaurant versions and keeps asking when I’m making it again!
Ingredients You’ll Need
To make the best crème brûlée recipe, you’ll need:
- Heavy whipping cream
- Egg yolks: Discard the egg whites, or use them for a different recipe
- Granulated sugar and superfine sugar
- Vanilla extract
- Salt
Note: Scroll down to the recipe card section of the post for the ingredients with amounts included and for more complete directions.
How to Make the Best Creme Brulee Recipe
This classic creme brulee recipe couldn’t be easier to make!
- First, place 6 small ramekins (I use Le Creuset 8-Ounce Round Covered Ramekins. You can also use a larger but shallow baking dish, adjusting baking time as necessary, and although you won’t have individual portions, it’ll work.) inside a 9×13-inch baking dish (you’ll fill this later with water to make a water bath).
- Next, heat the cream until it just starts to bubble — don’t let it come to a boil! Meanwhile, whisk together the egg yolks and sugar until fluffy and pale in color.
- Slowly pour the hot cream over the egg yolk mixture, whisking constantly the entire time. Stir in the vanilla and salt, then divide the mixture between the ramekins.
- Fill the 9×13-inch baking dish with hot water until it almost reaches the top of the ramekins. Then, bake the crème brûlée until you achieve a thick custard with a slight jiggle to it. Once they come out of the oven, they’ll need to cool on your counter for an hour before being transferred to the fridge.
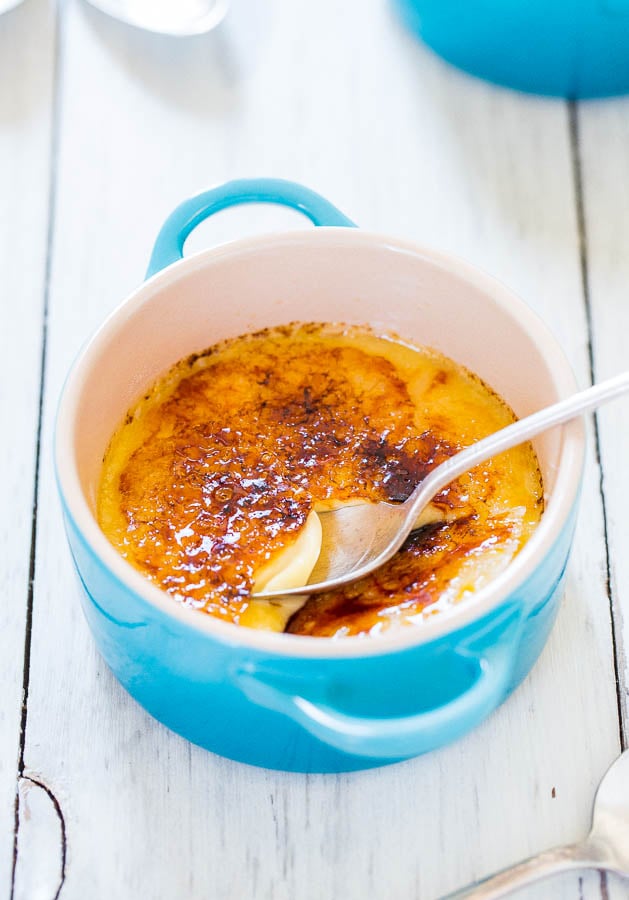
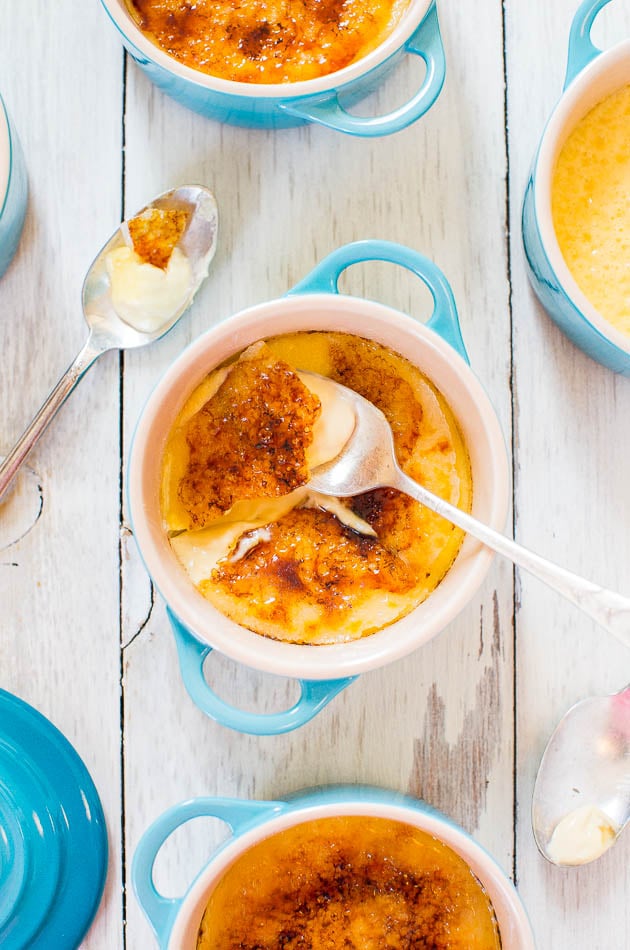
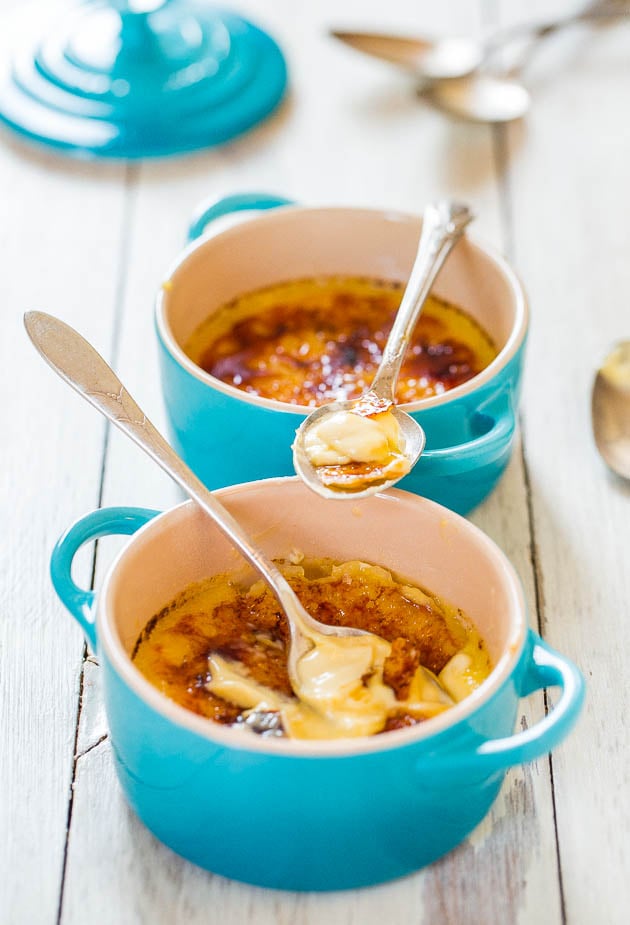
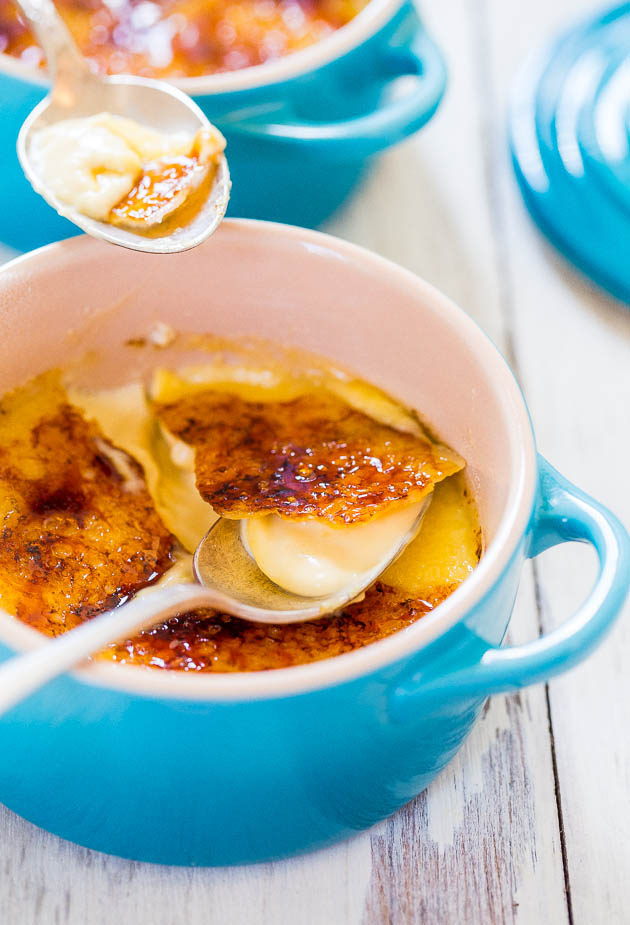
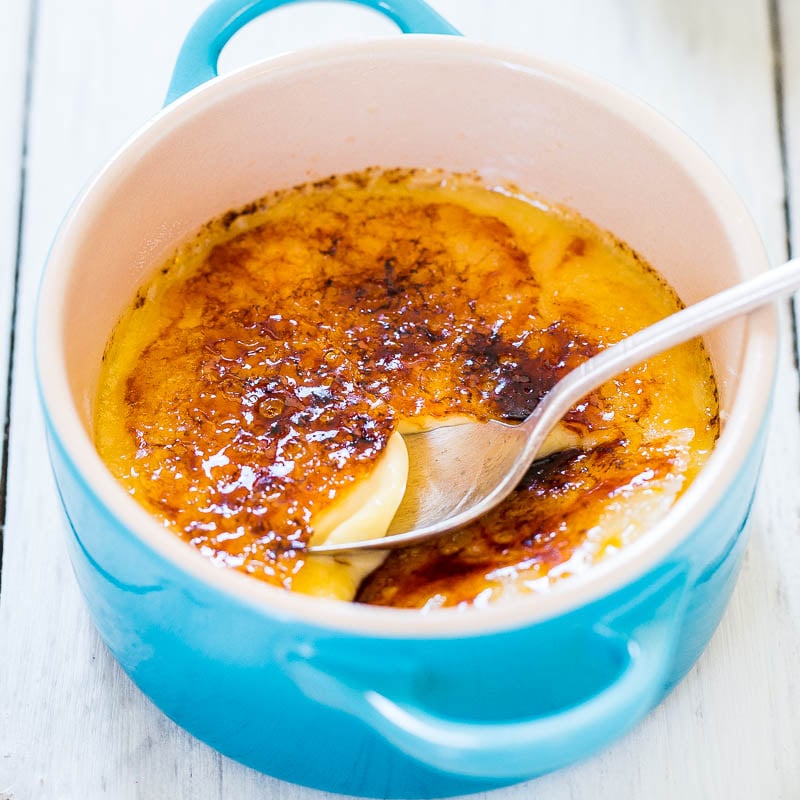
- Top each ramekin with a thin layer of superfine sugar, and use a kitchen blowtorch to gently caramelize the top. You could try to caramelize the top sugar layer under the broiler, but it’s unreliable, and you can easily burn all your precious work in seconds. I recommend a torch.
Can I Prep This in Advance?
Yes! Crème brûlée is a great party dessert because you can make it up to three days in advance, keep it chilled in the fridge, and sprinkle it with sugar right before serving and torch it in front of your guests. Super impressive and memorable for them, but easy for you.
The Best and The Easiest Classic Crème Brûlée
Equipment
- 6 Ramekins
- 1 Microwave-Safe Bowl
- 1 Small Bowl
Ingredients
- 1 pint whipping or heavy cream, 2 cups
- 4 egg yolks from large eggs
- ¼ cup granulated sugar
- 1 tablespoon vanilla extract
- pinch salt, optional and to taste
- about 3 to 4 cups water, for water bath
- 1 to 2 teaspoons superfine sugar per each ramekin, for caramelizing (granulated may be substituted but superfine melts more smoothly and evenly)
Instructions
- Preheat oven to 300 degrees F. Place 6 ramekins in a 9×13 pan or large baking pan that will be used for a water bath. Spray ramekins with non-stick cooking spray; set aside.
- Add the cream to a 2-cup glass measuring cup or microwave-safe bowl. Heat on high power until cream begins to bubble just a bit, but don’t let it come to a full boil; it took 3 1/2 minutes in my micro (or heat cream over medium heat on the stove, about 10 minutes). Remove cream from micro; set aside to cool.
- Crack the eggs into a small bowl and with clean hands, pick out the yolks and put them in a large bowl. I find picking out the yolks very carefully with my fingers is the easiest way to separate whites/yolks, but separate them as you prefer. Use the whites for another recipe or discard.
- To the large bowl with the yolks, add 1/4 cup granulated sugar, and whisk vigorously for 3 to 4 minutes until the mixture is lighter and paler in color, and has fluffed in volume. Your shoulder should be burning; use an electric mixer if you wish, or burn some calories, save dishes, and whisk by hand; set aside.
- With a spoon, remove any skin that’s formed on the cream. It will be quite warm, but not scalding; it should read 165F max on a thermometer.
- Very slowly pour about 1/4 cup of cream into the eggs, whisking the whole time. This is tempering the eggs (getting them used to the warm cream) so you don’t scramble them.
- Continue pouring the cream into the eggs very slowly, whisking the whole time.
- Add the vanilla, optional salt, and whisk to combine. Some recipes call for straining the mixture through a fine sieve now, but I find there’s no difference so I skip straining.
- Evenly pour mixture into prepared ramekins; set aside.
- Add 2 cups water to 2-cup glass measuring cup and microwave on high power until boiling, about 4 minutes.
- Slowly and carefully pour the hot water into the 9×13 pan. The water creates a water bath so the crème brûlée bakes more evenly. Make sure the water isn’t being poured onto or splashing into the ramekins. Top off with more very hot tap water until the water level in the pan is about as high as the level of crème brûlée inside the cups.
- Bake for 40 to 45 minutes, or until set with some jiggle. Baking time will vary widely based on pan size, if you’re baking 4 to 6, level of water in water batch, type of ceramic the ramekins are made of, climate and oven variances, and personal preference. Use your judgment and bake until done, noting that crème brûlée will set up more as it cools. If you open the oven and gently move the baking pan and the crème brûlée makes a wave-like motion, more than just slight jiggling, they’re not done. They should not be browned, won’t rise, and if testing with a thermometer it should read 150F to 155F for food safety; however I bake until about 170F because at 155F, there’s still too much jiggle for my liking.
- Remove pan from the oven and very carefully with a hot mitt, remove ramekins from water bath and place them on a wire rack to cool completely, about 1 hour.
- Cover them with lids or plastic wrap, and transfer to fridge to chill for at least 3 hours, or up to 3 days in advance.
- Prior to serving, evenly sprinkle each ramekin with 1 to 2 teaspoons superfine sugar. I prefer 2 teaspoons each to achieve an appropriately thick caramelized top layer.
- Using a torch held about 6 inches away from the surface, heat the sugar, making sure to keep the torch moving evenly to prevent burning. When sugar is sufficiently caramelized to your liking, serve immediately.
Notes
- Crème brûlée that has not been sugared/torched will keep in the fridge for up to 3 days.
Nutrition
Nutrition information is automatically calculated, so should only be used as an approximation.
©averiecooks.com. Content and photographs are copyright protected. Sharing of this recipe is both encouraged and appreciated. Copying and/or pasting full recipes to any social media is strictly prohibited.
More Special Occasion Desserts:
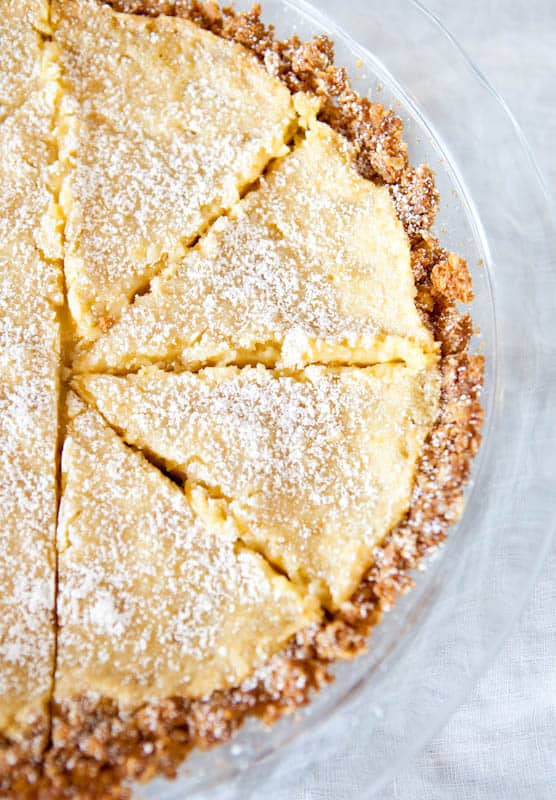
Crack Pie — There’s a reason this pie has the name it has and it definitely lives up to the hype!
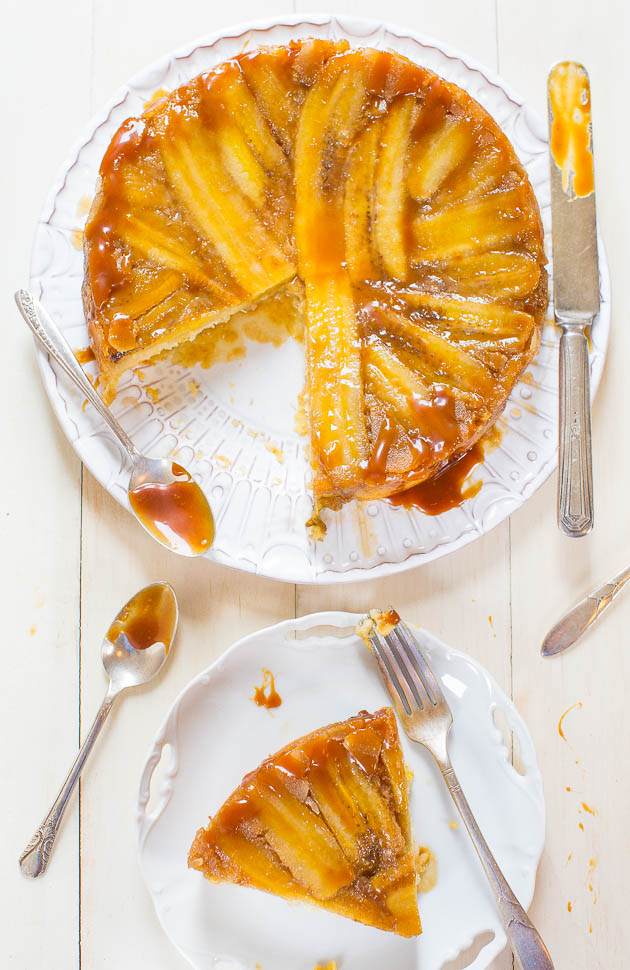
Caramelized Banana Upside Down Cake — This upside down cake is super moist thanks to the combination of sour cream, buttermilk, and vegetable oil. It’s so easy to make, and the caramelized banana flavor is impossible to resist!
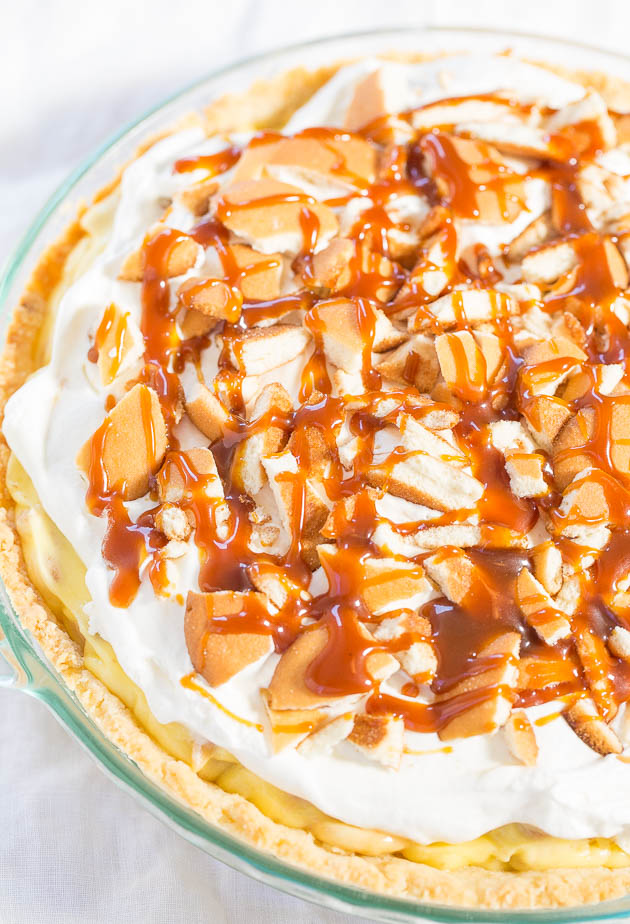
Banana Cream Pudding Pie with Cream Cheese Crust — You’re going to love this quintessential comfort food dessert. It tastes like you slaved over it but it’s one of the easiest pies ever.
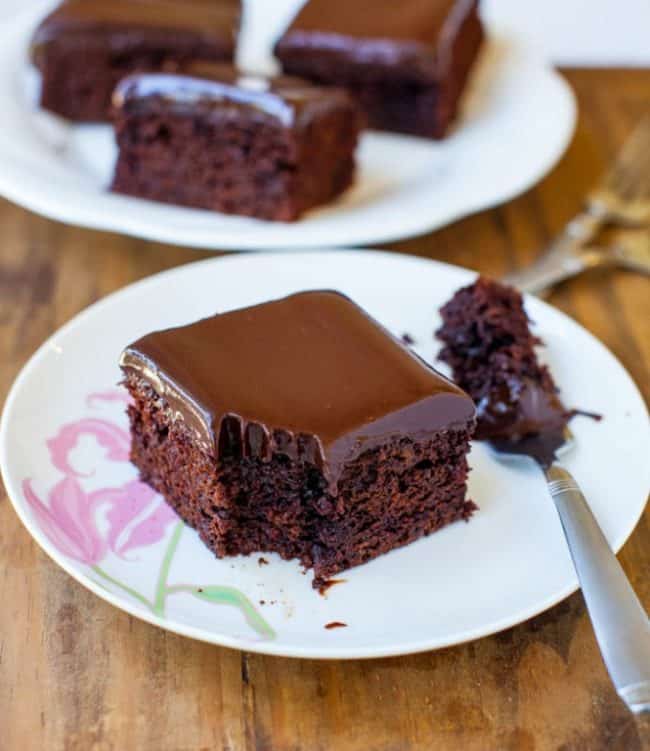
The Best Chocolate Cake with Chocolate Ganache — This truly is the best chocolate cake EVER. It’s topped with a silky smooth chocolate ganache frosting, and it takes just 10 minutes of hands-on prep!
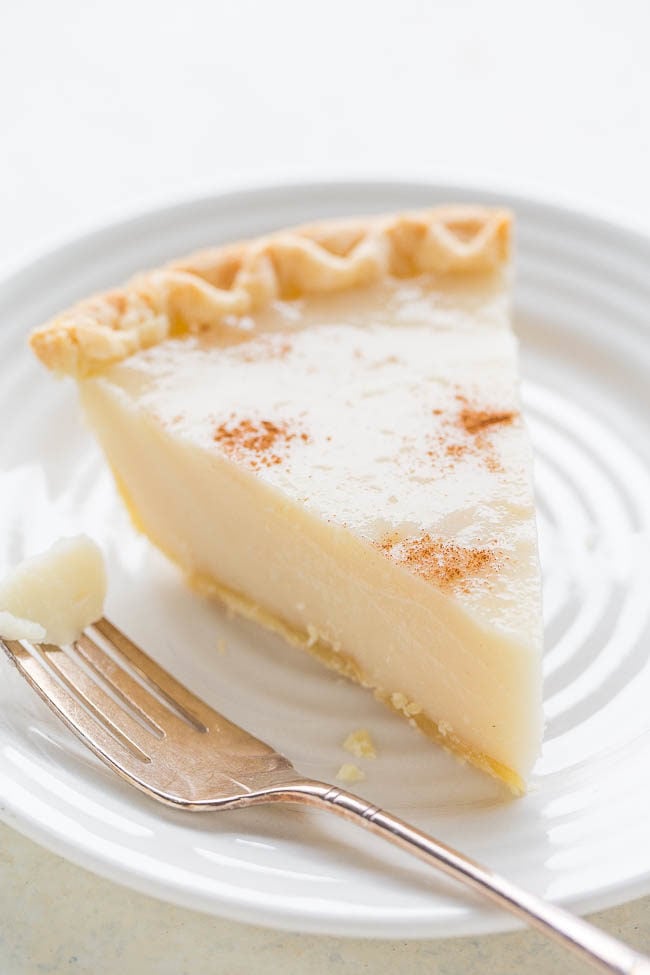
Sugar Cream Pie — This sugar cream pie reminds me a bit of crème brûlée. The filling is custard-like, and when topped with a sprinkle of cinnamon it’s irresistable!
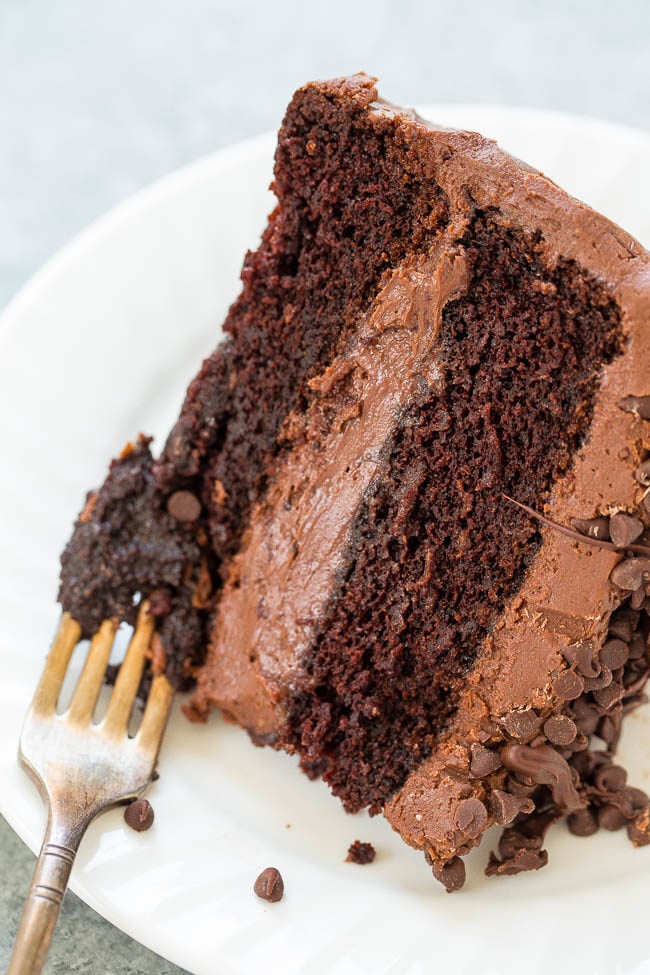
The Best Triple Chocolate Layer Cake — This is the chocolate layer cake to beat out all others. It’s rich, decadent, and everything you want in a triple chocolate cake!

Love this recipe! I always make creme brulee when I have a chance and heavy cream in my house but this recipe is so easy I make it even more!
I did make one tiny little adjustment though, my secret ingredient I always add to any creme brulee recipe, which is spiced rum! It makes it so much tastier in my and my families opinions. The first time I added it they were all oo-ing and ah-ing asking me what I did differently and saying it was the best creme brulee I had ever made!
I can see where some spiced rum would be heavenly!
I think the fact that I made so many changes and it still tasted restaurant quality (I used to serve at a fine dining restaurant where we made out own) speaks to the versatility of this recipe. You could call it “The Best, Easiest, and Most Versatile Creme Brulee”. I was using cheap Costco brand vanilla and I think you could taste the alcohol a bit. I would guess that higher quality vanilla would make a big difference. I passed this around facebook with my high recommendation!
The Best, Easiest, and Most Versatile Creme Brulee <--- apparently, totally true! And cheap vanilla, eeek, yes. You can always taste the alcohol because they go heavy on the cheap booze, low on the high quality expensive vanilla beans. Check this out https://www.averiecooks.com/2012/11/homemade-vanilla-extract.html
And thanks for sharing on FB!
I made this for my own birthday last night. It needed to feed my family of 5 so I doubled it (I wanted leftovers!). This was truly easy to make, and what I particularly appreciated was you use half the sugar that Martha Stewarts recipe uses, and it is still a sweet dessert! The texture was awesome. I have broken most my ramekins over the years so I poured it all into a shallow tart pan and it was perfect. I just had to cook a little longer.
Lastly, should this happen to anyone else, because I doubled it I was 2 cups short of cream (I thought creme brulee was a mix of milk and cream so I didn’t buy enough) and subbed a can of evaporated milk. Honestly, it was so good and you couldn’t tell at all. I agree with a commenter up there that I thought the Tablespoon vanilla was kind of a lot (mine had 2 Tbl since I doubled) but was still good. I will reduce it next time.
Thanks for trying the recipe and I’m glad it came out great for you even with the changes made (doubling, baking in a tart pan, running out of cream and subbing w/ a can of evap milk) – sounds like it all worked out! And yes, half the sugar of Martha’s :) Between the sugar in the batter and then the sugar on top that you torch, it’s still plenty sweet! I am a vanilla lover so if you thought it was a bit much, of course reduce! Happy Birthday and so glad this recipe delivered as a great birthday celebration recipe!
Would like to print recipe but can not find “print recipe” button. How to print just recipe?
Thank you.
Please read over the FAQs https://https://www.averiecooks.com/faq/ for answers to the most common questions.
OH MY GOODNESS! I love creme brulee and I cannot wait to try this recipe. For whatever reason I have never attempted it…I always get it when I see it on a menu!
And I’m with you – don’t do anything fancy to it. Just as it is. Simple.
Hello,
This looks delicioius! I am thinking about making it for my thanksgiving dessert contest that my family does every year. However, we are required to have lemon as an ingredient… Would it completely mess up the recipe if I were to add fresh squeezed lemon juice to it? And if not, how much would you recommend? And at what stage of the cooking process? Hope to hear back soon! Thanks a bunch! xx
I haven’t experimented with adding lemon so really cannot speak to what it will do. In many baking recipes, lemon will curdle milk and is used as a stand-in for buttermilk. I don’t know if that would happen here but it could.
Hmmm.. okay. Well thank you for the quick response and for your honesty! I guess I may just have to experiment :) Have a happy Thanksgiving!
This recipe is by far the best creme brûlée recipe I have come across (and I have come across many) in my search for the best creme brûlée! It’s so much simpler than the other recipes that I’ve tried. No need to boil a vanilla bean, the vanilla extract makes it so much simpler! The texture is beyond perfect- it has a real creme brûlée silkiness, not a watery flan texture like many other “creme brûlée” recipes have. I HIGHLY recommend this recipe to anyone looking for a good creme brûlée! This is the first recipe that I have tried from Averie, and I will definitely try more!!
Thank you for trying this recipe and the glowing praise! First, that it’s the best, second that it’s the simplest, third that the texture is beyond perfect- it has a real creme brûlée silkiness (I agree!) and so glad you’re pleased with this. I really took my time developing this recipe (like, a few years) so I’m glad it came out great for you! If you try other recipes, please LMK!
The tablespoon of vanilla in this recipe is clearly a mistake. I have never used a tablespoon of vanilla in any recipe, ever, and I bake all the time. It colored the egg mixture a light brown; clearly too much. Other recipes call for a teaspoon, or even a half teaspoon. The are still baking; I will see what they taste like, but am expecting an overbearing vanilla flavor!
if you prefer your creme brule warm, do you need to refrigerate it? is refrigerating necessary, or can you torch the tops after it’s cooled down and eat it that way?
I am unsure about room temp storage for a longer duration. To be safe, I personally would store extra in the fridge and then set it out for an hour or two beforehand so it warms up.
I tried this tonight and it was incredible!! Thanks for sharing such an easy recipe, and not too many yolks. It perfectly fit into my 6 (235mL) ramekins and only took around 20 minutes to bake. I won’t even dust nor torch the tops — it is THAT good — thanks again for sharing this. I used “half and half light cream” instead of whipping/heavy cream, delicious!
The fact that you didn’t even need to sugar dust & torch the tops is amazing. So glad you loved it and that half and half works, too!
Hi Averie! How would I adjust the baking time and oven temperature if I were to double the recipe for a 9″ x 13″ baking dish?
I wouldn’t change the temp but not sure how long to bake because I haven’t tried it in a 9×13 pan. I worry a bit that the center would stay loose and jiggly in such large pan. I would probably do a test run of the recipe in an 8×8 pan first and see how that goes before doubling.
Will do! Thanks!
Now how did I miss this dessert perfection! One of my all time favorite treats :)
Thanks, Marla, and I didn’t know you were a big creme brulee fan. Learn something new every day!
Absolutely beautiful!! I love your ramekins and I’m more than smitten with the luscious crème brûlée! wow. If I had enough ramekins (I only have two!) I’d make this right now.
I love making creme brulee – it’s so good! But it always seems like such an effort, so I love how easy you made this. Lately my creme brulee torch has been used more as a marshmallow toaster…but I think it’ll be going back to creme brulee soon! Pinned :)
Thanks for pinning and glad you put your torch to an alternate use – fun :)
Oh man – could these be any more perfect?! And the blue ramekins – just genius! I love how the colors just pop!
I never thought I’d get that much use out of them but so far, they have come in so handy!
One of our favorite desserts. I do have to say there is no comparison to a real vanilla bean. One of the things I love most about creme brulee is the little vanilla seeds. I could never use vanilla extract.
I also never make a ‘flavored’ creme brulee.