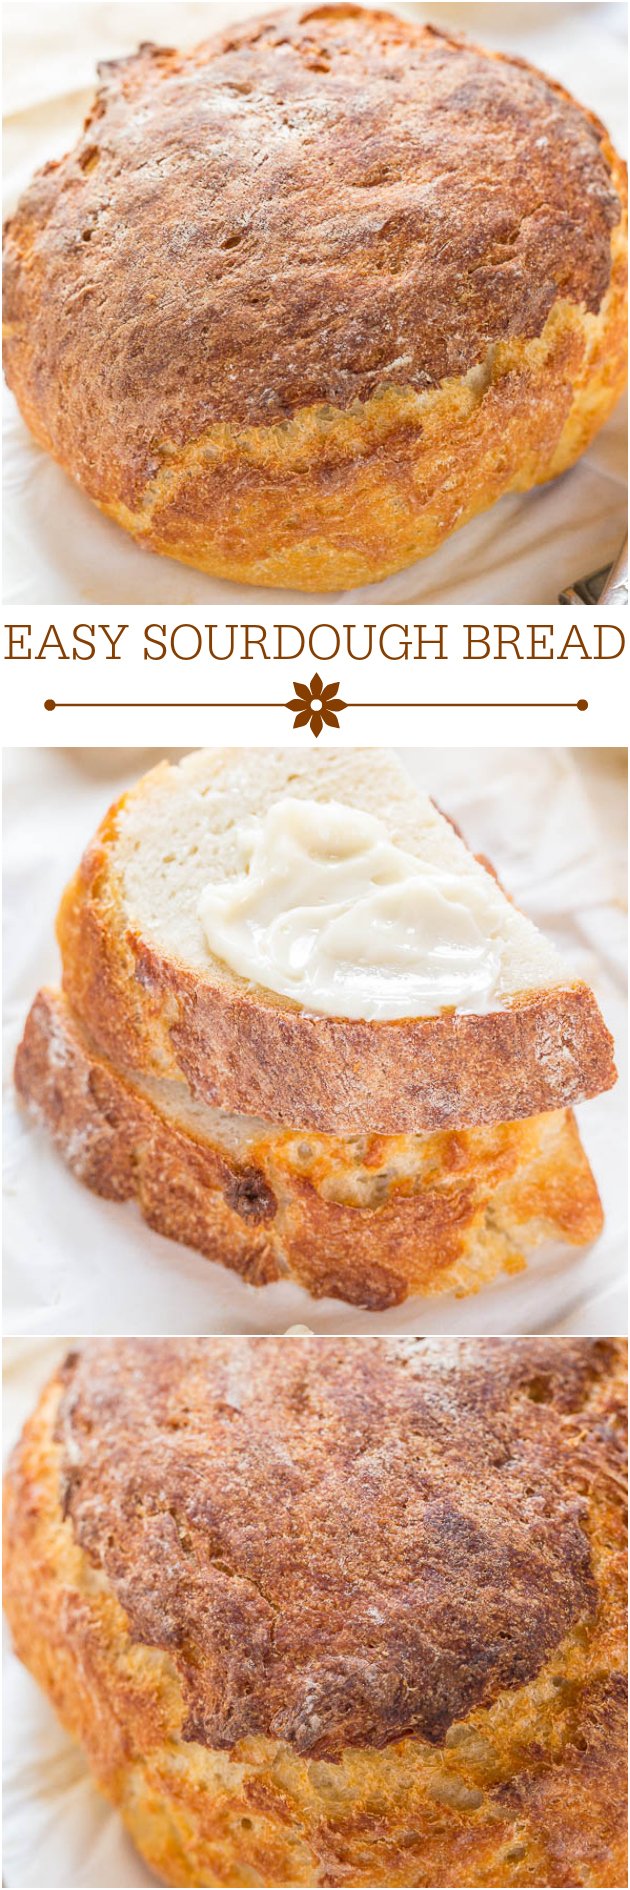
How to Make Sourdough Bread — This easy sourdough bread recipe uses yogurt and sour cream in place of a traditional sourdough starter, which makes it possible to prep a loaf in less than a day!
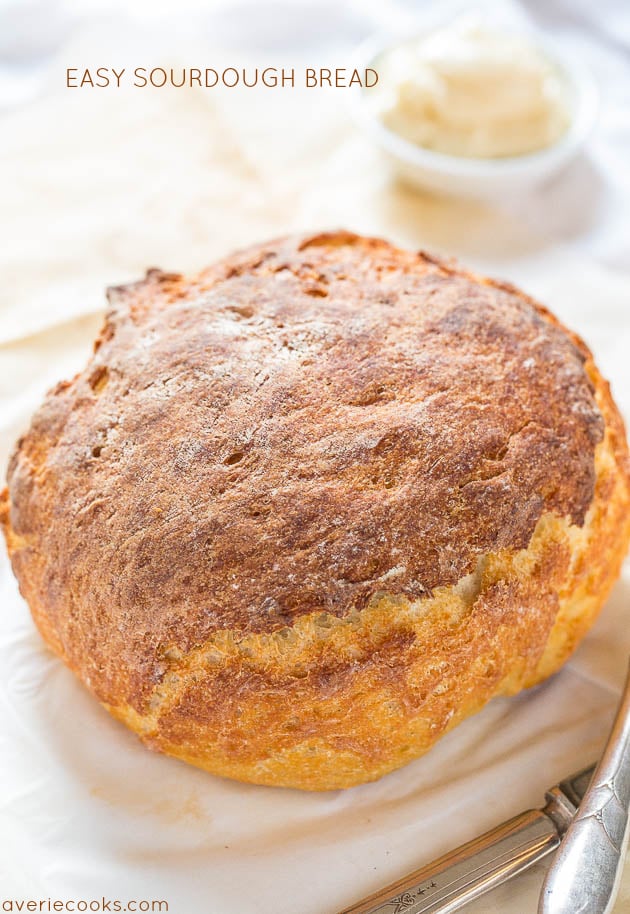
Table of Contents
- Easy Homemade Sourdough Bread Recipe
- Homemade Sourdough Bread Ingredients
- How to Make Sourdough Bread
- Do I Have to Use a Dutch Oven?
- Can I Freeze Sourdough Bread?
- Can I Make This Gluten Free?
- Tips for Making Sourdough Bread
- Easy Sourdough Bread Recipe
- Easy Sourdough Bread Recipe
- More Homemade Bread Recipes:
Easy Homemade Sourdough Bread Recipe
I’ve always wanted to make sourdough bread and can finally check it off my culinary bucket list. And rather than doing it in week(s), I did it in hours.
Traditional sourdough starters take 5-7+ days to develop and making the bread can take a full day, whereas I made this bread in 9 hours. Do it as an overnight recipe or think of it like a slow cooker recipe. Set it and forget it because it really is that easy.
Rather than using a traditional sourdough starter, Greek yogurt and sour cream are mixed with bread flour, yeast, and a pinch of salt. The active cultures in the Greek yogurt and sour cream ferment the dough and give the bread traditional sourdough flavor. The longer you let the bread rise and ferment, up to about 18 hours, the more sourdough-ey it’ll taste.
I’ve made the homemade sourdough bread twice because my family kept raving about this loaf. For this bread, I did a 6 1/2 hour rise/ferment (first rise) and for the next loaf I did 10 hours. The 10-hour version was more sourdough-ey and also had a more more ‘holey’ and open crumb, but I wouldn’t necessarily say the 10-hour was ‘better’. Both are fabulous.
If you’ve ever made bread, this recipe will be a total snap. Much easier than cinnamon rolls, sweet rolls, or dinner rolls, by a long shot.
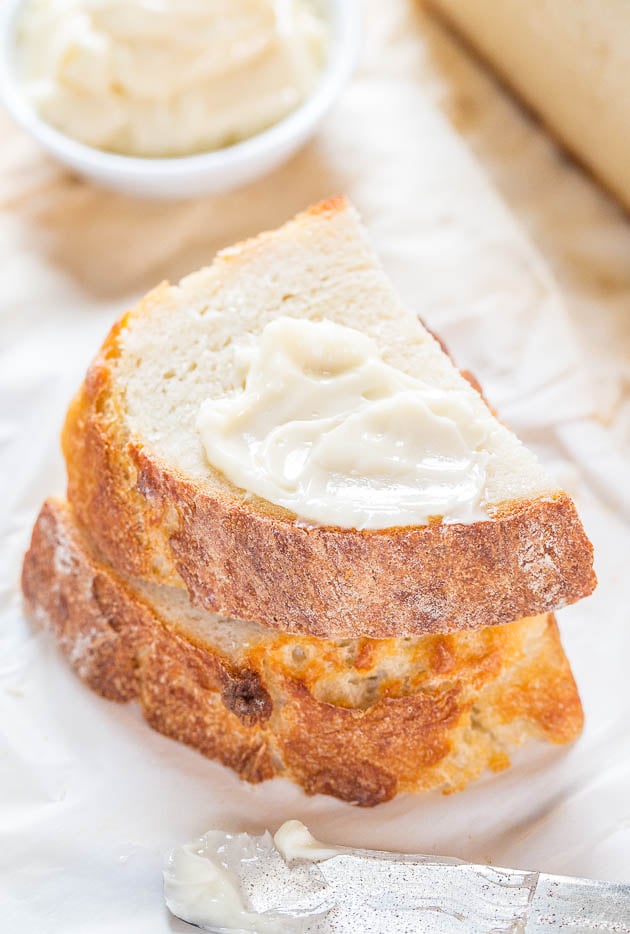
The bread is hearty, satisfying, and has a firm crust that gives was to a super moist, soft interior. My daughter loves crust (she didn’t get that from me) and my family devoured the loaf in one sitting.
I got the bug to try this because of Mandy’s post and without knowing I was making homemade sourdough bread or the flavor goal, my family said it tastes like a piece of San Francisco sourdough bread from a fancy bakery.
It’s so rewarding knowing I made bread that looks and tastes like something from a bakery. You’re going to love that feeling. And you’re going to love the bread.
Homemade Sourdough Bread Ingredients
When making sourdough bread, you’ll need:
- Bread flour
- Plain Greek yogurt with live active cultures
- Sour cream
- Salt
- Instant dry yeast
How to Make Sourdough Bread
Add all the sourdough bread ingredients to the bowl of a stand mixer and knead the dough for 5 to 7 minutes using a dough hook attachment. The dough will be seem like it’s almost too wet and it’s very heavy, but this is what you want.
Place the dough in an oiled bowl, cover with plastic wrap, and let rise for 6 to 8 hours. Once risen, remove the dough from the bowl and gently knead for a couple minutes. Shape the dough into a round mound and put back into oiled bowl to rise for another 1 to 2 hours.
Preheat your oven and place an empty Dutch oven inside to preheat as well. Once the oven is preheated, carefully remove the Dutch oven, place parchment paper on the bottom, and place dough inside. Cover with a lid and bake, then uncover during the last 10 minutes of baking.

Do I Have to Use a Dutch Oven?
While it’s not imperative to bake the bread in Dutch oven, it really helps develop sourdough’s signature crusty crust because a covered Dutch oven traps in the steam the bread releases while baking, aiding in crust development. This is the exact Le Creuset Dutch oven I used.
If you don’t have a Dutch oven, a cast iron skillet or heavy-bottomed skillet will work, although some of the crustiness will be sacrificed.
Can I Freeze Sourdough Bread?
Yes, homemade sourdough bread freezes well. Let the baked bread cool completely before freezing (you can freeze the entire loaf or slice and freeze).
Can I Make This Gluten Free?
That is a question I am not sure about since I have not tried this recipe with gluten-free flours of any kind.
However, my gut tells me that I definitely don’t think almond flour or spelt flour will work. A baking flour that is a cup-or-cup style replacement of traditional all-purpose flour is the only flour I think has a flying chance, but I do not know if it will work.
I have only made the recipe exactly as written. If you make the recipe with gluten-free flour, please comment how it went for you.
Tips for Making Sourdough Bread
I highly recommend using King Arthur bread flour for this sourdough bread recipe. I think it’s the best quality bread flour and it delivers consistently good results.
The sourdough bread recipe looks long but that’s because I write yeast recipes with as much detail and give as many tips as I possibly can to set you up for success. Read the recipe at least twice before starting. All you’re really doing is making dough, letting it rise for 6+ hours, letting it rise again for 1+ hour, and baking.
I like it served simply with honey butter or butter. Or try jam, jelly, or hummus. The bread is great toasted, perfect for sandwiches, for crostini, or with your favorite dip. I wouldn’t complain if you put a hunk of cheese and bread in one hand and a glass of wine in the other.

Pin This Recipe
Enjoy AverieCooks.com Without Ads! 🆕
Go Ad Free

Easy Sourdough Bread
Ingredients
- 3 cups bread flour, I use King Arthur
- one-17.6 ounce tub plain unsweetened Greek yogurt with active cultures, 500 grams
- about 1/2 to 1 cup sour cream, or Greek yogurt, lite versions are okay
- 1 teaspoon salt, or to taste
- scant 1 teaspoon, just slightly less than 1 teaspoon instant dry yeast (I use Red Star Platinum)
Instructions
- To the bowl of a stand mixer fitted with the dough hook (or use a large mixing bowl and wooden spoon and your hands), add the flour, Greek yogurt, 1/2 cup sour cream, salt, and yeast.
- Turn mixer on low speed and allow it to knead dough for about 5 to 7 minutes (about 7 to 10 minutes by hand using a wooden spoon and then switching to your hands). Add sour cream as needed to form a very moist and wet dough. If it’s at all dry or crumbly, add more sour cream (or Greek yogurt) until it comes together. I used one-17.6 ounce tub of Greek yogurt and almost 1 cup lite sour cream. Dough will be seem like it’s almost too wet and it’s very heavy, but this is what you want. Err on the side of wetter than drier because flour and yeast love moisture when rising.
- Remove dough from the mixing bowl, spray a large bowl with cooking spray, pat dough into a round ball, place it in the bowl, and flip it over once so it’s lightly oiled on both top and bottom. It will look like a dimply head of cauliflower.
- Cover bowl with plasticwrap (spray it with cooking spray in case dough rises high enough to touch it) and place bowl in a warm, draft-free place to rise for about 6 to 8 hours (I did 6 1/2 hours), or doubled in size. If you want to start this before work or before bed and made as an overnight dough and it’ll go 8-10 hours, that’s fine. There’s really no harm in letting it rise for up to 18 hours and the longer you let it go, the more of a classic sourdough/fermented flavor that will develop. If you suspect you’re going to allow it to rise on the longer side (12-18 hours), reduce yeast to about 1/2 teaspoon so dough doesn’t get too puffy and overflow the bowl.
- After 6+ hours of rising, turn dough out onto a floured surface (without punching it down to preserve the air pockets and bubbles that have been created) and knead lightly for about 2 to 3 minutes.
Pat dough into a round mound, and place it back into large mixing bowl, seam side down. Cover with plastic wrap, and allow to rise for 60 to 120 minutes, or until doubled in size (I did 60 minutes; I suspect the longer you let the second rise go, the more ‘holey’ the bread will be). Placing the bowl on the stovetop is a nice spot for this rise because you’re going to turn on the oven and the residual heat emitted helps with rising. - Shortly after dough begins the 60-120 minute rising, turn oven on to 450F and place a covered 7 to 10-quart or sufficiently large Dutch oven (empty) or heavy-bottomed skillet into the oven and allow it to heat for about 45 minutes. Dutch ovens are so heavy and take so long to get truly hot, and when you’re ready to bake the bread, you want the Dutch oven screaming hot.
- After about 60-90 minutes or dough has doubled in size, remove Dutch oven from oven (careful, it’s screaming hot, use two pairs of hot mitts) and carefully place a piece of parchment paper on the bottom of Dutch oven to prevent bread from sticking.
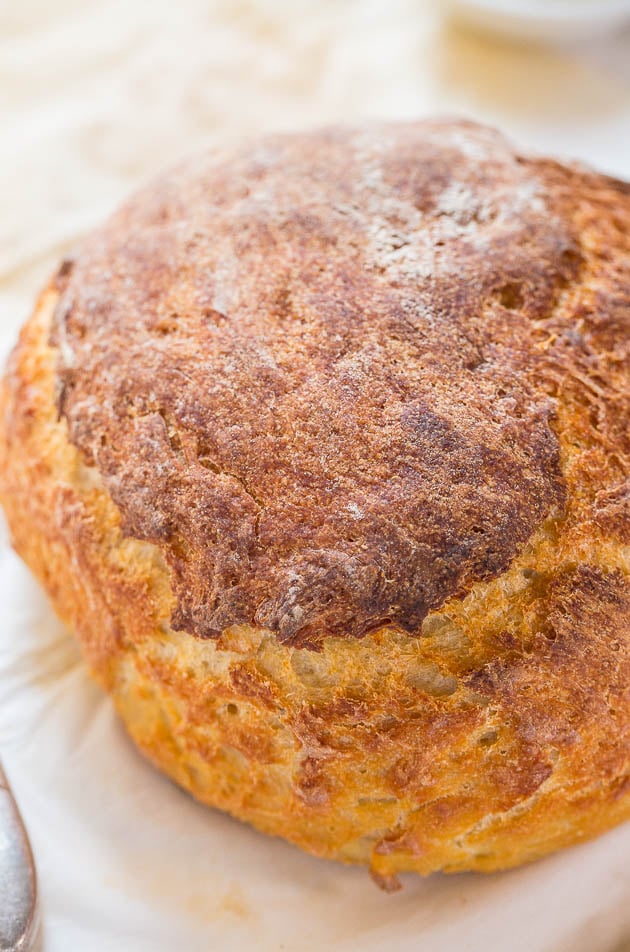
Carefully transfer dough from rising bowl to Dutch oven, cover it, and bake covered for 30 minutes. Don’t open the oven door or the Dutch oven lid to peek; you want to seal in the steam. - After 30 minutes, uncover the Dutch oven, and allow bread to bake uncovered for 5 to 10 minutes (I did 8 minutes) or until it’s as browned as desired. Traditional sourdough has a darker crust than most bread (sometimes almost burnt-looking, but I prefer mine on the lighter side).
- Remove Dutch oven from oven, and remove bread from Dutch oven. Place it on a wire rack to cool completely before slicing. As tempting as it is, don’t slice too early because the cooling process is important and should be considered an important extension of the baking process. Slice or break off hunks, and serve with honey butter, butter, jam, hummus, etc.
- Bread is best fresh, but will keep airtight at room temp for up to 3 days. Older bread may be better toasted.
Notes
- Note that the yogurt you use must say ‘active cultures’, I used 0% Non-Fat Fage.
- Use closer to 1/2 teaspoon yeast if you plan to allow dough to rise for 12-18 hours; see step 4 above.
Nutrition
Nutrition information is automatically calculated, so should only be used as an approximation.
©averiecooks.com. Content and photographs are copyright protected. Sharing of this recipe is both encouraged and appreciated. Copying and/or pasting full recipes to any social media is strictly prohibited.
Pin This Recipe
Enjoy AverieCooks.com Without Ads! 🆕
Go Ad Free
Easy Sourdough Bread
Ingredients
- 3 cups bread flour, I use King Arthur
- one-17.6 ounce tub plain unsweetened Greek yogurt with active cultures, 500 grams
- about 1/2 to 1 cup sour cream, or Greek yogurt, lite versions are okay
- 1 teaspoon salt, or to taste
- scant 1 teaspoon, just slightly less than 1 teaspoon instant dry yeast (I use Red Star Platinum)
Instructions
- To the bowl of a stand mixer fitted with the dough hook (or use a large mixing bowl and wooden spoon and your hands), add the flour, Greek yogurt, 1/2 cup sour cream, salt, and yeast.
- Turn mixer on low speed and allow it to knead dough for about 5 to 7 minutes (about 7 to 10 minutes by hand using a wooden spoon and then switching to your hands). Add sour cream as needed to form a very moist and wet dough. If it’s at all dry or crumbly, add more sour cream (or Greek yogurt) until it comes together. I used one-17.6 ounce tub of Greek yogurt and almost 1 cup lite sour cream. Dough will be seem like it’s almost too wet and it’s very heavy, but this is what you want. Err on the side of wetter than drier because flour and yeast love moisture when rising.
- Remove dough from the mixing bowl, spray a large bowl with cooking spray, pat dough into a round ball, place it in the bowl, and flip it over once so it’s lightly oiled on both top and bottom. It will look like a dimply head of cauliflower.
- Cover bowl with plasticwrap (spray it with cooking spray in case dough rises high enough to touch it) and place bowl in a warm, draft-free place to rise for about 6 to 8 hours (I did 6 1/2 hours), or doubled in size. If you want to start this before work or before bed and made as an overnight dough and it’ll go 8-10 hours, that’s fine. There’s really no harm in letting it rise for up to 18 hours and the longer you let it go, the more of a classic sourdough/fermented flavor that will develop. If you suspect you’re going to allow it to rise on the longer side (12-18 hours), reduce yeast to about 1/2 teaspoon so dough doesn’t get too puffy and overflow the bowl.
- After 6+ hours of rising, turn dough out onto a floured surface (without punching it down to preserve the air pockets and bubbles that have been created) and knead lightly for about 2 to 3 minutes.
Pat dough into a round mound, and place it back into large mixing bowl, seam side down. Cover with plastic wrap, and allow to rise for 60 to 120 minutes, or until doubled in size (I did 60 minutes; I suspect the longer you let the second rise go, the more ‘holey’ the bread will be). Placing the bowl on the stovetop is a nice spot for this rise because you’re going to turn on the oven and the residual heat emitted helps with rising. - Shortly after dough begins the 60-120 minute rising, turn oven on to 450F and place a covered 7 to 10-quart or sufficiently large Dutch oven (empty) or heavy-bottomed skillet into the oven and allow it to heat for about 45 minutes. Dutch ovens are so heavy and take so long to get truly hot, and when you’re ready to bake the bread, you want the Dutch oven screaming hot.
- After about 60-90 minutes or dough has doubled in size, remove Dutch oven from oven (careful, it’s screaming hot, use two pairs of hot mitts) and carefully place a piece of parchment paper on the bottom of Dutch oven to prevent bread from sticking.
Carefully transfer dough from rising bowl to Dutch oven, cover it, and bake covered for 30 minutes. Don’t open the oven door or the Dutch oven lid to peek; you want to seal in the steam. - After 30 minutes, uncover the Dutch oven, and allow bread to bake uncovered for 5 to 10 minutes (I did 8 minutes) or until it’s as browned as desired. Traditional sourdough has a darker crust than most bread (sometimes almost burnt-looking, but I prefer mine on the lighter side).
- Remove Dutch oven from oven, and remove bread from Dutch oven. Place it on a wire rack to cool completely before slicing. As tempting as it is, don’t slice too early because the cooling process is important and should be considered an important extension of the baking process. Slice or break off hunks, and serve with honey butter, butter, jam, hummus, etc.
- Bread is best fresh, but will keep airtight at room temp for up to 3 days. Older bread may be better toasted.
Notes
- Note that the yogurt you use must say ‘active cultures’, I used 0% Non-Fat Fage.
- Use closer to 1/2 teaspoon yeast if you plan to allow dough to rise for 12-18 hours; see step 4 above.
Nutrition
Nutrition information is automatically calculated, so should only be used as an approximation.
©averiecooks.com. Content and photographs are copyright protected. Sharing of this recipe is both encouraged and appreciated. Copying and/or pasting full recipes to any social media is strictly prohibited.
More Homemade Bread Recipes:
Easy Cheddar Sourdough Bread — The bread is hearty, satisfying, and has a firm crust that gives was to a super moist, soft interior with ample hunks of cheddar.

No-Knead Make-Ahead Dinner Rolls with Honey Butter — The easiest dinner rolls ever! No kneading, no fuss & you can make the dough ahead of time! Perfect for holiday meals and parties!

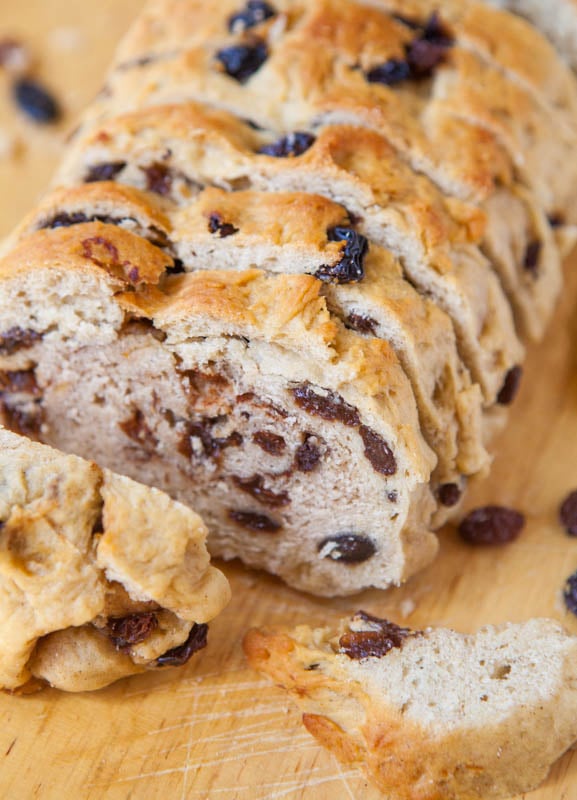
Raisin Bread for Raisin Lovers — There’s nothing worse than raisin bread with like five raisins in the whole slice, which isn’t a problem here. Calling all raisin lovers, this bread is for you!
Honey Dinner Rolls — Soft, fluffy rolls brushed with sweet honey butter! Truly the best dinner rolls ever. They disappear so fast at holiday meals & parties!

One-Hour Sun-Dried Tomato, Basil, and Mozzarella Focaccia Bread — The bread is soft and chewy, loaded with tangy sun-dried tomatoes, and the basil is the perfect complement to the tomatoes.

100% Whole Wheat No-Knead Make Ahead Dinner Rolls with Honey Butter – Working with wheat flour and yeast is usually the kiss of death but these rolls are light, fluffy, soft and you’d never guess made exclusively with whole wheat flour!

Soft and Fluffy Sandwich Bread (vegan) — The bread is versatile for anything from sandwiches to grilled cheese to French toast. It’s an easy recipe, even for bread-making novices.

Originally posted November 20, 2014 and reposted with updated text February 25, 2022.


Wonderful recipe.I am waiting for my starter to be ready, but would like to make some bread for my kids.
Was wondering if einkorn flour can be used instead, as my kids can’t have any other wheat. I have celiac and my husband is wheat intolerant. Thankfully, my kids are not celiac.
If einkorn flour could be used, what would be the proper amount?Should I just start with what the recipe calls, then keep adding if more is needed?
Thank you.
I am not familiar with einkorn flour so can’t make a recommendation or suggestion one way or the other. If you already bake with it, and you know it’s approx 1-for-1 with regular flour (I have no idea) then do that. Let me know how it turns out if you make it.
I made this exactly like the recipe stated. Because I wanted a more sourdough taste I let sit 18 hours and it was hard to tell if it rose at all. I used only the 1/2 teaspoon of yeast as warned. It didn’t rise the next time either. Boy I’m disappointed
There must have been a mistake regarding the amount of flour. The dough was very very runny. In fact so runny I had to throw it out and did not do a redo.
Is there no starter in this recipe? What am I missing. I’ve gone thru recipe a couple times and don’t see it🤷♀️
Very first sentence at the top of the blog post says: “How to Make Sourdough Bread — This easy sourdough bread recipe uses yogurt and sour cream in place of a traditional sourdough starter, which makes it possible to prep a loaf in less than a day!”
I’m really interested in trying this recipe. I’ve tried making starter a few times and have just not been successful. I have a Dutch oven, but I really want to make loaves, rather than rounds. Can I shape into a loaf and bake on a sheet pan, and spray with water, and/or put a pan of water on the bottom of the oven to get the nice crust?
I don’t know because I have only made this as written. I would make it once as written in the Dutch oven, get a feel for the recipe, and then you can decide if you think you adapt it.
So I made this for the 1st time yesterday. Luv sourdough, hate starter. My only problem was when I tried to get it out of the bowl to bake. Broke in half (heavy and wet as you said!) So I had to just pick up the 2nd part and plop it on top the first. Not sure it rose quite well or enough while baking because of that. Any suggestions? Maybe just kind of pour it out? Then I just lifted the parchment paper and dropped it into the dutch oven. I love the yogurt/sour cream option. I’m making another tonight to do the overnight rising.
It is so hard to troubleshoot from afar without actually having been in the kitchen to watch you do what you did and offer a critique on something like bread making especially. If it was so wet that you really couldn’t lift it out of the bowl, perhaps it needed a bit more flour. That is a judgment call that only you could make at the time.
If you tried to sort of just plop the broken part on top of the other, and they were never really “united as one” fully, the weight of the second blob on top of the original dough on the bottom, probably impacted its ability to rise, overall. That is my guess.
So add more flour the dough to make it not sooo wet and sloppy that it would break and then cause the rest of the issues you described. I hope your next trial went more smoothly!
Hi Averie,
New fan here! So, unless I missed it like other goobers who comment on here, I have read through EVERY single comment on this thread (I must say I had a myriad of emotions reading through them: silly, irritation, excitement, and madness at such stupid questions – I literally cannot believe someone asked you for measurements……ummmm that’s what your damn recipe IS – insert face palm emoji). Anyway, I also went through the FAQ section and cannot find any alterations for high altitude baking, anywhere. I live at approx. 4500 ft. and am wondering if you have any suggestions? Although I am an avid cook, I have never, ever, in my 42 years on earth, made bread, so I’m extremely motivated to get this right the first time! I suppose I can just google it, but I guess it’s more fun asking you. Plus it gave me an excuse to come on here and tell you how much I have loved making a variety of your recipes and extend some gratitude. The Hummingbird Cake was AMAZING btw….among others! :)
It’s great you have been making some of my other recipes and have been enjoying them! I appreciate you also checking diligently before asking, very courteous of you!
As for altitude baking, I live at sea level so I don’t provide suggestions at altitude since there is no way I could test things.
https://www.kingarthurbaking.com/learn/resources/high-altitude-baking They are a trusted baking brand, notably flour, but their info is always very reliable. I would potentially take into account what they say. Although if you have made my other recipes with no changes, I don’t know if you’d need to change anything with this either. It will be trial and error. Best of luck!
Okay, thank you for that website! Although I assumed you probably didn’t have suggestions, you’d at least send me somewhere credible. I will check it out, do some trial and error, and let you know! :) So far, I will say, most of the recipes that require baking turn out just fine. I have a convection oven and I think that helps a LOT for high altitude baking. Sometimes I had a bit more flour and water to recipes, depending on the size and that seems to work well.
Thanks again!
I have a 5 quart Dutch oven. Your recipe indicates 12 to 14 quarts. Will this still work if I have to divide my dough?
Thanks, Henrietta
Possibly yes that will be fine. Rather than trying to divide the dough (because then what are you going to do with the other half for such a long period of time?) I suggest halving the recipe and you can see how it goes for you.