Buttery Vanilla Sandwich Cookies — These vanilla sugar cookies with frosting in the middle are buttery, delicate, and literally melt-in-your-mouth. They’re sandwiched with vanilla buttercream frosting. Perfect for holidays, baby showers, and more!

Easy Frosting Sandwich Cookies
These vanilla sandwich cookies are what I remember from childhood. Soft, buttery, light, delicate, and airy.
They’re not cakey and not dry, which are problems that can plague many sugar cookies. The wafer cookies themselves are more buttery than sweet, and the overall sweetness comes from the buttercream.
The melt-in-your-mouth quality is wonderful. The vanilla wafer cookies practically dissolve when you bite in, and then you hit the creamy, rich, and dense buttercream and it’s such a great contrast. The baked in sugar crystals also add a bit of texture and make you just want another one.
It’s really a good thing I didn’t make a larger batch because I could go to sandwich-cookie town on these. They remind me of being 10 years old and my mom and grandma leaving me alone with a container of them and in literally a half hour, the container was gone.
It’s just because pink food tastes better.

Ingredients for Vanilla Sandwich Cookies
To make the vanilla cookies with frosting in the middle, you’ll need the following ingredients:
- Butter
- Granulated sugar
- Vanilla extract
- All-purpose flour
- Cream or half and half
- Confectioners’ sugar
- Food coloring

How to Make Vanilla Sandwich Cookies
I’ve gone into detail below on how to make these vanilla frosting sandwich cookies. The instructions look lengthy because I’ve included all of my top tips!
You can scroll to the recipe card at the bottom of this post for the full ingredients list and instructions, if desired.
Step 1: Make the Cookie Dough
Interestingly, there’s no egg in the dough and it’s made by creaming one stick of butter with a small amount of sugar and vanilla before adding flour.
After adding the flour, the dough will be very sandy, pebbly, and dry.
Add half-and-half or cream one tablespoon at a time, and mix.
Heavy Cream Tip
The dough will will be on the soft and sticky side and in a small-batch recipe like this, one tablespoon makes a difference. If you need to add a third tablespoon, go for it.

Step 2: Chill the Cookie Dough
Transfer the dough to an airtight container and park it in the fridge for at least two hours, or up to five days, before rolling it out.
Step 3: Roll & Cut the Cookie Dough
Turn the dough out onto a floured Silpat Non-Stick Baking Mat or floured countertop and cover it with a piece of plastic wrap and roll it out to about one-eighth inch thick.
Tip
The plastic wrap prevents dough from sticking to the rolling pin and makes for an easier, neater, and cleaner job.
Use a 2-inch cookie cutter or biscuit cutter to make rounds. You may make them smaller, in the one-inch range using a shot glass as your cutter if you don’t have a one-inch cutter, but I frankly don’t have the patience for anything less than two inches. God Bless my mom and grandma; they did.
Re-roll your scraps and use every last bit of dough until it’s gone because this is a small batch recipe, yielding only about 26 wafers, or 13 sandwich cookies.

Step 4: Chill the Dough … Again
Place the rounds on a Silpat-lined baking tray and I refrigerated it for an hour before baking because after all that rolling, the dough was on the soft side and I didn’t want them to spread. I fit all 26 on one tray and they didn’t spread much at all.
Step 5: Bake the Cookies
Before baking, dredge each dough round through granulated sugar. It adds an extra dimension of texture and flavor to the smooth wafers and it’s a must.
After they’ve been sugared and are on the baking sheet, pierce each cookie with the tines of a fork three or four times, making tiny impressions that remind me of tiny button holes.
Tip
Piercing the cookies is not only decorative, but it gives the steam a place to escape so the cookies bake flat and don’t puff up like little air balloons.
Bake them at 350F for about 7 to 9 minutes. I baked for 8 and I urge you not to leave the kitchen and to watch them like a hawk, literally staring inside your oven starting at about 6 minutes.
They are small, full of butter, sugar, white flour, and are highly prone to burning.

Step 6: Make the Buttercream
While the cookies cool, make the buttercream. Beat one stick of butter, add confectioners’ sugar, vanilla, and beat until you have soft and fluffy buttercream, about 5 minutes.
Add food coloring slowly, in the color of your choice.
Step 7: Assemble the Vanilla Sandwich Cookies
Dollop a heaping teaspoon of frosting into the center of one cookie, top with a second cookie, rotating the second cookie and smooshing it down slightly so the frosting disperses.
I don’t bother with a pastry bag but if you like to make work for yourself, be my guest.

FAQs
They’ll look glossy and shiny even when they’re done. You want them to stay light and golden and don’t let them turn brown because the melt-in-your-mouth quality just won’t be there.
Pull them even if they look underdone because they firm up as they cool on the baking sheet.
Depending on your comfort level (because of the buttercream), wafer cookies can be stored in an airtight container at room temperature for a couple days, or in the refrigerator for up to 1 week.
My grandma and mom kept these cookies at room temperature for days, but store them based on your comfort levels.
I imagine you could freeze the wafer cookies and the buttercream frosting in separate containers, then bring both to room temperature and assemble them. However, I’ve not tried this myself so I can’t say for certain.
I would describe them as tender, flakey, and on the soft side. Definitely not crunchy or firm. It’s a very delicate cookie!
Of course! I love to make classic vanilla sandwich cookies with vanilla frosting in the middle, but you could also use marshmallow buttercream, Baileys frosting, peanut butter frosting, chocolate frosting, strawberry frosting, you name it!

Tips for Making Vanilla Sandwich Cookies
Sugar in the frosting: When making the frosting, feel free to play with the sugar ratio depending on how thick you like your buttercream.
I find 2 cups sugar gives me a frosting that’s just right for a job like this when I want a firmer frosting. If you like looser frosting, 1 1/2 cups will probably do the trick.
Adding the food coloring: Extracts and food colorings are two things you can’t un-do once they’re in, so go slowly when coloring the buttercream. I used about 10 drops of red and it caught me off guard how fast it turned rosy-red-pink rather than pale-pastel-pink.
Leftover frosting? I used all but 1/4 cup of the frosting and prefer to frost the cookies liberally and thickly. Leftover frosting can be stored in an airtight container in the refrigerator for up to 1 month.

Buttery Vanilla Sandwich Cookies
Ingredients
For the Cookies
- ½ cup unsalted butter, softened (1 stick)
- ¼ cup granulated sugar
- 2 teaspoons vanilla extract
- 1 cup all-purpose flour
- 2 tablespoons+ half-and-half or cream, I used half-and-half
- about 1/2 cup granulated sugar, for dredging
For the Buttercream
- ½ cup unsalted butter, softened (1 stick)
- 1 ½ teaspoons vanilla extract
- 1 ½ to 2 cups confectioners’ sugar
- food coloring of your choice, I used 10 drops of red
Instructions
For the Cookies:
- To the bowl of a stand mixer fitted with the paddle attachment (or mixing bowl and hand mixer), add the butter and beat to soften and fluff it, about 1 minute.
- Add 1/4 cup granulated sugar, vanilla, and beat to cream ingredients until fluffy, about 3 to 4 minutes, stopping to scrape down the sides of the bowl as necessary.
- Add the flour and mix to incorporate it. The dough will be very sandy, pebbly, and dry. Add two tablespoons of half-and-half or cream and mix. The dough will come together and it will be on the soft and sticky side. If your dough is sandy and dry and hasn’t come together, add 1 additional tablespoon of cream, or as needed, so it combines. I used 2 tablespoons and cannot foresee needing more than 3 tablespoons of cream, but add cream very, very slowly until it combines.
- Wrap dough in plastic wrap and transfer it to an airtight container and refrigerate it for at least two hours, or up to five days, before rolling it out.
- Turn the dough out onto a floured Silpat Non-Stick Baking Mat or floured countertop and cover it with a piece of plasticwrap to prevent it from sticking to the rolling pin. Roll dough out to about one-eighth inch thick.
- Using a 2-inch cookie cutter or biscuit cutter, cut out the dough into rounds (or if desired, cut them smaller in the one-inch range. Use a shotglass if you don’t have a one-inch cutter). Re-roll your scraps and use every last bit of dough until it’s gone. I made 26 rounds to yield 13 sandwiches.
- Place rounds on a Silpat-lined, parchment-lined, or cooking sprayed baking sheet. I fit them all on one sheet. If dough has gotten soft while rolling and cutting it out, cover and refrigerate the tray for about an hour, which will help prevent spreading.
- Preheat oven to 350F. Before baking, place about 1/2 cup granulated sugar in a shallow bowl and dredge each dough round through the sugar and return sugared rounds to baking sheet. Piece each round three or four times with the tines of a fork to give steam a place to escape so the cookies bake flat and don’t puff up while baking.
- Bake for 7 to 9 minutes or just until they’ve set, rotating trays halfway through baking. I baked for 8 minutes. They’ll look glossy and shiny even when they’re done. Don’t let them turn brown in the least, and pull them even if they look underdone because they firm up as they cool. Don’t leave the kitchen and watch them like a hawk because they’re small, full of butter, white flour, sugar, and are highly prone to burning.
- Allow cookies to cool for about 5 minutes on baking trays before transferring to a wire rack to finish cooling.
For the Buttercream:
- While the cookies cool, make the buttercream. Beat one stick of butter to soften and fluff it, about 1 minute.
- Add 1 1/2 cups confectioners’ sugar (I don’t bother sifting), vanilla, and beat until soft and fluffy, about 5 minutes. Play with the sugar ratio depending on how thick you like your buttercream. I find 2 cups sugar gives me a frosting that’s just right for a job like this when I want a firmer frosting, but if you like looser frosting, 1 1/2 cups will probably do the trick.
- Add food coloring very slowly, in the color of your choice, and mix to incorporate.
- Frost one cookie generously with 1 to 2 tablespoons frosting, top with another cookie, sandwich them together, and lightly squeeze. Repeat until all cookies have been sandwiched. I don’t bother with a pastry bag and use a knife and spoon.
Notes
Nutrition
Nutrition information is automatically calculated, so should only be used as an approximation.
©averiecooks.com. Content and photographs are copyright protected. Sharing of this recipe is both encouraged and appreciated. Copying and/or pasting full recipes to any social media is strictly prohibited.
More Easy Sandwich Cookies:
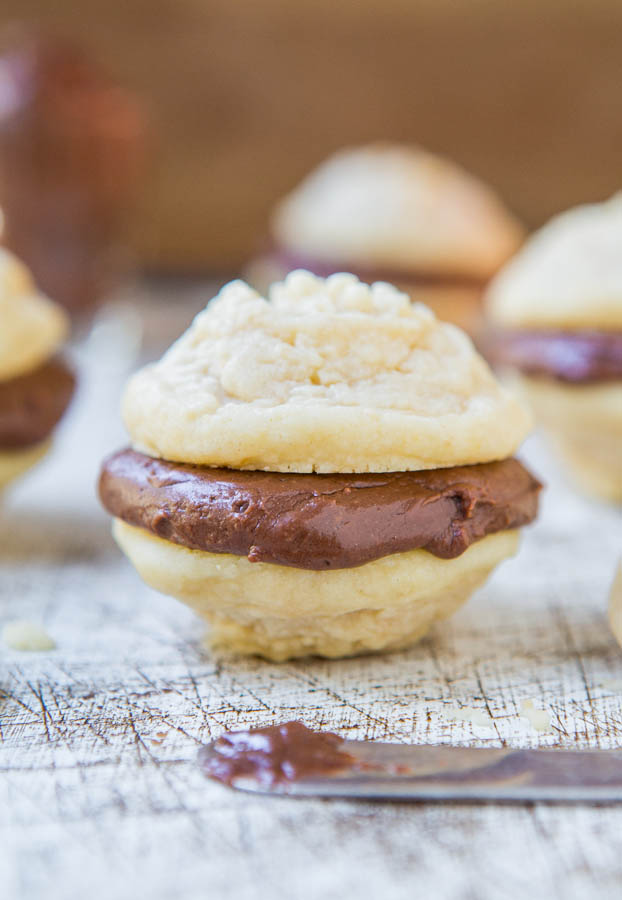
Vanilla Melting Moments Cookies with Nutella Filling — These sandwich cookies are so soft and they literally melt in your mouth! Perfect for Christmas, Easter, and family gatherings!
Shortbread Sandwich Cookies – Chocolate filling is sandwiched between two buttery shortbread cookies before the cookies are dipped in sweet white chocolate and festively decorated!

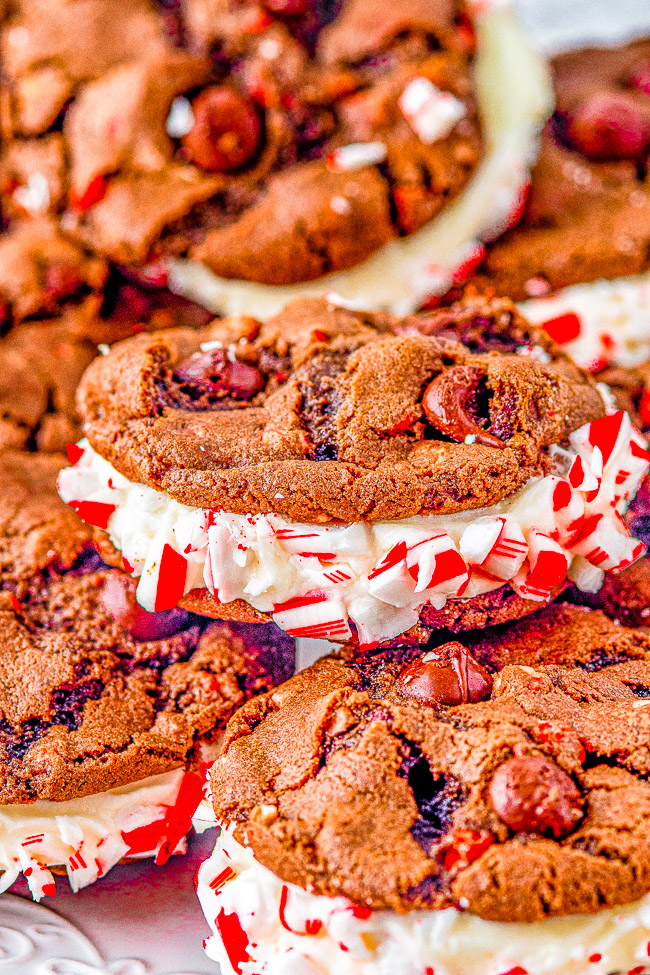
Double Chocolate Peppermint Cookies — Rich, decadent, soft and chewy double chocolate cookies are sandwiched together with a tangy cream cheese filling before being rolled in crushed candy canes and drizzled with white chocolate for extra flavor and holiday festiveness!
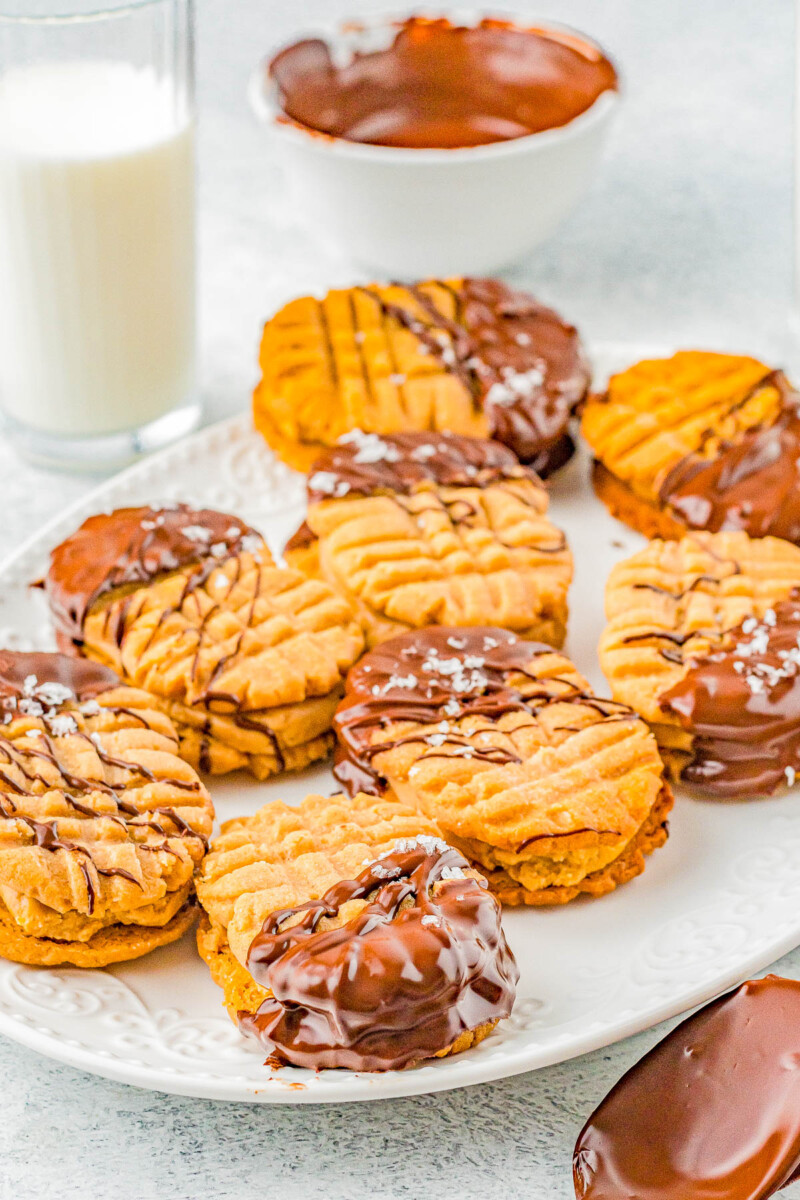
Homemade Nutter Butter Cookies — Homemade copycat Nutter Butters are so much better than the store bought originals! Creamy peanut butter filling is sandwiched between lightly crunchy peanut butter cookies.
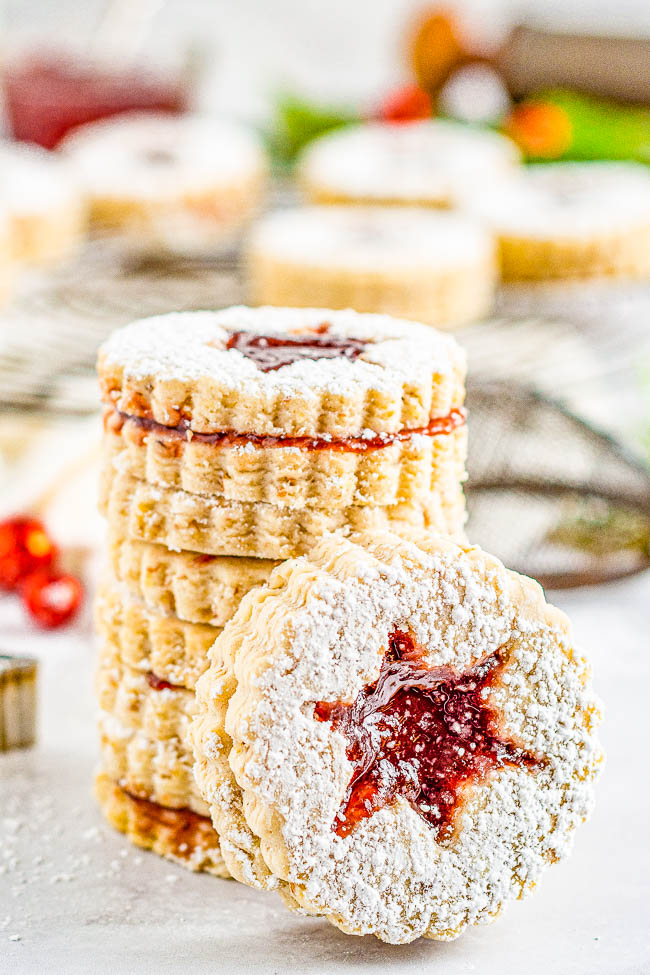
Raspberry Linzer Cookies — Linzer cookies are the ultimate sandwich cookies! A layer of raspberry jam is tucked in between two buttery, nutty cookies and dusted with powdered sugar!

Oh my goodness, these look like they would just melt in your mouth. Must try these! :)
They really do just melt in your mouth! Next up, I’d love to try the macarons from some of your posts…they are just so beautiful!
Averie, these just look like spring! They make me want to get out my summer dresses, cold lemonade, and inhale stacks of them at once :) I LOVE simple buttery sugar cookies, and with thick cream frosting in the middle? Yes, please.
simple buttery sugar cookies, and with thick cream frosting = YES. You know the kind. These are those :)
Curse the snow on the ground here in the Midwest! I thought I was yearning for spring before, but you just kicked it up a notch. These are just beautiful! And I can imagine them melting in my mouth right now alongside my cup of coffee. Yum.
They’re such melt-away style cookies, too. So buttery! Snow on the ground…well, here’s to hoping it melts asap!
So cute, and I love the pink color! Perfect treats for Easter!
These are so cute, and perfect for spring! These look way too good to have just once a year (:
Given that I also posted pink cookies today, I couldn’t agree more. Once again, we’re on the same page.
There is nothing like a soft buttery cookie with LOTS of buttercream frosting. Those grocery store cookies are my downfall. I love them so much. I never bother with sandwich cookies, because I’m too lazy for all that piping business (and the associated cleanup), so I’m with you on the smooshing.
These look so sweet and fun! Love that pink buttercream too!!
I totally agree – pink food does taste better. I don’t think I’ve ever had these cookies before, but it sounds like I need to ASAP.
They’re not a super popular or well-known cookie, although some people make similar types of cookies, and I just love them!
There is a local bakery that makes a buttercream filled sugar cookie sandwich–the frosting is different colors based on the holiday or season. Theirs are quite large and the cookie itself is also pretty sweet but they are good for sharing or spreading your sugar fix out over a few days! I plan to travel this weekend to see my parents and will be passing through Indianapolis (which has a Trader Joe’s). I really want to stop on my way home and do my grocery shopping there!
Oh I hope you get to stop at TJ’s for a few (or many!) items :)
These are so cute! My little sister would LOVE the pink buttercream, these are totally happening!
If you try them, please LMK!
Very cute! Too bad I’m not really an icing person. My favourite cookie memory is always Nanaimo bars at Christmas. But I would eat only the bottom and the top, and scoop out the middle!
That’s funny – when I made Nanaimo Bars (and I do LOVE icing) but I actually felt the crust/base was the best part of them!
https://www.loveveggiesandyoga.com/2012/10/nanaimo-bars.html
These cookies are just adorable with the light pink frosting. They’re a perfect Easter cookie! They would make a perfect “tea” cookie for a little girl’s tea party, don’t you think? Instead of the traditional tea sandwiches you could serve up a batch of these. You could have different color frostings, like pink, green, yellow, etc. Have a great Monday girl! xoxo, Jackie
They are totally a tea-cookie, bridal/baby shower, girlie party of any kind type of cookie – yes!
YES please
I made these EXACT cookies a couple months ago for Valentine’s Day! Pink frosting and all! Except I dipped mine in chocolate because I’m not very good at leaving things alone. I’d never made them before that and they really are super easy and light and buttery. Perfect for Easter for sure. So pretty!! I think my cookies puffed a little when baking– wonder why?
The puffing could be due to the dough not being really well-chilled when going into the oven. I think with rollout/cutout cookies, the cooler the better, which is why after I roll out cookies like this, I re-chill the dough. Or, maybe you have overzealous baking powder/soda so they just puffed up more! I’m sure they tasted great regardless :)
I’ll re-visit this with extra refrigeration, I think. Thanks!
These look so pretty Averie. They are very similar to shortbread cookies, and with filling? Great idea!!
Not nearly as dense, hard (or dry or tasteless…LOL) as shortbread. Like little thin wafers of buttery goodness. They just melt in your mouth like no other!
Dressed up with pretty pink filling, your cookies are set for the holiday table. I can see how they might also be fitting for Christmas. And my guess is that the cookie tastes even better because it is imbued with loving memories with your mother and grandma.
My sweet Easter memories and treats (besides Cadbury chocolates) are petit fours. (If the spirit moves you to visit, I’ve just posted the how-to on my site.)
Wow they looked wonderful…what a project but you nailed it!
Thank you, Averie!
Very much appreciate that you took time out of your busy schedule to stop by NinjaBaking.com.
=)