
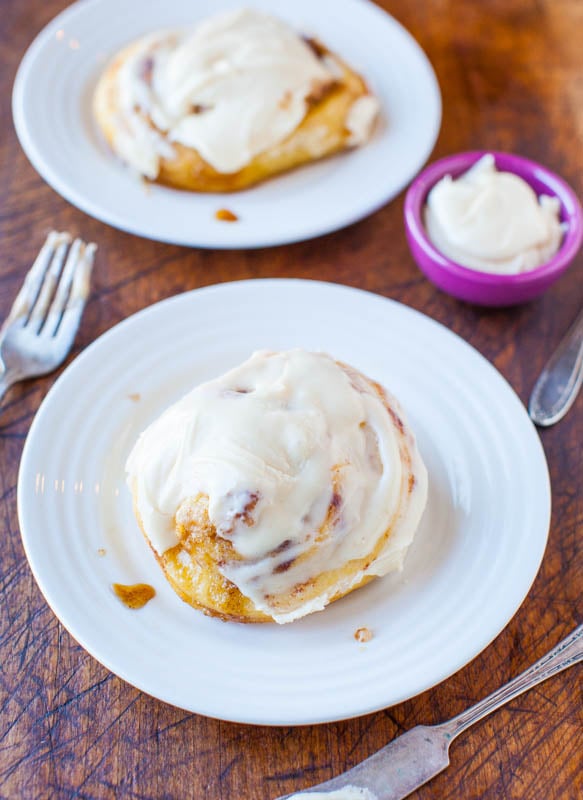
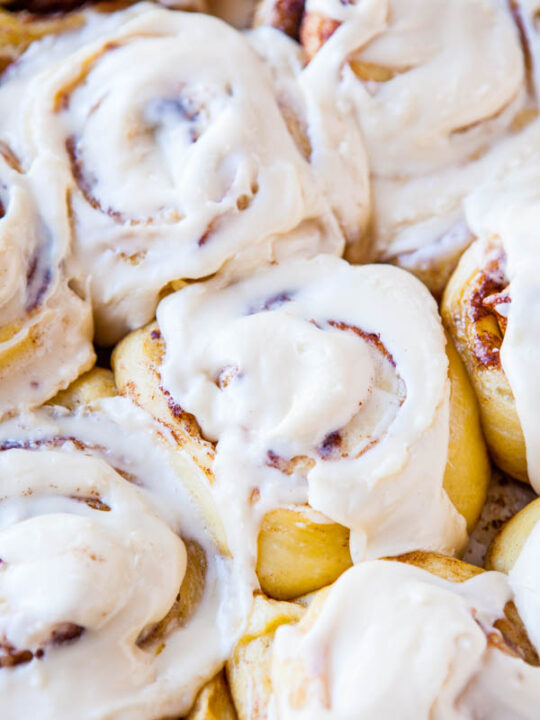
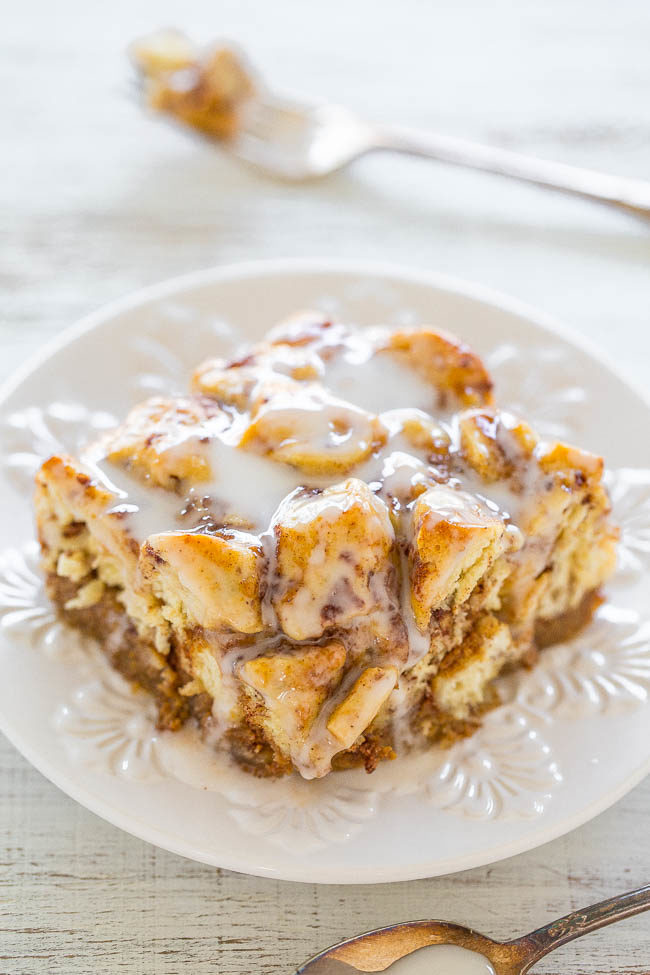
❤️ My Overnight Cinnamon Rolls Recipe results in sweet, fluffy rolls that are ultra-fluffy, thanks to the buttermilk in the dough. Topped with homemade cream cheese frosting, they’re one of my favorite make-ahead breakfasts or brunches for Easter, holidays, and special occasions!

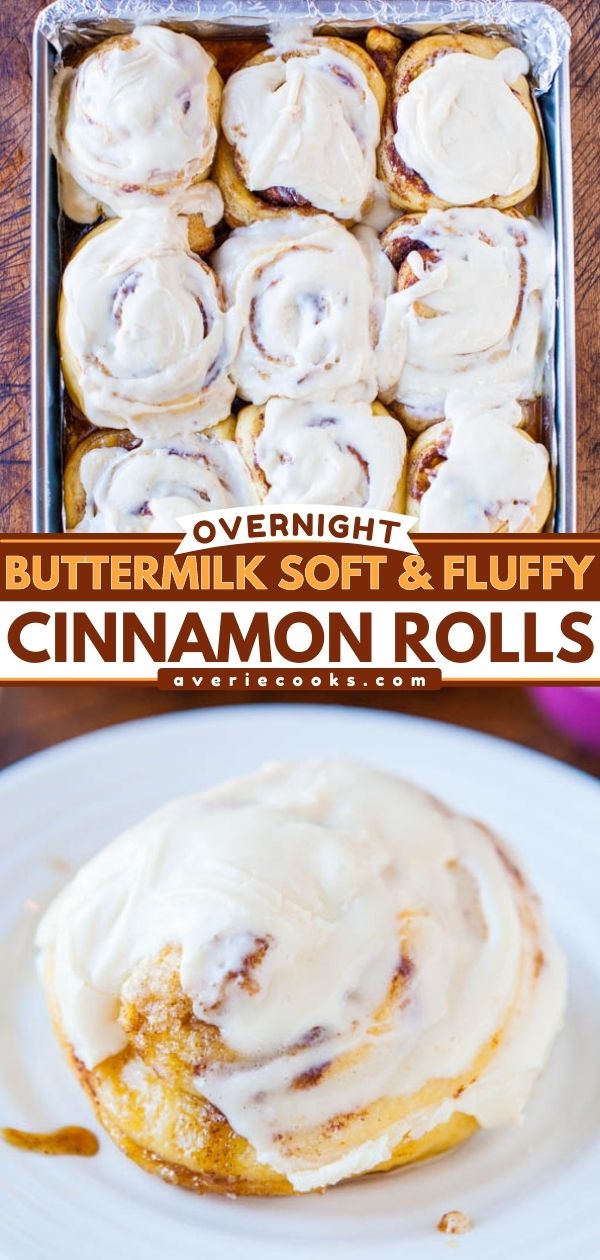
Soft & Fluffy Overnight Cinnamon Rolls
Homemade cinnamon rolls always sound great in theory… until you realize you’d need to wake up at 5 am just to have one with your 10 am coffee. No, thanks!
Luckily, I was able to fix that with this overnight cinnamon buns recipe. These rolls are some of the best I’ve ever made, which is saying a lot, because I’ve tested countless cinnamon roll variations. My chocolate cinnamon rolls, carrot cake cinnamon rolls, and pumpkin cinnamon rolls are all delicious.
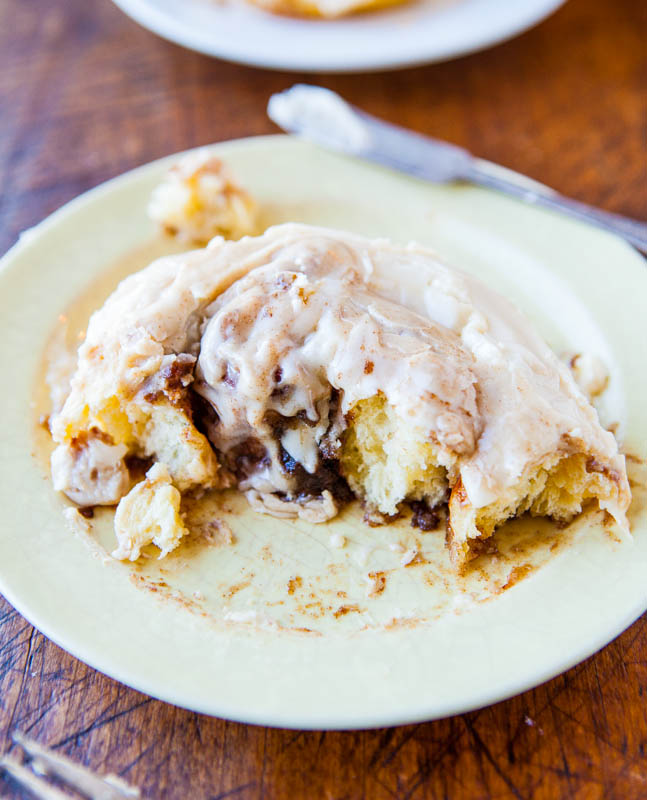
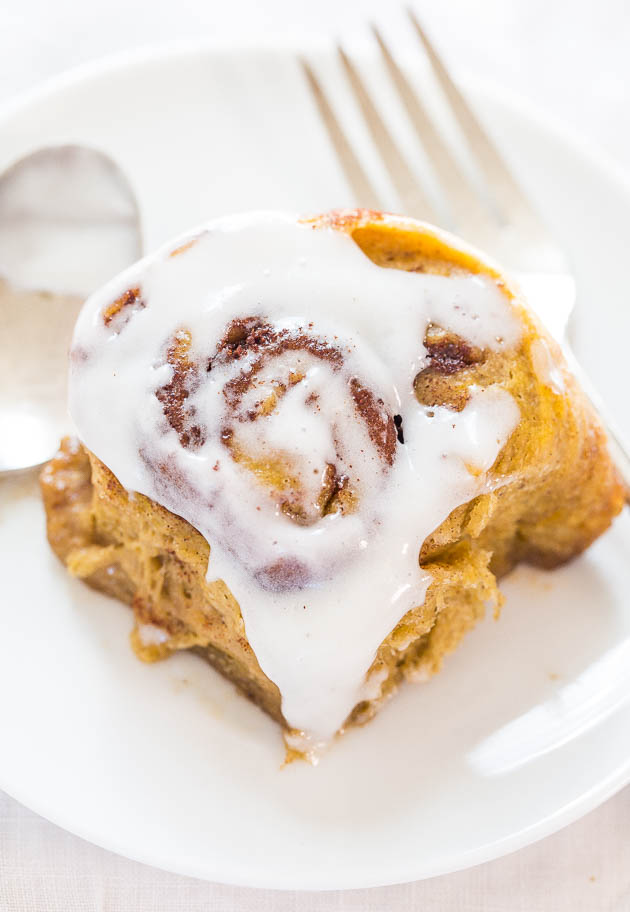
But you just can’t beat the classic flavor, especially when these rolls are made with an ultra-soft, fluffy dough that’s light without being overly dense and a brown sugar-cinnamon filling that melts into a caramel-like sauce. Topped with a dreamy cream cheese frosting, they taste like they came from a bakery but are simple to make at home.
My overnight prep process ensures there are no shortcuts while keeping the process simple and eliminating stress in the morning. It’s the best of both worlds, which is why these rolls have a nearly 5 -star rating with over 100 reviews! Take a look at what readers are saying:
I’ve been making these cinnamon rolls for over a decade (12+ years, I think, as of 2025) and they are everyone’s favorite! I’ve made them dozens of times at this point and the recipes comes out perfectly every time, which is not an easy feat for *any* bread recipe.
Annie
I’ve made this recipe MANY times now over several years. It’s my go-to Christmas morning recipe. Being able to make the dough the night before is a lifesaver. And everyone who’s ever had one of these has raved!!
Jana
Ingredients and Notes
To make the best cinnamon roll recipe ever, you’ll need:
- All-purpose flour: You can also use bread flour, but the rolls will be chewier. I prefer all-purpose flour for a soft, fluffy consistency. I haven’t tested this recipe with gluten-free flour
- Instant dry yeast: I used Red Star Platinum instant yeast, which is my gold standard. It’s an instant dry yeast, so you don’t have to proof it first with water and wait for it to get bubbly and foamy. Just sprinkle it right into the bowl with the other ingredients and then pour the liquids over the top of everything. When I deviate from Platinum and use other yeast, my dough doesn’t rise as well and doesn’t bake up as puffy and fluffy. Do not substitute active dry yeast. It’s not the same
- Baking staples: Granulated sugar, salt, unsalted butter, large eggs
- Buttermilk: If you don’t have buttermilk on hand, you can make your own with milk and white vinegar. Or, use powdered buttermilk. (See the recipe card below)
- Cinnamon sugar filling: Unsalted butter, light brown sugar, and cinnamon
- Cream cheese frosting: Unsalted butter, cream cheese, vanilla extract, confectioners’ sugar, and salt
Note: Scroll down to the recipe card section of the post for the ingredients with amounts included and for more complete directions.
How to Make Homemade Cinnamon Rolls
This overnight cinnamon rolls recipe is simple, but there are quite a few steps. I highly recommend reading over the reicpe card a few times before starting and planning accordingly. Here’s an overview of the process:
Make the dough: Prep the wet and dry ingredients. Then, beat the wet ingredients in with the dry ingredients using a stand mixer fitted with a paddle attachment. Switch the paddle attachment with a dough hook, and knead the dough, adding more flour as needed. Note that the dough is very sticky and tacky and is supposed to be that way!
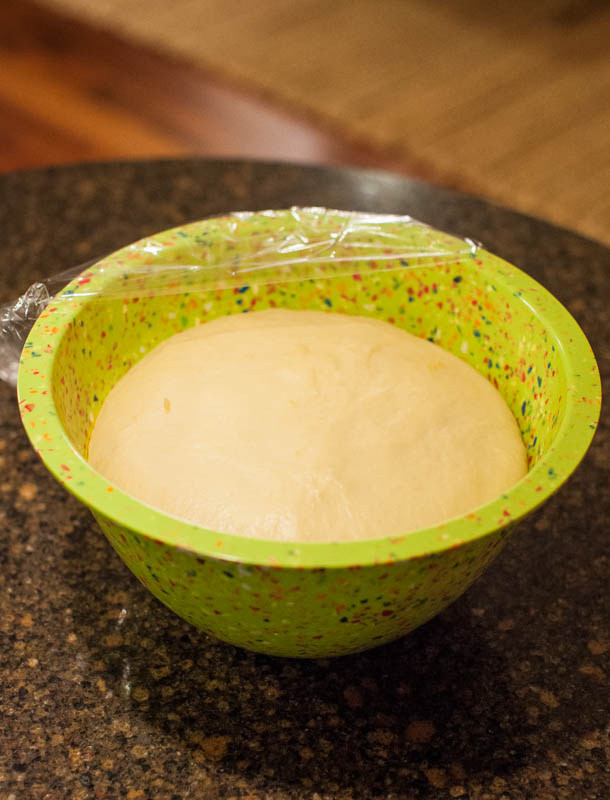
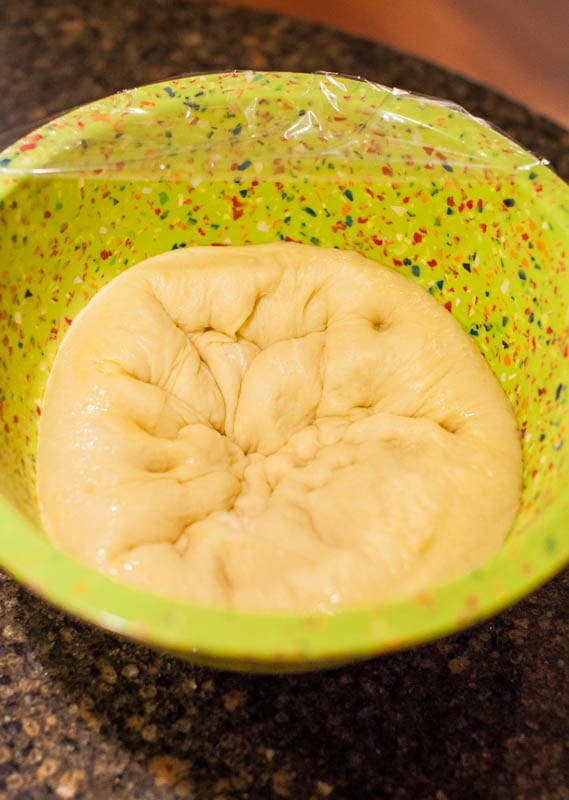
Proof the dough: Transfer the dough to a large bowl that has been greased with cooking spray, cover, and let it rise in a warm, dry place until it doubles in size.
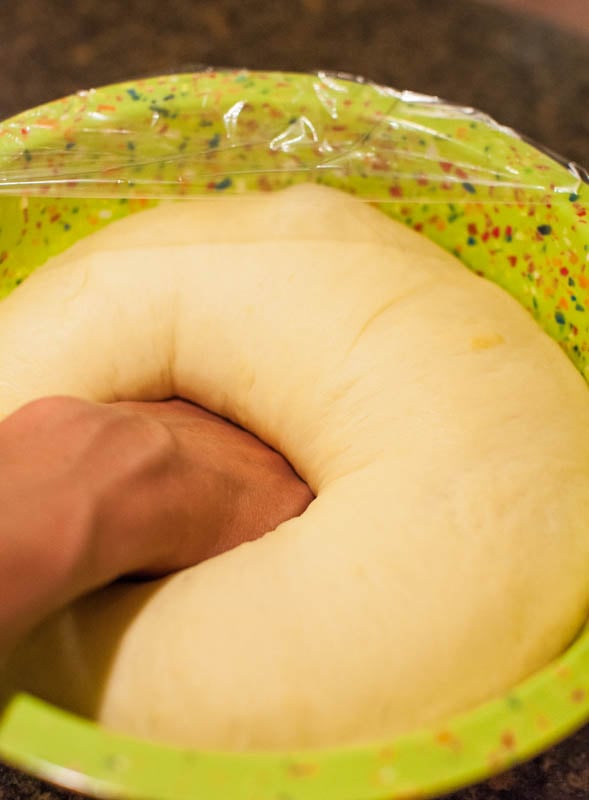
Shape the cinnamon rolls: Punch the dough down, transfer it to a floured work surface, and knead until smooth. Roll the dough out into a large rectangle, and butter the dough, leaving a border around the edges. Sprinkle brown sugar over the dough, and roll it into a tight log. Pinch the seam closed, and stretch the log out evenly. Slice the dough into equal-sized rolls.
Bake the rolls: Arrange the rolls, cut side down, in a prepared baking pan, and cover with plastic wrap. Let the rolls rise and double in size before baking. Then, bake until they’re lightly golden brown on top and cooked through.
Prep the frosting: While the rolls cool, beat the frosting ingredients in a stand mixer or medium bowl. Then, spread the frosting over the semi-cooled rolls in the baking dish, and enjoy!

My Top Tips for Success
- Don’t over-flour the dough. This dough is supposed to be soft, sticky, and slightly messy. That’s what gives you that ultra-fluffy, tender texture. Adding too much flour will result in dense, bready rolls. Trust the process.
- Temperature matters more than you think. Warm (not hot) buttermilk is key to activating the yeast properly. If it’s too hot, you’ll kill the yeast. If it’s too cold, your dough won’t rise well. Aim for “warm bath water” vibes if you’re not using a thermometer.
- Create a warm rising environment. If your kitchen runs cold, use the oven trick: briefly warm it, turn it off, and let your dough rise inside. This makes a huge difference in getting that soft, pillowy texture.
- Use unflavored dental floss to cut the rolls. It sounds weird, but it’s the best way to get clean slices without squishing the dough (way better than a knife).
- Adjust the frosting. I prefer a simple cream cheese icing, but you can add milk, cream, buttermilk, orange zest, almond extract, or whatever you like to make the flavor your own.
Overnight Soft and Fluffy Cinnamon Rolls
Equipment
- 1 Stand Mixer Fitted with a Paddle Attachment
- 2 Mixing Bowls
- 1 (15x10x1-inch) Jelly Roll Pan
Ingredients
Dough
- up to 4 1/4 cups all-purpose flour, divided
- ⅓ cup granulated sugar
- 2 ¼ teaspoons instant dry yeast, one 1/4-ounce packet, I use Red Star Platinum
- pinch salt, optional and to taste
- 6 tablespoons unsalted butter, melted (3/4 of one stick)
- 3 large eggs, lightly whisked
- ¾ cup buttermilk*, See Notes
Filling
- ½ cup unsalted butter, 1 stick, very soft – let it sit out while dough rises
- 1 to 1 ¼ cups light brown sugar, packed (granulated sugar or a half-and-half combo of white and brown sugars may be substituted)
- 3 to 4 teaspoons cinnamon, or to taste (I use 5 teaspoons)
Cream Cheese Frosting
- ½ cup unsalted butter, softened
- 6 ounces cream cheese, softened
- 1 tablespoon vanilla extract
- 1 pound confectioners’ sugar, 4 cups
- ½ teaspoon salt, optional and to taste
Instructions
Make the Dough
- To the bowl of a stand mixer fitted with the paddle attachment, combine 4 cups flour, 1/3 cup sugar, yeast, salt to taste; set aside.
- Place 6 tablespoons butter in a small microwave-safe bowl, and heat to melt, about 45 seconds; set aside.
- Crack eggs in another bowl and whisk; set aside.
- Add buttermilk to a glass measuring cup and warm to temperature, about 45 seconds on high power in the microwave. Tips – Based on the type of yeast used, milk temperatures will vary. Red Star Platinum yeast calls for warmer temperatures than most, 120 to 130F; other brands and yeast call for much lower temperatures, about 95 to 105F. Warm milk according to manufacturer’s recommendations on the packaging. Taking the temperature with a digital thermometer is highly recommended, but if you’re not, make sure the milk is warm, not hot. Err on the cooler rather than hotter side so you don’t kill the yeast. If the milk separates or gets a little funny looking after being warmed, whisk it to smooth it out.
- To the dry ingredients in the stand mixer, add the melted butter, eggs, buttermilk, and beat on medium-low speed for about 1 minute, or until combined.
- Switch to the dough hook (the dough will have stuck to the paddle and just pick off what you can and put it into the bowl) and knead for 10 to 12 minutes (15 to 18 minutes by hand).
- If after 5 minutes more flour is needed, add the remaining 1/4 cup flour, 1 tablespoon at a time, until the dough clears the side of the bowl but sticks to the bottom. Tips – This is a very sticky, tacky, moist, and borderline sloppy dough; don’t be tempted to over-flour it. It’s supposed to be that way. The more flour you add now, the less fluffy and more dense the rolls will be. Dough should clear the sides of the mixer while kneading but sticking to the bottom is fine. However, if the dough is simply too sloppy to work with, you can't move it from mixing bowl to rising bowl, it does need more flour so add some, as little as you can get away with, until you can work with the dough more easily.
- Remove the dough from the mixing bowl, spray a large mixing bowl with cooking spray, and place the dough in the bowl. Cover with plastic wrap and place it in a warm, draft-free place to rise for about 2 to 2 1/2 hours, or doubled in size. I keep my bowl inside a powered-off oven. Every 45 minutes or so, I power on the oven for 1 minute to 400F, as if I am preheating it, then I power it off. Do not, repeat not, keep the oven on. These short bursts of 1 minute of heat create a stable 85F-ish warm environment, ideal for the yeast. If your rising spot is cold, it will take longer than 2 1/2 hours.
- Prepare a 11-by-17-inch or similar sized jellyroll pan or sheetcake pan with a raised edge, or use a 9-by-13-inch pan. I prefer a jellyroll pan because it’s slightly larger so the rolls are less squished, have more room to rise, and bake more evenly. Line pan with aluminum foil, spray with cooking spray; set aside.
Shape the Cinnamon Rolls
- After dough has doubled in size, punch it down. Turn dough out onto a floured Silpat or floured countertop. Knead it lightly for about 2 minutes.
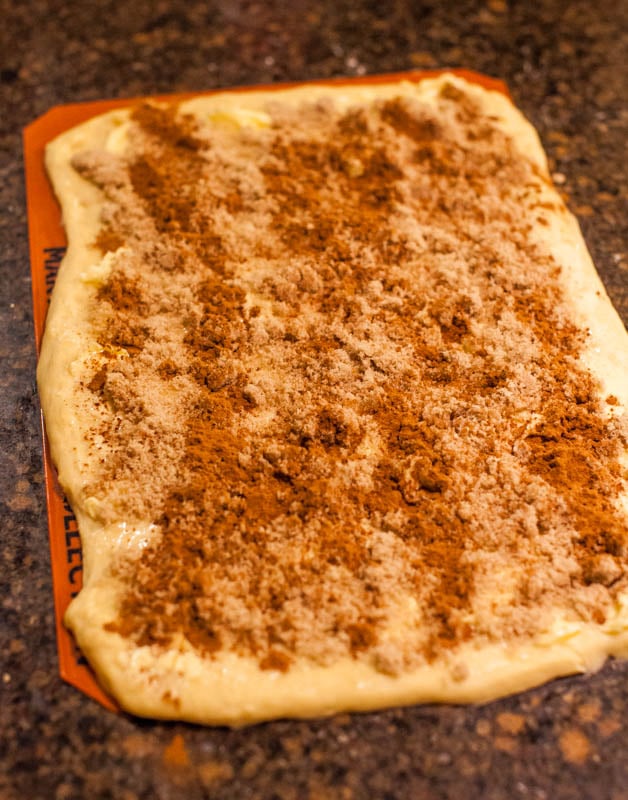
- With a rolling pin, roll it out to a 16-by-12-inch rectangle; just slightly larger than a standard Silpat.
- With a knife, butter the dough with 1/2 cup soft butter, leaving a 3/4-inch border around the edges.
- Sprinkle the brown sugar over it. Sprinkle the cinnamon over the brown sugar; I was very generous with the cinnamon and used almost 5 teaspoons and recommend at least 3; just eyeball it and shake it on.
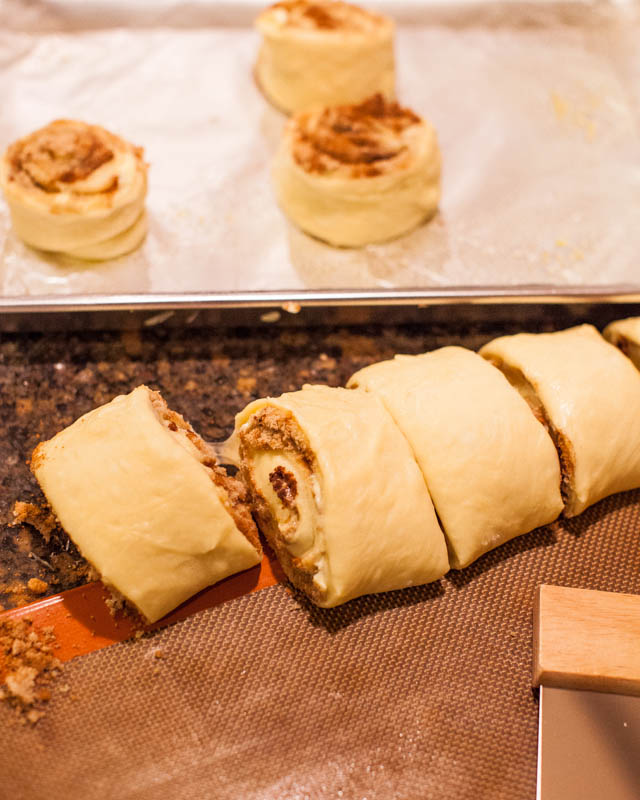
- Loosen the dough from the counter using a bench scraper (or metal spatula), and starting with a long edge, roll the dough into a tight log. Pinch the seam closed and turn log so seam side is down.
- Gently stretch the log to be 18 inches in length with an even diameter all the way around and pat the ends to even them up. Don’t fret if your log isn’t perfect; it’s okay.
- Slice the cylinder into 12 evenly sized rolls (about 1 1/2 inches wide) using a bench scraper, serrated knife, or plain unwaxed dental floss (works great to not squish and compact the log).
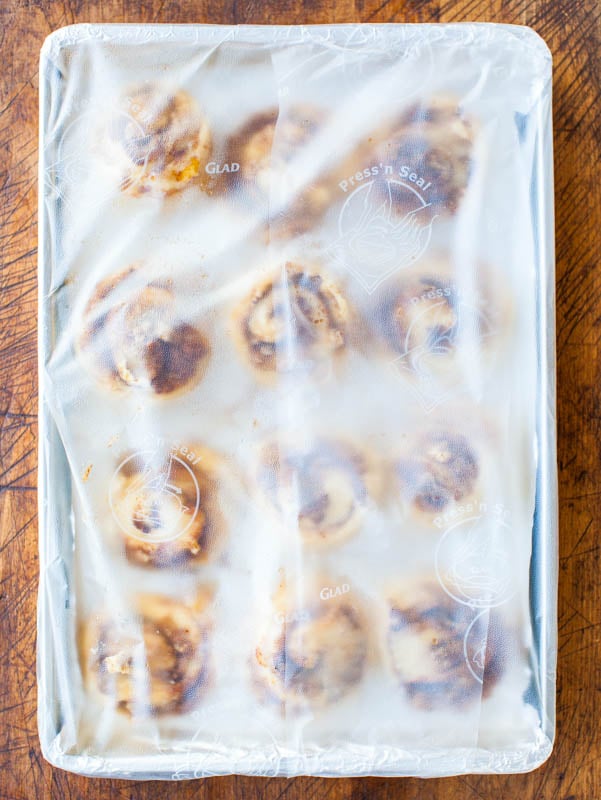
- Arrange the rolls cut side down in the prepared baking pan. Cover with plastic wrap.
- If making the rolls straight through: Let rise in a warm, draft-free place until the rolls have nearly doubled in size, 1 to 1 1/2 hours.
- If making the rolls overnight: Don’t let rolls rise after they’ve been sliced and placed in covered pan. Place pan in refrigerator for up to 16 hours. Before baking, let the rolls sit at room temperature until they have nearly doubled in size, about 1 hour.
Bake the Rolls
- For either version, bake at 350ºF for 22 to 25 minutes, or until lightly golden on top and cooked through but not overly browned.
- While the rolls cool, make the frosting.
Make the Cream Cheese Frosting
- To the bowl of a stand mixer fitted with the paddle attachment, combine 1/2 cup butter, cream cheese, and beat on medium speed to combine, about 1 minute.
- Add the vanilla, 3 cups confectioners’ sugar (I don’t bother sifting), and beat until smooth and fluffy, about 3 minutes, stopping to scrape down the sides of the bowl as necessary.
- Add remaining 1 cup of sugar (or more, or none) as necessary, to taste, based on desired frosting consistency and flavor.
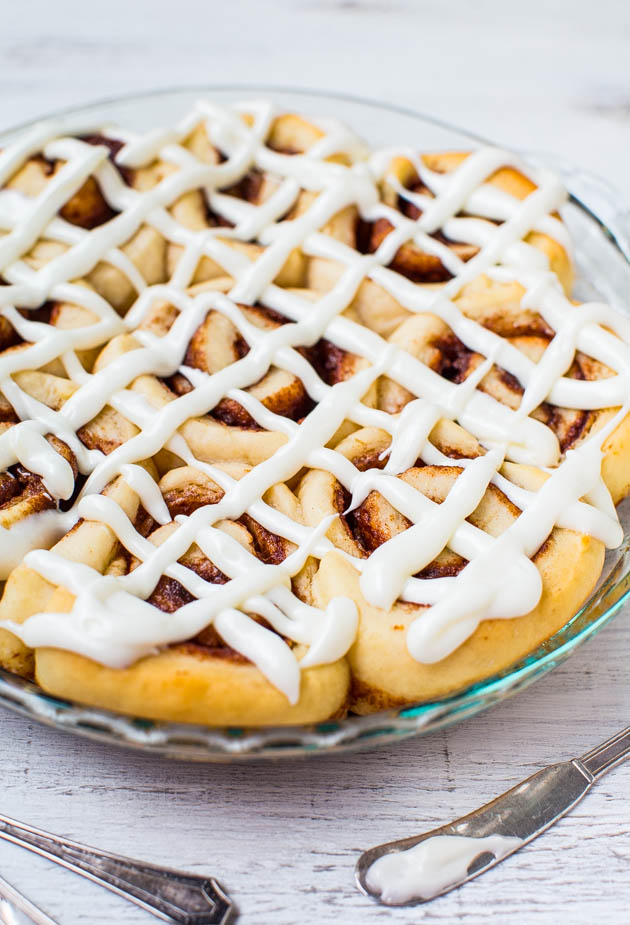
- Spread the frosting over the tops of the semi-cooled rolls and serve. Tips – Make sure they're not too warm or the frosting will melt. You may not use all the frosting if you don't like a lot of frosting on your rolls. That's fine, you don't need to use it all. Extra frosting will keep airtight in the fridge for many weeks or you can freeze it.
Notes
- Make your own buttermilk with whole milk and vinegar. Add 3/4 cup of 2% or whole milk to a large measuring cup. Stir in 1 tablespoon of white vinegar. Let that mixture sit for 2 minutes before using in the recipe.
- You can use powdered buttermilk. You’ll mix how many ever tablespoons the package calls for, with 3/4 cup of water, to yield 3/4 cup of buttermilk. For those who bake with or use buttermilk semi-frequently, but not so frequently to keep in in your fridge, keeping a tub of powdered buttermilk in your pantry is very handy.
Nutrition
Nutrition information is automatically calculated, so should only be used as an approximation.
©averiecooks.com. Content and photographs are copyright protected. Sharing of this recipe is both encouraged and appreciated. Copying and/or pasting full recipes to any social media is strictly prohibited.
More Cinnamon Roll Recipes:
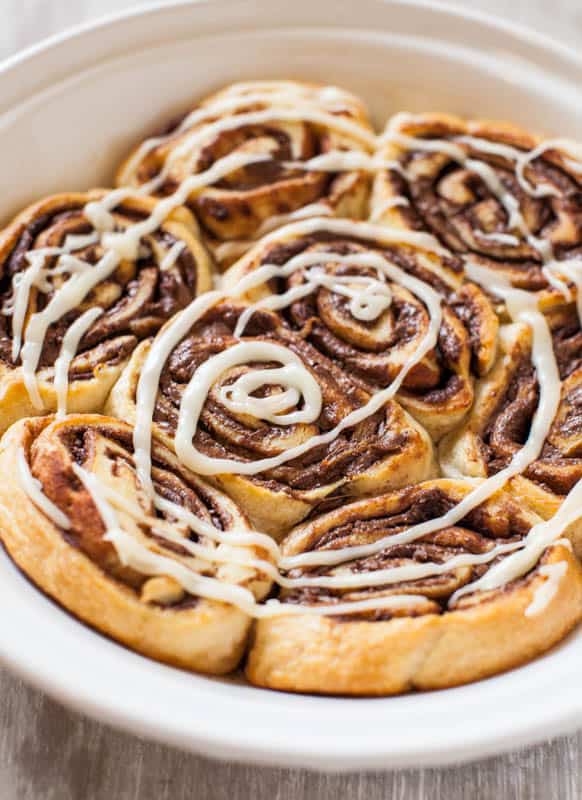
Nutella Cinnamon Rolls with Vanilla Glaze — A can of crescent rolls never tasted so good as when they’re stuffed with Nutella and rolled up. Ready from start to finish in 15 minutes, no joke
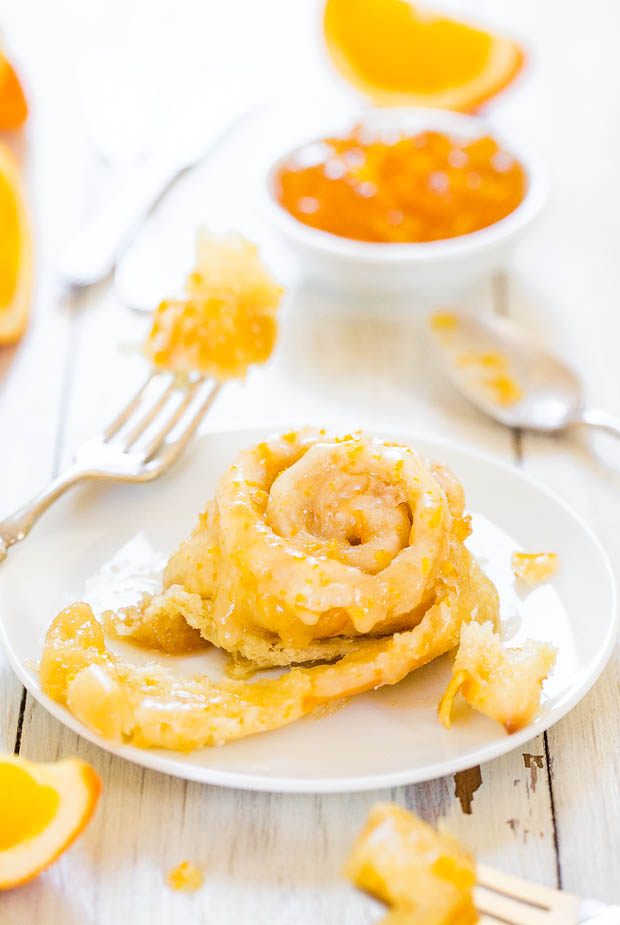
The Best Glazed Orange Sweet Rolls — These homemade orange rolls are filled with a buttery orange filling and are topped with a simple orange glaze. They can be prepped the night before, if needed.
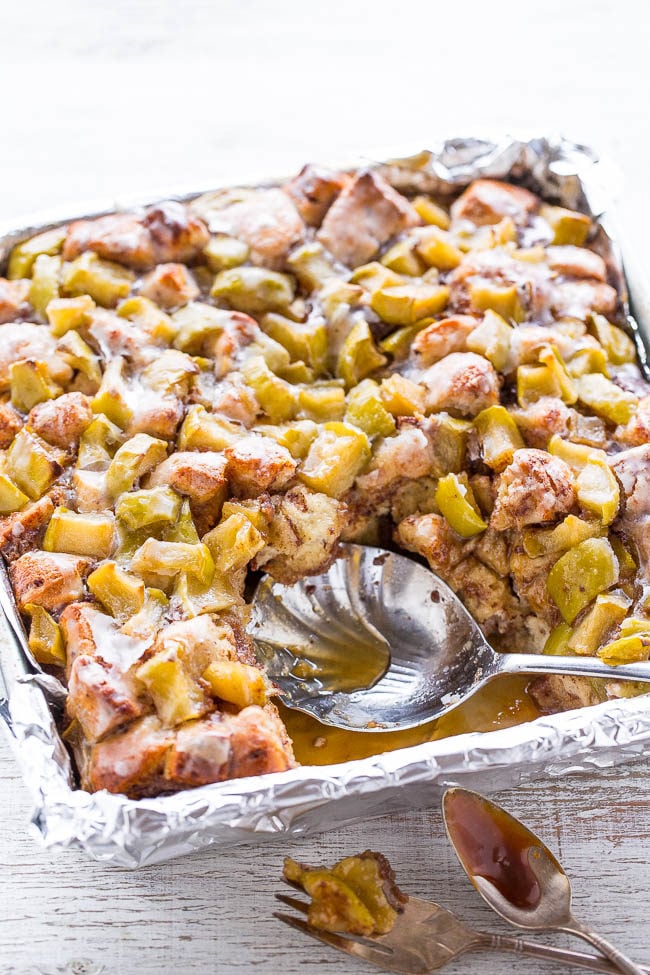
Pumpkin Cinnamon Roll Bake — The recipe is easy, ready in 40 minutes, and you don’t even have to make scratch cinnamon roll dough.
The BEST Pumpkin Cinnamon Rolls — The glaze soaks into the nooks and crannies and adds even more moisture and softness. Total gooey, cinnamon-and-sugary, juicy perfection.
1-Hour Cinnamon Rolls with Cream Cheese Frosting — The dough is made, rolled out, sliced, and immediately baked, which eliminates many hours and steps compared to most cinnamon roll recipes.
Caramel Apple Cinnamon Roll Bake — This cinnamon roll recipe with apples and caramel sauce is easy, ready in 30 minutes, and you don’t even have to make scratch cinnamon roll dough.

These cinnamon rolls and your detailed instructions were EXCELLENT! So good. Thank you for a keeper of a recipe.
Thanks for the 5 star review and glad that the recipe is a keeper for you!
Kneading for 10 to 12 minutes in a stand mixer was way too long! I trusted the recipe but that was foolish of me-my dough turned out very overworked and tough. I would have appreciated a caution in this recipe on over-working the dough, and a description on how dense to expect the dough to be.
Kneading for 10 to 12 minutes in a stand mixer was way too long! I trusted the recipe but that was foolish of me-my dough turned out very overworked and tough. I would have appreciated a caution in this recipe on over-working the dough, and a description on how dense to expect the dough to be.
Maybe your mixer is more powerful than mine, different flour, different climates, there are so many variables in bread making. I have never had someone bring up this concern though in all the comments over the years that I’ve gotten on this recipe. Thanks for trying the recipe.
Greetings–quick question! Why can you only refrigerate for up to 16 hours…how about 24 hours? Thanks so much!
The yeast can over proof and then the rolls won’t turn out properly.
Hi,
Great recipe, I have made it once before following the exact recipe for my friends as part of brunch. They loved these cinnamon rolls.
Quick question: Would I be able to substitute the granulated sugar in the dough for brown sugar as well?
I would not start changing the types of sugar around. Make it as written and as you made before which yielded great results.
I’m wanting to make a few batches and freeze them. Should I bake them and then freeze them or freeze them (with no frosting) and bake them when I’m ready?
Hard to say because I’ve never done it but I would go with the bake, freeze, frost method.
I have been making cinnamon buns for a while now but this is definitely the best recipe I have used. I followed it almost exactly except II had made some yogurt that was a little runny so I used that instead of the butter milk and they turned out perfectly. They tasted great the next day and from the freezer. The only thing I would differently is use half the icing recipe as I will now need to make another dozen cinnamon buns to use all the extra icing – I am not too unhappy about that ;)
Thanks for the 5 star review and glad this is the best recipe you’ve ever used!
I know you don’t say you can do this, but I doubled the recipe and used a kitchenaid mixer and it worked great. So now ya know! This recipe is the BEST.
Thanks for the 5 star review and I am glad these are the BEST!
Glad to know that you doubled the recipe and used a KitchenAid with great success.
These cinnamon rolls were easy to make and were quite possibly the best I’ve ever eaten….and I’ve eaten more cinnamon rolls than I care to admit! My husband declared them in the top 3 sweet things I’ve ever made in the 21 years we’ve been married (the others being lemon bars and coconut cream pie). My children loved them so much that they were sneaking the rolls out of the kitchen to eat them in secret! I don’t know how they taste the next day…they didn’t last 12 hours. The rolls were soft and pillowy, exactly what I was looking for. I loved that I could refrigerate them overnight. Next time I’ll probably make a simple glaze. I liked the cream cheese frosting but most of my family doesn’t like cream cheese. If I could give this recipe 6 stars, I would. This is going in my permanent cookbook…. the one my children are already calling dibs on! Thank you for sharing it!!!
Thanks for the 5 star review and I’m glad they were quite possibly the best you’ve ever eaten and top 3 things you’ve ever made!!
I love this recipe and have made these often. Just wondering if anyone else has experienced the sugar being a bit crystallized and gritty? I wondered if I mixed the butter and sugar together if that might help. This dough is really amazing and I love that I can make them the night before. I still gave it 5 stars.
Thanks for the 5 star review and I’m glad you make these often!
I have never had any issues or read from anyone that’s written in with the sugar issue you’re talking about. Maybe as you said you could try doing what you suggested and see if that helps in your case.
I’ve made this recipe several times and it is my go to! Delicious rolls topped with decadent cream cheese frosting, how can you go wrong? I need to make 3 dozen for a wonens retreat in a few weeks, have you ever frozen the rolls or the dough? I’d love to take them frozen, leave them out on the counter to come to room temp then bake them? What are your thoughts?
Thanks for the five star review and I’m glad you love these rolls! I would say in answer to your questions, I never have done any of the above so I would just make a test batch, maybe halve it – do one thing with one half and see how that goes, and another variable/thing with the other half – and then decide what’s best for the retreat. Good luck!
I make these Christmas Eve and then bake them for Christmas morning every year! We love them :)
Thanks for the five star review and I’m glad these are you go-to for Christmas morning!
I may just now be reviewing, but I’ve made this recipe at least 3 times! I made them at Christmas last year and the year before for Christmas morning and they were a hit with everyone. I looooooove how you can make the day before (and I may try making them 2 days before… not sure how they’d do an extra day in the fridge) and then just put them out and bake in the morning. And they are so fluffy! And delicious.
I also love the icing, but even heaping it on I only use 1/2 to 3/4 of it. But I love love love this recipe!! It has become a family favorite.
Thanks for the five star review and I’m glad this is a family favorite! You can always halve the icing recipe if you find it’s too much for you.
This is by far the best recipe for cinnamon rolls I’ve ever had! When people are looking at it it may seem like a lot of steps but it is just super detailed so you don’t mess up! Thanks for such a great recipe this is my go-to!! So yummy! :)
Thanks for saying that it’s the best cinnamon roll recipe you’ve ever had! PS if you look at it it seems like there’s a lot of steps, but I’ve found with recipes in general, especially anything to do with bread or yeast, if I’m not extremely specific and detailed, people screw it up. So I try to prevent that and save everyone a lot of frustration.
I’ve made these so many times now, and iI beentoo tell you thank you! My mom used to make the best cinnamon rolls I’ve ever had before she passed, but her recipe was just in her head! Every recipe I’ve tried has been ok, but a failure ultimately at re-creating her recipe. Until yours. I cried the first time iI th ate them because the taste immediately brought me back to her and her cinnamon rolls. She used a glaze instead of a cream cheese, but there taste after it melts it’s identical. I can’t thank you enough for these. Not only are they amazing just on their own, but you helpedmy family find a piece of mom again. Thank you!
Thanks for the 5 star review and glad these rolls are ‘the ones’ that make you feel like you’re eating your mom’s rolls! What a lovely comment and so glad these are perfect for you!
Hi there! Just want to say I’ve made these more times than I can count over the past few years, and in many climates, kitchens, states, and even multiple countries. This is one of my all-time favorite recipes and it works like a charm every time for me. Thanks so much for sharing it!
Thanks for the 5 star review and glad this has been a staple go-to for you – even in multiple countries! I have a few recipes like that myself but it’s nice to hear that this recipe is just that for you!