
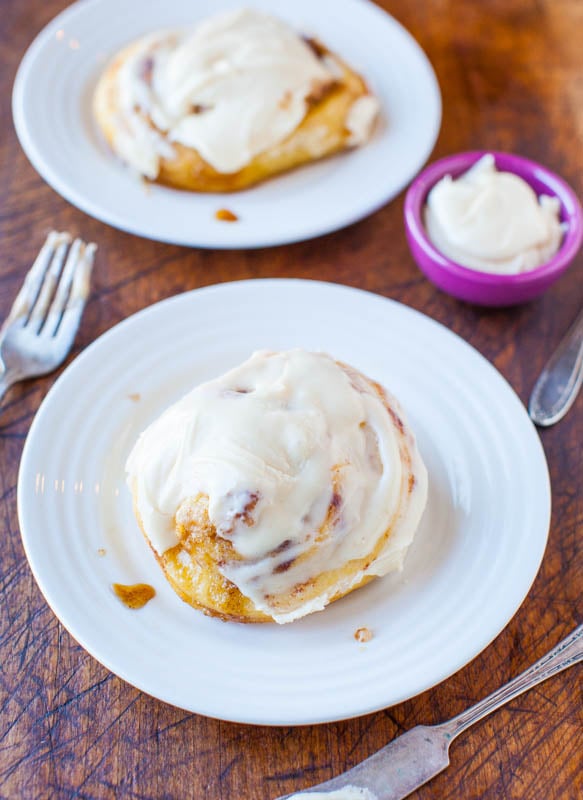
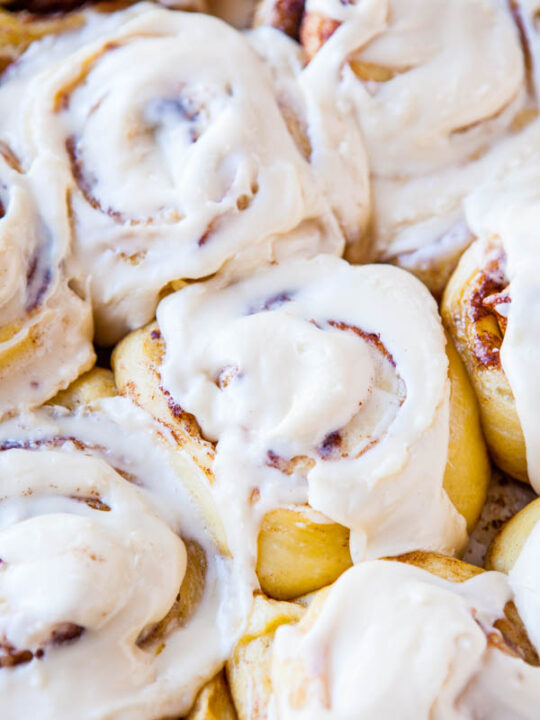
❤️ My Overnight Cinnamon Rolls Recipe results in sweet, fluffy rolls that are ultra-fluffy, thanks to the buttermilk in the dough. Topped with homemade cream cheese frosting, they’re one of my favorite make-ahead breakfasts or brunches for Easter, holidays, and special occasions!

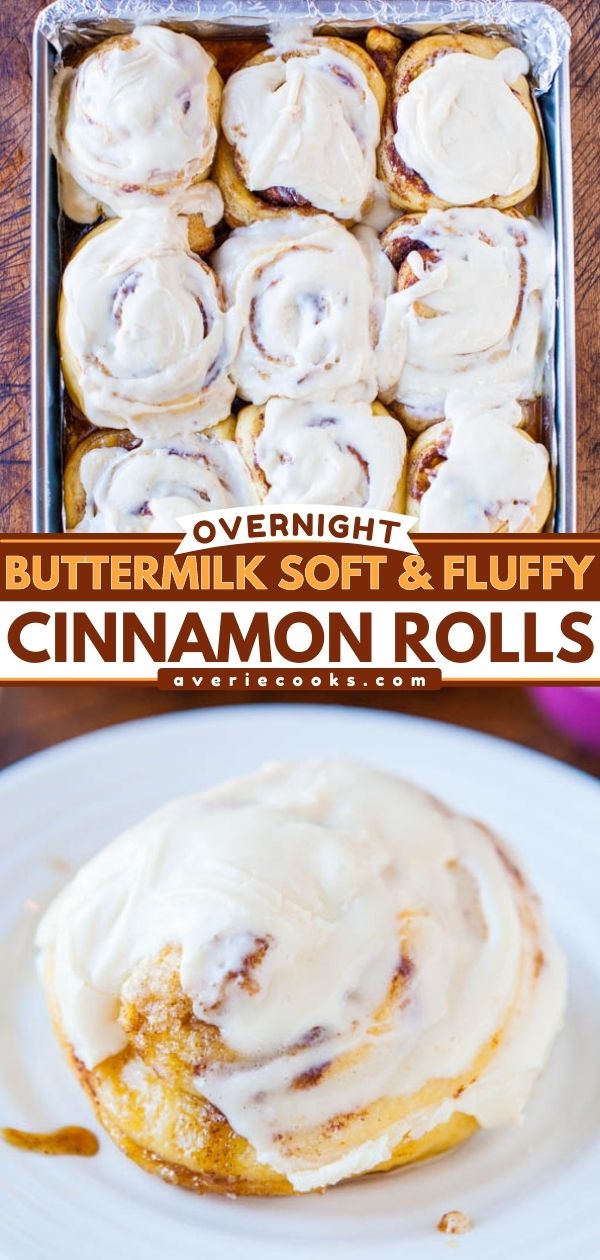
Soft & Fluffy Overnight Cinnamon Rolls
Homemade cinnamon rolls always sound great in theory… until you realize you’d need to wake up at 5 am just to have one with your 10 am coffee. No, thanks!
Luckily, I was able to fix that with this overnight cinnamon buns recipe. These rolls are some of the best I’ve ever made, which is saying a lot, because I’ve tested countless cinnamon roll variations. My chocolate cinnamon rolls, carrot cake cinnamon rolls, and pumpkin cinnamon rolls are all delicious.
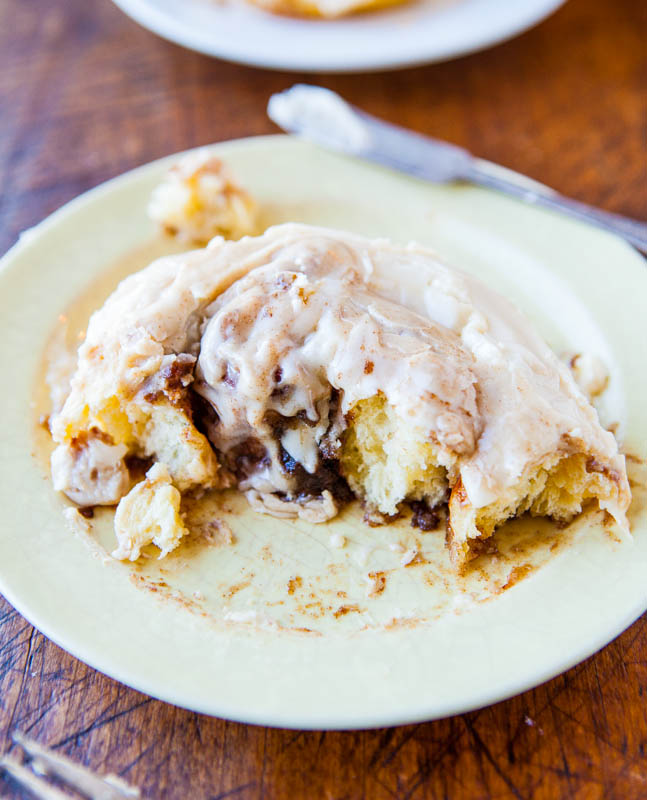
But you just can’t beat the classic flavor, especially when these rolls are made with an ultra-soft, fluffy dough that’s light without being overly dense and a brown sugar-cinnamon filling that melts into a caramel-like sauce. Topped with a dreamy cream cheese frosting, they taste like they came from a bakery but are simple to make at home.
My overnight prep process ensures there are no shortcuts while keeping the process simple and eliminating stress in the morning. It’s the best of both worlds, which is why these rolls have a nearly 5 -star rating with over 100 reviews! Take a look at what readers are saying:
I’ve been making these cinnamon rolls for over a decade (12+ years, I think, as of 2025) and they are everyone’s favorite! I’ve made them dozens of times at this point and the recipes comes out perfectly every time, which is not an easy feat for *any* bread recipe.
Annie
I’ve made this recipe MANY times now over several years. It’s my go-to Christmas morning recipe. Being able to make the dough the night before is a lifesaver. And everyone who’s ever had one of these has raved!!
Jana
Ingredients and Notes
To make the best cinnamon roll recipe ever, you’ll need:
- All-purpose flour: You can also use bread flour, but the rolls will be chewier. I prefer all-purpose flour for a soft, fluffy consistency. I haven’t tested this recipe with gluten-free flour
- Instant dry yeast: I used Red Star Platinum instant yeast, which is my gold standard. It’s an instant dry yeast, so you don’t have to proof it first with water and wait for it to get bubbly and foamy. Just sprinkle it right into the bowl with the other ingredients and then pour the liquids over the top of everything. When I deviate from Platinum and use other yeast, my dough doesn’t rise as well and doesn’t bake up as puffy and fluffy. Do not substitute active dry yeast. It’s not the same
- Baking staples: Granulated sugar, salt, unsalted butter, large eggs
- Buttermilk: If you don’t have buttermilk on hand, you can make your own with milk and white vinegar. Or, use powdered buttermilk. (See the recipe card below)
- Cinnamon sugar filling: Unsalted butter, light brown sugar, and cinnamon
- Cream cheese frosting: Unsalted butter, cream cheese, vanilla extract, confectioners’ sugar, and salt
Note: Scroll down to the recipe card section of the post for the ingredients with amounts included and for more complete directions.
How to Make Homemade Cinnamon Rolls
This overnight cinnamon rolls recipe is simple, but there are quite a few steps. I highly recommend reading over the reicpe card a few times before starting and planning accordingly. Here’s an overview of the process:
Make the dough: Prep the wet and dry ingredients. Then, beat the wet ingredients in with the dry ingredients using a stand mixer fitted with a paddle attachment. Switch the paddle attachment with a dough hook, and knead the dough, adding more flour as needed. Note that the dough is very sticky and tacky and is supposed to be that way!
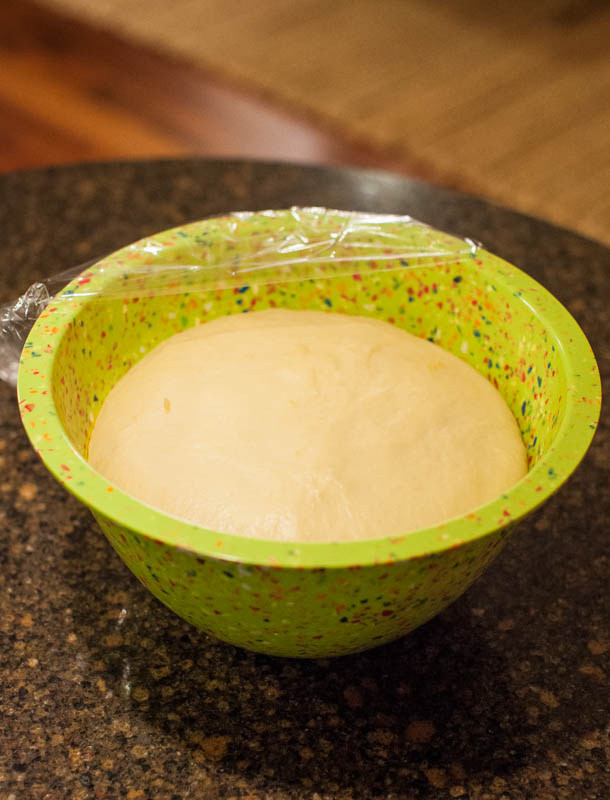
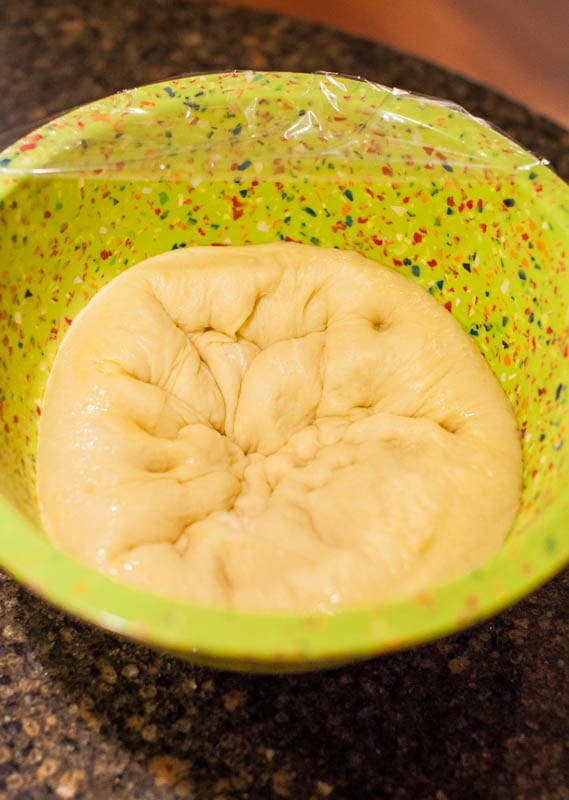
Proof the dough: Transfer the dough to a large bowl that has been greased with cooking spray, cover, and let it rise in a warm, dry place until it doubles in size.
Shape the cinnamon rolls: Punch the dough down, transfer it to a floured work surface, and knead until smooth. Roll the dough out into a large rectangle, and butter the dough, leaving a border around the edges. Sprinkle brown sugar over the dough, and roll it into a tight log. Pinch the seam closed, and stretch the log out evenly. Slice the dough into equal-sized rolls.
Bake the rolls: Arrange the rolls, cut side down, in a prepared baking pan, and cover with plastic wrap. Let the rolls rise and double in size before baking. Then, bake until they’re lightly golden brown on top and cooked through.
Prep the frosting: While the rolls cool, beat the frosting ingredients in a stand mixer or medium bowl. Then, spread the frosting over the semi-cooled rolls in the baking dish, and enjoy!

My Top Tips for Success
- Don’t over-flour the dough. This dough is supposed to be soft, sticky, and slightly messy. That’s what gives you that ultra-fluffy, tender texture. Adding too much flour will result in dense, bready rolls. Trust the process.
- Temperature matters more than you think. Warm (not hot) buttermilk is key to activating the yeast properly. If it’s too hot, you’ll kill the yeast. If it’s too cold, your dough won’t rise well. Aim for “warm bath water” vibes if you’re not using a thermometer.
- Create a warm rising environment. If your kitchen runs cold, use the oven trick: briefly warm it, turn it off, and let your dough rise inside. This makes a huge difference in getting that soft, pillowy texture.
- Use unflavored dental floss to cut the rolls. It sounds weird, but it’s the best way to get clean slices without squishing the dough (way better than a knife).
- Adjust the frosting. I prefer a simple cream cheese icing, but you can add milk, cream, buttermilk, orange zest, almond extract, or whatever you like to make the flavor your own.
Overnight Soft and Fluffy Cinnamon Rolls
Equipment
- 1 Stand Mixer Fitted with a Paddle Attachment
- 2 Mixing Bowls
- 1 (15x10x1-inch) Jelly Roll Pan
Ingredients
Dough
- up to 4 1/4 cups all-purpose flour, divided
- ⅓ cup granulated sugar
- 2 ¼ teaspoons instant dry yeast, one 1/4-ounce packet, I use Red Star Platinum
- pinch salt, optional and to taste
- 6 tablespoons unsalted butter, melted (3/4 of one stick)
- 3 large eggs, lightly whisked
- ¾ cup buttermilk*, See Notes
Filling
- ½ cup unsalted butter, 1 stick, very soft – let it sit out while dough rises
- 1 to 1 ¼ cups light brown sugar, packed (granulated sugar or a half-and-half combo of white and brown sugars may be substituted)
- 3 to 4 teaspoons cinnamon, or to taste (I use 5 teaspoons)
Cream Cheese Frosting
- ½ cup unsalted butter, softened
- 6 ounces cream cheese, softened
- 1 tablespoon vanilla extract
- 1 pound confectioners’ sugar, 4 cups
- ½ teaspoon salt, optional and to taste
Instructions
Make the Dough
- To the bowl of a stand mixer fitted with the paddle attachment, combine 4 cups flour, 1/3 cup sugar, yeast, salt to taste; set aside.
- Place 6 tablespoons butter in a small microwave-safe bowl, and heat to melt, about 45 seconds; set aside.
- Crack eggs in another bowl and whisk; set aside.
- Add buttermilk to a glass measuring cup and warm to temperature, about 45 seconds on high power in the microwave. Tips – Based on the type of yeast used, milk temperatures will vary. Red Star Platinum yeast calls for warmer temperatures than most, 120 to 130F; other brands and yeast call for much lower temperatures, about 95 to 105F. Warm milk according to manufacturer’s recommendations on the packaging. Taking the temperature with a digital thermometer is highly recommended, but if you’re not, make sure the milk is warm, not hot. Err on the cooler rather than hotter side so you don’t kill the yeast. If the milk separates or gets a little funny looking after being warmed, whisk it to smooth it out.
- To the dry ingredients in the stand mixer, add the melted butter, eggs, buttermilk, and beat on medium-low speed for about 1 minute, or until combined.
- Switch to the dough hook (the dough will have stuck to the paddle and just pick off what you can and put it into the bowl) and knead for 10 to 12 minutes (15 to 18 minutes by hand).
- If after 5 minutes more flour is needed, add the remaining 1/4 cup flour, 1 tablespoon at a time, until the dough clears the side of the bowl but sticks to the bottom. Tips – This is a very sticky, tacky, moist, and borderline sloppy dough; don’t be tempted to over-flour it. It’s supposed to be that way. The more flour you add now, the less fluffy and more dense the rolls will be. Dough should clear the sides of the mixer while kneading but sticking to the bottom is fine. However, if the dough is simply too sloppy to work with, you can't move it from mixing bowl to rising bowl, it does need more flour so add some, as little as you can get away with, until you can work with the dough more easily.
- Remove the dough from the mixing bowl, spray a large mixing bowl with cooking spray, and place the dough in the bowl. Cover with plastic wrap and place it in a warm, draft-free place to rise for about 2 to 2 1/2 hours, or doubled in size. I keep my bowl inside a powered-off oven. Every 45 minutes or so, I power on the oven for 1 minute to 400F, as if I am preheating it, then I power it off. Do not, repeat not, keep the oven on. These short bursts of 1 minute of heat create a stable 85F-ish warm environment, ideal for the yeast. If your rising spot is cold, it will take longer than 2 1/2 hours.
- Prepare a 11-by-17-inch or similar sized jellyroll pan or sheetcake pan with a raised edge, or use a 9-by-13-inch pan. I prefer a jellyroll pan because it’s slightly larger so the rolls are less squished, have more room to rise, and bake more evenly. Line pan with aluminum foil, spray with cooking spray; set aside.
Shape the Cinnamon Rolls
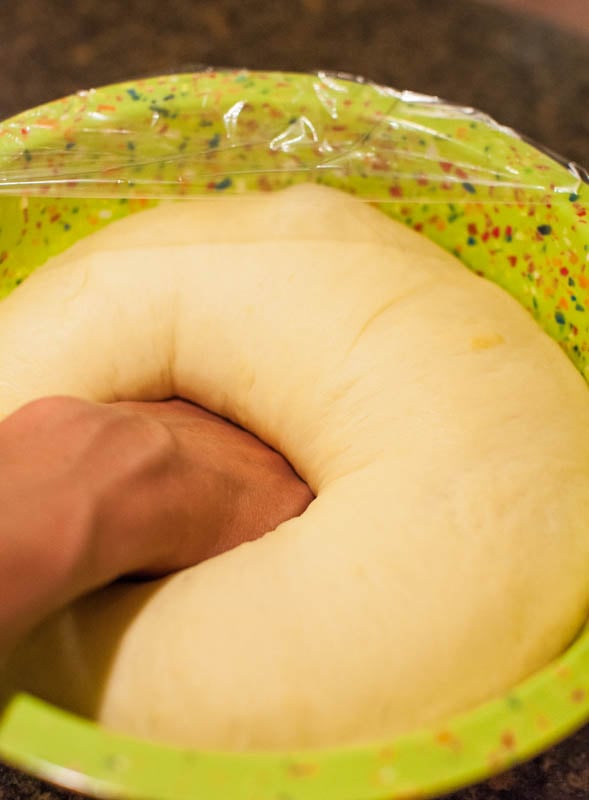
- After dough has doubled in size, punch it down. Turn dough out onto a floured Silpat or floured countertop. Knead it lightly for about 2 minutes.
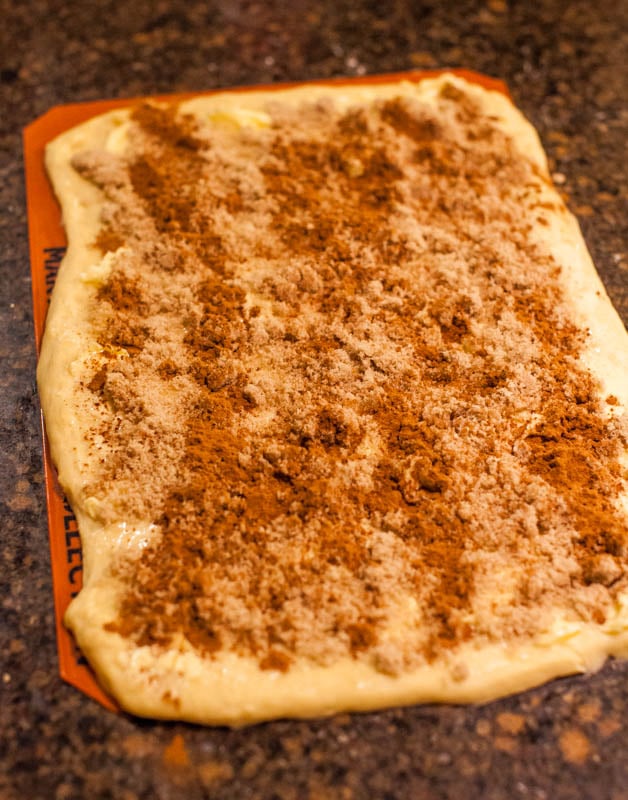
- With a rolling pin, roll it out to a 16-by-12-inch rectangle; just slightly larger than a standard Silpat.
- With a knife, butter the dough with 1/2 cup soft butter, leaving a 3/4-inch border around the edges.
- Sprinkle the brown sugar over it. Sprinkle the cinnamon over the brown sugar; I was very generous with the cinnamon and used almost 5 teaspoons and recommend at least 3; just eyeball it and shake it on.
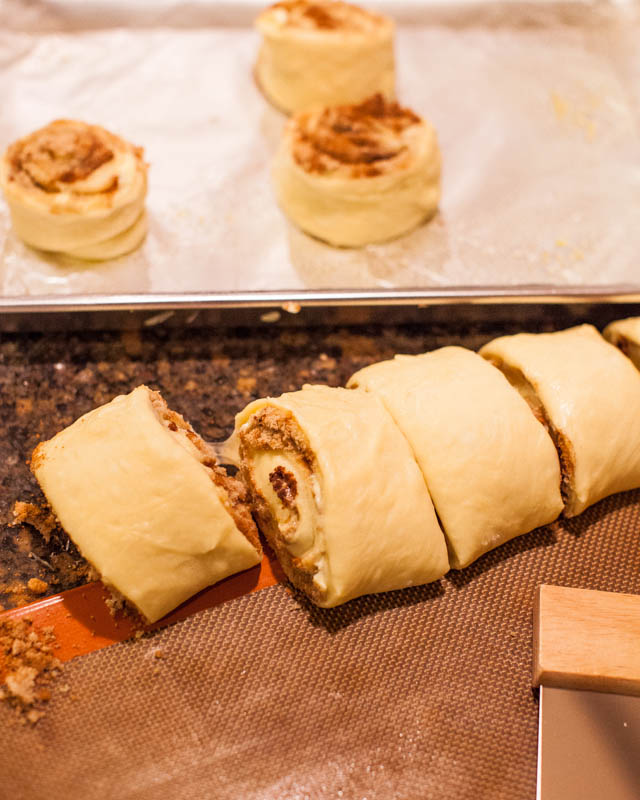
- Loosen the dough from the counter using a bench scraper (or metal spatula), and starting with a long edge, roll the dough into a tight log. Pinch the seam closed and turn log so seam side is down.
- Gently stretch the log to be 18 inches in length with an even diameter all the way around and pat the ends to even them up. Don’t fret if your log isn’t perfect; it’s okay.
- Slice the cylinder into 12 evenly sized rolls (about 1 1/2 inches wide) using a bench scraper, serrated knife, or plain unwaxed dental floss (works great to not squish and compact the log).
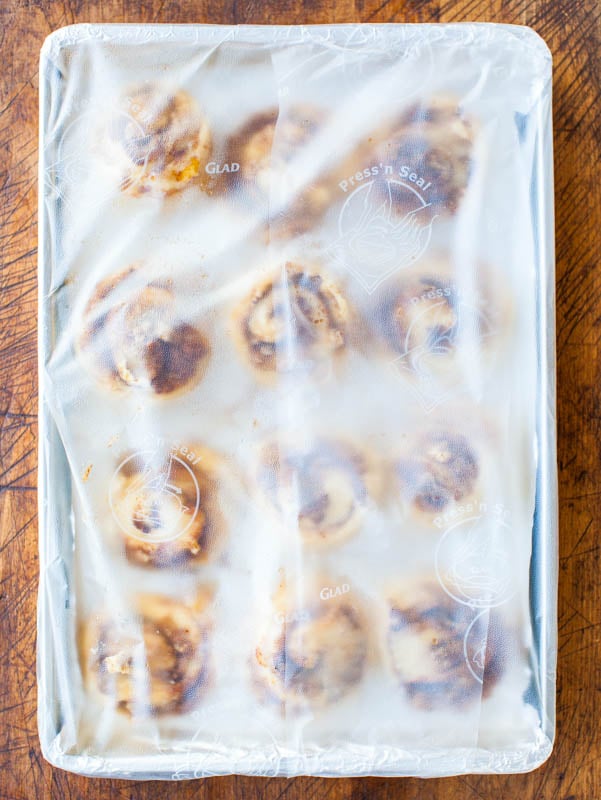
- Arrange the rolls cut side down in the prepared baking pan. Cover with plastic wrap.
- If making the rolls straight through: Let rise in a warm, draft-free place until the rolls have nearly doubled in size, 1 to 1 1/2 hours.
- If making the rolls overnight: Don’t let rolls rise after they’ve been sliced and placed in covered pan. Place pan in refrigerator for up to 16 hours. Before baking, let the rolls sit at room temperature until they have nearly doubled in size, about 1 hour.
Bake the Rolls
- For either version, bake at 350ºF for 22 to 25 minutes, or until lightly golden on top and cooked through but not overly browned.
- While the rolls cool, make the frosting.
Make the Cream Cheese Frosting
- To the bowl of a stand mixer fitted with the paddle attachment, combine 1/2 cup butter, cream cheese, and beat on medium speed to combine, about 1 minute.
- Add the vanilla, 3 cups confectioners’ sugar (I don’t bother sifting), and beat until smooth and fluffy, about 3 minutes, stopping to scrape down the sides of the bowl as necessary.
- Add remaining 1 cup of sugar (or more, or none) as necessary, to taste, based on desired frosting consistency and flavor.
- Spread the frosting over the tops of the semi-cooled rolls and serve. Tips – Make sure they're not too warm or the frosting will melt. You may not use all the frosting if you don't like a lot of frosting on your rolls. That's fine, you don't need to use it all. Extra frosting will keep airtight in the fridge for many weeks or you can freeze it.
Notes
- Make your own buttermilk with whole milk and vinegar. Add 3/4 cup of 2% or whole milk to a large measuring cup. Stir in 1 tablespoon of white vinegar. Let that mixture sit for 2 minutes before using in the recipe.
- You can use powdered buttermilk. You’ll mix how many ever tablespoons the package calls for, with 3/4 cup of water, to yield 3/4 cup of buttermilk. For those who bake with or use buttermilk semi-frequently, but not so frequently to keep in in your fridge, keeping a tub of powdered buttermilk in your pantry is very handy.
Nutrition
Nutrition information is automatically calculated, so should only be used as an approximation.
©averiecooks.com. Content and photographs are copyright protected. Sharing of this recipe is both encouraged and appreciated. Copying and/or pasting full recipes to any social media is strictly prohibited.
More Cinnamon Roll Recipes:
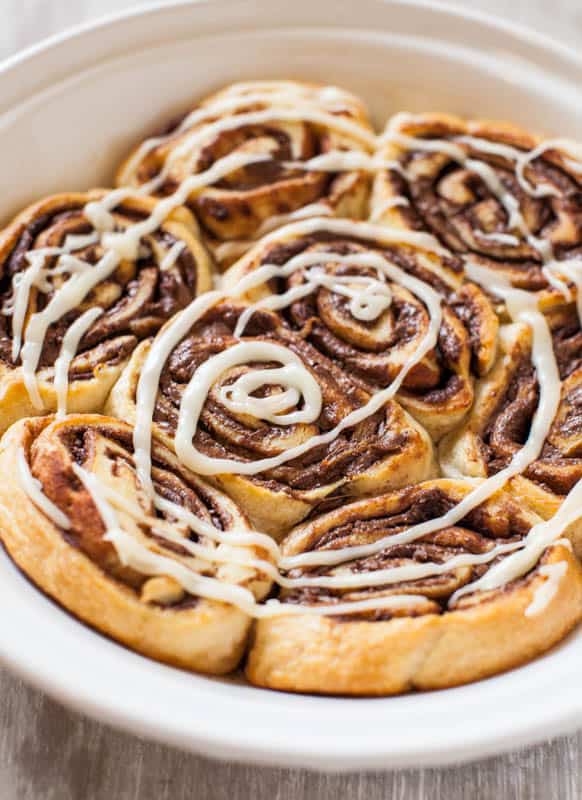
Nutella Cinnamon Rolls with Vanilla Glaze — A can of crescent rolls never tasted so good as when they’re stuffed with Nutella and rolled up. Ready from start to finish in 15 minutes, no joke
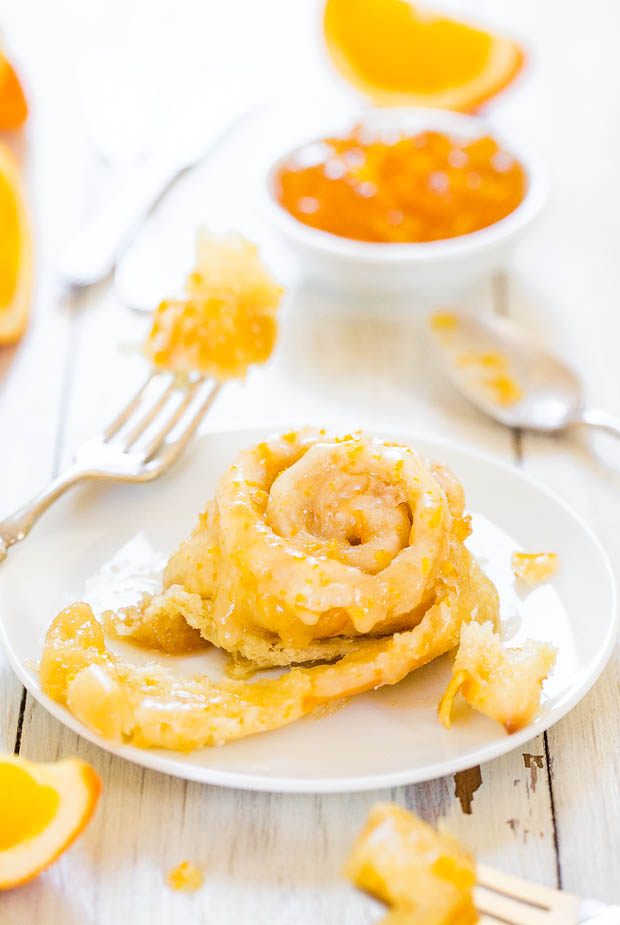
The Best Glazed Orange Sweet Rolls — These homemade orange rolls are filled with a buttery orange filling and are topped with a simple orange glaze. They can be prepped the night before, if needed.
Pumpkin Cinnamon Roll Bake — The recipe is easy, ready in 40 minutes, and you don’t even have to make scratch cinnamon roll dough.
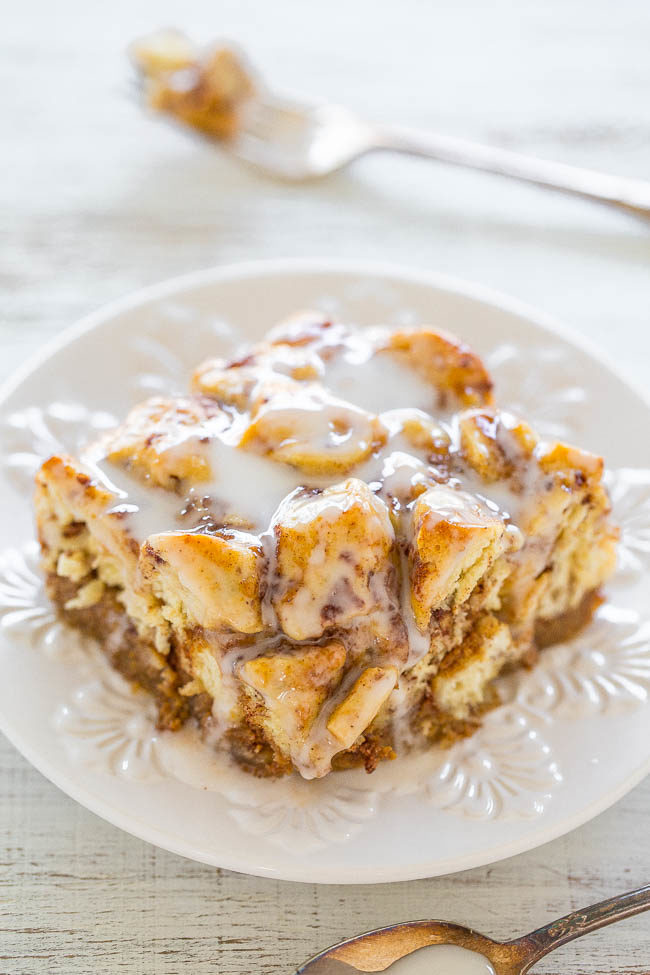
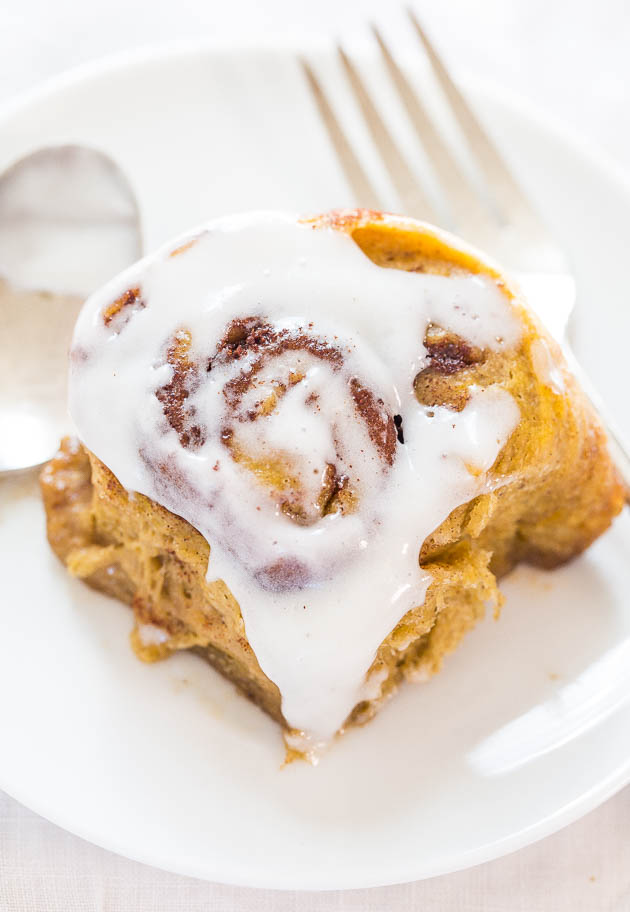
The BEST Pumpkin Cinnamon Rolls — The glaze soaks into the nooks and crannies and adds even more moisture and softness. Total gooey, cinnamon-and-sugary, juicy perfection.
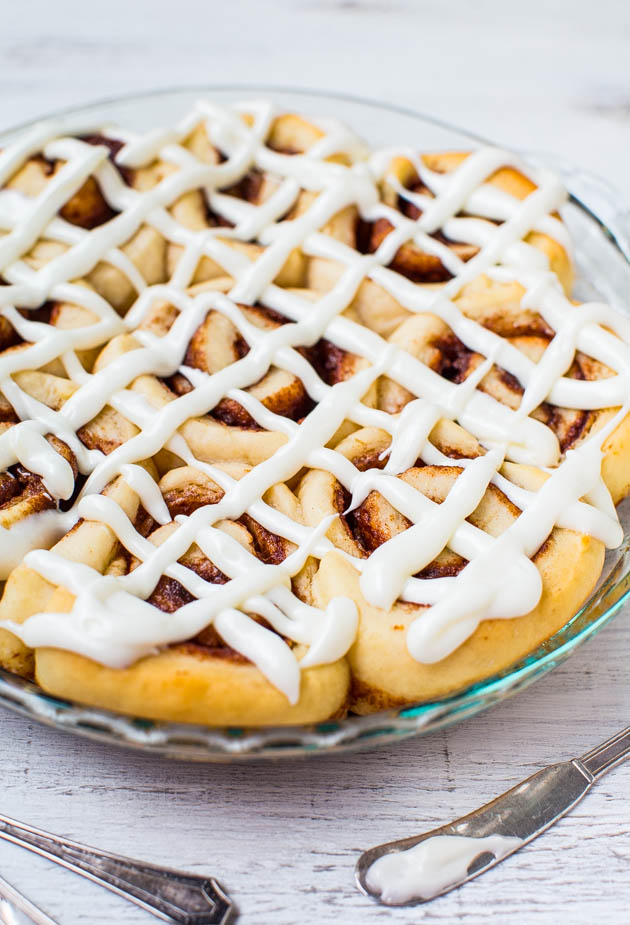
1-Hour Cinnamon Rolls with Cream Cheese Frosting — The dough is made, rolled out, sliced, and immediately baked, which eliminates many hours and steps compared to most cinnamon roll recipes.
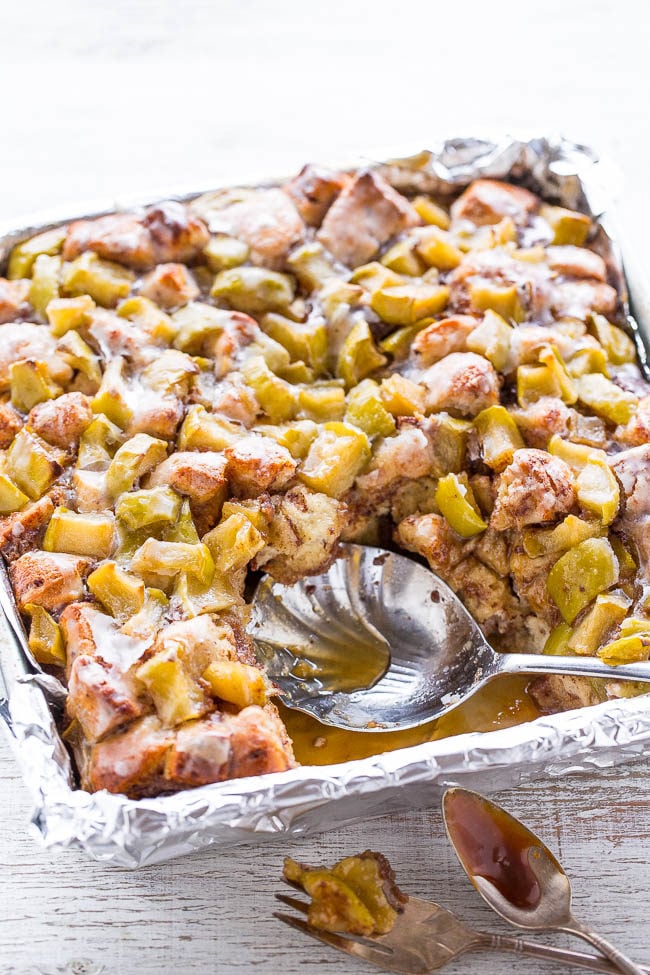
Caramel Apple Cinnamon Roll Bake — This cinnamon roll recipe with apples and caramel sauce is easy, ready in 30 minutes, and you don’t even have to make scratch cinnamon roll dough.

Thank you! Thank you! Thank you!
You’re welcome!
What is the difference if I use active dry yeast (Red Star Brand) compared to the instant? Can I substitute this or is there another step I need to take?
I am making these tonight for a breakfast date tomorrow :) they look absolutely delicious!!
Active dry yeast needs to be proofed, i.e. combined with water, milk or another warm liquid for about 10 minutes until foamy and bubbly and THEN added to the rest of the recipe. Whereas instant can just be tossed into the dry ingredients, no extra step required.
I really love love love Platinum Red Star yeast. It’s $2 bucks for a pkg of 3 at the grocery store and if you’re seriously making these, I do really recommend that yeast for super soft, puffy rolls if you haven’t started yet. Either way, LMK how they turn out!
I followed your advice and went to the store and got instant yeast! The rolls look amazing, I have never seen dough that soft before, and I’ve made a fair share of bread recipes. They are in the fridge now rising and I can’t wait to bake them tomorrow morning!!
Thank you so much for taking the time to respond to my comment and also for the amazing detailed recipe! I’ll let you know how they turn out tomorrow morning :)
YAY! Glad you made them and that you’re loving the soft PUFFball status :) Yes, that yeast is amazing and it never lets me down. And the dough itself, with the buttermilk, it’s like buttahhh!
So happy they’re in the fridge right now rising. Keep me posted how they bake up for you! I am sure you’re going to have a very happy morning!
THEY WERE ABSOLUTELY AMAZING!!!!! :) I cannot thank you enough for your detailed recipe and all of your advice! I ended up baking them in a 9×13 glass pan for about 23 minutes and they were perfectly golden on the top and soft and doughy in the middle. The frosting was of course amazing, I ended up making 3/4 of a batch this morning and it was the perfect amount!
As expected there aren’t too many leftover :) This is my new “keeper” recipe for cinnamon rolls and I will pass it along to family and friends! I cannot wait to try more of your recipes :)
Thank you again!!
Looooove this comment & that you had success and that they turned out perfectly for you AND that this is your new keeper recipe! When I write these posts they take.me.forever. But I figure if I can help 1 person have cinnamon roll nirvana, it’s worth it! So glad you followed my instructions to a T and that everything worked out amazing! Thanks for LMK! Makes my day :) Have a great weekend and LMK if you try other recipes!
I also froze one cinnamon roll just to test out how it held up…well it’s only been a few days but I couldn’t wait any longer and I reheated it and it was just as delicious as the first day!!! I’m now obsessed with your blog and every recipe! I think I have pinned every single recipe!! I can’t wait to try more :)
And it just so happens that I have a bag of cinnamon chips sitting around and I am going to make those cookies that you posted yesterday! Thanks again :)
So glad to hear that the freezer test worked! I do it all the time :) Such a timesaver, too!
Thanks for all the pins and the sweet compliments and if you try the cinn chip snickerdoodles, LMK how they go!
I was wondering how essential it is to make these in a jelly roll pan? I know you mentioned using another but the rolls could brown easier. Also, can this recipe be halved? I am only cooking for 2 people and I think this night make too many for us :) or at least I shouldn’t eat that many!! Your recipe looks delicious and I can’t wait to try it! Thanks for taking the time to write a detailed post :)
I have never halved it but I’m sure you could. I simply make the rolls as directed and freeze extra and pull them out as desired.
You could use a 9×13 pan or a jelly roll pan for the fullbatch; I personally think you will get better results with a jelly roll pan (less squishing) but either will be fine. LMK when you make them and how they were!
OH MY GOODNESS. I baked these this morning for Mother’s day (she LOVED THEM) but made them last night, and I didn’t need to add extra flour. When I rolled out my dough, it was pretty thick and when I rolled it up, I was scared it was too thick. It wasn’t. IT WAS DELICIOUS. I had never made cinnamon rolls but these are perfect. I gave them away to neighbors and I’m sure they are enjoying them now. thank you so much for the recipe! <3
So glad to hear that they turned out so well for you and that they were a big hit!! And that you’ve never made cinn rolls before and still had perfect success! That is wonderful! Glad your mom loved them (and no doubt the neighbors)- in the future you can take the finished rolls, wrap them in clingwrap or foil, stuff into gallon sized ziplock bags and freeze for months. That way on a random Sat morning you can pull out a couple if that’s all you need :) Thanks for coming back to tell me you made these!
Hi Averie, thanks so much for this amazing recipe! I just made them and they were SO AMAZINGLY DELICIOUS! This was my first attempt at making cinnamon rolls, I was never too excited in waking up at 5AM to start the baking, even starting them the night before seemed like too much planning ahead for me :), but I love your blog and recipes so this was the one to try! They turned out fantastic, your detailed recipe was really helpful and nothing went wrong! I did kneed the dough by hand, I think it might have been easier/less sticky than using a dough hook.
The results were fantastic! I made them for my boyfriend and his roommates to help with studying for finals, everyone loved them but I think it backfired because everyone needed a nap after! Thanks for the great recipe Averie, happy baking!
I am beyond impressed that you kneaded by hand, never made cinn rolls but made them, that you got up at 5am and that you gave them to your boyf & gang for studying. You get GF of the year award!! :) Thanks so much for making them & LMK! And glad the detailed info & instructions help! :)
I don’t know if this has been asked already….I understand that you preheat the oven to 400 turn it off and then quickly place the dough inside. But, when powering the oven on again for one minute, is the dough still in the oven for the one minute of heat?
I am going to try this on Sunday night.
The point of doing this is to create a warm environment for the dough to rise. If you house is 68F inside, that’s chilly for yeast. They like it about 90F. So just keep the pan in the oven for a minute while you power the oven on, then shut it off. This creates a 90F spot. It does cool back down as time goes on, but at least it gives them a headstart. Please come back and tell me how the recipe goes for you!!
I’m making these tonight/tomorrow morning, Avery! The first recipe of yours I’ve tried (and now make whenever I want a cookie) is your Chewy Chocolate Chip and Chunk cookies – they’re amazing! Then I tried your One Hour Whole Wheat Pizza Dough, my first ever homemade pizza dough – and it turned out so delish too! So excited to make these and just wanted to say thank you for posting your recipes and also all of your detailed tips and techniques – I’m sure it takes a lot of time to write each post but it makes a huge difference!
xo
Wow you’ve made so much and thanks for LMK! The cookies are some of my faves and glad you tried pizza dough and now these rolls..you’re going to love them!
I am so glad that my writing/tips/tidbits help because you’re right, it does take a fair amount of time but I’d rather be thorough so people have success! It’s a peeve of mine when I read recipes that are not quite flushed out enough to really know if I am on the right track or not so I try to be super clear.
Please report back if you make the rolls how they went for you!
They turned out delicious! I missed the part where it said to only use 4 cups of flour and just add the 1/4 cup afterwards if needed. When I noticed that I was worried it would make them too dense but they weren’t – they were so good and a huge hit with my friends/family I shared them with! Thanks again for this amazing recipe:) I will be making these many time’s I’m sure!
Oh Stephanie I am soooo glad that they worked out well for you! If you ever want a version on this theme, these Oatmeal Raisin Rolls are very similar in preparation method and if you like oatmeal raisin bagels, you’d love these https://www.loveveggiesandyoga.com/2012/11/oatmeal-raisin-rolls.html
I am so happy that everyone loved them and that they even wanted the recipe.
Oh and these take an hour, from start to finish, if you ever want something QUICK and easy! https://www.loveveggiesandyoga.com/2013/01/soft-buttery-one-hour-pretzels.html
Just wow! My sister and I just finished making these and are in the fridge for the overnight rise, but we just haad to sample out the off-cuts, sooo good! I love the goey sticky kinda sauce that forms at the bottom, paired with the cream cheese frosting and it’s just heaven!
I am so glad to hear that you made them and they’re already in the oven for tomorrow! And that you sampled some already and are so happy! Thanks for coming back to LMK you tried a few tastes already and tried the recipe!
Um it’s so much more amazing this morning! My whole family loved them and they taste like Cinnabon, which we don’t have in Australia but tried overseas last yr and fell in love with! Thank you! I think this will become a weekend regular and my place!
I was so baffled by your last comment about the time of day and I thought, well, maybe she’s a real early riser and on the east coast, i.e. New York. Ahh, I get it now. Australia!!! :)
I love the rolls too and so glad they met your approval and the family’s, too; and that you think they’re like Cinnabons! YAY! Thanks for coming back to LMK you enjoyed them so much!
I saw those photos and I knew I had to make them, IMMEDIATELY. So I did. There were some mishaps, but there always are when making something for the first time, in my experience. I think I should have rolled them tighter. When I went to cut them, there was extra slack in the dough that made them hard to cut. Practice makes perfect! Although, I don’t know how these could be made any more perfect, given how delicious they were!
There was one thing that happened that I think you might find hilarious – heaven knows I did! I usually put yeast dough into the oven with the oven light on while it rises, and the oven light makes the oven nice and ~80 degrees. So I put the dough in the oven, and went to go read on the couch while waiting for it to rise. Only one problem – I fell asleep! When I woke up, it’d been a little over two hours. And when I went to check the dough….it had EXPLODED. It had gotten so big, it had thrown off the plastic wrap, and had spilled over onto everything! it was so unexpected that I just cracked up! I couldn’t stop laughing for half an hour, and after that I still kept giggling sporadically.
Wow, that’s some good-rising dough! Holy moly! I’ve never had any explosions quite like that. I guess your yeast was active and working well :)
And so glad to hear you made them and for a first effort, very pleased! Rolling dough into logs is a practice makes perfect thing. Trying to get a tight log/tight seal can be tricky. And then if you slice it with a dull knife, or even a sharp one, it can compress your handiwork!
Anyway, thanks for coming back to LMK you tried them & they were delicious! :)
I have tried lots of different cinnamon rolls recipes too – this will be my next (and if they taste as good as their picture, my last!) One tip I found from another recipe if you’re really pressed for time in the mornings: mix up and slice your cinnamon rolls, freeze them 1-2 hours on your cookie sheet and then store in a plastic bag, the night before you want cinnamon rolls just lay them on a sprayed cookie sheet, cover with plastic wrap and leave on top of your stove overnight, in the morning they will be thawed, risen and ready to put directly into the oven!
That’s a good tip…sort of a version of a theme on my overnight/makeahead refrigeration option for the 2nd rise. To just let them go into the fridge and rise on counter the next morning for an hour or so, then bake off. Eliminates the freezing/thawing step but some circumstances/situations call for various timeframes and timing/scheduling so it’s always nice to have options. LMK if you try these & please tell me how it goes!
I have tried at least 10 cinnamon roll recipes trying to find one that my grandson thought were as good as his best friend Bo’s mother’s . Well he said these are even better . Thanks for making me a star!!!!!
You’ve tried 10 and these are the best? AWESOME! I happen to agree they’re the best I’ve ever tried, but that’s so sweet of you to say & glad you’re a star with your grandson!! :)
Oh my goodness…these look so good for a weekend brunch…or any day with my coffee:) I will be trying these! Thanks so much for sharing!