
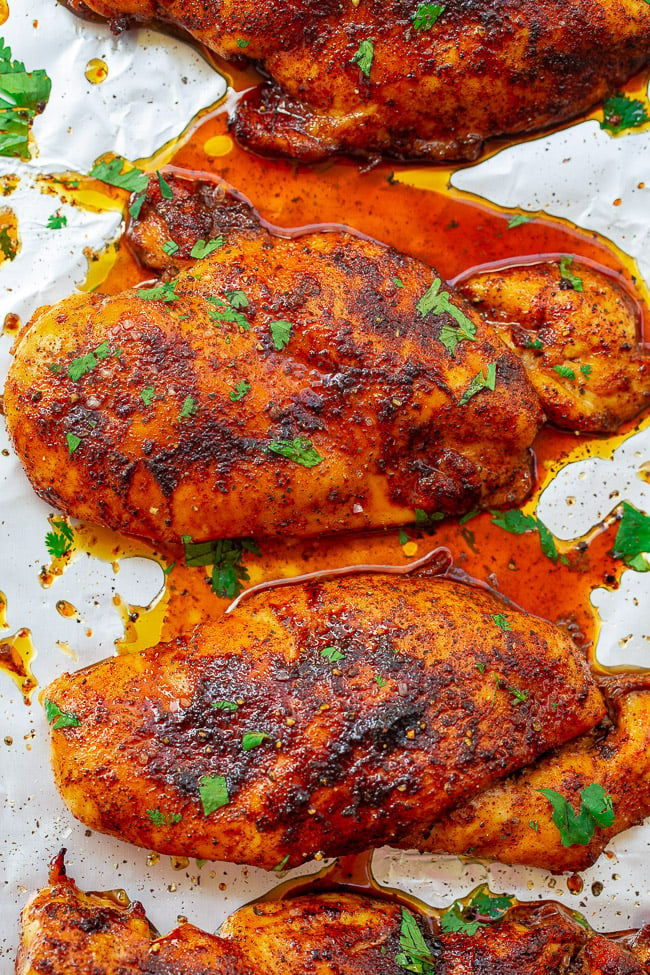
Perfect Baked Chicken Breasts — 🍗❤️🙌 Super juicy, flavorful, EASY, and tender baked chicken breasts that are ready in 20 minutes and made on ONE sheet pan! Nothing complicated or fussy about this PERFECT chicken that everyone LOVES!

Table of Contents
The Best Juicy Baked Chicken Breasts
Generally, I am not a fan of baking chicken breasts, because they tend to turn out dry and don’t usually have as much flavor as, say, grilled chicken.
However, this baked boneless chicken breast recipe changes all that, I promise.
The chicken is tender, juicy, moist, easy, ready in a half hour from start to finish, and best of all, made on one sheet pan. Cleanup is as easy as tossing away a sheet of foil.
This recipe makes 3 pounds of chicken. Yes, that’s quite a bit, but it’s great to keep this leftover chicken in your fridge to throw over salads in the upcoming days or for any way you like to use your chicken. Such as in tacos, burritos, omelets, on its own with a side of roasted veggies, you name it.
It freezes great too, but if you don’t need that much, halve the recipe.
I received this recipe in my email. It was the luscious picture that hooked me. It was the description that landed me. I made it that evening(yesterday). It was sooooo phenomenal that I made it again tonight. My family adored it. Thank you, thank you. This was exactly as the email stated – “perfect.”
Lisa
Ingredients Needed
When cooking chicken in the oven, you only need a few common fridge and pantry staples:
- Boneless skinless chicken breasts
- Extra virgin olive oil
- Kosher salt and pepper
- Brown sugar
- Chili powder
- Regular or smoked paprika
- Cumin
- Garlic powder
- Cayenne pepper, optional but recommended
Note: Scroll down to the recipe card section of the post for the ingredients with amounts included and for more complete directions.
How to Bake Chicken Breasts
Cooking chicken breasts in the oven doesn’t have to be challenging, nor does it have to result in meat that’s the consistency of shoe leather.
Follow my basic and straightforward steps for baked chicken success.
- Add the chicken breasts to a baking sheet.
- Use a meat mallet to pound them to a uniform thickness.
- Drizzle the chicken with olive oil, season generously with salt and pepper, and then add a dry rub to both sides.
- Bake that seasoned chicken in a preheated oven until the internal temperature reads 165F when measured with a meat thermometer at the thickest part.
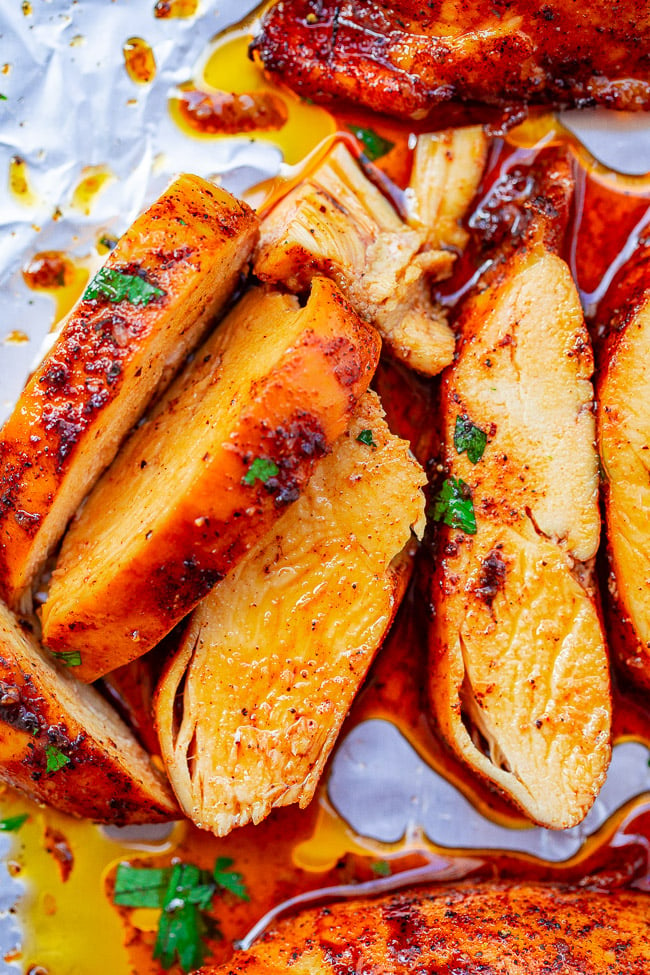
- But first, let it rest for a few minutes. Then, slice and serve!
Can confirm, this recipe makes PERFECT chicken breasts! I was taught to bake chicken at 350, which takes ages and always resulted in dry chicken for me. But baking at 425 is a game changer! I’ll definitely use this as a base recipe for different spice combinations in the future — although I really loved the smoky-spicy-sweet spice blend you shared. You’re so good at creating unique flavor combos with “normal” ingredients!
Claire


Chicken Breasts FAQs
Once pounded to an even thickness, these baked boneless chicken breasts will need to cook in the oven for about 20 minutes, or until chicken is cooked through inside (i.e. the internal temperature is 165 degrees F).
The cooking time will vary slightly depending on the size of your chicken and your oven. Use a digital thermometer. It’s the only way to know for sure! Don’t just guess.
For the best oven baked chicken breasts, I suggest baking them at 425 degrees F.
The reason for pounding the chicken to an even thickness before baking is because chicken breasts are thicker in the middle and thinner on the edges. If you don’t use pounded chicken breasts, the edges will become dry and can burn before the center is cooked through. Additionally, the pounding helps to tenderize the protein and makes for extra juicy chicken breasts.
Obviously a meat tenderizer is the obvious choice, but not everyone has one. I know I didn’t for many years. But do you have an empty wine bottle laying around? Champagne bottle if you’re fancier? Those work very well! Use the plastic or paper the chicken comes in to create a barrier between chicken + bottle.
You’re not pounding the bitter life out of it so don’t worry about breaking the bottle. Plus the bottle then goes straight in the recycling so it’s one less thing I need to
even wash. I am always thinking about the easiest possible way out with the fewest dishes, trust me. But if you are concerned about using a glass bottle, a rolling pin (need to dust mine off) or a heavy skillet will all suffice.
You don’t need to pound it overly thin, just make sure it’s of uniform thickness.
I strongly recommend you let the chicken breasts rest for 5 to 10 minutes. It seals in the juices. Nothing worse that slicing into a steak and watching the juice run everywhere. Same principle here, so relax a minute, and let the chicken do the same. Cover it with a sheet of foil if you want to keep it warmer.
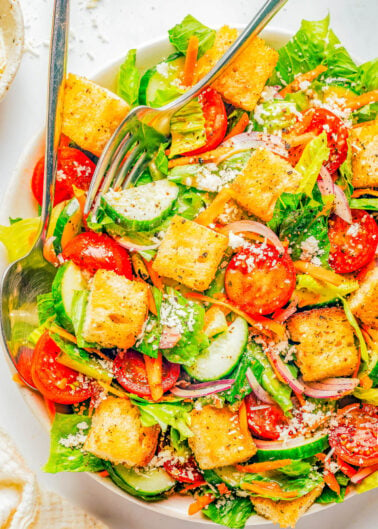
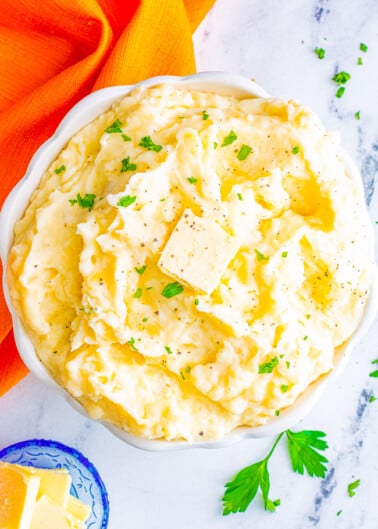
What to Serve with Baked Chicken

Storage and Reheating Instructions
In the fridge: Let the chicken cool before storing in an airtight container. Leftovers will last up to 5 days.
In the freezer: Seal in an airtight container or freezer bag for up to 3 months.
To reheat: Reheat in the microwave for 30-second intervals. You might want to slice the chicken first so the interior warms up faster (this helps prevent the exterior from drying out in the meantime).
Perfect 20-Minute Oven-Baked Chicken Breasts
Equipment
- 1 Small Bowl
- 1 Instant-Read Meat Thermometer
Ingredients
- 3 pounds boneless skinless chicken breasts, 4 extra-large breasts or 6 average
- 3 to 4 tablespoons olive oil
- kosher salt, to taste
- freshly ground black pepper, to taste
- ¼ cup light brown sugar, packed
- 2 to 3 tablespoons chili powder
- 1 to 2 teaspoons paprika or smoked paprika
- 1 teaspoon cumin
- ½ teaspoon garlic powder
- ⅛ teaspoon cayenne pepper, optional and to taste
- 1 to 2 teaspoons finely minced fresh herbs, optional for garnishing (parsley, cilantro, basil)
Instructions
- Preheat oven to 425F (use convection if you have it) and line a baking sheet with foil (optional but highly recommended, see Notes below)) for easier cleanup.
- Place the chicken on the baking sheet, and pound to an even thickness. I use an empty wine bottle, but a meat pounder or tenderizing tool, a rolling pin, or a heavy frying pan all work. The chicken doesn’t need to be pounded ‘thin’, but it needs to be of pounded to a uniform thickness so it all cooks through at the same time.
- Evenly drizzle the chicken with olive oil and generously season with salt and pepper; set aside.
- To a small bowl, add the remaining ingredients (except the fresh herbs), stir to combine, and evenly spoon the dry rub over the chicken on both sides. I add a bit more to the side that’s facing up than the side that’s on the bottom in contact with the baking sheet.
- Bake for about 20 minutes, or until chicken is cooked through (165F) and done. Allow chicken to rest for 5 to 10 minutes before slicing into it (cover with foil if desired to keep it warmer). Resting the chicken really helps lock in the juices and moisture so don’t skip this step. Optionally garnish with fresh herbs before serving. Chicken will keep airtight in the fridge for up to 5 days or in the freezer for up to 4 months.
Notes
Nutrition
Nutrition information is automatically calculated, so should only be used as an approximation.
©averiecooks.com. Content and photographs are copyright protected. Sharing of this recipe is both encouraged and appreciated. Copying and/or pasting full recipes to any social media is strictly prohibited.
More Baked Chicken Breast Recipes:
ALL OF MY EASY CHICKEN RECIPES!
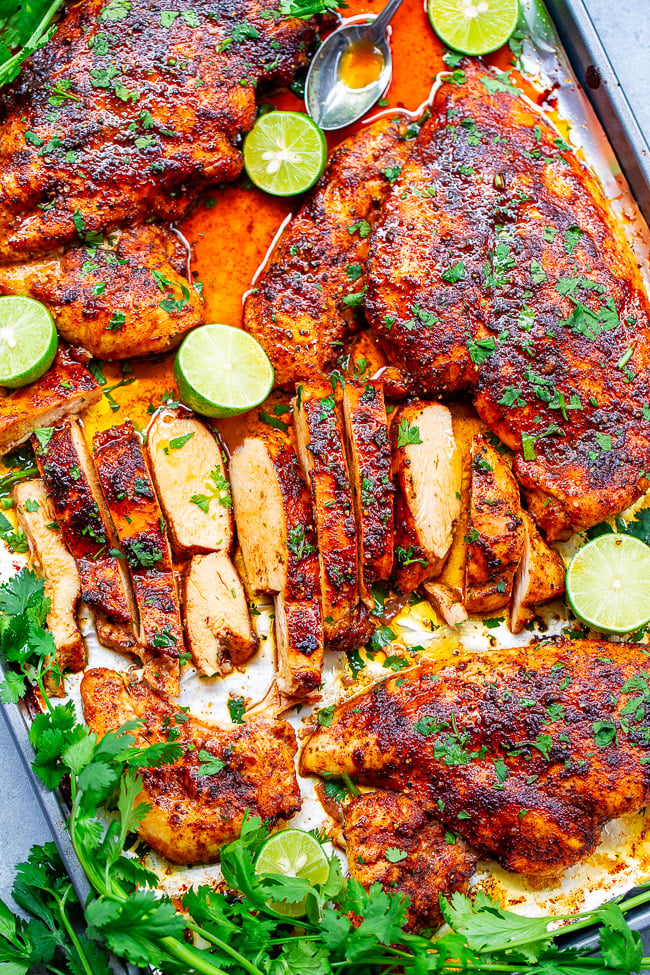
20-Minute Baked Lime Cilantro Chicken Breasts – Super juicy, EASY, tender chicken that’s ready in 20 minutes and made on ONE sheet pan! Bursting with robust Mexican-inspired lime cilantro flavors that will make this an automatic family FAVORITE!
Sheet Pan Brown Sugar Chicken — An EASY sheet pan meal that’s ready in 30 minutes and loaded with layers of flavors from the spice rub, which features a mixture of chili powder, brown sugar, cumin, and more!

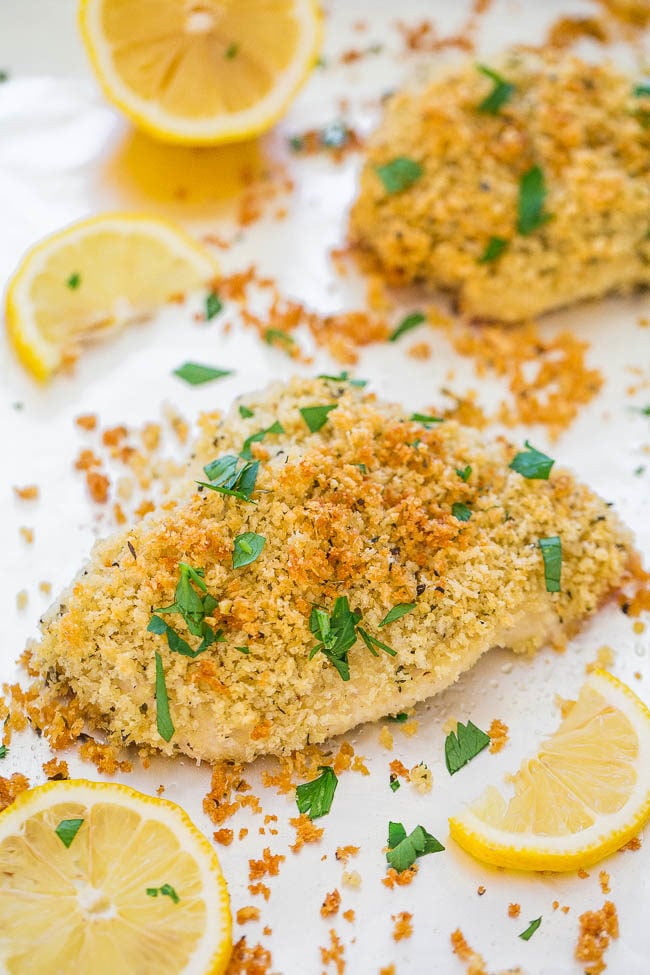
Baked Parmesan-Crusted Chicken — This Baked Parmesan-Crusted Chicken tastes like it’s been deep fried, but it hasn’t! Even better, it’s ready in under 30 minutes and is easy to whip up at the last minute.
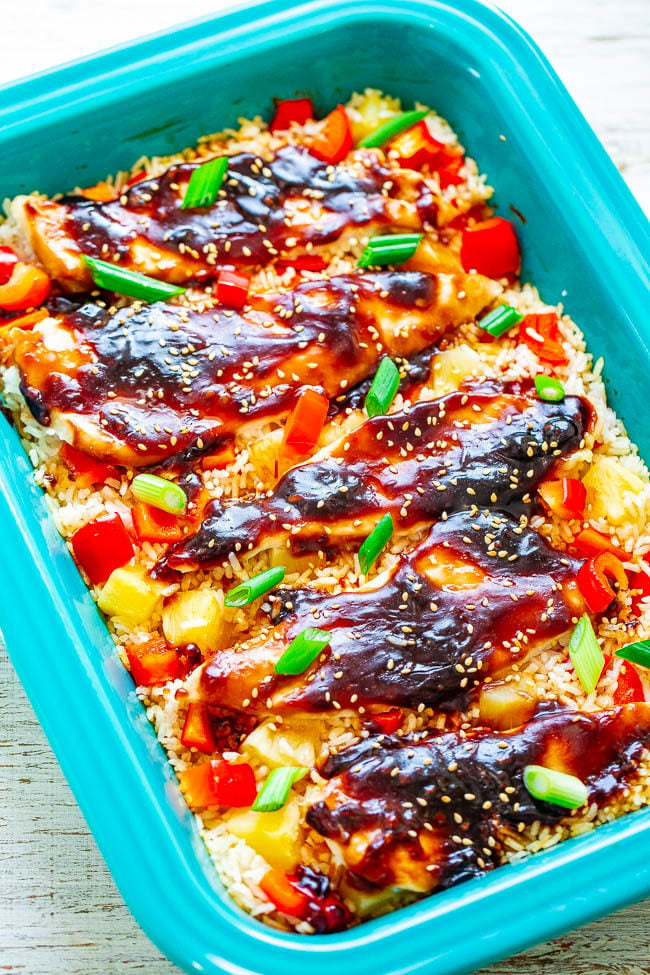
Baked Teriyaki Chicken and Rice — Chicken, rice, pineapple, and red peppers cook together in one pan for an EASY weeknight dinner that tastes like you’re in Hawaii! The homemade teriyaki sauce adds so much INCREDIBLE flavor!
Melt In Your Mouth Chicken — This FAST and EASY baked chicken recipe transforms chicken breasts into a new dinner-time FAVORITE! Tender, juicy, saucy chicken with a Parmesan topping that is incredibly flavorful and made with just FIVE main ingredients!

Sheet Pan Italian Chicken and Vegetables — Fast, EASY, one pan recipe that’s full of FLAVOR from balsamic, Italian seasoning, Parmesan cheese, and basil! The chicken is so tender, juicy, and moist!

Originally posted June 15, 2020 and reposted April 28, 2023 with updated text.

Can confirm, this recipe makes PERFECT chicken breasts! I was taught to bake chicken at 350, which takes ages and always resulted in dry chicken for me. But baking at 425 is a game changer! I’ll definitely use this as a base recipe for different spice combinations in the future — although I really loved the smoky-spicy-sweet spice blend you shared. You’re so good at creating unique flavor combos with “normal” ingredients!
Can confirm, this recipe makes PERFECT chicken breasts! I was taught to bake chicken at 350, which takes ages and always resulted in dry chicken for me. But baking at 425 is a game changer! I’ll definitely use this as a base recipe for different spice combinations in the future — although I really loved the smoky-spicy-sweet spice blend you shared. You’re so good at creating unique flavor combos with “normal” ingredients!
Hi Claire, thanks for the 5 star review! Glad this came out great for you, not dry, and yes 350 the low and slow method, always produced dry chicken for me as well, but not this version. I have a lime-cilantro version of this one and over the weekend just tested another version along these lines with more brown sugar and more chili powder, and sweet potatoes for the fall. Glad you like the unique flavor combo but with normal, common ingredients! That is KEY especially during a pandemic or anyone not living in the US.
This was easy and very good.
This was easy and very good.
Thanks for the 5 star review and glad it was easy and very good!
I totally missed it with the ads and videos that pop up everywhere. Thanks.
What temp and how long to bake?
Start by reading Step 1. and continue reading.
Maybe I missed it but when do you add the fresh herbs? This recipe sounds delicious. Can’t wait to make it. Can you tell me what to do with the herbs?
Thank you,
Sharon
They are optional for garnishing, so at the end before serving if you choose to use them.
Super easy and quick recipe for JUICY chicken, however BEWARE the amount of chili powder!
I used smoked chili powder, so maybe that made it really hot, but next time I will halve the amount. Even my husband that LOVES hot/spicy was sweating it out.
Other than the heat, it was delicious!
Super easy and quick recipe for JUICY chicken, however BEWARE the amount of chili powder!
I used smoked chili powder, so maybe that made it really hot, but next time I will halve the amount. Even my husband that LOVES hot/spicy was sweating it out.
Other than the heat, it was delicious!
Yes probably it was the smoked chili powder as well as the fact that all chili powders do vary in heat . And/or it could have been the cayenne. Either way, you know how to fix it for next time.
Hello. I was wondering what you meant by using the convection oven method. Usually if I use convection, I adjust the temperature down by 25 degrees. So, in this case, should the chicken cook at 400 or 425 using convection?
Most newer ovens these days have a “convection” position. I simply mean turn it to that setting if you have it, if you don’t that’s fine too. You don’t have to alter the temperature for this recipe one way or the other. 425F convection or normal.
I received this recipe in my email. It was the luscious picture that hooked me. It was the description that landed me. I made it that evening(yesterday). It was sooooo phenomenal that I made it again tonight. My family adored it. Thank you, thank you. This was exactly as the email stated – “perfect.”
I received this recipe in my email. It was the luscious picture that hooked me. It was the description that landed me. I made it that evening(yesterday). It was sooooo phenomenal that I made it again tonight. My family adored it. Thank you, thank you. This was exactly as the email stated – “perfect.”
Thanks for the 5 star review and glad it was phenomenal and that you’ve made it two days in a row and your family loved it!
I do not care for ANY dark meat poultry!!! This recipe is tomorrow night’s dinner. They look moist and heavenly!
Maybe you are not aware of it, but throwing the wine bottle into the recycle container without rinsing it out and/or washing off the chicken gunk after pounding the chicken will render it non-recyclable and if there is anything else in the recycle bin, it too will be non-recyclable.
I keep the chicken in the clear plastic bag the butcher puts it in. Don’t worry.
Look forward to viewing and trying your great recipes..thank you
Look forward to viewing and trying your great recipes..thank you