Seven Minute Microwave Caramels are rich, buttery, creamy, sweet, and softly flavored with vanilla and incredibly easy to make!.
Some recipes sound absolutely too good to be true and this is one of them. But it works.
And they’re the best caramels I’ve ever had. And I’m not just saying because they’re made in the microwave in seven minutes without a candy thermometer.

I love caramels and my mom used to make them when I was growing up but there was nothing quick and easy about them. I remember pots of boiling hot liquid, molten sugar, candy thermometers, and just thinking about the absolute precision required stresses me out. I don’t like making things where a few degrees can turn a pound of butter and sugar into a hard worthless rock. I like to have fun in the kitchen and not worrying about soft ball and hard crack stages is why this easy microwave recipe is perfect.
Theoretically I knew it was possible to make caramels in the microwave and did some digging and saw this recipe, but there wasn’t enough butter in it. I fixed that problem by doubling the butter. I recently doubled the butter in these, too. I guess Butter does make everything better, especially in caramels, which are nothing more than sugar, cream, and butter.

Once you begin this is a fast-moving recipe and with any candy-making, in the microwave or traditional stovetop methods, the resulting liquid gets incredibly hot and using caution and common sense is necessary. Have the small children go play in their room so you can concentrate fully, put your phone down and stop texting, and have all your supplies lined up and ready to go, including oven mitts. And clear a space out in advance in your refrigerator to place the screaming hot pan to cool.
Also, this is not a time to shave calories. Don’t use lite anything here. Use real butter not margarine, real corn syrup and not honey or agave or lite corn syrup. Don’t use fat-free or lite sweetened condensed milk. The recipe is designed for full-fat ingredients and making substitutions will adversely effect results. Eat fewer caramels or do more cardio, but don’t use substitutes.

Begin by lining an 8-by-8-inch square pan with aluminum foil, spraying with cooking spray, and setting the pan aside. It’s mandatory to line your pan and don’t even think about not doing it. In a large microwave-safe mixing bowl, melt the butter, about ninety seconds. I use unsalted butter but for saltier caramels, salted butter is fine. Make sure the bowl you select is large, probably the largest size that still fits in your microwave, because over the next seven minutes, there will be lots of bubbling and you’ll need the depth. Also, make sure it’s truly microwave-safe. I’ve used bowls in the past for other microwave projects that were a little iffy and they melted. The bowl will get extremely hot so make sure it’s up to the task.
To the melted butter, add one-half cup of each of the following: white granulated sugar, light brown sugar, light corn syrup (light in color, not lite in calories), sweetened condensed milk, and stir until smooth. The recipe uses about half of one standard-sized 14-ounce can of sweetened condensed milk and rather than wasting 89 cents worth of sweet milk, use the remainder to make either No-Bake Vanilla Cake Batter Chocolate Truffles or Chocolate Peanut Butter Fudge (in the microwave), both of which use partial cans. I hate to waste and if I can make more candy or chocolaty treats in the process of making caramels with spare sweet milk, life is good.

Place the bowl in an 1100-watt microwave and heat on high power for three minutes and thirty seconds (3 and 1/2 minutes). Likely your microwave is 1100 watts, most are these days; if it’s not, you may need to tinker with the cooking times by 15 or 30 seconds in either direction if your microwave is lower or higher wattage.
Using a hot pad, remove the bowl from the microwave, scrape down the sides, and stir. You may wonder why I say to scrape down the sides because it won’t appear that much of anything is on the sides. Well, this is key. If there is sugar or sugar granules that are not dissolved and fully incorporated into the bubbling mixture and they remain uncooked, they can cause graininess or crystallization in the finished caramels. Uncooked sugar crystals have regrowth that spreads and can take over a whole pan, rendering it a grainy and gross mess over time.
I hate to use this analogy but it’s like a wart or a rash that starts out small and in a tiny place but if you don’t treat it, it will spread and pretty soon it takes over. The solution to heading off potential graininess and crystallization is to make sure each and every sugar granule that’s on the side of the bowl is cooked. So scrape down the bowl well with a spatula, making sure no chunks of sugar are clinging on the sides. My Chocolate Saltine Toffee is one of the most popular recipes on my site and the overwhelming majority of people make it with great success, but when there’s an issue, it’s usually one of crystallization, which can happen in any candy-making endeavor unless you’re careful.

Return the bowl to the microwave and heat it on high power for another three minutes and thirty seconds (3 and 1/2 minutes). While cooking, the mixture will foam, bubble vigorously, and become very active. I recommend standing in front of the microwave and watching it the whole time, just on the very unlikely chance you had to power off the microwave immediately.
Seven minutes total cooking time is perfect for me (two rounds of 3 and 1/2 minutes), but if your caramels turn out a bit too hard, reduce cooking time by 30 seconds; and if your caramels are too soft, increase cooking time by 30 seconds or so. Microwaves and ingredients vary and although seven minutes is perfect for me, some minor tweaks may be necessary.
Using a hot pad, remove the bowl from the microwave, set it on the counter, and very, very, very carefully add the vanilla extract with while standing as far back from the bowl as possible with an outstretched arm. The mixture will still be boiling when you add it, and after doing so, it will bubble up even more. Stir to incorporate the vanilla and the mixture will continue to bubble like a science project. Pour the bubbling mixture into the prepared pan, cover it with another sheet of aluminum foil, and place it in the refrigerator to firm up for at least four hours, or overnight, before slicing caramels.
I made this batch at night and after 16 hours in the refrigerators, this is what it looked like. The color gradient is from the light reflecting wickedly against the aluminum foil, the aluminum pan, and the shiny caramels. In person, it’s all a uniform shade of caramel.

Lift the caramels out using the foil overhang and I flip them over, upside-down-cake style, onto a piece of parchment that’s waiting on a cutting board. You could just slice them in the pan but I don’t want knife marks scratching my pan.
I slice them into 64 one-inch squares, but any shape you desire from logs to triangles is fine. If you have a bench scraper for bread or pasty-making, that’s handy to use for slicing. If your knife is sticking to them, spray it with cooking spray and repeat as necessary to prevent sticking.

Depending on if you’re eating them or giving them away, wrapping them individually in parchment paper is a nice touch. I don’t bother with individual wrapping for something I know we’ll devour soon anyway. I place them side-by-side without touching on top of large pieces of parchment paper inside a large plastic airtight container. They keep at room temperature for many weeks, and in the refrigerator or freezer for months. I store them in the refrigerator because I like them slightly chilled and they never get rock hard like storebought caramels do; they’re firm yet malleable.
Feel free to sprinkle them with coarse sea salt, dip them in chocolate, sandwich a layer of peanut butter or marshmallow fluff in between two of them and dip the whole stack in chocolate, or just eat them as is and savor the luxuriousness.

They really are too good to be true. They’re the best caramels I’ve ever had and I’ll put them up against Godiva, See’s Candy, or fancy candy-shop caramels. Yes, I really would and I am super picky. I guarantee no one will ever suspect you made them in the microwave and even if you’ve never made candy or caramels, this recipe is the easiest you’ll ever find. I love it when the simplest recipes produce the best results.
They’re creamy, buttery, sweet, and the vanilla adds a special touch and depth of flavor that makes them irresistible. They’re the perfect balance of firm-yet-soft, and after I’ve sank my teeth in, they just melt in my mouth.
What are you doing for the next seven minutes?

Pin This Recipe
Enjoy AverieCooks.com Without Ads! 🆕
Go Ad Free
Seven Minute Microwave Caramels
Ingredients
- ½ cup butter, 1 stick, melted (I use unsalted, use salted for saltier caramels)
- ½ cup granulated sugar
- ½ cup light brown sugar, packed
- ½ cup light corn syrup
- ½ cup sweetened condensed milk
- 1 teaspoons vanilla extract
- coarse sea salted and/or melted chocolate for dipping, optional
Instructions
- This is a fast-moving recipe once it begins. Have everything in place including a large oven mitt because the bowl will be very hot. Also clear out a space in your refrigerator in advance for placing the hot pan to cool. Make sure your bowl is truly microwave-safe because it will get very hot. Do not use lite or reduced fat ingredients; use real butter, corn syrup, and sweetened condensed milk. Send small children out of the kitchen while making these and fully concentrate on the recipe because the mixture is incredibly hot.
- Line an 8-by-8-inch pan with aluminum foil, spray with cooking spray; set aside. In a very large microwave-safe bowl (nearly the largest your microwave can accommodate because you will need the room and depth for the bubbling-up), melt the butter, about 90 seconds on high power. To the melted butter add the granulated sugar, light brown sugar, corn syrup, sweetened condensed milk, and stir until smooth. Place bowl in the microwave and heat on high power for 3 minutes and 30 seconds (3 and 1/2 minutes).
- Using a hot pad, remove bowl from the microwave, scrape down the sides incredibly well, and stir. Very important - it won’t appear that much of anything is on the sides but if there is sugar or sugar granules that are not dissolved and fully incorporated into the bubbling mixture and they remain uncooked, they can cause graininess or crystallization in the finished caramels. Uncooked sugar crystals have regrowth that spreads and can take over a whole pan, rendering it a grainy and gross mess over time. Scrape down the sides of the bowl very well making sure no sugar is clung to the sides.
- Return bowl to microwave and heat on high power for 3 minutes and 30 seconds (3 and 1/2 minutes). During this time, the mixture will foam, bubble vigorously, and become very active. I recommend standing in front of the microwave and watching it the whole time so you could power off the microwave immediately if necessary. Using a hot pad, remove the bowl from the microwave, set it on the counter, and very, very carefully add the vanilla extract, standing at arm's length. The mixture will still be boiling and when you add it, it will bubble up even more. Use extreme caution and stir to incorporate the vanilla. The mixture will continue to bubble quite rapidly.
- Pour the bubbling mixture into the prepared pan, cover it with another sheet of aluminum foil, and place it in the refrigerator to firm up for at least four hours, or overnight, before slicing caramels. Lift the caramels out using the foil overhang and flip them over, upside-down-cake style, onto a piece of parchment that’s waiting on a cutting board. You could slice them in the pan but I don’t want knife marks scratching. I slice them into 1-inch squares with a sharp knife or pasty-making bench scraper works well. Spray knife or scraper with cooking spray if it's sticking to the caramels and repeat as necessary until finished slicing.
- Store caramels by wrapping them individually in parchment paper or by placing them side-by-side without touching on top of large pieces of parchment paper inside a large plastic airtight container. I store them in the refrigerator, but they keep at room temperature for many weeks, and will keep in the refrigerator or freezer for months. Optionally, sprinkle them with coarse sea salt, dip them in chocolate, sandwich a layer of peanut butter or marshmallow fluff in between two of them and dip the stack in chocolate.
Nutrition
Nutrition information is automatically calculated, so should only be used as an approximation.
©averiecooks.com. Content and photographs are copyright protected. Sharing of this recipe is both encouraged and appreciated. Copying and/or pasting full recipes to any social media is strictly prohibited.

Related Recipes:
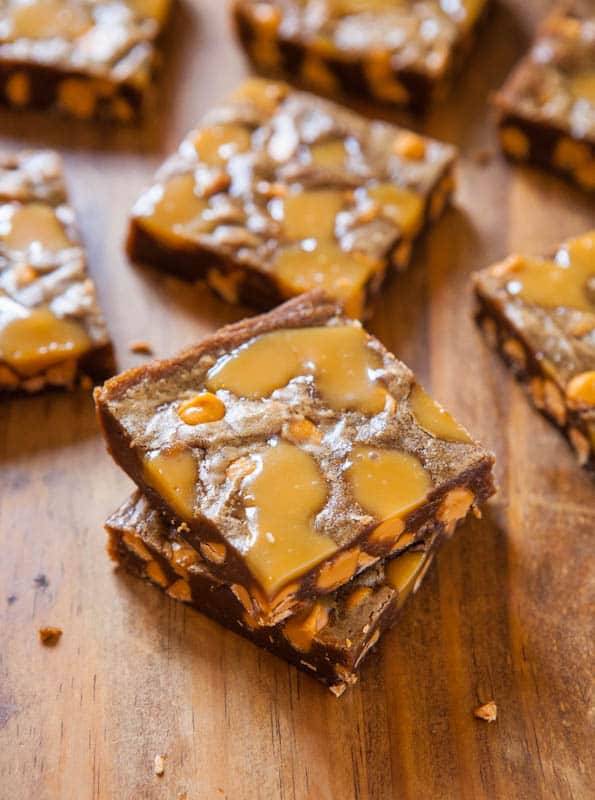
Browned Butter Caramel and Butterscotch Bars – Nutty and aromatic browned butter is paired with dark brown sugar, sweet butterscotch chips, and creamy caramel to create a dense, comforting, and rich treat. The bars are moist and packed with an incredible depth of flavor. Between the butterscotch chips and the caramels, there’s plenty of texture in these easy-to-make, buttery bars
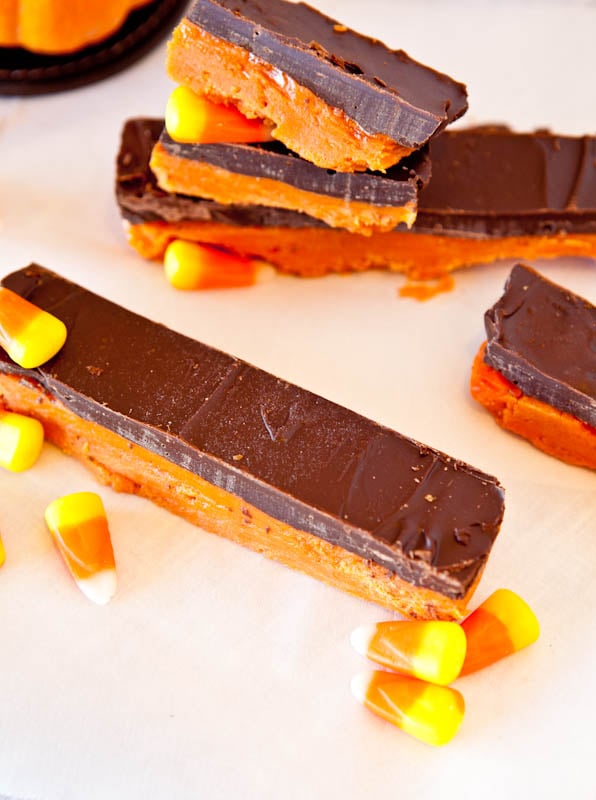
Butterfinger Bars (no-bake, vegan, gluten-free) – Made in the microwave in mere minutes and they taste eerily close to real Butterfinger bars
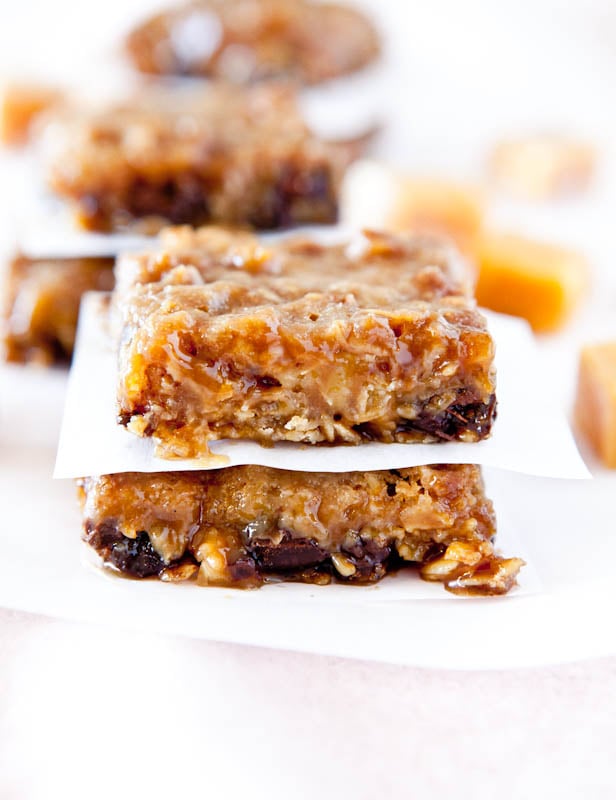
Caramel and Chocolate Gooey Bars (GF with Vegan adaptation) – Caramels, more carmaels, and plenty of chocolate and oats are combined in these gooey, sticky, sweet, and texture-rich bars
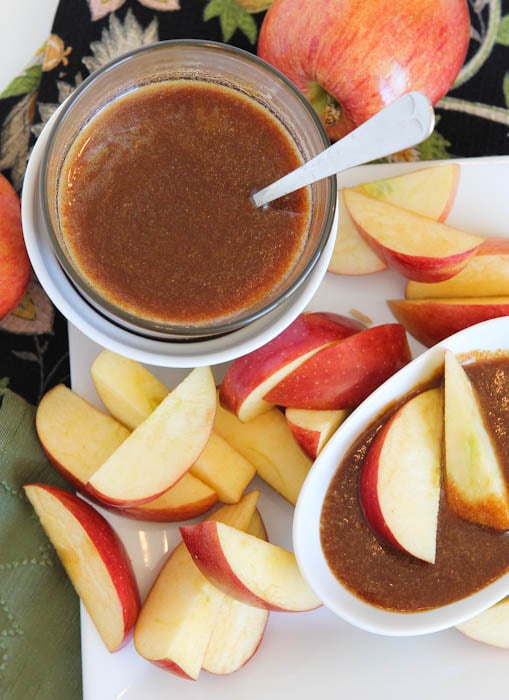
Dark Rum Caramel Sauce (gluten-free) – The caramel sauce can be made with or without rum, although I recommend it. A step-by-step guide for easy at-home caramel sauce to be used on everything from ice cream to apples
Raw Vegan Gluten-Free Caramels – Three ingredients and you’ll never believe what they are. Creamy, rich, easy, and fast. Some I filled with peanut butter in the middle f0r peanut butter-caramel sandwiches

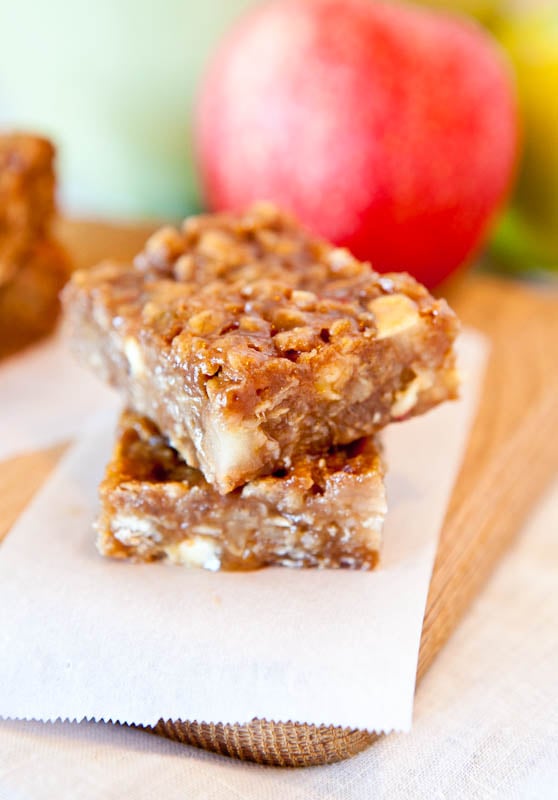
Caramel Apple Bars (gluten-free with vegan adaptation) – Apples, oats, brown sugar, peanut butter and plenty of caramel sauce are combined for a fast and easy bar that’s full of texture and richness
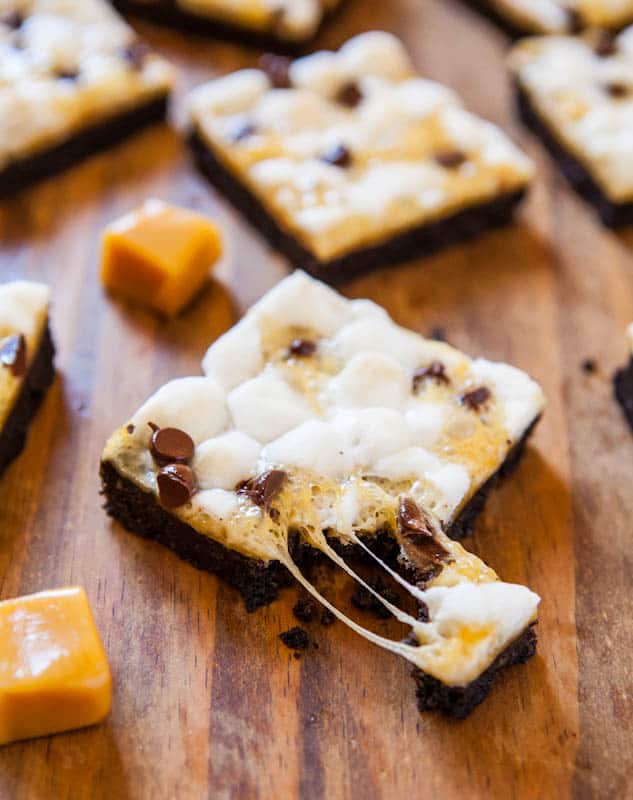
Marshmallow Caramel Oreo Cookie S’Mores Bars – An Oreo cookie-crumb and buttery crust is topped with marshmallows, caramels, and chocolate chips for an easy and fast dessert reminiscent of s’mores. As the bars bake, the marshmallows puff and become gooey and the rich and buttery caramels melt, providing plenty of texture and diverse flavors in each bite. The chocolate chips sprinkled on top boost the chocolate intensity
Do you like caramels? Have you ever tried making your own?
I love them for all the buttery, creamy, sweet, and rich glory and this is going to be my go to recipe forever. I feel that strongly about it.
If you have favorite tried and true recipes, feel free to link them.
Thanks for the Valentine’s Day Treats Giveaway entries

have you ever heard of caramelitas? they are a caramel base covered with another type of caramel…you used to be able to buy them at the restaurant with the rockers on the front porch…they were behind the cash out counter…do you know of these?
This recipe is very, very similar to them!
https://www.loveveggiesandyoga.com/2012/02/caramel-and-chocolate-gooey-bars.html
Hi!
I really like the thought of having caramells in such a short time!!!
But i know that the temperature of the microwaves can be verry diffrent.
Do you know howmuch Watt yours is?
Thanx!
Greetings from the Netherlands ;-)
As I wrote in the body of the post, “Place the bowl in an 1100-watt microwave and heat on high power for three minutes and thirty seconds (3 and 1/2 minutes). Likely your microwave is 1100 watts, most are these days; if it’s not, you may need to tinker with the cooking times by 15 or 30 seconds in either direction if your microwave is lower or higher wattage….”
I’ll be trying these soon – just had a question before I start making them. After you pour the hot caramel into the foil lined pan and cover with foil – does the other foil need to touch the top of the caramel or is it just to cover it while it’s in the fridge? Do I let the caramel cool first, then cover, then fridge? or pour, cover, fridge ? Thanks
You’re simply covering your main baking pan with foil so it doesn’t pick up any fridge aromas, you know, those leftovers that are lingering. Just cover it in the way you’d cover any baking pan. I mean you can put it in uncovered but I always feel strange about putting uncovered pans in my fridge. Like I’ll knock a glass of water onto them or something! And you can cover and refrigerate it all immediately. It will be screaming hot & that’s fine. Please report back after you’ve tried them!!
These look delightful, and I’m excited to try them. I am curious about the wetness that seems visible beneath the main caramel in your pictures. Is that from the cooking spray? Does it make the caramels greasy at all? (Not that think I’ll care, because they sound so delicious!)
In order for them not to stick to the wood, I had to spray them. It was that, or stick. And I didn’t want them to stick to the wood! But if you keep them on parchment you don’t need to spray them and it’s a non-issue. I almost mentioned it in the post what was going on but figured why draw attn to something that no one will likely notice. But you did.
“Eat fewer caramels or do more cardio, but don’t use substitutes.” <–My new mantra!
This recipe sounds too good to be true! I love homemade caramels, especially when they contain loads of butter, but I'm usually too lazy to go through the cooking (and pot washing) process. I love the idea of using a microwave to make something sweet! Right now my microwave is just a storage unit for cookie and brownie bins. (Out of sight, out of mind. Right?) ;)
A few people have commented they’ve enjoyed the mantra. I mean the truth is just the truth sometimes!
I just made these and I followed the directions to the T but they turned rock hard like toffee. And they turned dark when I added the vanilla. Theyre still delicious, mind you(ty for the recipe) but I was wondering if you have any idea what I could have done wrong..Thanks!
Too hard/rock hard likely means you overcooked them. Your microwave may run hotter than mine. Reduce cooking time. Possibly your vanilla is just deeper in color than mine, too.
These would make SUCH good gifts!!! I might have to try my hand at making them, as they don’t seem too, too difficult! (I’m a candy-making virgin, so I’m a little scared!)
They’re the easiest candy you’ll ever make!
So quick and easy! They look so rich and tasty!
Can’t wait to try the caramels! I have everything in the pantry, but also have a 3-year-old granddaughter under foot right now. I will heed your advice and not make them until I can be sure to clear the kitchen of tiny tots! Pinned! Thank you!
P.S. I’m now making challah bread , your recipe, regularly, but doing it start to finish in the bread maker and adding 1 c. craisins for a perfect sandwich loaf!
Better to just do it when you have 100% of your mental energy on the recipe. I know how it is cooking with a small kiddo underfoot and this isn’t that kind of recipe you want to mess around with. Thanks for pinning!
Oh I would love it if you left feedback on your new tweak with the challah on the post when you get done! Breadmaker and craisins and not making braids but a loaf (or two?) instead. LMK the details!
https://www.loveveggiesandyoga.com/2012/11/challah.html
double butter…love that! put my yelling wrestling loud boys in their room for 7 minutes with no interference…ha ha that right now in my life won’t happen ha ha ha…so will pin and save for a mommy day alone :-)
I know the feeling of needing some mommy time…ALONE. Some times you just need a minute (or seven) to collect your thoughts :)
Microwave caramels? Sign me up. I’ve always wanted to explore candy making, especially caramels and even bought a candy thermometer, which has been in its package for a few years now. I love this line: “Eat fewer caramels or do more cardio, but don’t use substitutes.” Too funny and true.
The truth is just the truth some times :)
What a cool recipe!! Who knew it was that easy? I certainly didn’t!
“Eat fewer caramels or do more cardio, but don’t use substitutes.” Haha, yes, so true with certain recipes! I can tell the fact that these are so quick to make, they’re going to be a Pinterest favorite! I need to put these on my list of blogger recipes to try, candy making typically intimidates me, but this sounds like something I could tackle!
I was thinking they might become a Pinterest fave but it’s so hard b/c you just never know WHAT will blow up there. I’ve had some of the most really?? type posts get big and then the ones I swear will, never do. Regardless, I LOVE these caramels!
Oh it’s so true, with Pinterest you just never know. But I will pin these anyway. :)
My favorite part is ‘Do more cardio just don’t use substitutes’ LOVE IT
Sometimes telling the blunt truth is just the only way to be :)