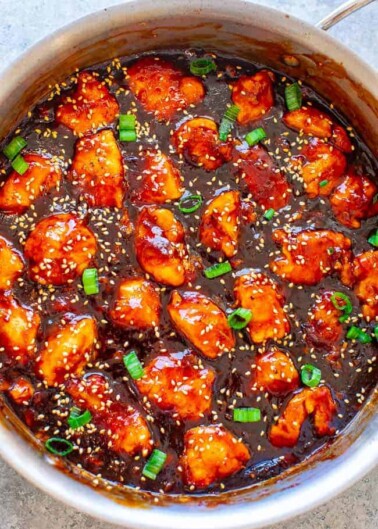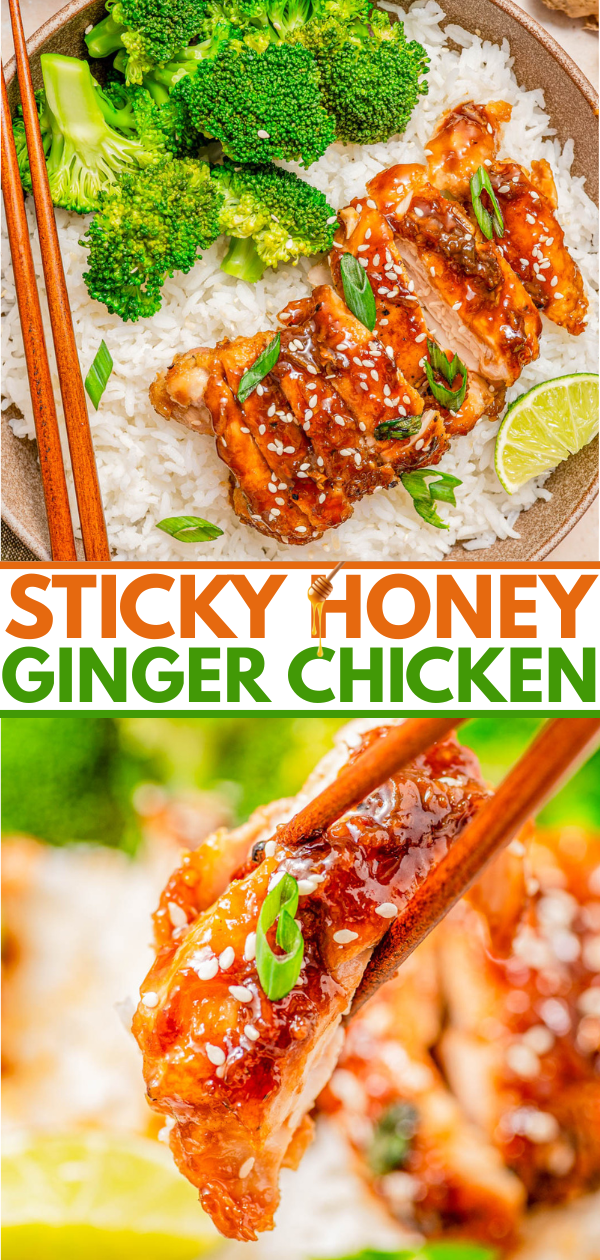
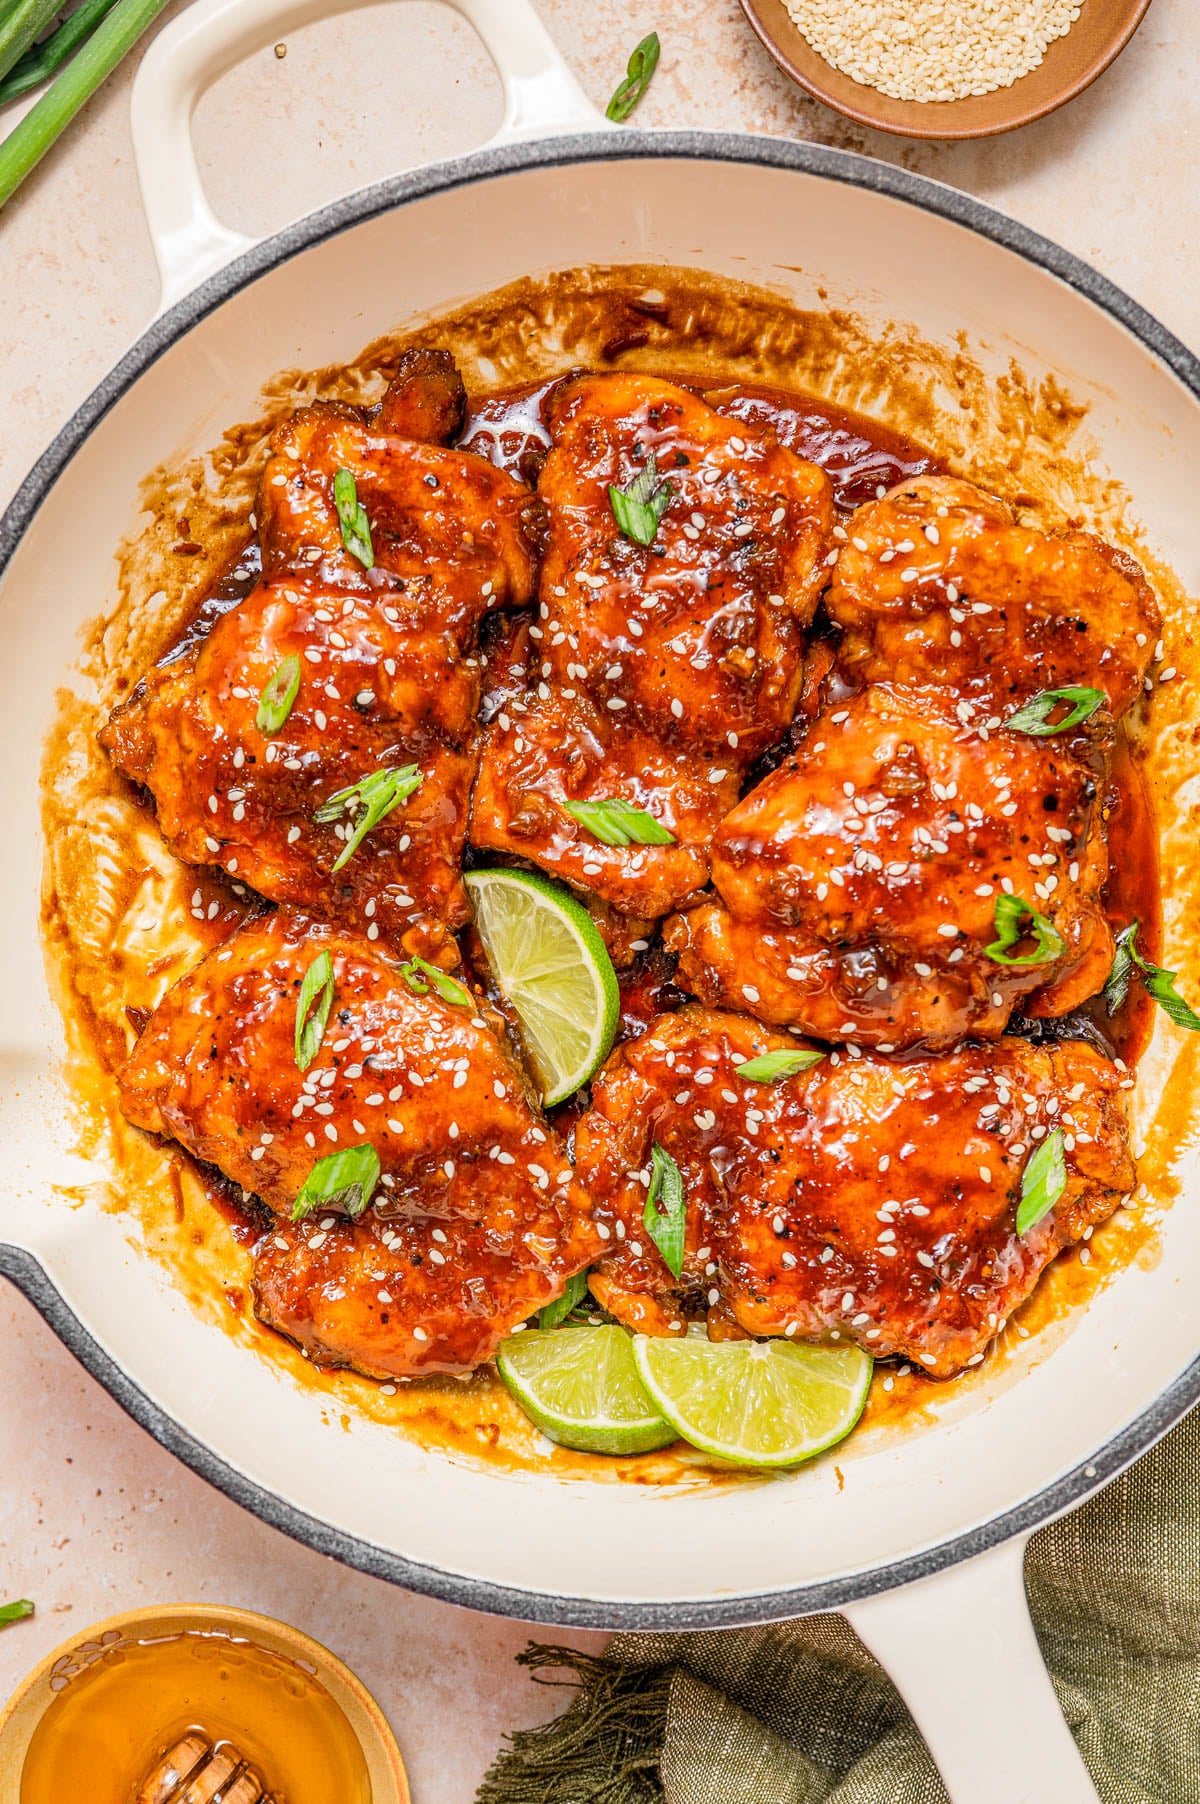
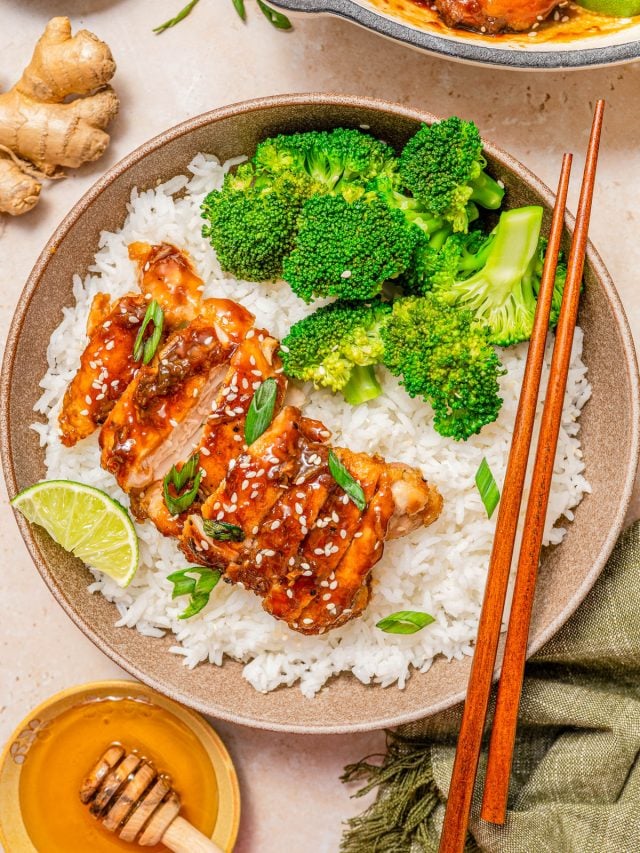
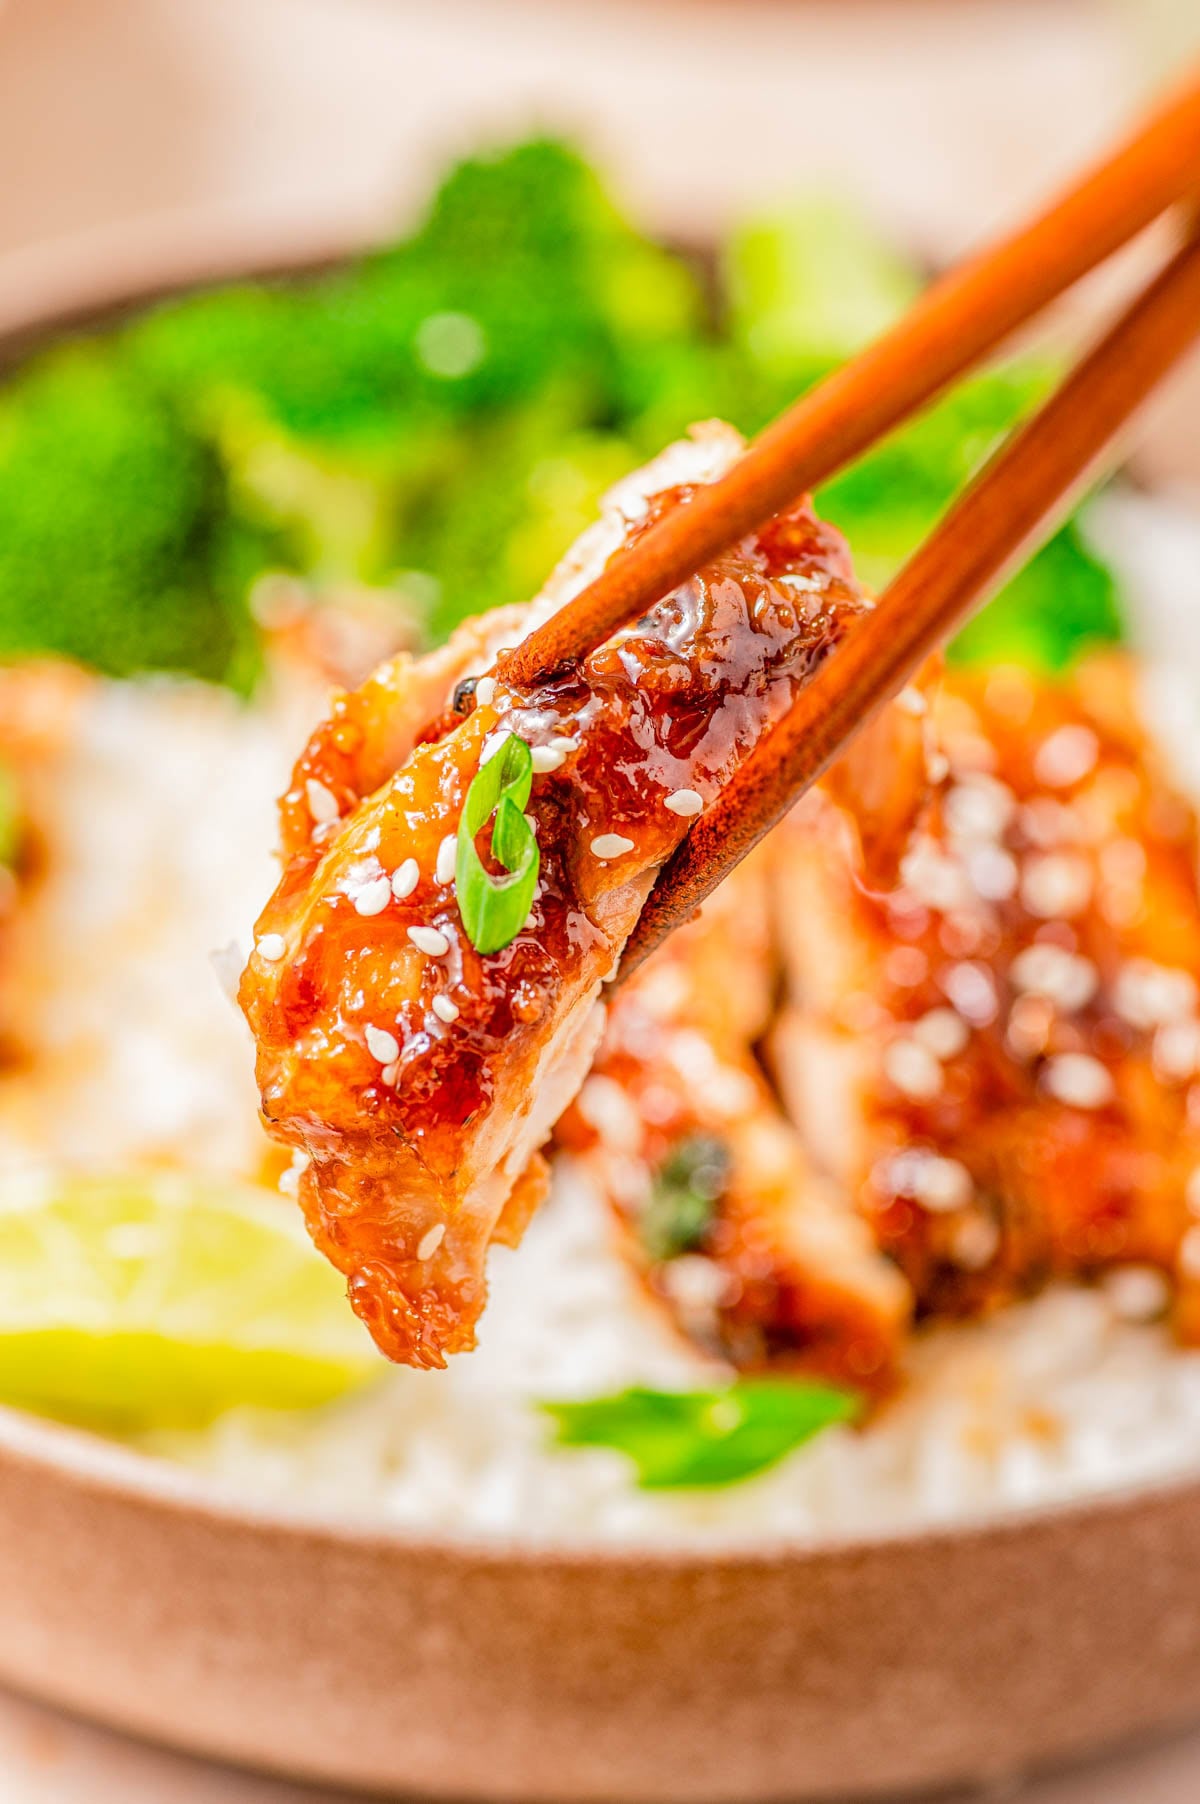
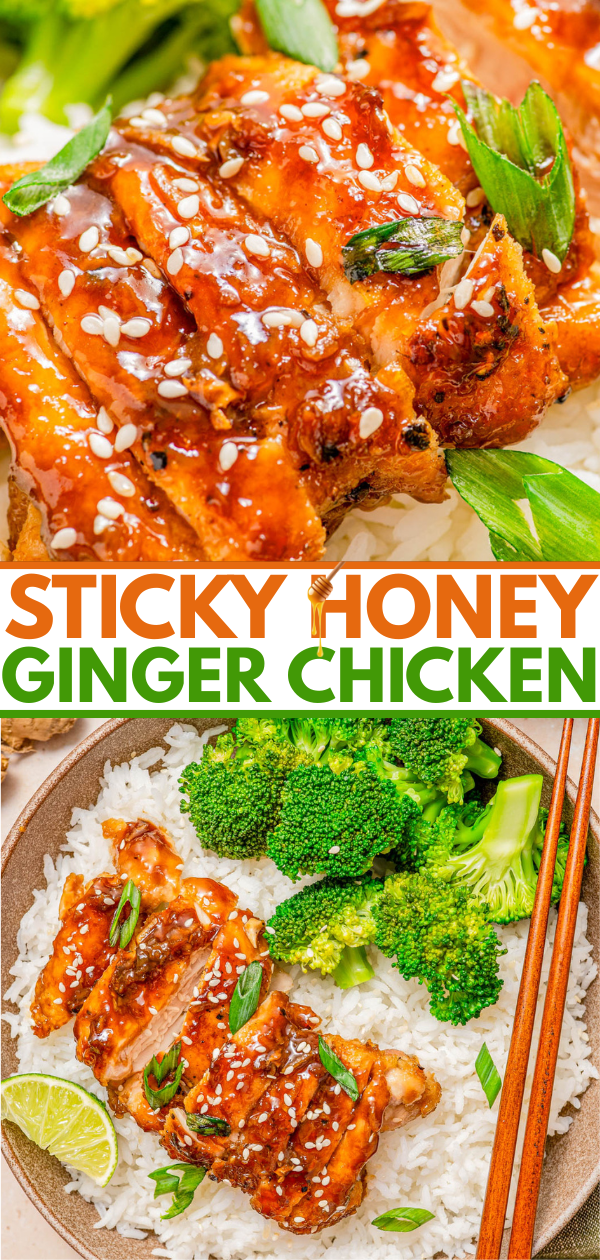
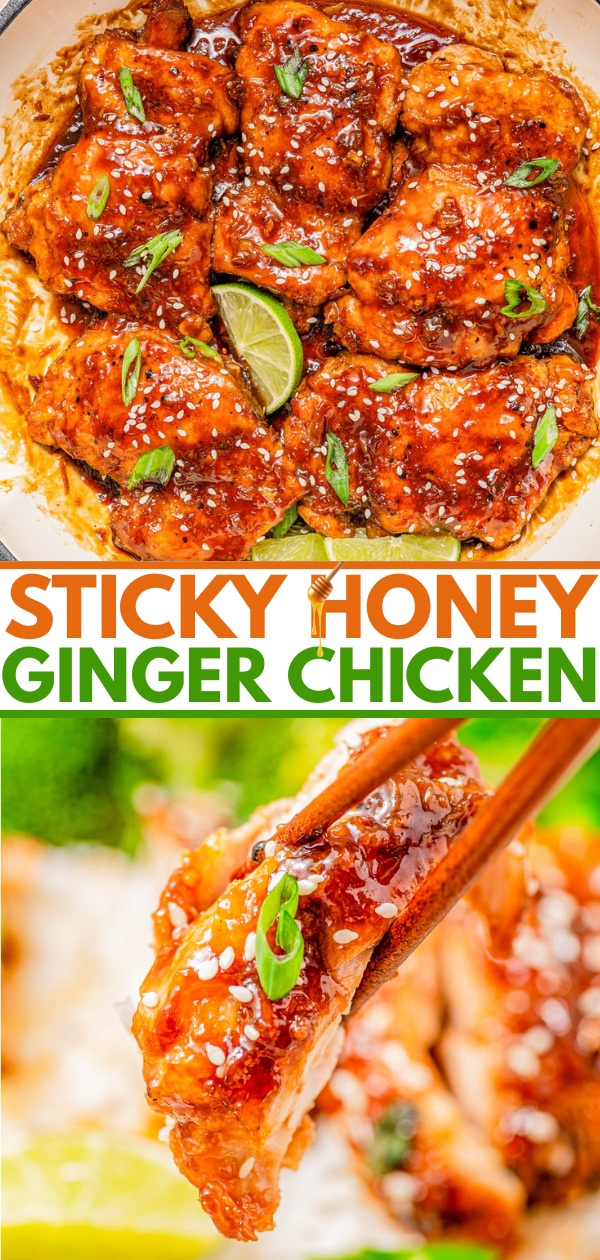
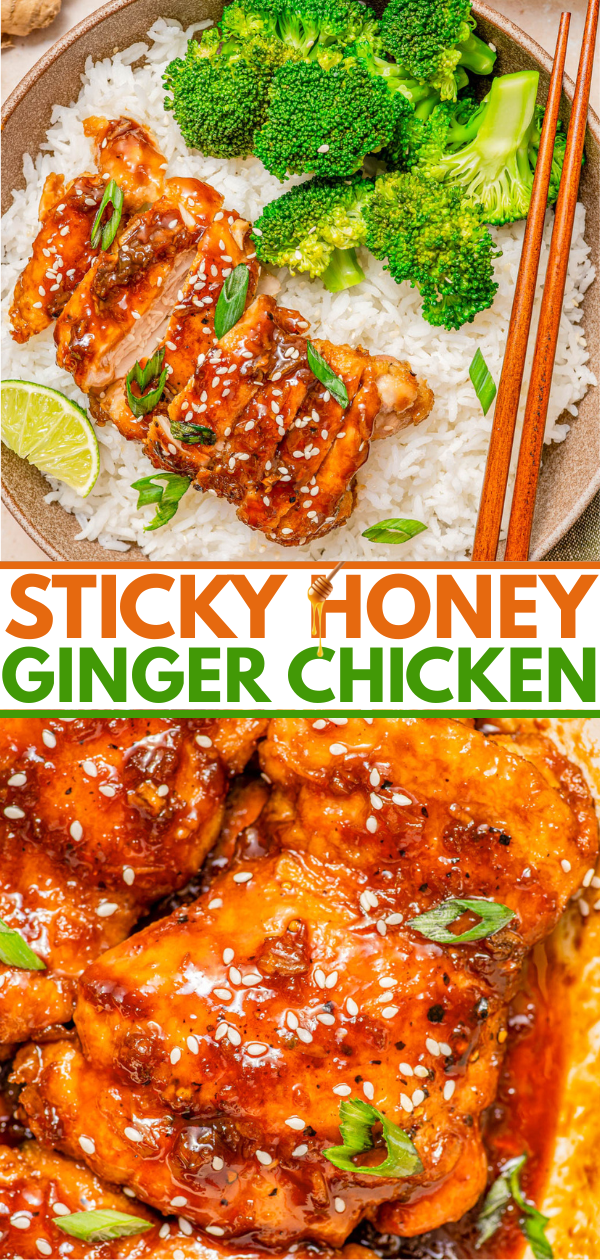
Stovetop Sticky Honey Ginger Chicken 🍯🫚🧡 is savory with a lightly sweet honey-ginger glaze that perfectly coats the chicken and gives it a craveworthy sticky texture along with a ginger kick! Ready in 20 minutes, one skillet, perfect for busy weeknights, and you can use either chicken breasts or thighs.

Easy Sticky Honey Ginger Chicken Recipe
- I love chicken with a sticky sauce or sticky glaze! It’s seriously one of my favorite ways to jazz up chicken! This one is made with soy sauce, honey, fresh ginger, and garlic and has a perfect balance of flavor. It clings perfectly to the tender juicy chicken.
- Chicken thighs are what I use because they’re thinner so they cook quicker than breasts and stay juicier, but breasts are fine if you prefer.
- This is such a simple one-skillet chicken recipe that’s ready in 20 minutes and is exactly what you need for busy weeknights! Or make it as a meal prep recipe. It uses common pantry staples to keep things easy.
- Not to mention, it’s high protein which is great to keep you full and satisfied. You can keep this recipe gluten-free too by using tamari instead of soy sauce.
Ingredients in Glazed Honey Ginger Chicken
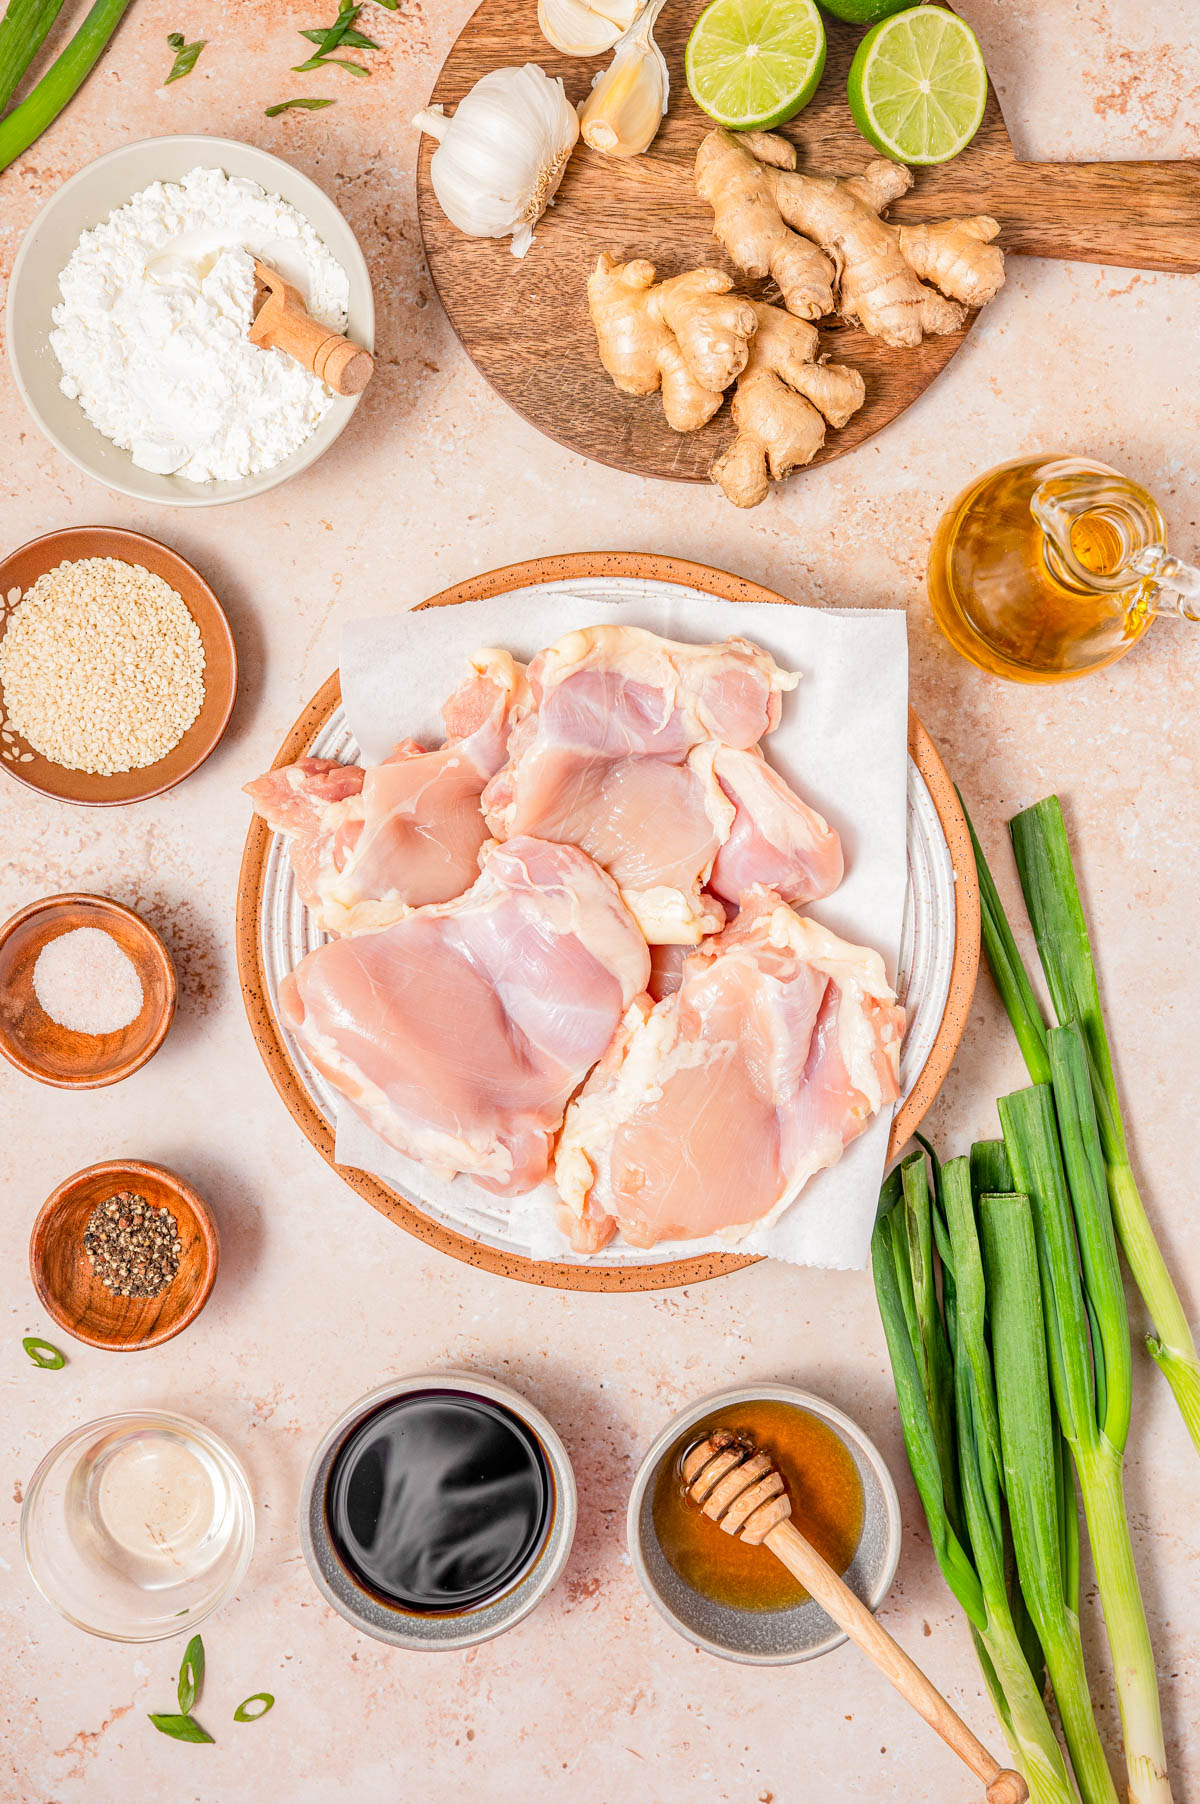
- Cornstarch: This helps give the chicken a light crust, not as thick as breading, but just a little crispness.
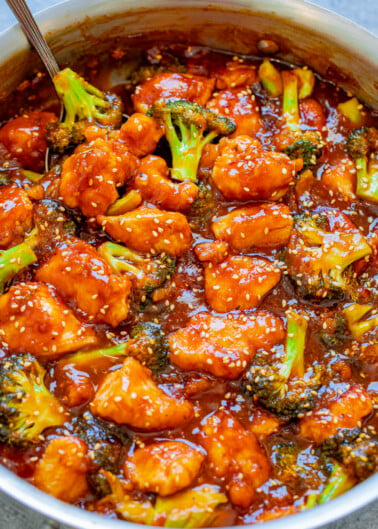
- Chicken: I use boneless chicken thighs because they’re flatter than breasts, but you could use boneless skinless chicken breasts if you prefer. Wondering about using tofu? You can, just select extra-firm tofu! Veggies? Also fine! Add sliced bell peppers, peapods, or broccoli after you’ve cooked the chicken and removed it and saute them for a few minutes until crisp-tender.
- Salt and pepper for seasoning.
- Oil: Vegetable oil, canola oil, or olive oil are all fine for pan-frying.
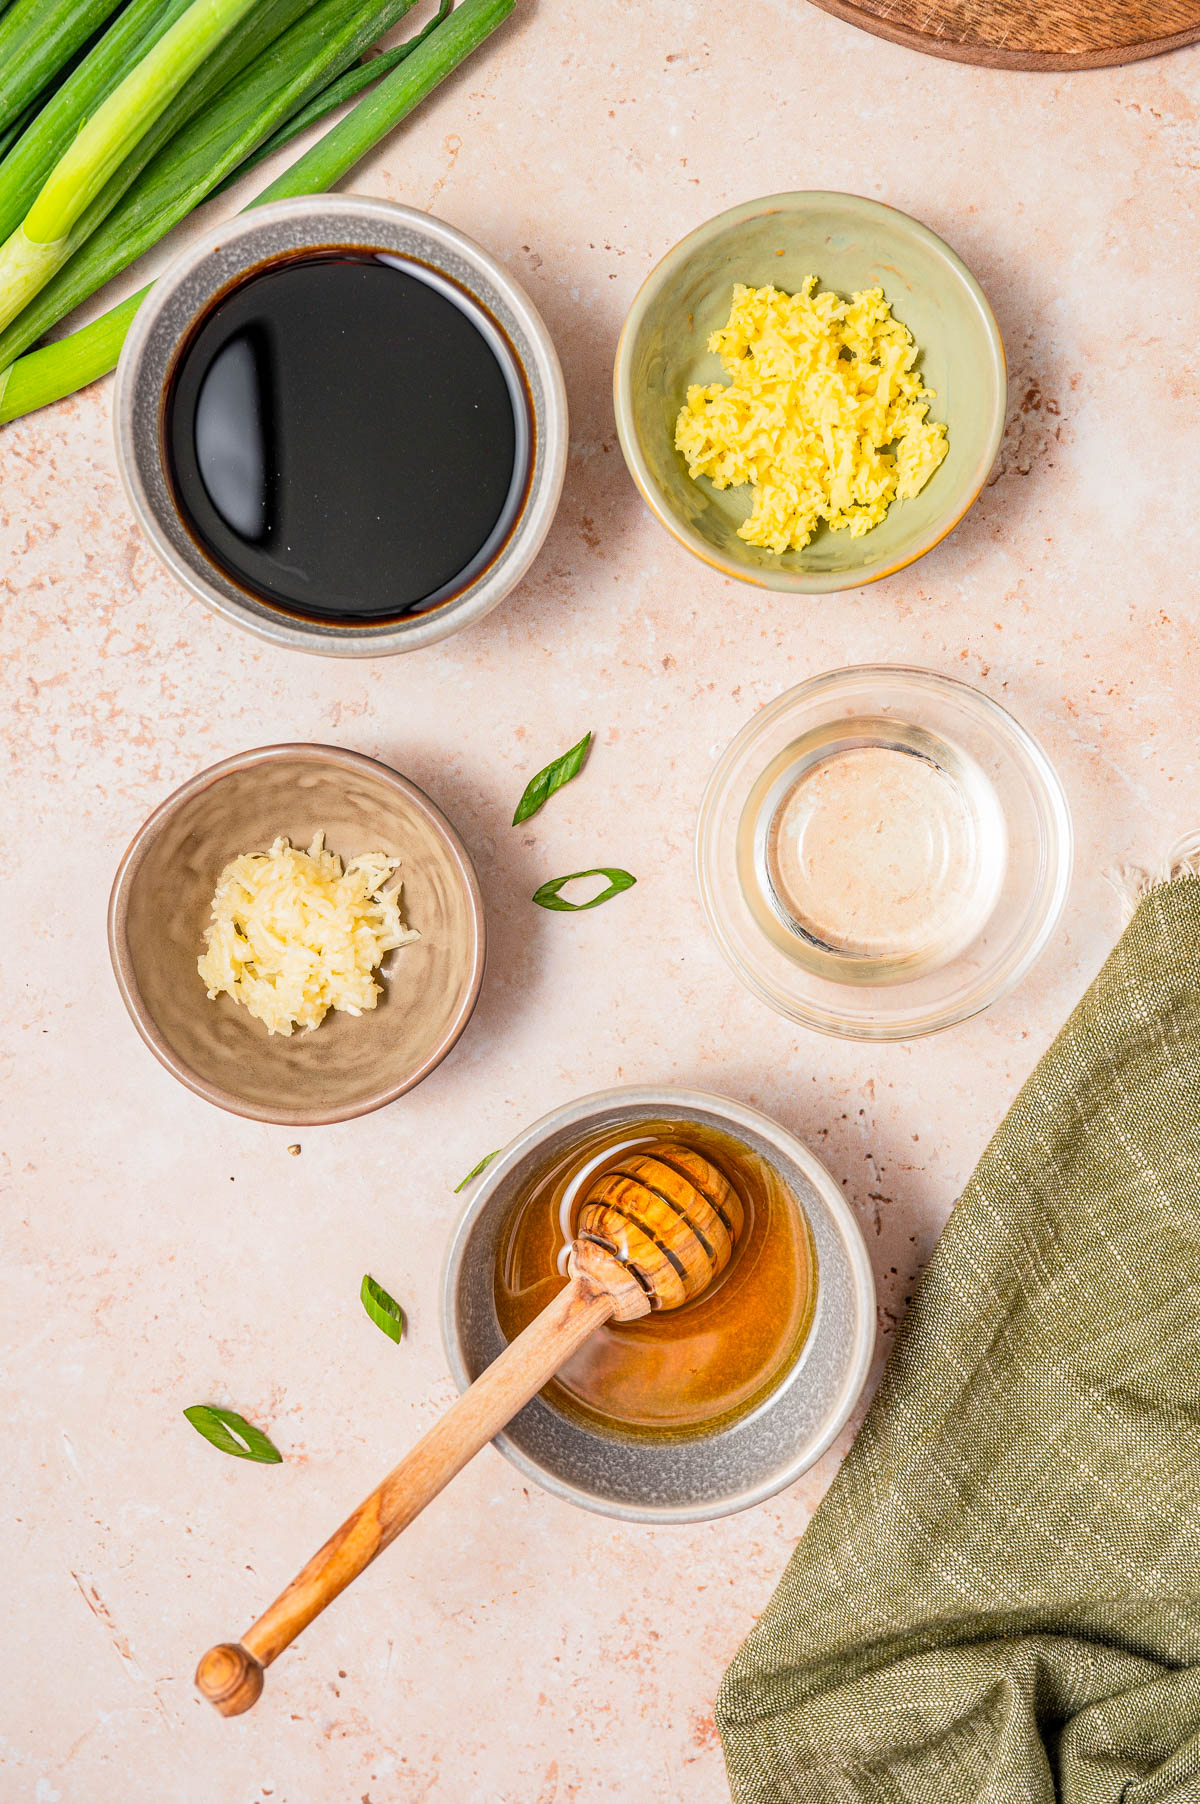
- Honey Ginger Glaze: Reduced sodium soy sauce (I prefer it to regular soy sauce), honey, rice vinegar, freshly grated ginger (or ground ginger if that’s what you have) and garlic create so much flavor. If you like toasted sesame oil, add a teaspoon or so.
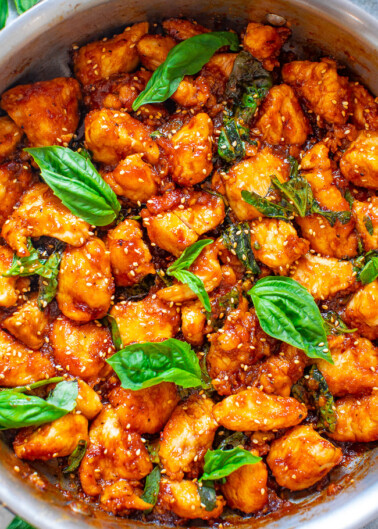
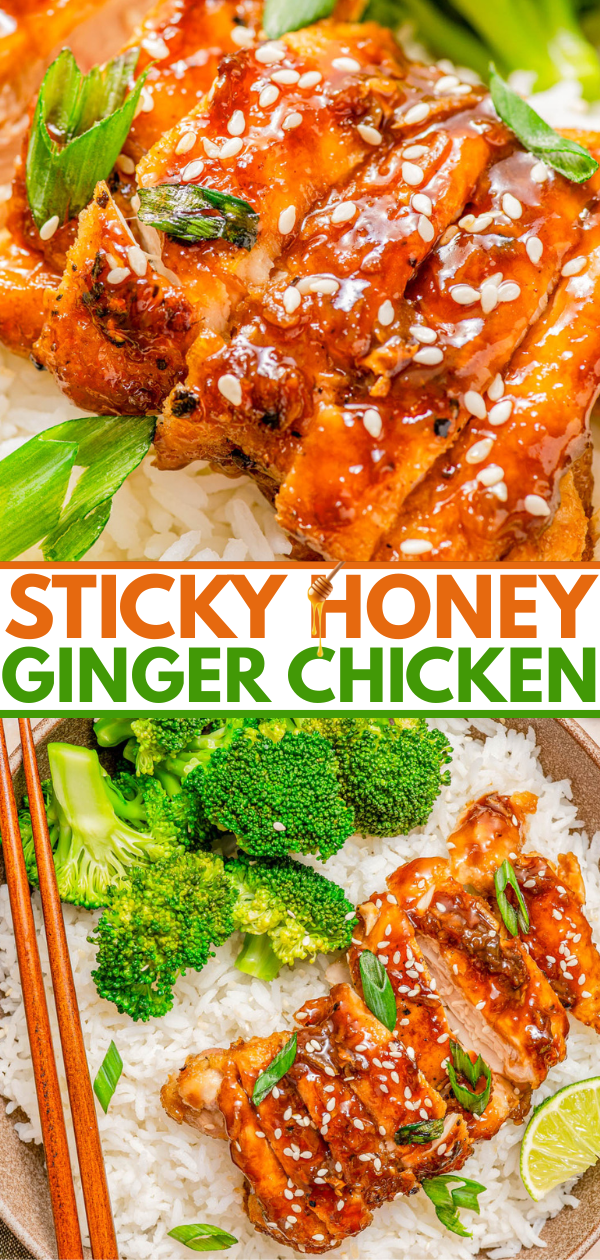
- Garnishes: Green onions or scallions, sesame seeds, optional red pepper flakes for heat, fresh herbs such as cilantro, basil, or parsley for a pop of fresh flavor.
Note: Scroll down to the recipe card section of the post for the ingredients with amounts included and for more complete directions.
How To Make Honey Ginger Chicken Stir-Fry
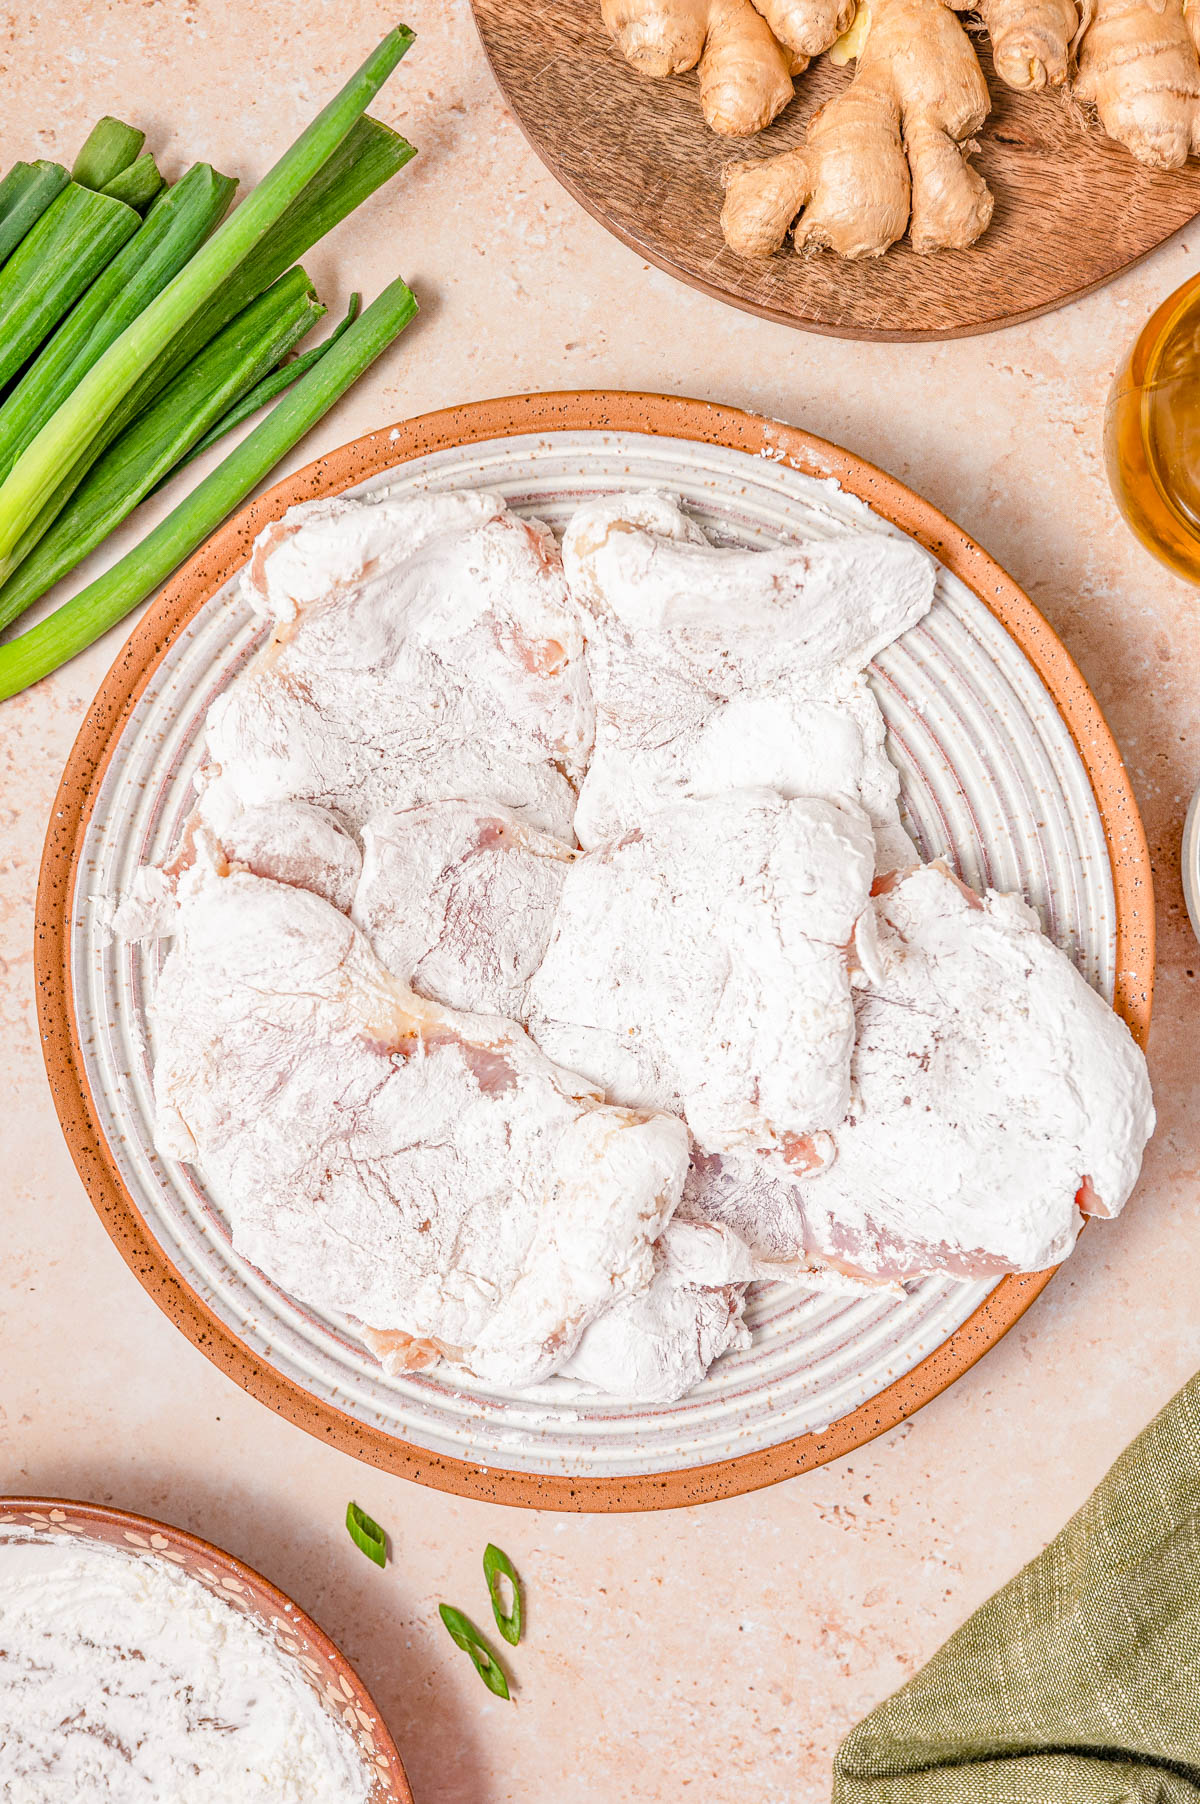
- Coating: To a large bowl, add the cornstarch, and dip the seasoned chicken into it, making sure to shake off excess.
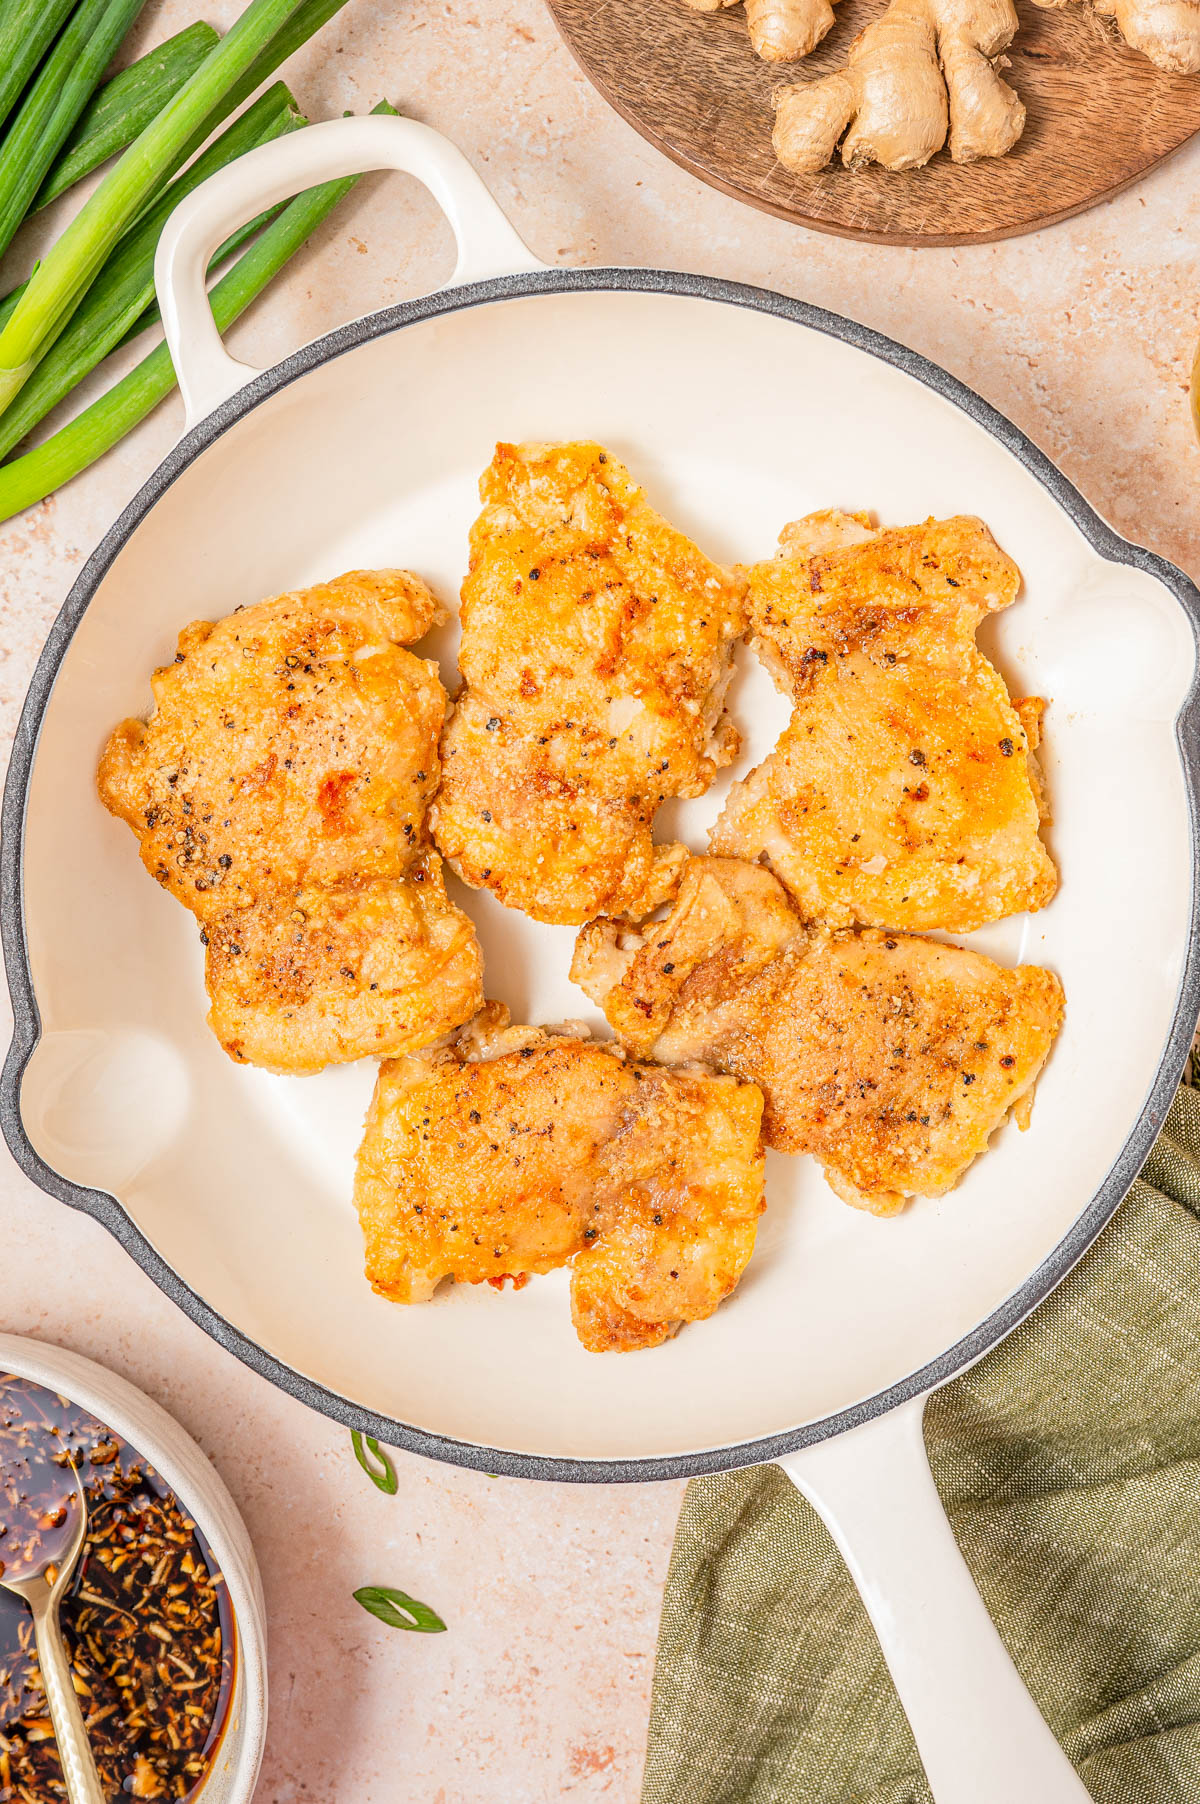
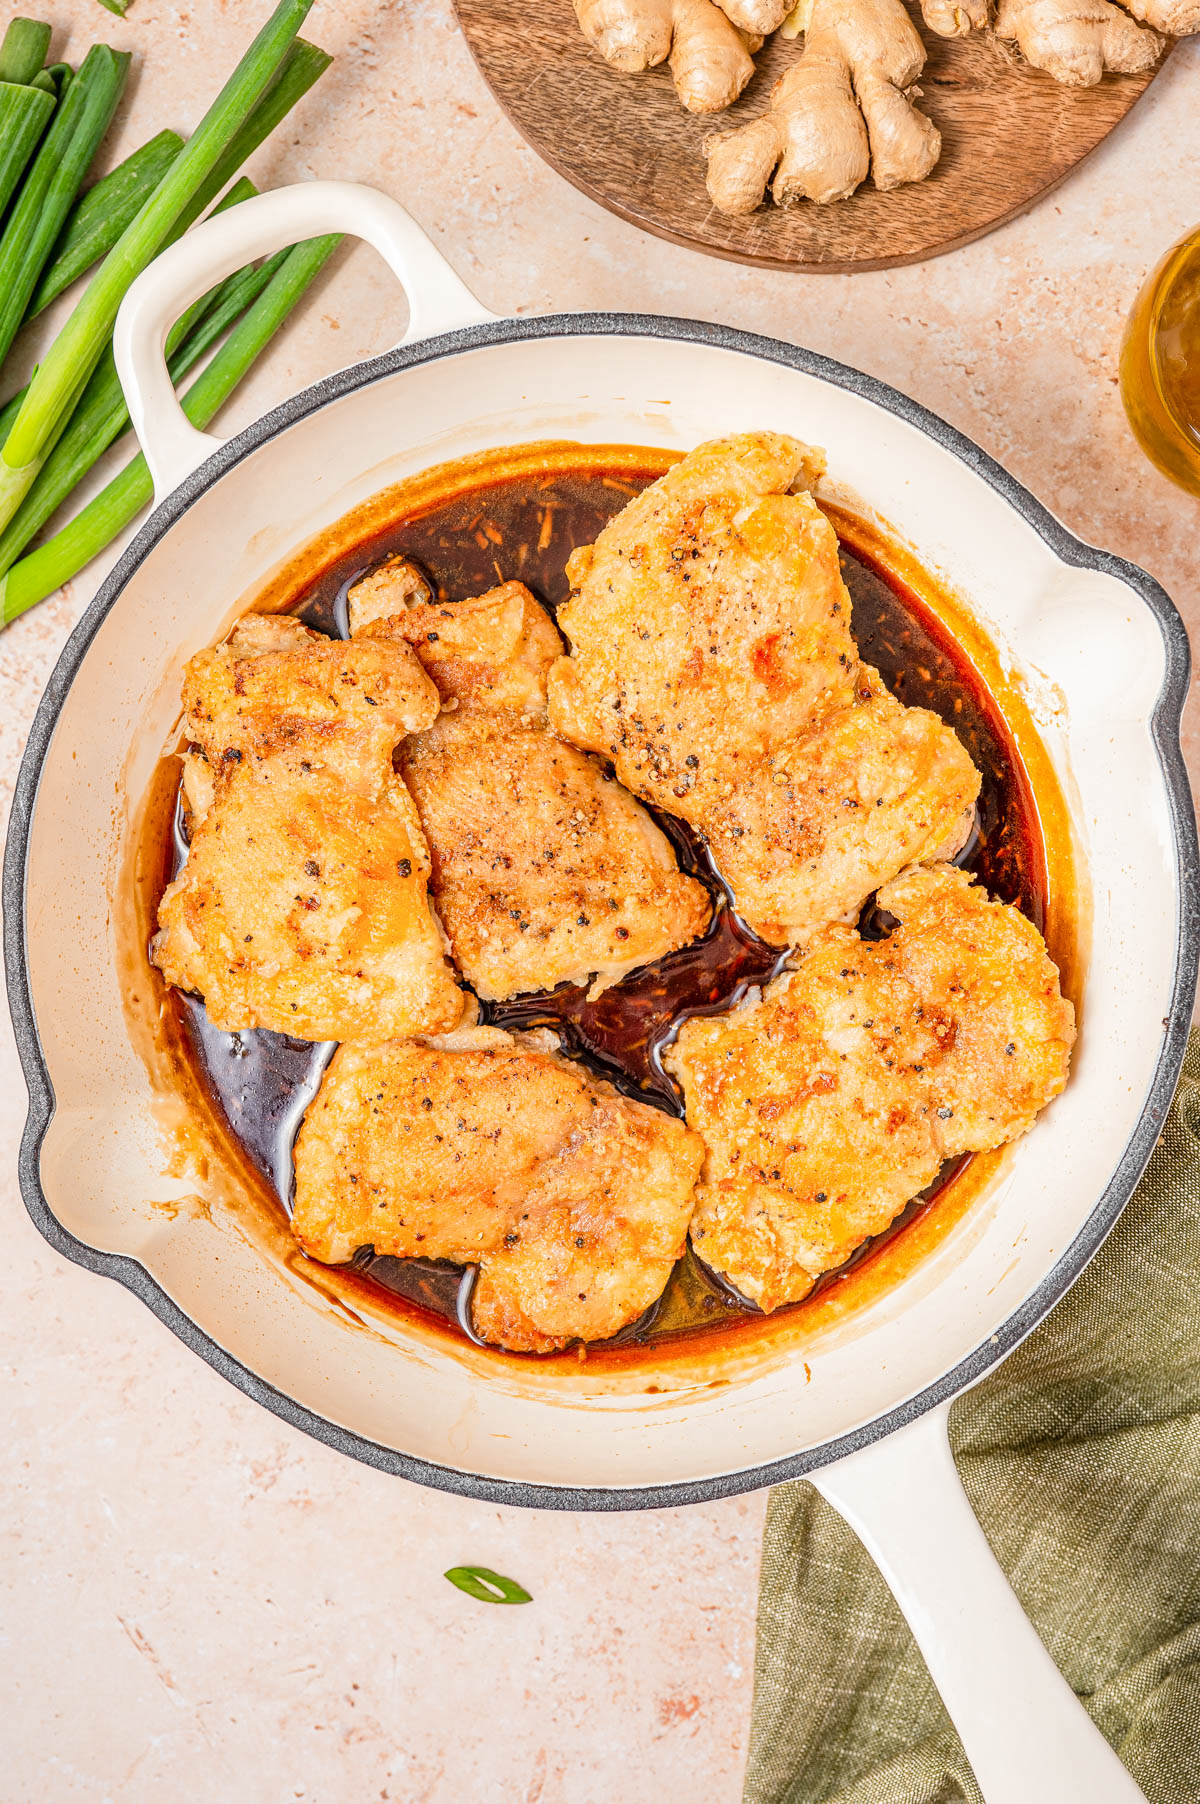
- Cook: To a large skillet, add oil, chicken, sear, and cook over medium-high heat for 5 to 7 minutes. Work in batches if your skillet is not large enough. When the chicken is done, remove it from the pan and set it aside.
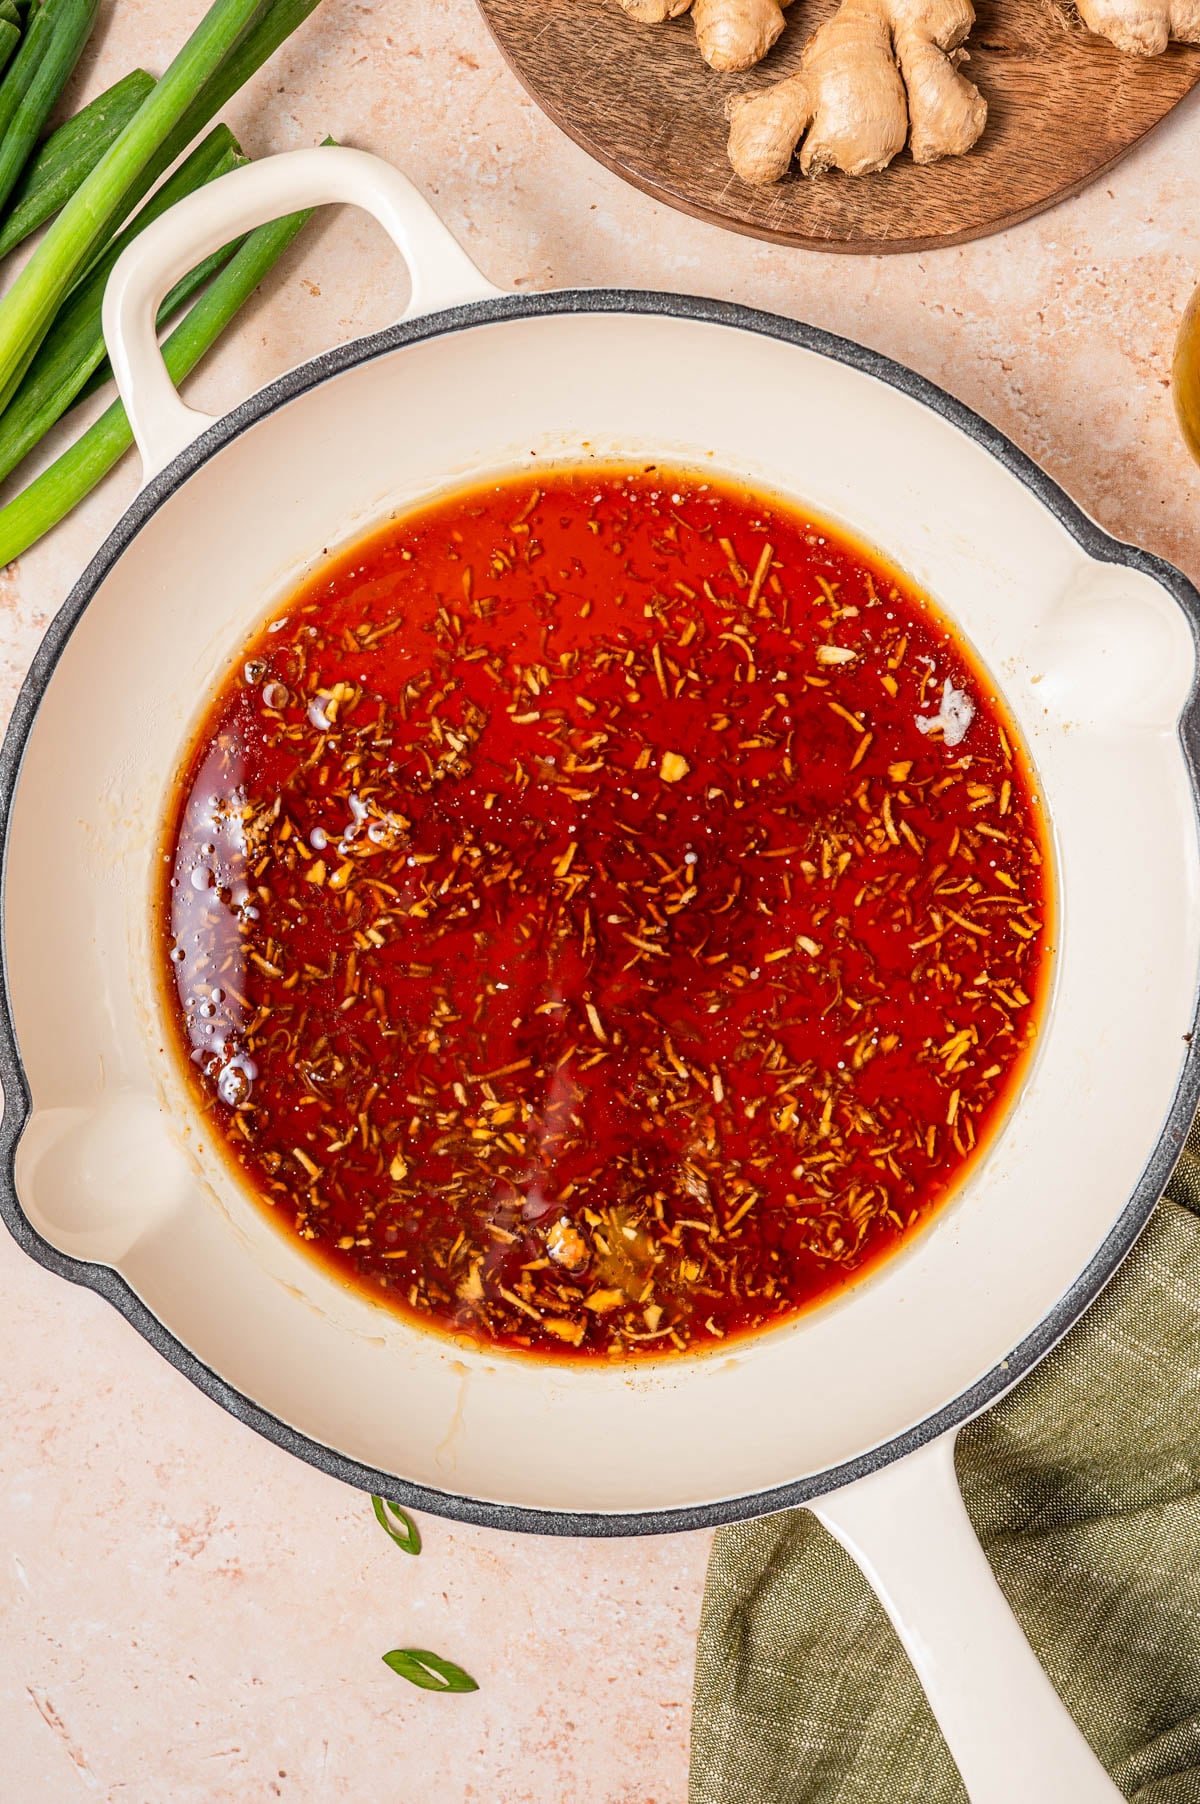
- Glaze: Combine the glaze ingredients in a bowl, whisk, reduce to medium heat, pour it into the skillet and let it simmer for 2 to 3 minutes or until slightly thickened. The residue cornstarch in the skillet will help the sauce thicken.
- Combine: Return the chicken to the skillet, toss well in the ginger sauce, and allow it to cook momentarily.
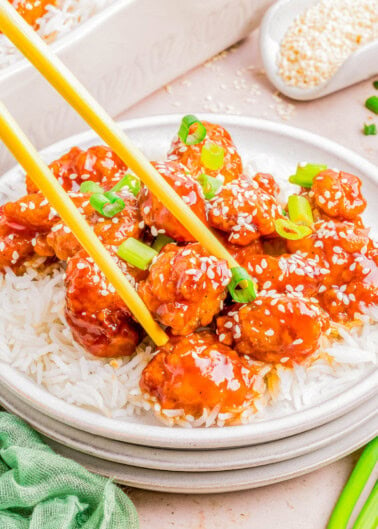
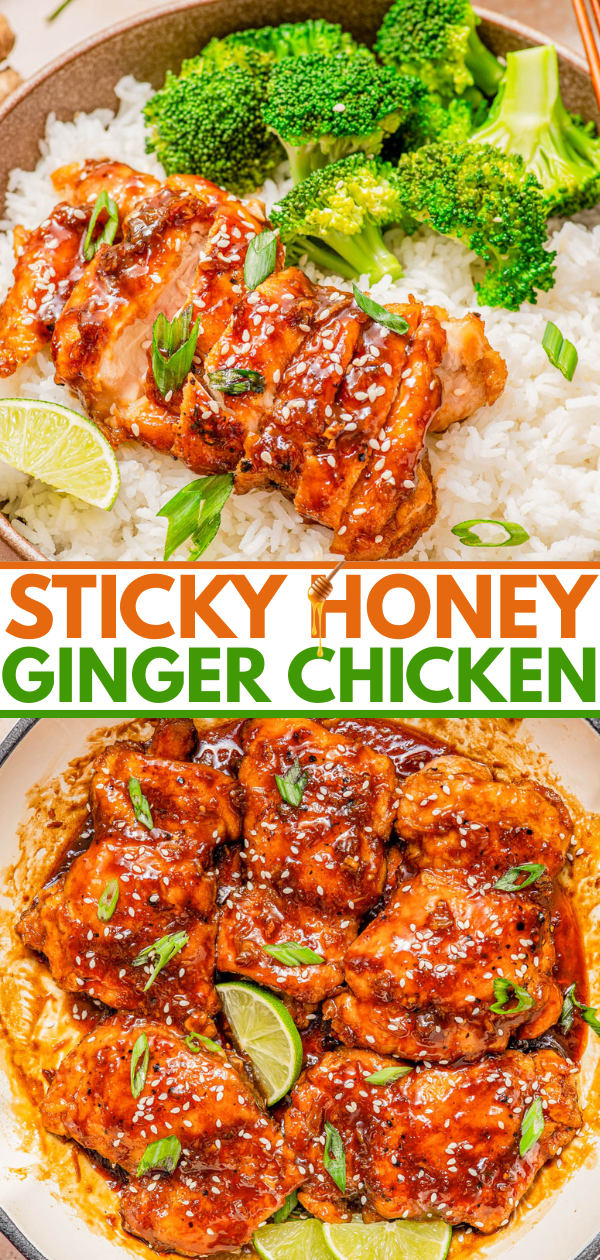
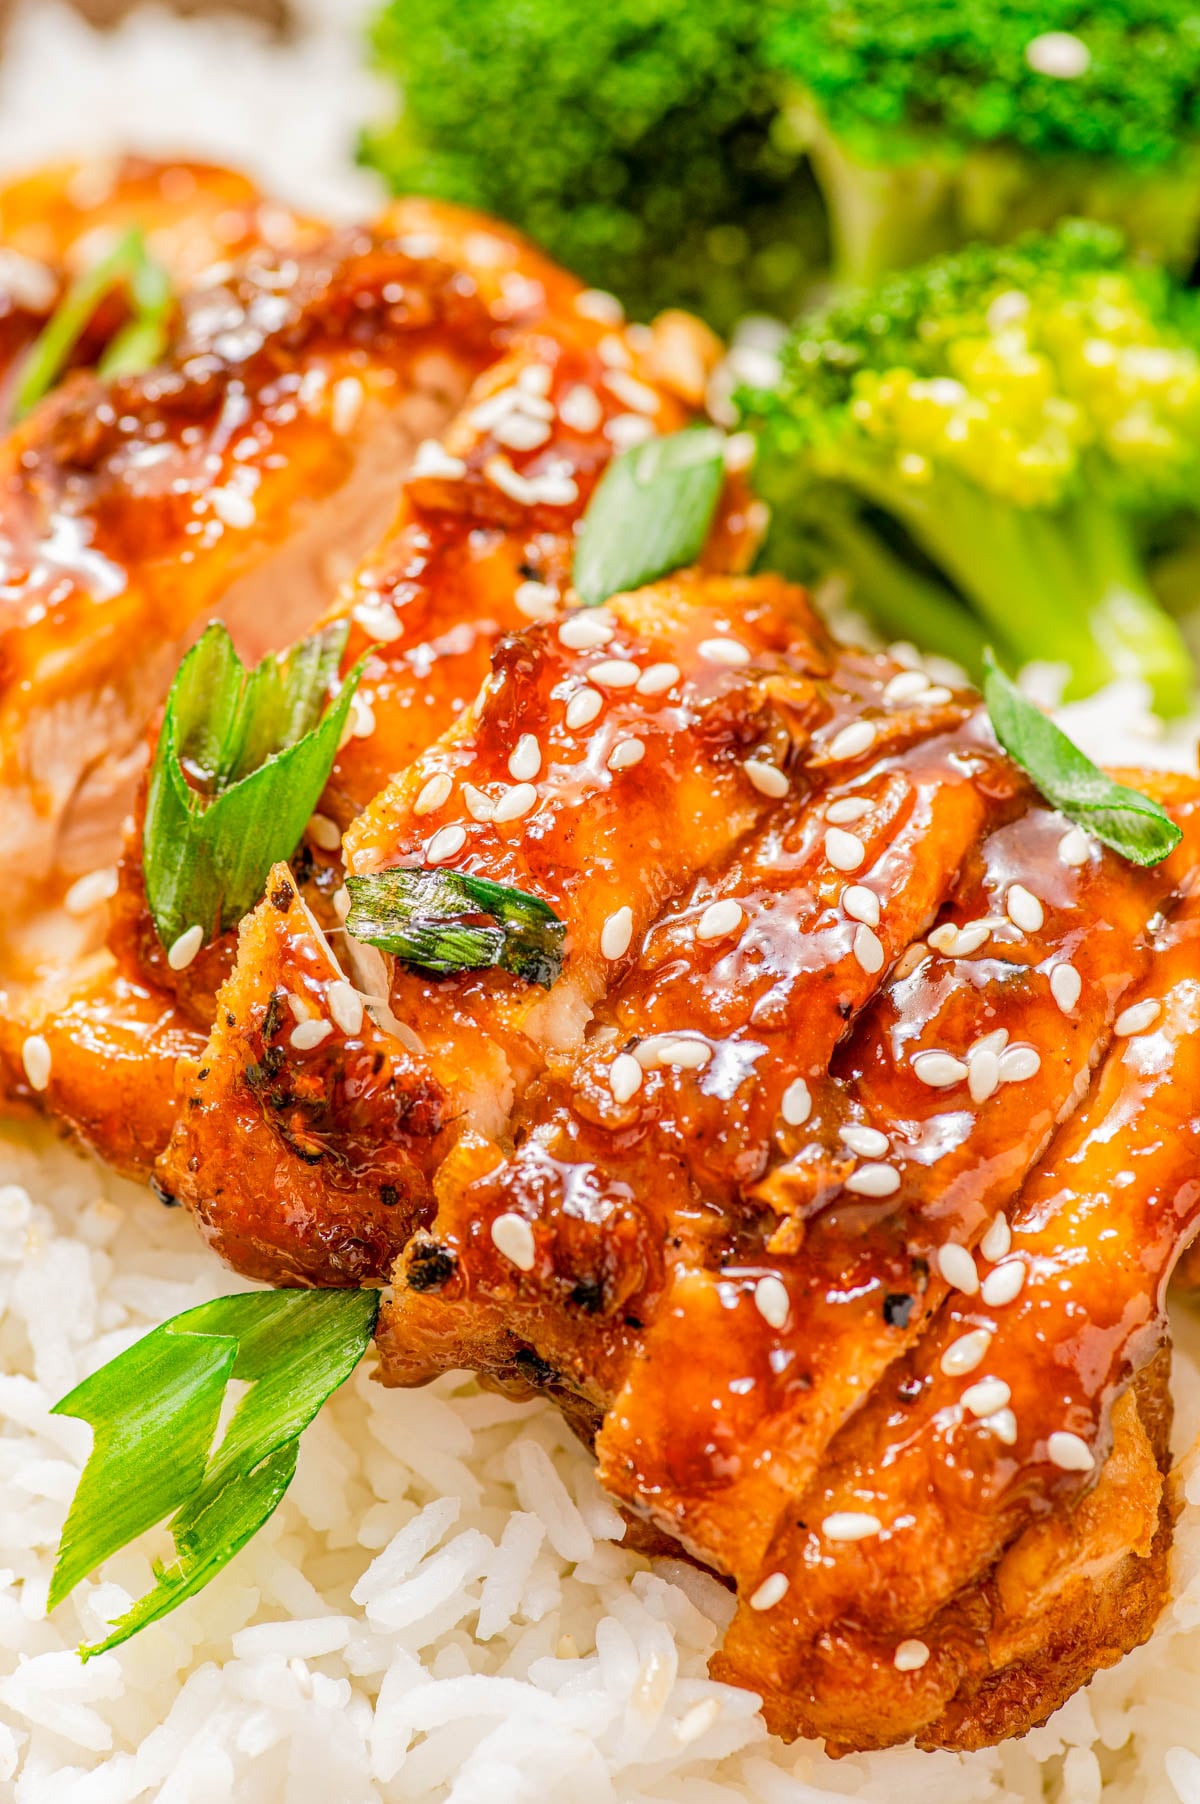
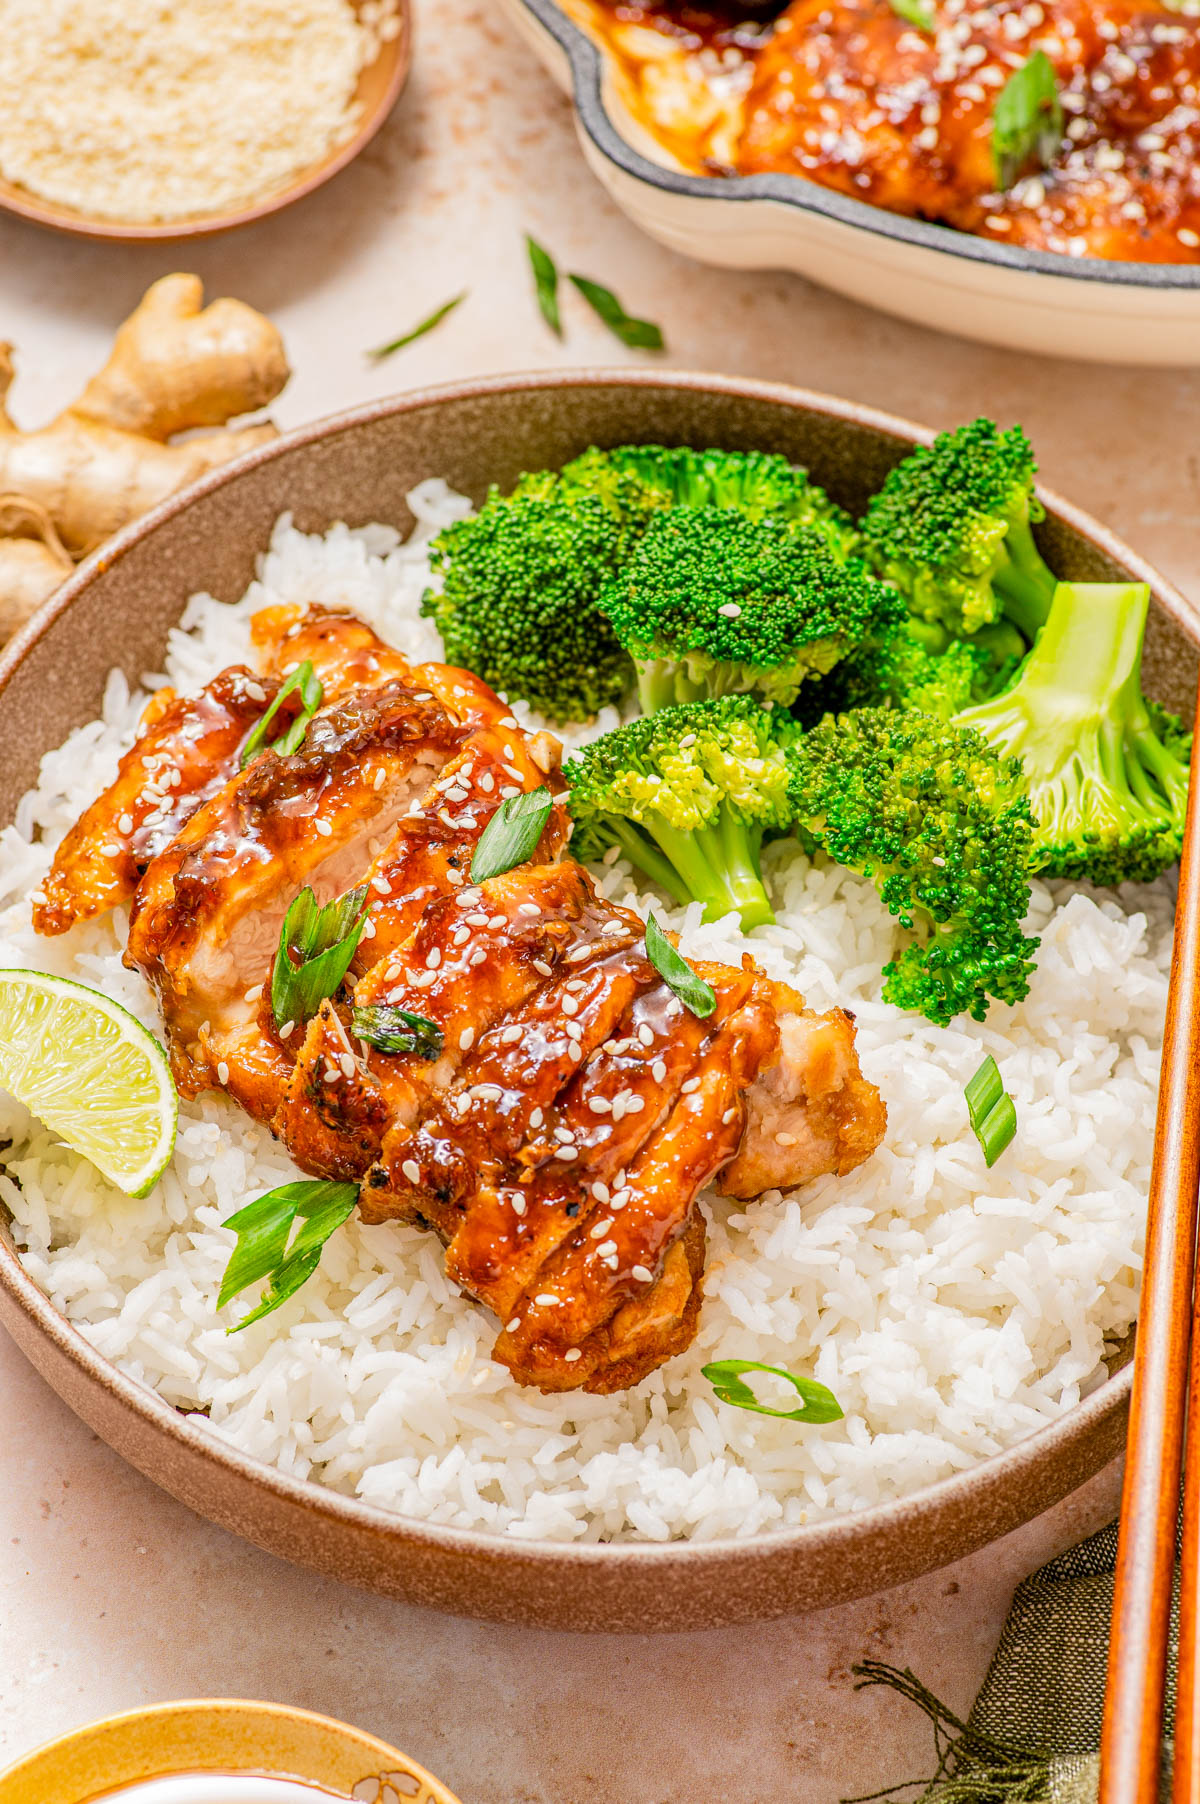
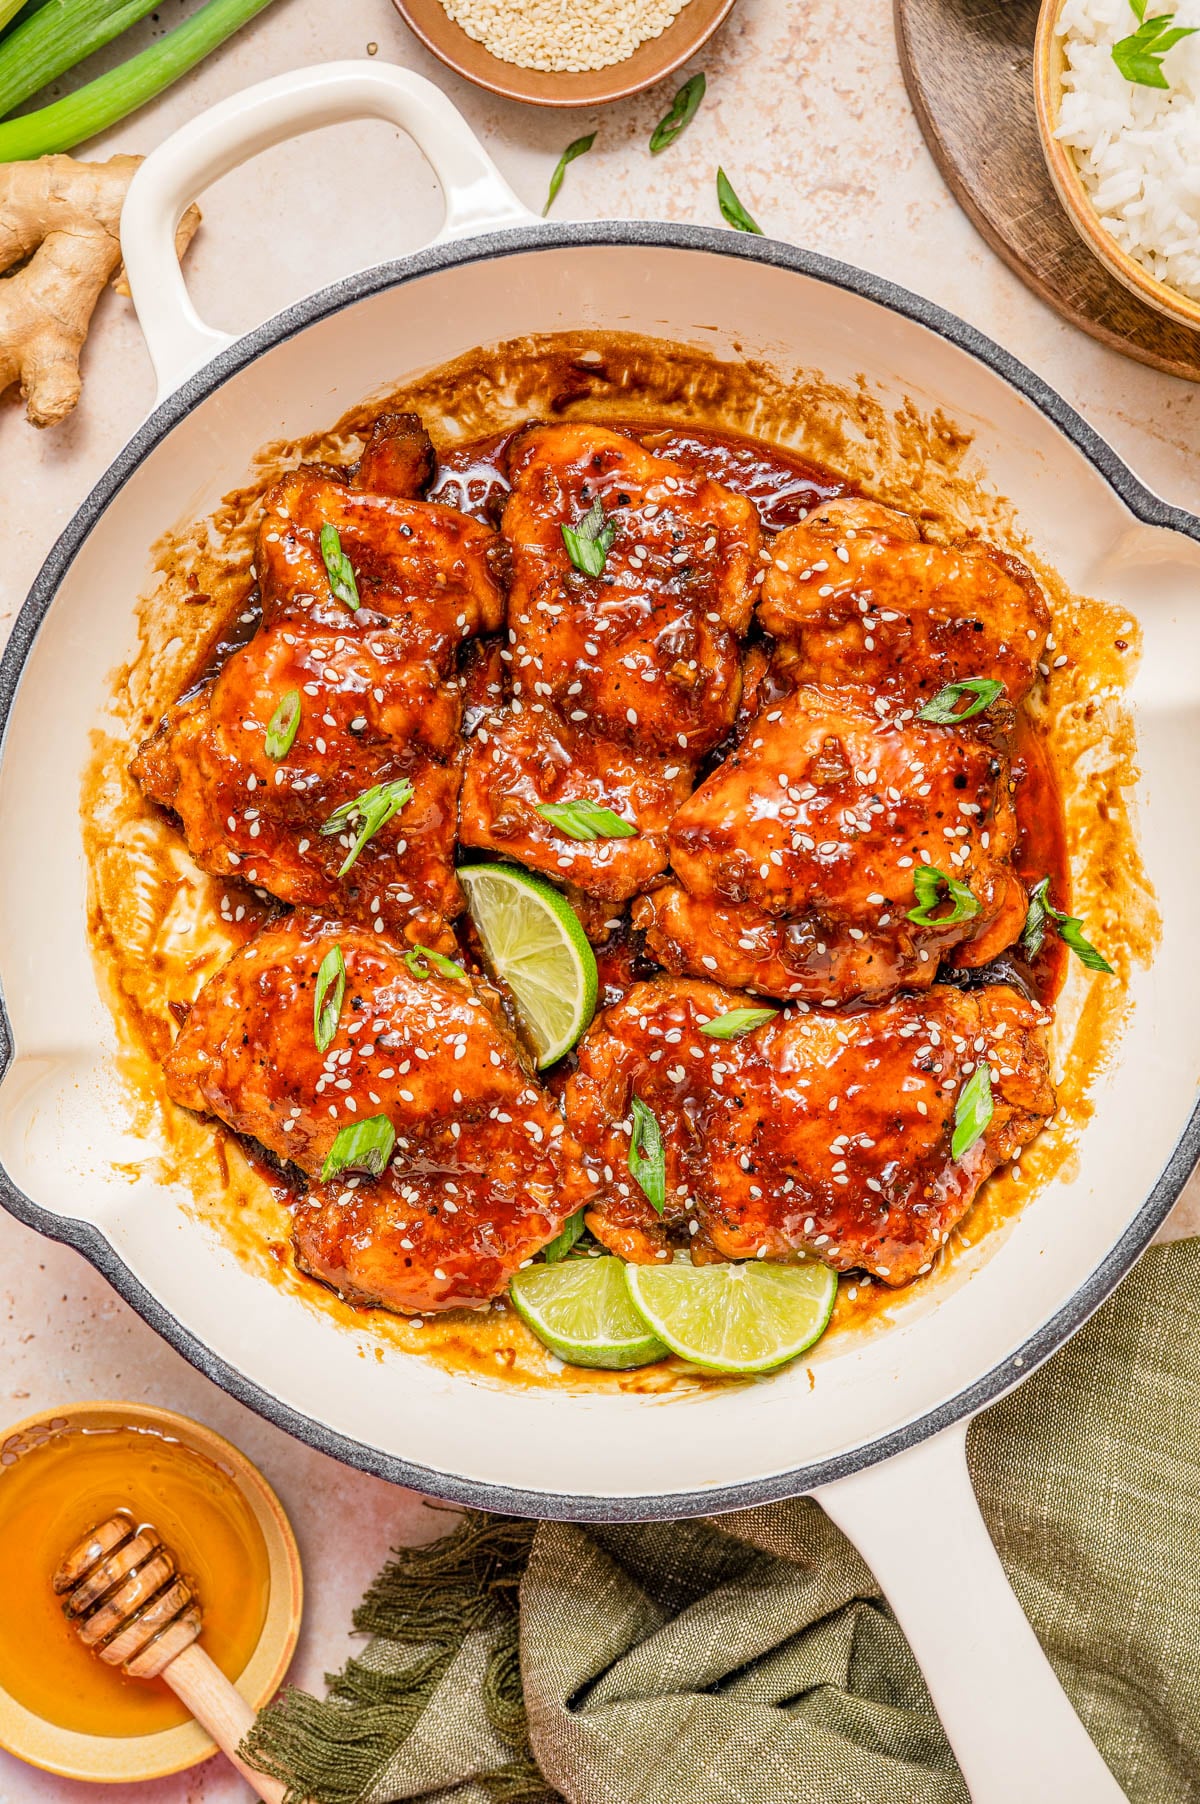
- Garnish: Garnish as desired and serve your dish immediately! It’s going to be the best honey ginger chicken, I promise.
Note: Scroll down to the recipe card section of the post for step-by-step photos and process shots of the cooking process.
Sticky Honey Ginger Chicken
Equipment
Ingredients
Chicken
- 1.5 pounds boneless skinless chicken thighs, (boneless skinless chicken breasts may be substituted and pound to an even thickness)
- 1-2 teaspoons salt, or to taste
- 1 teaspoon freshly ground black pepper, or to taste
- ⅓ cup cornstarch
- 2 tablespoon olive oil, (vegetable oil may be substituted)
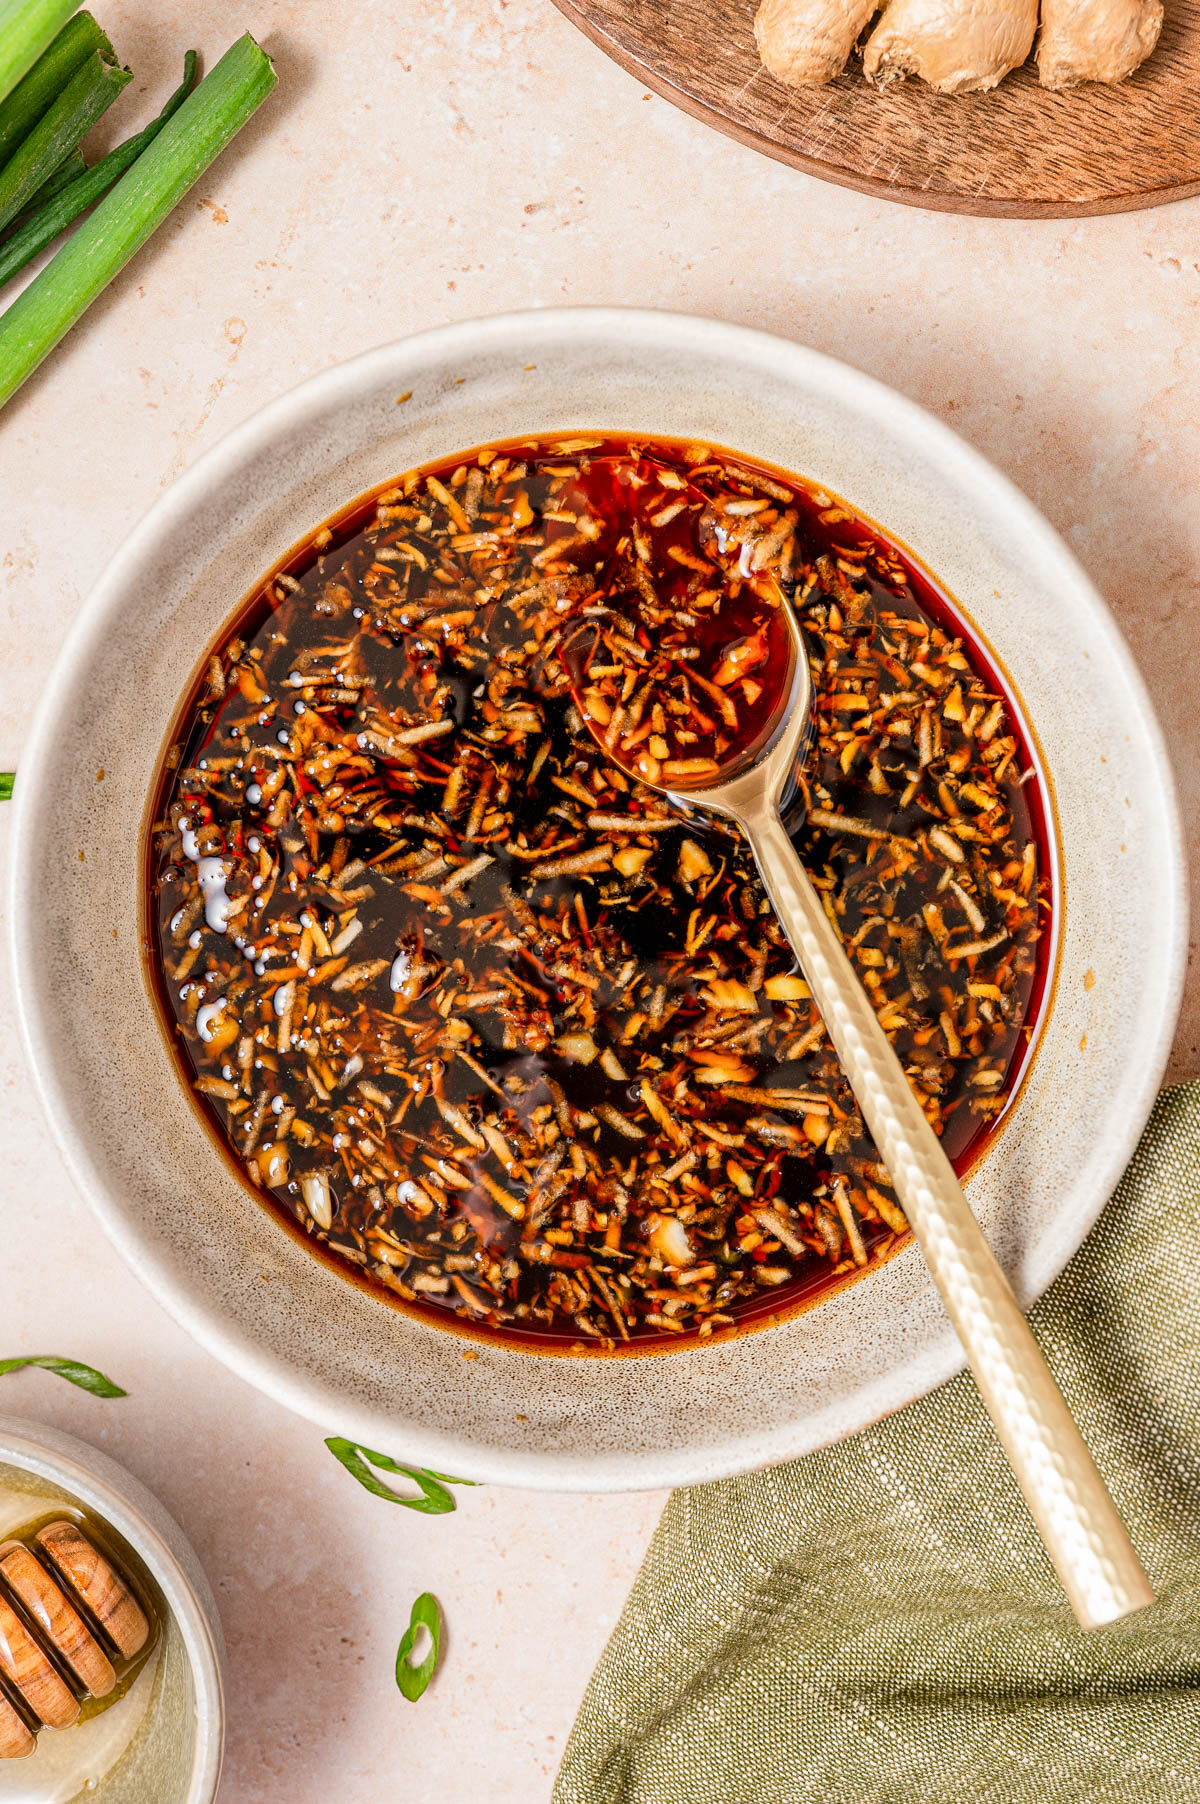
Sticky Honey Ginger Glaze
- ½ cup low-sodium soy sauce
- ⅓ cup honey
- 2 tablespoons fresh ginger, finely grated; or to taste (2-3 teaspoons ground ginger may be substituted, or to taste)
- 1 tablespoon rice vinegar
- 3 to 4 cloves garlic, finely minced
Garnishes
- 2 tablespoons green onions, sliced into rounds or small segments
- sesame seeds, optional and as desired
- fresh herbs, optional and as desired (basil, mint, cilantro, parsley, etc.)
- red pepper flakes, optional and taste to add spiciness
- lime wedges, optional for serving
Instructions
- Chicken: Pat the chicken dry with paper towels, and then evenly season the chicken evenly with salt and pepper. Tip – Make sure to thoroughly pat the chicken thighs dry before seasoning. This helps the cornstarch stick better in the next step, and creates a crispier texture when cooked.
- To a large bowl, add the cornstarch and then lightly coat each piece of chicken on both sides with the cornstarch. Shake off the excess. Tip – It's very important to shake off access cornstarch because if you don't, it will make a gummy mess in your skillet.

- To a large skillet, add the oil, chicken, and cook over medium high heat for 5-7 minutes turning occasionally, and cook uuntil the chicken is golden brown, and cooked through to 165F. Take the temperature with a thermometer, do not guess.Do not overcrowd your skillet and if your skillet is on the smaller side, cook in batches.
- When the chicken is fully cooked, remove it from the skillet, and set it aside on a plate. Do not wash out the skillet; set aside momentarily.
- Glaze: To a medium bowl, add all of the glaze ingredients, and whisk to combine.
- Reduce the heat to medium or medium-low, add the glaze to the skillet, and simmer for 2-3 minutes, or until slightly thickened; whisk nearly continuously. Tip – The cornstarch residue in the skillet will help the sauce to thicken.
- Combine: Add the chicken back into the skillet, flip and toss it around a few times to coat it uniformly with the glaze. Allow it to cook for 1-2 minutes to help the glaze really soak into the chicken.
- Garnish: As desired, evenly spring, with green onions, and any optional garnishes such as sesame seeds, fresh herbs, red pepper flakes.
- Serve: With optional lime wedges, broccoli, carrots, rice, etc.
Notes
Nutrition
Nutrition information is automatically calculated, so should only be used as an approximation.
©averiecooks.com. Content and photographs are copyright protected. Sharing of this recipe is both encouraged and appreciated. Copying and/or pasting full recipes to any social media is strictly prohibited.
more Easy sticky chicken recipes