Soft & Fluffy Sweet Dinner Rolls — Lightly sweetened from the honey in the dough and brushed with honey-butter prior to baking!! These dinner rolls are made from scratch and are baked to golden brown perfection!

Sweet Dinner Rolls … From Scratch!
There’s something about soft, warm, fresh homemade dinner rolls that makes them nearly impossible to resist. They’re so irresistible that I could happily and easily make a dinner out of dinner rolls.
Until these sweet dinner rolls, I had never made dinner rolls, but they turned out to be the best dinner rolls I’ve ever had. They’re going to be a very tough act to beat and even though my search for the perfect end-all-be-all chocolate chip cookie recipe isn’t over, I think my dinner roll recipe search is.
Rarely does recipe karma strike so perfectly that the first attempt at a recipe is the one I want to live with forever, but in this case, I struck dinner roll gold.

Recipes for dinner rolls are like chocolate chip cookies. There are so many and they all promise to be the best. In chocolate chip cookies, among other variables, the ratios of brown and granulated sugars, butter, flour, baking soda or powder, dough chilling, baking times and temperatures all vary from recipe to recipe.
In dinner rolls, making the dough with water or milk, using butter or oil, including an egg or not, sweetening the dough and to what degree and with sugar or honey, kneading or no-knead recipes, are among the many wild cards.
Before making these, I read dinner roll, honey dinner roll, honey wheat dinner roll, and Parkerhouse dinner roll recipes like it was my job. Having a slightly sweet dinner roll was a priority, and one sweetened with honey was even better.
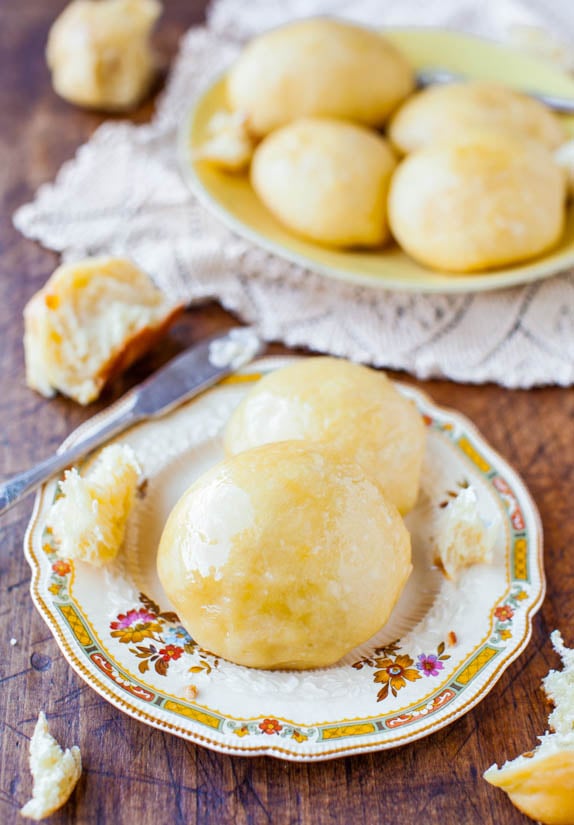
Honey is used twice in these golden puffballs, both in the dough and it’s brushed on top of the rolls just before baking them using a honey and melted butter mixture.
The resulting rolls are slightly sweet and the flavor of the honey is present and discernible. Sometimes when I bake with honey it gets lost, but not in these. The final sweeps of honey-butter brushed on the rolls before their stint in the oven goes a long way to enhance the overall honey-butter punch.

As a bonus, whatever mixture pools in the bottom of the pan creates a slightly caramelized and chewy honey-butter crust on the base of the rolls. If could pick off just those golden sticky bases from all the rolls in the pan, I would, just like I pick off muffin tops.
I used oil in the dough rather than butter. In my mind, butter-based doughs are reserved for pie crust, brioche, or decadent cinnamon rolls. Even though I wanted a buttery, soft, tender roll, butter wasn’t the way to that goal; oil was.
In doing research about bread-making, I’ve learned that oil keeps bread dough softer and more pliable than butter, much like using oil instead of butter in cakes keeps them moister and more tender, too.
The from scratch dinner rolls are soft, tender, supple, moist and the glorious honey-butter mixture brushed on the rolls before baking provides plenty of buttery flavor. The rolls are light, but not feather-light, and retain enough density for some hearty chewing.

Bread flour, rather than all-purpose flour, is used exclusively, and because of it’s higher gluten and protein content, it creates marvelous chewy texture. It’s always better to chew your food rather than just inhaling it, and these have just the right amount chew-factor; enough so that you don’t mindlessly inhale three in three minutes as is the case with feather light, flaky croissants.
It’s rare for me to say, but the rolls are fabulous plain and don’t actually need butter. But twist my arm, cinnamon sugar-butter or honey butter won’t hurt.
These dinner rolls are every single thing I could ever want in a white dinner roll recipe. Light and fluffy balanced with chewy and hearty. Moist, soft, and tender and the slightly caramelized crust that forms on the base from the honey-butter is dreamy.
They’re generously sized, too. One is probably all you need, but needs and wants can vary when the sweet smell of bread baking has been tantalizing you.

What’s in Sweet Dinner Rolls?
To make this sweet dinner rolls recipe, you’ll need:
- Water
- Instant dry yeast
- Honey
- Egg
- Canola oil
- Salt
- Bread flour
- Unsalted butter

How to Make Sweet Dinner Rolls From Scratch
If you’ve never made bread using yeast before, these are not hard at all. The rolls can be made, from start to finish, in about three hours. Making the dough is a snap and it comes together in just minutes, about the same time as it takes to make cookie dough. Using a stand mixer is easier, but making without is completely viable.
After making and kneading the dough, it’s placed in a bowl and allowed to rise for about 90 minutes. Because the dough is made exclusively with white bread flour, and because I used Red Star Platinum yeast, there is almost no way to screw up the rising with this recipe.
In fact, my dough rose so well it almost blew the plastic wrap off the top of my bowl. When canning, the sound of a sealing jar is music to my ears and in bread-making, a big bowl of high rising dough is one of the most beautiful sights ever. Not worrying that the dough didn’t want to rise is a moot point with this recipe.

After the first rise and the dough has doubled in size, punch it down and knead it gently for a minute or two. Then, allow it to rest for 10 minutes, which makes shaping the dough into rolls easier because it gives the gluten a chance to relax a bit.
Then, from the big wad of pillowy dough, form one dozen rolls and place them in a pan and allow them to rise for about 30 minutes. Immediately before baking, brush the rolls with honey-butter and bake for 15 minutes.
They bake up very fast and are baked in a very hot oven because that blast of really hot oven air helps contribute to them rising well, known as oven spring.

Can I Prepare the Rolls in Advance?
Yes, these soft and fluffy dinner rolls can be made in advance! As is the case with most any bread, you can make a batch of the rolls from start to finish, freeze them, and then on the big day or on any day for breakfast, a snack, or to eat with dinner, just pull out one or four or two dozen, and allow them to thaw.
Warming them gently in a low oven immediately prior to serving them gives them that just-baked quality, with zero work on the day-of, which is my kind of recipe for Thanksgiving or on a busy Monday night for dinner. Effortless and stress-free at crunch time keeps the cook, and everyone around her, much happier.
Although I haven’t tried it, I would also venture to guess that after the first rise of 90 minutes, and after the dough has been shaped into rolls and placed in the pan, you could cover the pan and refrigerate it overnight, and bake the rolls off the next morning; a loose interpretation of the Artisan Bread in Five Minutes a Day principles.

Tips for Making the Best Dinner Rolls
For the dough to rise properly, it needs to be in a warm, draft-free environment. Preheating your oven for 1 minute to 400F, then shutting it off (make sure you shut it off!), and quickly sliding the bowl of dough in so the hot air doesn’t escape is one way to create a warm environment.
Because of the high oven temperature in conjunction with the honey and the butter brushed on top of the rolls, they can burn as the baking time draws to a close. I recommend hanging out in the kitchen while these bake because things can change quickly and you don’t want burnt buns.
I am unsure if this recipe can be made in a bread machine as I don’t have one. I suspect the dough could also be baked in loaf pans; I’d use two 9-by-5 inch loaf pans, but I have not tried it.
Pin This Recipe
Enjoy AverieCooks.com Without Ads! 🆕
Go Ad Free
The Best Soft and Fluffy Honey Dinner Rolls
Ingredients
- 1 cup water, warmed to 120 to 130F for Red Star Platinum yeast (or 105 to 115F for most other yeast, or according to package directions)
- 2 ¼ teaspoons instant dry yeast (one 1/4-ounce packet, I use Red Star Platinum
- 1 large egg
- ¼ cup honey
- 3 tablespoons canola oil
- ½ teaspoon salt, or to taste
- 3 ¾ cups bread flour King Arthur Unbleached Bread Flour
- 2 tablespoons unsalted butter, melted
- 2 tablespoons honey
Instructions
Make the dough:
- Add water to a glass measuring cup or microwave-safe bowl and heat on high power to warm it, about 30 seconds. Testing with a thermometer is highly recommended, but if testing with your finger, water should feel warm but not hot.
- To the bowl of a stand mixer fitted with the paddle attachment, add the water and sprinkle the yeast on top of it. Beat on low speed for about 10 seconds, just to combine; let mixture stand for 10 minutes.
- Add the egg, 1/4 cup honey, oil, salt, and mix until well-combined, about 2 minutes on low to medium-low speed.
- Add 3 cups flour and beat until a sloppy, wet, loose dough forms. Scrape off any dough bits stuck to the paddle, remove the paddle attachment, and put on the dough hook.
- With the dough hook attached, turn mixer on low speed, and slowly sprinkle in remaining 3/4 cup flour. If necessary to obtain soft, smooth, non-sticky dough, sprinkle in the full 1 cup flour that remains (for a total of 4 cups flour, rather than 3 3/4 cups, noting that the more flour used, the denser the finished rolls will be). Knead dough for about 8 minutes. It will be firm, smooth, not sticky, and elastic.
- Turn dough out onto a Silpat Non-Stick Baking Mat or floured work surface and knead dough by hand for 1 to 2 minutes, just to get into the nooks and crannies with your fingers the dough hook may have missed and make sure dough is very smooth and uniform in texture.
First Rise:
- Place mounded ball of dough in a cooking sprayed or lightly greased large bowl and cover with plastic wrap. Place bowl in a warm place until it has doubled in size, about 2 hours. Tip - Preheating your oven for 1 minute to 400F, then shutting it off (make sure you shut it off), and quickly sliding the bowl in so the hot air doesn't escape is one way to create a warm environment; think 85 or 90F summer day warm environment. A cooler environment simply means dough will take longer to rise.
Shape Into Rolls:
- After dough has risen and doubled, punch it down to release the air bubbles, and turn it out onto a Silpat or floured work surface. Knead for about 1 minute.
- Mound dough into a ball, place it back into the bowl, cover it, and allow it to rest and relax for about 10 minutes, making it easier to shape into rolls.
- Prepare a 9-by-13-inch baking pan by lining it with aluminum foil, spray with cooking spray; set aside.
- Place dough on Silpat or floured work surface, and using your hands, roll it into a long cylinder shape, about 12 to 15 inches in length, and it will about 3 to 4 inches in girth.
- Divide the log into 12 uniformly-sized pieces with a dough cutter or sharp knife.
- Roll each piece into a ball, creating surface tension on the top of the ball by stretching the dough over itself a bit and pinch off the bottom, tucking the dough into itself. Place each piece into the prepared pan, seam side down, uniformly spaced, four rows by three. (Dough may also be rolled into just a simple 'plain ball', without pulling on the top surface of dough to create tension and not bothering to pinch off the bottom a bit, but I find they rise better and are fluffier if they're pinched off rather than just round dough globes)
Second Rise:
- After all pieces are in the pan, cover it with plastic wrap and allow to dough to rise for about 30 minutes. While dough rises, preheat oven to 400F. A good place for this rise is placing baking pan on the stovetop while oven is preheating for the carryover warmth.
Bake the rolls:
- Prepare honey-butter mixture by melting butter in a microwave-safe bowl on high power, about 1 minute. To the melted butter, add 2 tablespoons honey and stir to combine; set aside.
- After the rolls have risen and before baking, brush tops and sides of dough with the honey-butter mixture, getting into the sides and crevices and with a pastry brush.
- Bake rolls for about 15 minutes or until golden; they bake up very fast and watch them closely so the honey-butter mixture doesn't burn in this very hot oven.
- Allow rolls to cool before serving. Serve with Honey Butter or Cinnamon-Sugar Butter
Notes
Nutrition
Nutrition information is automatically calculated, so should only be used as an approximation.
©averiecooks.com. Content and photographs are copyright protected. Sharing of this recipe is both encouraged and appreciated. Copying and/or pasting full recipes to any social media is strictly prohibited.
More Easy Yeast Bread Recipes:
ALL OF MY YEAST BREAD RECIPES!
No-Knead Rolls with Honey Butter — These soft, light, fluffy yeast dinner rolls are so easy to make! They’re practically work-free because there’s no-kneading involved.
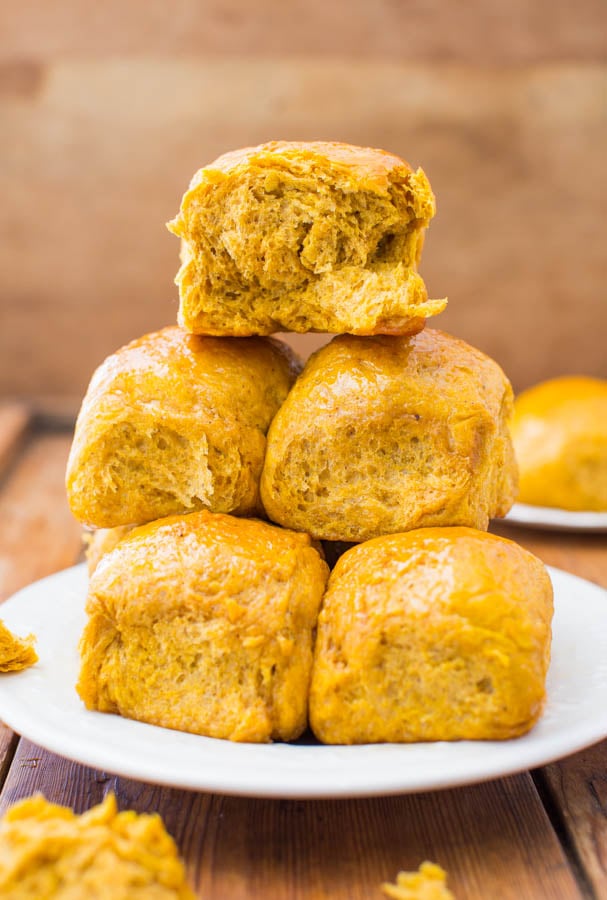
Pumpkin Dinner Rolls — These rolls are soft, slightly chewy, and the pumpkin puree keeps them moist and adds just enough tooth-sinking density.
No-Knead Whole Wheat Dinner Rolls — These 100% whole wheat dinner rolls are soft, light, fluffy, and so easy. They’re practically work-free because there’s no kneading.
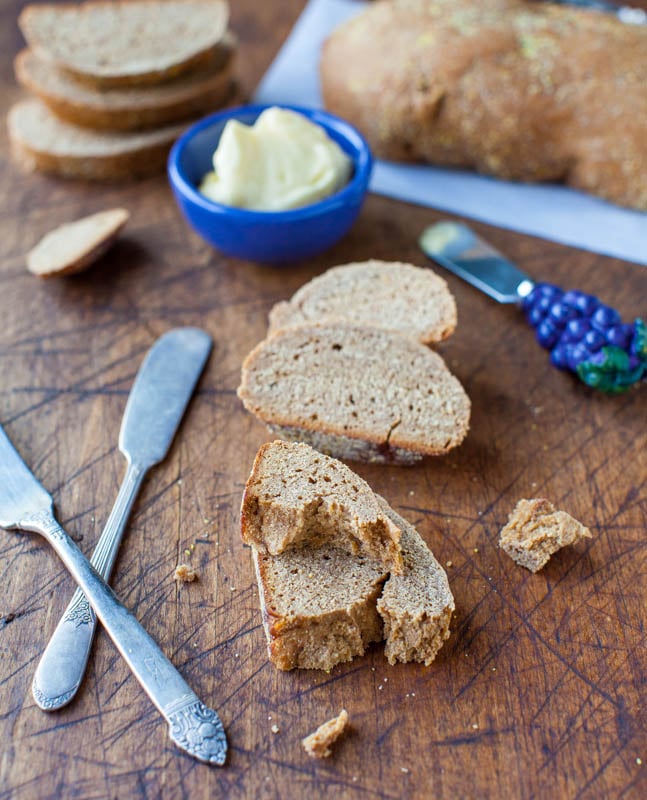
Copycat Outback Steakhouse Wheat Bread — If you’ve never made yeast-based bread, this is an easy one to tackle. A very short ingredient list, no mixer, and nothing fancy is required.
How to Make Sourdough Bread— This easy sourdough bread recipe uses yogurt and sour cream in place of a traditional sourdough starter, which makes it possible to prep a loaf in less than a day!
1 Hour Breadsticks — Warm and fresh from the oven, these vegan buttery breadsticks are ridiculously good. They’re soft, fluffy, tender, and make your house smell amazing while baking.


Those rolls look so moist and happy – thanks for the recipe!
Just popped these in the oven. Cannot wait to try them. I made the dough yesterday and refrigerated it after it was kneaded and had risen at least once. You can refrigerate the dough for a few days before baking – either as formed rolls or in a ball (I prefer the ball because it is still oiled from the bowl and comes out of the bag easier). Just let it rest after you pull it out.
I am so happy to hear that you made them, and that you refrigerated it after the first rise – and your logic regarding rolling into balls/rolls either before or after the refrigeration and the big ball/not as sticky – and now you’re ready to bake!
That’s what the Artisian Method in 5 Minutes a day for bread-baking is in a nutshell…you let the dough keep in the fridge after the first rise til you’re ready to shape it, then you shape it, and depending on the dough, give or take, it needs 75 to 90 mins to rise at room temp before baking it off.
https://www.loveveggiesandyoga.com/2012/11/challah.html
Thanks for the feedback and LMK how you like them!
Averie,
Thank you very much for this recipe. I used it in my Thanksgiving dinner and they were absolutely delicious!! I must confess, I didn’t follow it to the letter, however. First, I made the dough the night before and placed it in the refrigerator to rise and covered it with plastic wrap until the following morning. It was one less thing to worry about the day of. Secondly, I doubled the recipe and I used coconut oil instead of butter. I have food that coconut oil not only has a world if health benefits, it is a miracle ingredient for dough, especially a sweet dough (honey + coconut = heaven!). The coconut flavor is so mild that it’s hardly noticeable and it’s consistency is very close to that if butter. All and all, these came out wonderfully. My only bit for next time is that they could have used a pinch more salt to bring out their flavor a bit more.
Thanks again, and Cheers!
Ryan
Glad you made these, Ryan, and thanks for the feedback about “First, I made the dough the night before and placed it in the refrigerator to rise and covered it with plastic wrap until the following morning” — I had suspected that this would be okay but because I hadn’t personally tried it, now I know!
And also that doubling the recipe AND using coconut oil instead of butter works. I had suspected, again, that both of those things would work but hadn’t tried them personally and good to know! Salt is so personal that I hate to over-recommend it, and always tend to say, ‘to taste’ since it’s such an individual thing.
Thanks for the great feedback and glad they were a hit!
Can this recipe be doubled? Thinking about making for Thanksgiving as they look fabulous!!
I am inclined to say yes but haven’t try it that way so can’t give you a personal testimonial. It does make a hearty-sized pan-full but if you’re feeding a large crowd, I can understand why you’d want to double it. LMK if you try them – they are hands down, my fave dinner roll, ever.
Sorry I didn’t realize that it stated that in the recipe. These were my first homemade rolls I was going to try because I haven’t been very successful with bread so far. I ended up finding the Red Star Platinum yeast so I wouldn’t have to worry about it and my family absolutely loved these. They did not last very long at all. Thank you so much for the easy to follow recipe, I had not trouble at all. Now I know you stated that you haven’t tried refrigerating them overnight and then baking but I was wondering if you have heard from anyone who has tried yet. I am planning on making 3 batches today, some to freeze and some for Thanksgiving and didn’t want to bake them until tomorrow. Please let me know if you have, if not then I guess I will just have to bake them today and warm them tomorrow. Thanks again for the wonderful recipe.
Glad they were a big hit with your family and you had great success!
” Now I know you stated that you haven’t tried refrigerating them overnight and then baking but I was wondering if you have heard from anyone who has tried yet.” — no, I haven’t
“3 batches today, some to freeze and some for Thanksgiving and didn’t want to bake them until tomorrow” – LMK what you end up doing, whether you make the dough from start to finish and bake them fully; and then just reheat/rewarm them. Or if you shape the dough into rolls and then refrigerate the pan and then bake them off in the a.m. tomorrow – or how you work it. Will be curious to know what happens!
Super excited that they came out perfect after being in the fridge overnight. I just made them all the way through to the rolls and put them in the refrigerator. I took them out and let them sit on top of the stove for about 30-45 minutes while I it preheated. They were awesome and now my family said that I can’t show up for any holiday without these rolls. Thank you so much for making the instructions so easy to understand or else I would have never attempted. Thanks
That is awesome that they came out perfect after a night in the fridge. I am glad to know that making them into rolls, putting them in the pan, then refrigerating, then a nice 45 min room-temperature warmup while oven preheats worked like a champ for you.
And now you are ‘stuck’ with making them forever for family gatherings :)
And I am SO GLAD that I made the instructions do-able and understandable – that was my #1 goal b/c they are SO GOOD I want people to actually make them! Like you did!
What if my stores don’t sell the Red Star Platinum yeast?? Do I use the quick rise or active dry?? Please let me know because these rolls look amazing and I am dying to try them. Thanks
If you read the recipe section of the post, I had written “2 1/4 teaspoons instant dry yeast (one 1/4-ounce packet, I use Red Star Platinum) ” – so although I use the Platinum you can use instant dry.
your bread always looks so amazing and so good – i could just eat these rolls for dinner and that is it nothing else.
And we sort of did for a couple nights :)
A dinner out of dinner rolls sounds amazing to me. Am I sensing a new recipe from you? Please, say yes :D
These look incredible and perfect timing with Thanksgiving right around the corner.